Kerzel Hit and Miss

Home Model Engine Machinist Forum

Help Support Home Model Engine Machinist Forum:

This site may earn a commission from merchant affiliate links, including eBay, Amazon, and others.

weez

Project Of The Month Winner
Joined
Dec 11, 2012
Messages
193
Reaction score
141
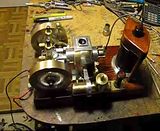
I finally got started on my first IC engine, the Kerzel Hit and Miss. Here is the start of the cylinder body.

First I milled a chunk of aluminum to size. I used my new boring head as a flycutter and it worked very well.
CIMG5029.jpg

I drilled out the bore with a 1/2 inch drill, then a 3/4 inch endmill, and finished up with the boring head.
CIMG5037.jpg

Drilled and tapped the head bolt circle.
CIMG5038.jpg

I didn't notice that I forgot about the counterbore until I had taken the piece out of the vise. So I had to reindicate the piece to finish the counterbore.
CIMG5040.jpg

After flipping it on the side, I milled the pocket for the cam slide bearing.
CIMG5041.jpg

And finally drilled and tapped the holes on this side.
CIMG5042.jpg
 
  • Like
Reactions: gus
This is the setup I used for the undercut for the water passage. I mounted the boring bar upside down and cut on the backside of the bore to make it easier to see.

CIMG5045.jpg
CIMG5044.jpg
CIMG5048.jpg
 
Hi Weez,
you are making great progress.th_wav Will be following your thread.
Kerzel is a good engine to build but I have a long list to dream on. So many engines to build and so little time.
 
Here is the machining of the water reservoir. First I milled out the square portion with a 3/8 inch endmill.
CIMG5050.jpg

Then machined the round undercut with the boring head. I had to grind some clearance above the carbide. (Sorry for the blurry picture).
CIMG5051.jpg
CIMG5054.jpg
 
Got the rounding done on the cylinder body. After centering the rotary table on the mill I indicated on the bore and clamped it down using a threaded rod and washers. I installed some clamps to use as stops for when the part gets flipped over so that I don't have to re-indicate. Using a 3/4 inch end mill, I machined away the majority of the radius to a depth of .655".
CIMG5056.jpg

Then finished up with a 3/8 inch ball mill.
CIMG5057.jpg

I flipped the part over and rested it against the stops and clamped it down.
CIMG5059.jpg

Using a 3/8 inch ball mill, I milled out the bottom radius to a depth of 3/4 inch.
CIMG5060.jpg

Then milled the top radius to a depth of 1/8 inch.
CIMG5061.jpg

And milled away the rest with a 1/2 inch end mill.
CIMG5062.jpg
 
Here is the detail work on the top of the water reservoir. First using a 3/8 inch ball mill.
CIMG5063.jpg

Then finishing with an end mill.
CIMG5064.jpg

And finally the finished cylinder body. I think this is the most complicated piece that I have made to date. I am very pleased with how it turned out. Hopefully it is all downhill from here on this build.
CIMG5065.jpg
CIMG5066.jpg
 
Lovely job indeed. I remember thinking at the time that it was the most complex part I had made. Good luck with fitting the cylinder and getting it water tight. I remember that I slathered mine with green Loctite, started out with an arbor press, stuck half way in, and finished with a 4 pound hammer!!---Brian
 
Lovely job indeed. I remember thinking at the time that it was the most complex part I had made. Good luck with fitting the cylinder and getting it water tight. I remember that I slathered mine with green Loctite, started out with an arbor press, stuck half way in, and finished with a 4 pound hammer!!---Brian

Thanks Brian. Have you run yours without water? In the drawing notes David Kerzel states that it doesn't need water and will only get to 120 deg F without.
 
No, I always run mine with water. David Kerzel is probably right, but I am an old guy and I well remember using hit and miss engines 50 years ago, and we always ran them with water. Of course, they were working engines, driving buzz saws and irrigation pumps, so they probably generated more heat. I can remember running my Kerzel hit and miss out in my main garage in the wintertime on an endurance run, and after an hour of running there was a visible column of steam rising into the cool air from the water reservoir, which I thought was really neat!!!----Brian
 
Lovely job indeed. I remember thinking at the time that it was the most complex part I had made. Good luck with fitting the cylinder and getting it water tight. I remember that I slathered mine with green Loctite, started out with an arbor press, stuck half way in, and finished with a 4 pound hammer!!---Brian


I share the same sad story with a DIY hydraulic cylinder cap threaded into the cylinder. The lesson is " Check Loctite No'' before use.

Now Retrofitting the Deep Sea Swivel-Base/inclinable Rod Holder for Feb 22---28 Burma fishing trip. Now prepping my mind to finish up the H&M after Burma.
 
Hi Weez

Great looking cylinder, I remember going through all those steps, except I bored my cylinder block in the lathe, I added (2) O-Ring Grooves, and silicone O-Rings, to prevent leaks.

Jack
Draw-Tech

Cut_Cylinder.jpg
 
Hi Weez,

Water Jacket very well done and finished. For the finishing cut,did you use very sharp end mill?

Thanks Gus. For the finishing cut I use a standard cheap end mill. I make my final depth of cut about .005" deep and feed really slow.
 
Hi Weez

Great looking cylinder, I remember going through all those steps, except I bored my cylinder block in the lathe, I added (2) O-Ring Grooves, and silicone O-Rings, to prevent leaks.

Jack
Draw-Tech

Thanks Jack. I would have bored mine in the lathe, but my 4" chuck was too small. I checked out your engine and it looks great. Did you get it running?
 
Now on to the base. First drilling and counter boring all the bolt holes.
CIMG5069.jpg

Because of lack of enough Z axis I couldn't use the vise and had to come up with this setup. I almost made a huge mistake and had it all set up with the bottom of the base facing out. I noticed it right before starting to cut. Glad I caught it but still didn't like having to re-indicate everything for a second time.
CIMG5071.jpg

Then a 3/8" ball mill to finish the piece.
CIMG5073.jpg

And here is the completed base.
CIMG5075.jpg
 
Back
Top