KB Draws Steve's V-8

Home Model Engine Machinist Forum

Help Support Home Model Engine Machinist Forum:

This site may earn a commission from merchant affiliate links, including eBay, Amazon, and others.

Thanks Greg, that's what I have been doing for my images. What I meant to ask is, is there a video capture?
The local tech support sends me videos on how they fix my problems.

What does "match machining parks" mean?

 
KustomKB said:
Maybe SW has a similar screen capture function...

Leucetius, that's beautiful! Got any more?

That one in 1920x1080 but I handed the rights over to steve so he may post it or not ;)

Beside that numerous renderings of other engines, I've modeled. By the way: I'm modeling in Inventor and render in 3DSMax

Example:
 

That's great!

Numerous others? Hey, don't hold back, lets see what you have got, that goes for anyone else who's got something they'd like to share.

I think all I have got left is the rad and base but I've thought that before so I guess all I have got left is everything.

 
LoL. Typing is not my forte, and I didn't even read it. Machining marks. It gets tedious when you want an appearance pattern to lay a certain way. I still haven't figured out how to simulate a turned face(facing on a lathe). And if you have a cast part with machined features and you want it to look nice it takes time. I've only messed with Photoworks a bit. Screen video capture is probably a third party software, there are several these days.


FS30M2.jpg
 

Ha, Ha, I see what you mean, that looks really sharp. Very realistic. When I said surface finishes, I meant 1 part chrome 1 part gray etc.

I see now, the possibilities seem to be endless.
 
Amazing drawings :bow: :bow:
Pete
 
dieselpilot said:
At any time in SW you can choose "save as" and select type ".jpg". If you are rendering you want to render to file.

Applying finishes and patterns to a model can take a lot of time. trying to match machining parks or other visual features takes some effort. I don't usually do it unless I'm board. I'll dig one up later.
That is pretty much how Nx is you can add realistic material and surfaces to each face or you can do a full component you can pick. In the show room effect in NX you can set it up with as many or as few lights and back grounds you want. I think most cad systems will do that now. What I like in NX is to turn on the movie capture ant it will record your graphics wind into a movie for you.
 

Added a couple more pieces to the puzzle...

DV8.jpg
 
Ooooh, thats purdy!

Nice job Kevin!

Kel
 
Thanks Kel!

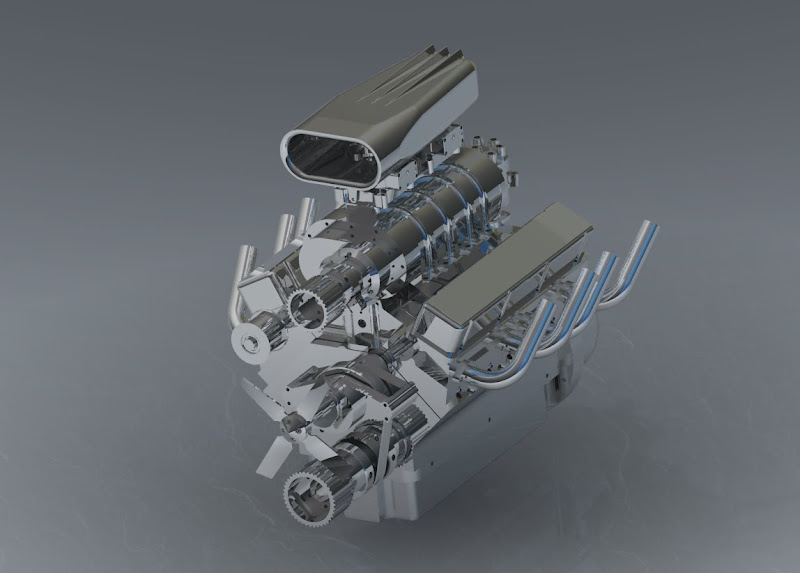
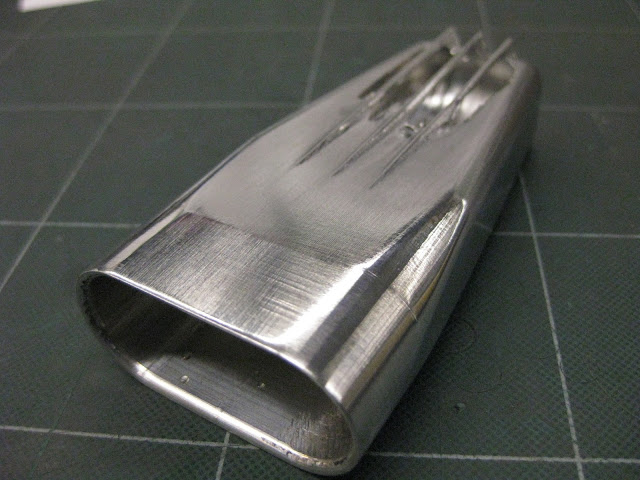
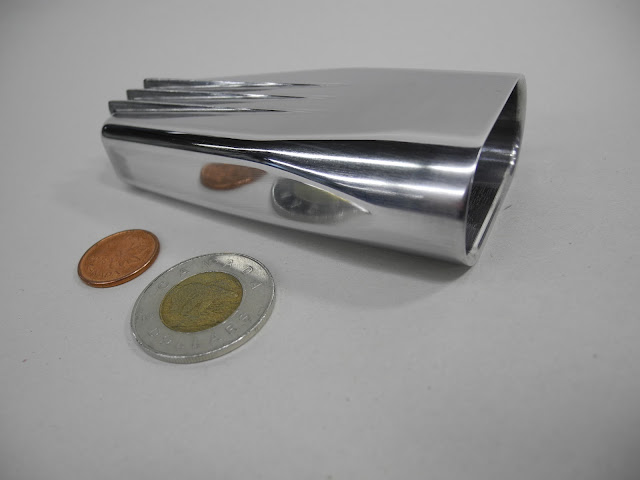
I've been itching to make some chips for this engine so I thought I would start at the top. The blower scoop.

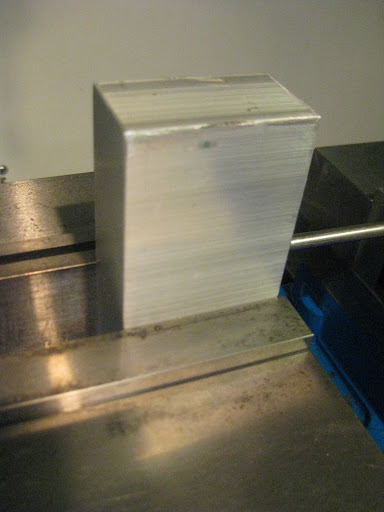
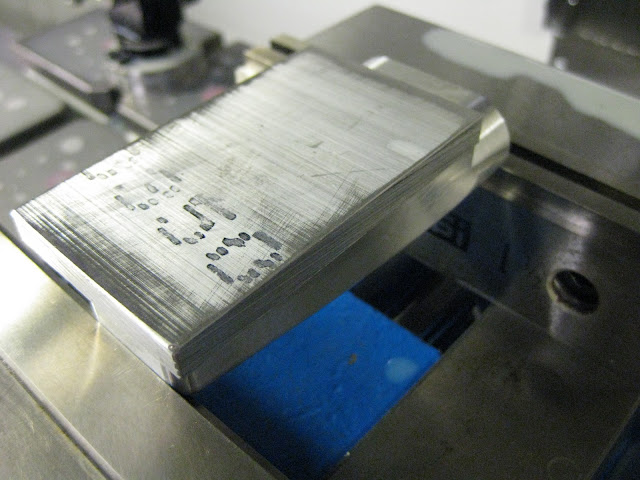
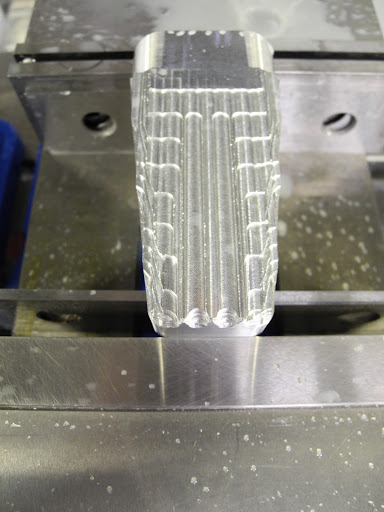
I started with a block in the vise;

D%252520V-8%252520001.jpg


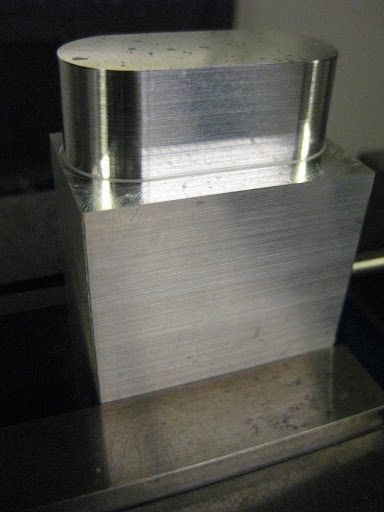
And then finish machined the front outer profile, which was offset to leave some stock for work holding, to establish a datum for subsequent operations;

D%252520V-8%252520003.jpg


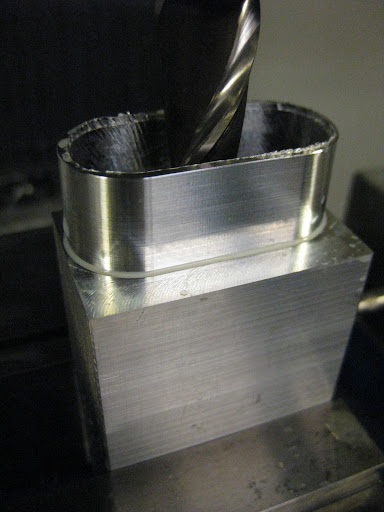
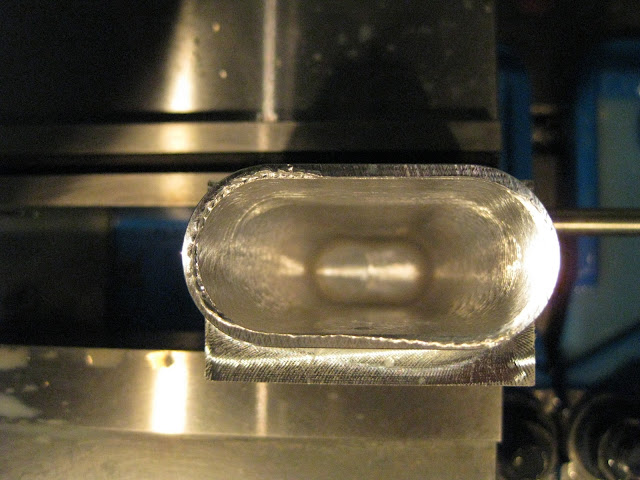
Then the core was roughed out with a 5/8 end mill four inches long;

D%252520V-8%252520004.jpg


And finished with a ball nose;

D%252520V-8%252520007.jpg


The part was turned on its side and a probe was used to pick up the datum;

[ame]http://www.youtube.com/watch?v=h14iA5FykZI[/ame]

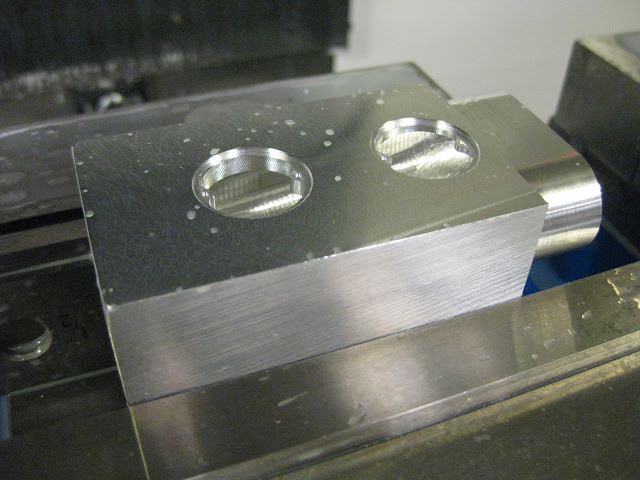
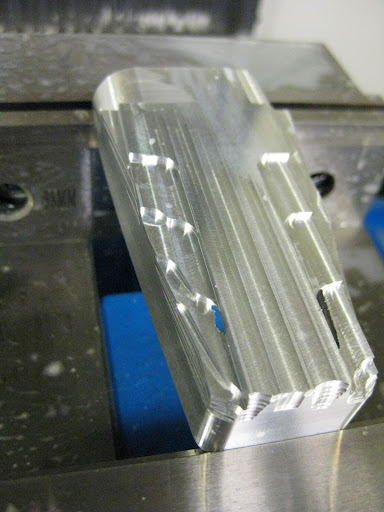
Then the mounting counter bores were machined,

D%252520V-8%252520015.jpg


Outer contours roughed out;

[ame]http://www.youtube.com/watch?v=W2L3jQUKQEA[/ame]

D%252520V-8%252520019.jpg


And finished, again with a ball nose.


[ame]http://www.youtube.com/watch?v=JbAJAq1BgGs[/ame]

D%252520V-8%252520023.jpg


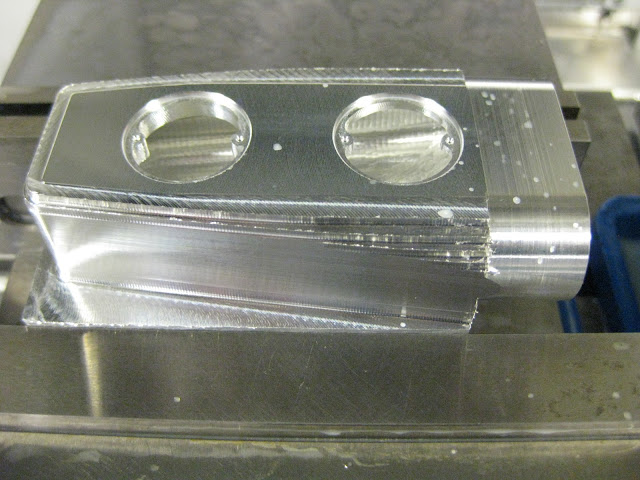
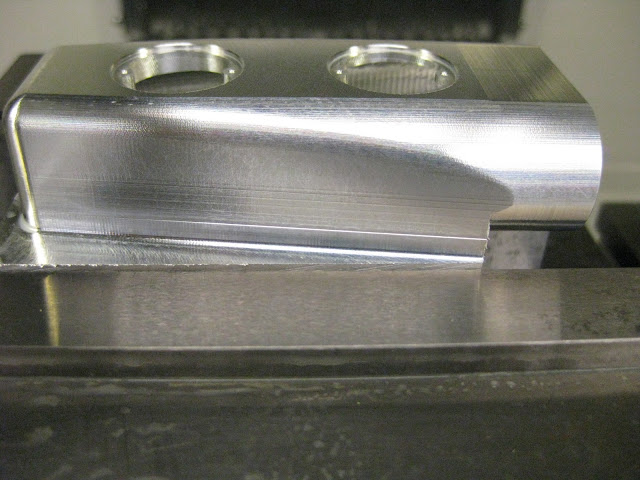
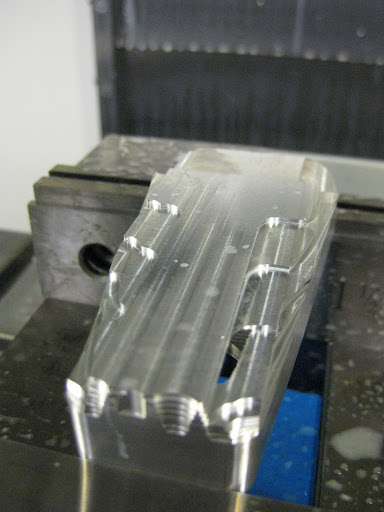
The part was flipped and rotated finished side down;

D%252520V-8%252520024.jpg


Then the extra stock was milled off and the "top" details were roughed out;
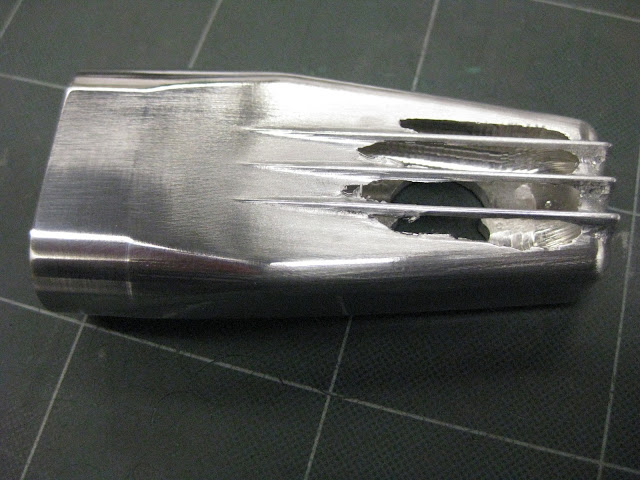
D%252520V-8%252520025.jpg
D%252520V-8%252520026.jpg


Disaster;

D%252520V-8%252520029.jpg


D%252520V-8%252520030.jpg


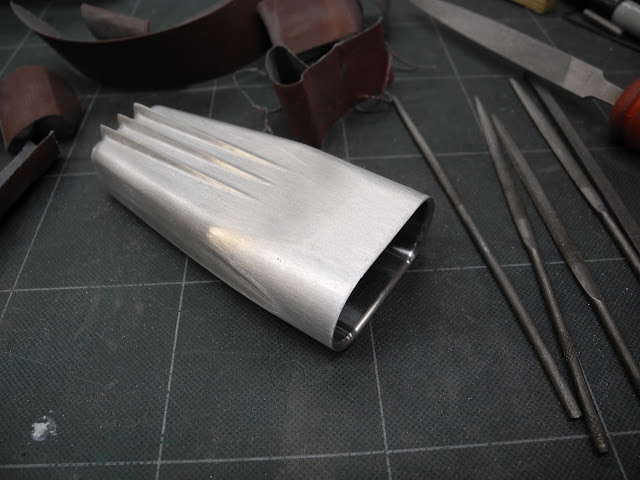
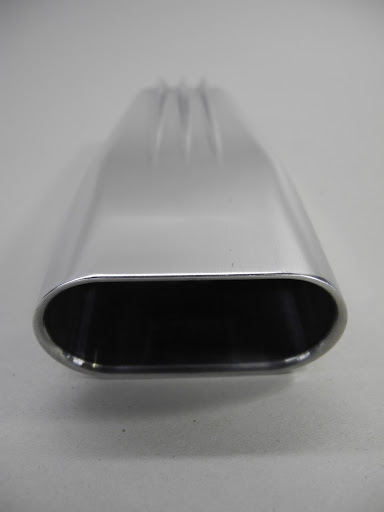
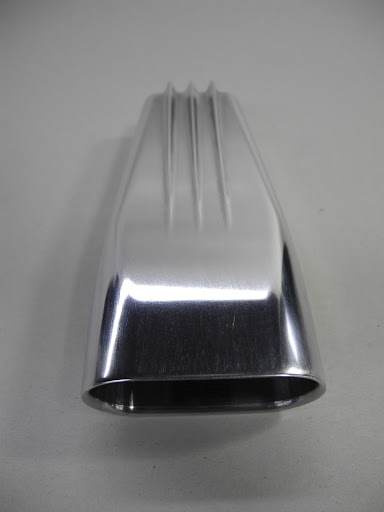
So here we have a finished part, complete with added ventilation at no extra charge!

The bore is flat on the bottom and tapers down toward the back on the top. When I offset the origin for the first operation I left the extra stock on the wrong side.

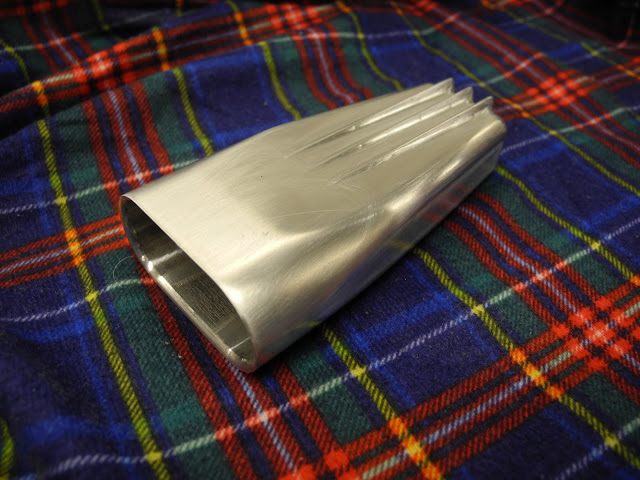
Oh well the second one is always quicker than the first. I just hope this isn't an omen for things to come..


Here is the replacement roughed out;

D%252520V-8%252520031%252520%2525281%252529.jpg


here it is after finish machining and file-work and 220/320 paper;

D%252520V-8%252520031%252520%2525284%252529.jpg


This is it after 400 and 600 paper;

D%252520V-8%252520031%252520%25252814%252529.jpg


And then after a quick rub with some paste;

D%252520V-8%252520031%252520%25252817%252529.jpg


D%252520V-8%252520031%252520%25252822%252529.jpg


D%252520V-8%252520031%252520%25252823%252529.jpg


That looks great!

Unless you learned to do some amazing cad renderings... Kidding!

Lee

 
Looks great!
Can't wait to see more

Thanks Triple Slash, but I'm afraid I'll have to ask you not to hold your breath. I've got a feeling that this will be a multi-year build. (major basement renovation to do)

That looks great!

Unless you learned to do some amazing cad renderings... Kidding!

Thanks Lee, but with renderings the experts recently showed us, that is not really a stretch!


Thanks Steve,

Well I guess I did, there's the extra aspirated version. ;D


Latest posts

Back
Top