Mcgyver said:
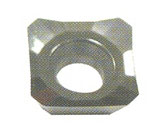
the CCGT is a bit irrelevant (that is shape - relief - tolerance - hole and afaik is the same for iso and ansi). ansi or iso determine where its metric or imperial and are the numbers follow the letters. The part that'll make you mental is the chip breaker info seems to be manufacturer specific. for example, the Kennematal HP says the chip breaker gives it 15 degrees top rake - this, the HP, is what distinguishes it from a CCGT with say 0 or negative rake.
i looked into these wondering if maybe material advancements had changed the relative merits of hss and carbide however as i suspected, there is no free lunch, everything is a trade off.
These 15 degree top rake tools are recommended for finishing cuts in aluminum and with a caution that it is a weak edge and is not recommended for steel.
Mcgyver, I would be interested in seeing the link to where there is a caution about only finishing aluminum with these inserts. I found quite the opposite both through personal experience, but also in what the manufacturers say. Try this page for example:
http://www.carbidedepot.com/Dynamiclanding.aspx?CategoryID=594
The application note for Kennematal CCGT-HP says:
"Exceptional edge wear resistance combined with very high strength for machining titanium, cast irons, austenitic stainless steels, non-ferrous metals, nonmetals, and most high-temperature alloys."
High-temperature alloys = Inconel, FYI, so this insert is not afraid to go against some tough stuff.
The Iscar insert is available in two grades:
IC20: Used for semi-finishing, finishing and semi-roughing of aluminum, cast iron and stainless steel. Used at low to medium speeds and feeds.
IC520: Suitable for turning austenitic stainless steel and soft materials.
Two points. First note the "low to medium speeds and feeds". Translation: you don't need a Monarch at 4000 rpm to run carbide. This is not surprising to me, because I've been running it for years and it works great. Second, there is a wide range of materials here that clearly suggests these are not just for aluminum, but also consider the differences in need of a home versus pro shop. The home shop will run at lower speeds, feeds, and material removal rates. It will likely take a shallower cut. What looks like finishing in the pro shop is general use for most home lathes. Home shops won't want to carry 10 different varieties of inserts, but a pro shop carries a lot more. I've run these inserts on all sorts of material, through interrupted cuts, and to the limit of depth of cut my lathe will do. They're fine.
I expect many people have had some of the bad carbide experiences described, but that it was for two reasons. First, home users operate differently than pro users, so you have to know how to shop differently. Pros like negative rake tooling because there are more edges to harvest on an insert, so it comes out cheaper. Pros make money removing gobs of material fast with deep cuts. But that is changing as more discover the advantages of positive rake even for pros, and as the CNC manufacturers keep making lighter and lighter machines and cranking up the speeds and feeds while reducing depths of cut. Ironically this results in technology more applicable to lightweight home machines. So you have to know what to look for, such as realizing that "finishing" might mean "general purpose" in a home shop context. Pros are also much more conscious of wear characteristics. Home shops want to be frugal, sure, but if an insert breaks sometimes in a manual machining op, we see it immediately, change it, dial back on what we were doing so it doesn't happen again, and go on. The pro is running a CNC lathe at ridiculous material removal rates (we've all seen the cool videos!) with a bar feeder for many hours in the day. If an insert breaks, a bunch of parts pop out the other end that are wrong. In fact, when the next tool hits the material thinking it was already cut, and it wasn't because of a broken insert, even worse can happen. So the definition of what's "fragile" for a pro is different than for the home.
Second, the exact details of what to look for and how to use it are the "secrets" of carbide tooling. For example, the choice of tooling and insert geometry matters hugely with carbide, and I can certainly understand someone having a bad experience and deciding it was because their machine wasn't "up to carbide." Let me assure you, that isn't the case, you just haven't gotten hold of the right tooling yet. I don't mean to pick on them, but I have one of the Plastool turning and facing holders and found it performs poorly next to even regular CCMT tooling let alone CCGT. I can definitely grind an HSS tool that gives a better result than the Plastool and have done so. If that was my only experience with carbide, I'd be taking Mcgyver's position 100%.
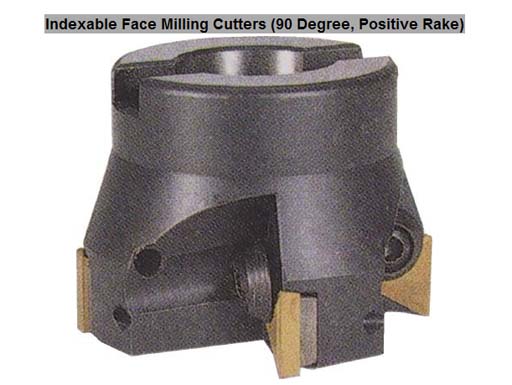
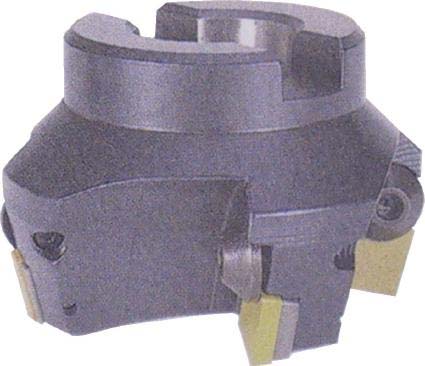
I chalk that up entirely to the insert being used. I've seen similar things with indexable tooling for the mill. TPG tooling just doesn't cut nearly as nicely as something like a high positive rake Iscar Helimill or my Lovejoy 225 face mill. So, a "secret" for carbide turning tools is to run tooling with CCGT inserts. Another is to stick the biggest holder in that your QCTP will accomodate. I saw marked differences when I went from 3/8" Glanze up to 1/2" Micro100 holders. I made my own dovetail cutter using TPGB inserts originally and found performance improved greatly when I switched to TCMT. I haven't tried TCGT but will soon!
Most of the time you read about guys buying the cheapest possible bargain because that's what the budget permits. I understand, and HSS will easily outperform the cheapest indexable tooling. No contest. The tools I grind are already there. If you can either wait for the right sale, spend a little more, or get lucky on eBay, you can get some awesome results out of indexable tooling that are well worth it.
Okay, enough carbide. I definitely didn't start out to debate carbide vs HSS, but we seem to wind up there. That's fine. Perhaps its because most guys do one or the other while I'm basically trying to do both and am neither fish nor fowl. Just please be aware there is a LOT of misinformation about carbide in the context of the home shop. I've enough experience with it to be completely comfortable on that. I hope I've passed along some information that will make others more successful with carbide than they otherwise might have been.
What I hoped to get here was the genuinely new and hard to find tips about HSS. Sort of like the "secret CCGT" insert info I've presented on carbide. Several have suggested there is no such information on HSS, that's its very basic and you just do it. That's cool, I'll take that as my working assumption and keep experimenting and asking questions. At the moment I can get surface finish from HSS that is equivalent to my CCGT tooling and that I consider good. But, if I can't get HSS to do something better than the carbide, I'm a carbide man. It's easier and more consistent. I'll keep the HSS for form tools and other things for which there is no purpose-built indexable tooling.
Towards that end, I am really looking forward to seeing and trying out Widgitmaster's flycutter. I have also ordered today a set of diamond EZE-Laps so I can keep playing with honing/stoning my HSS. I have also heard you can touch up an insert with them.
Cheers,
BW


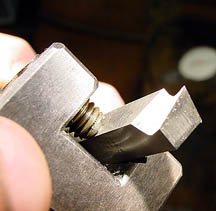
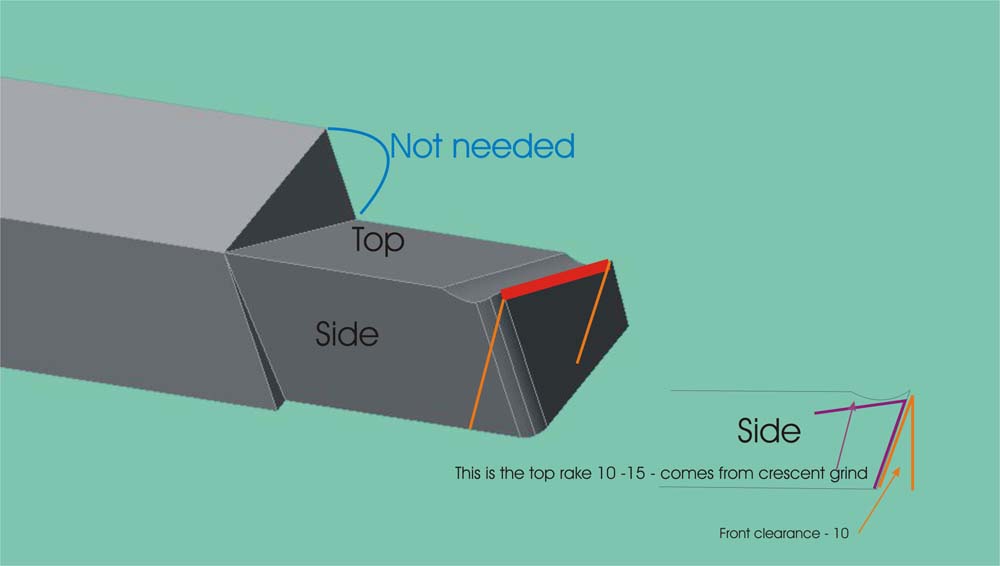
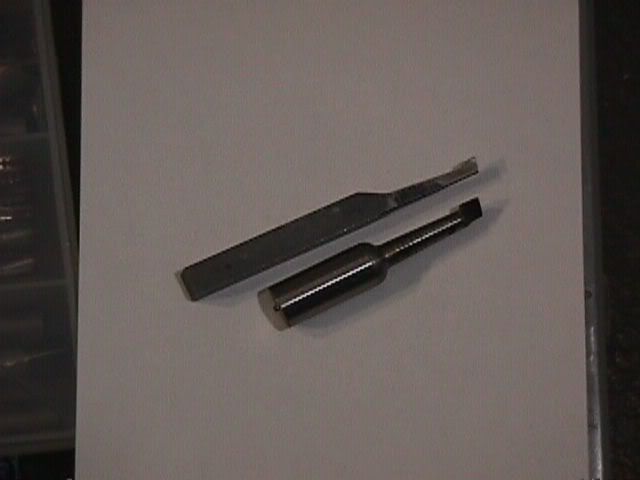
 ) basically you don't grind a rake angle (angle on the top of the bit, slanting away from the cutting edge) but you grind a chip break that comes up to the cutting edge - the rake comes from the side of the chip breaker 'trough' itself. I'll see if i can sketch it.