Half Scale Douglas Motorcycle

Home Model Engine Machinist Forum

Help Support Home Model Engine Machinist Forum:

This site may earn a commission from merchant affiliate links, including eBay, Amazon, and others.
Wow! th_confused0052 :bow: :bow: :bow: :bow:

Ambitious project and perfect metal working! You got me following along, love the way you combine CNC and conventional machining!

Regards Jeroen
 
Hey all. A quick update on finding spark plug material. I wanted to produce some Lodge spark plugs in the pink colour and was finding it very difficult to get the right colour. Strawberry Ice was too light and everything else seemed too dark.
On the way into town I passed a kitchen show room and saw that they had a rack of the entire corian range. Next day I took the old spark plug along and compared it with the samples in the shop. The shopkeeper obviously wanted to know what I was upto as a bloke with a spark plug in a kitchen showroom stands out a bit. After explaining that I was after a sample he suggested that I email the corian website and they would provide a sample in the colour I wanted.
Sweet Violet was the closest available so that afternoon I sent an email off and three days later I received a 2" square 12mm thick sample of corian! Enough to make 3 or 4 spark plugs. It's not the perfect colour I know but it's not bad and it was free!

090320111100.jpg


So, if you need some white or pink corian or any colour under the sun for spark plugs and dont do it too often - ask for a sample :) If you dont ask you dont get :p
 
Thats a good thought, I will file that away with the folks on ebay that sell pen blanks.
 
Easter holidays = workshop time.

A newly made spark plug

[ame]http://www.youtube.com/watch?v=FXhL6wPd-R4[/ame]

I have also made some videos showing how I made it.

08042011092.jpg


Rob.
 
Wow. You do nice work.

Tangential question: are the brakes on the prototype as marginal as they look?
 
I just found this build and i find it really interesting. Can't wait for more updates. Your machining is looking great.
 
Mainer said:
Wow. You do nice work.

Tangential question: are the brakes on the prototype as marginal as they look?

The brake drums are 9" diameter and the shoes about 1" wide and they do work quite well. Brakes of similar age machinery can be as little as 6" diameter so these would've been considered sporty!
 
Hello all, I thought I better do a small update because between finishing university for the year and starting a new job 100+ miles from the workshop I only have 3 days to play, this being the second :(

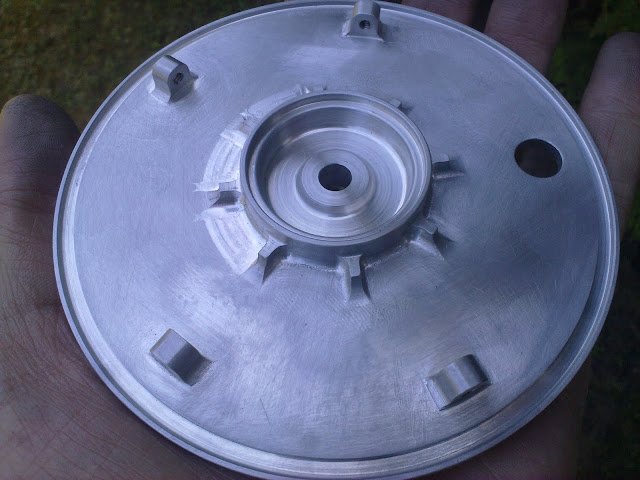
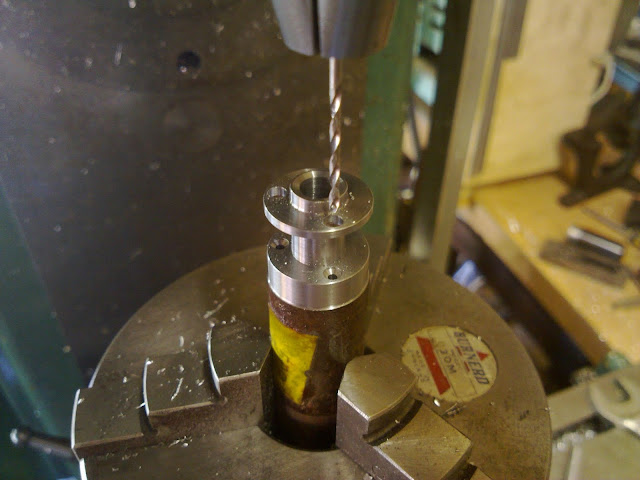
So, the last major item I was doing was the brake drum cover plates so decided to continue with them. I only had 1 made at that stage so the first thing was to try and remember how I made the first one! Since Easter I have managed to loose my note book with ALL my sketches and drawings in (I hope I left it at university) So I had to re-measure the component and check it against the 1st plate. I actually had to go back to my build website to see what set-ups I used also, which was very handy. The second plate took about 5 hours to complete and was almost exactly 1/5 the weight of the blank it came from! What a waste of material!

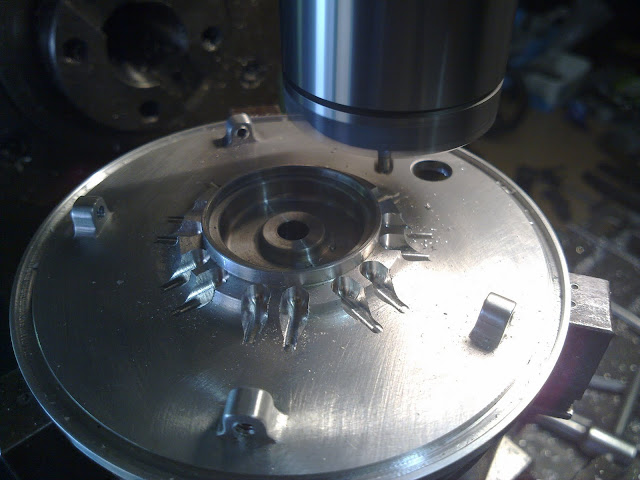
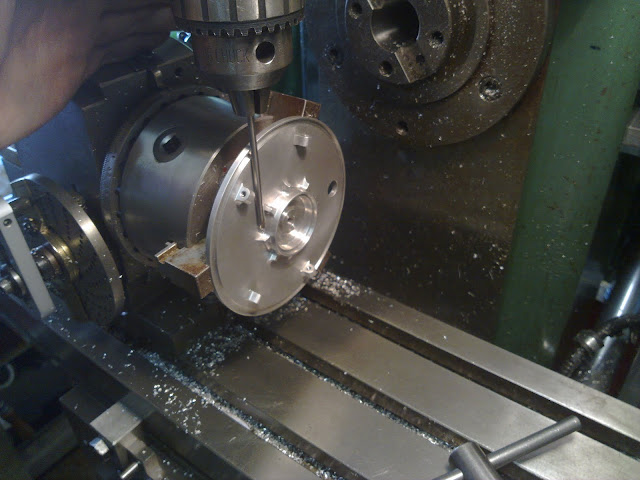
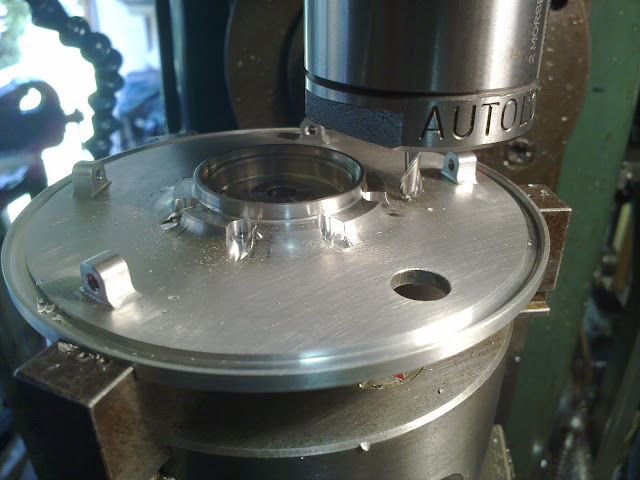
Next, if you look at the last photographs of the full size and half scale plates, you can see 8 webs around the centre boss of the plate which arent machined yet. This was the next item on the list. The plate was set up vertically in the dividing head and located centrally about the quill. I added to the list of 'specials' slot drills by taking a 3/16" and hand grinding a 1/6" radius on its corners giving me a tool that will still mill the 'face' of the job. The table was then moved over the radius of the tool plus half the thickness of the web I wanted to remain. By setting a table stop I was able to bring the side of the tool close to the raised centre boss and just scratching it for a nice blend. I then cut a slot upto the boss in many passes working my way down until I scratched the face of the plate. Rotated the chuck 45degrees and repeated as photo 1:
26062011602.jpg


I then moved the table back to the zero position and then the radius of the tool plus half the thickness of the web in the minus direction and the whole process repeated thus creating the 'web'.
26062011605.jpg


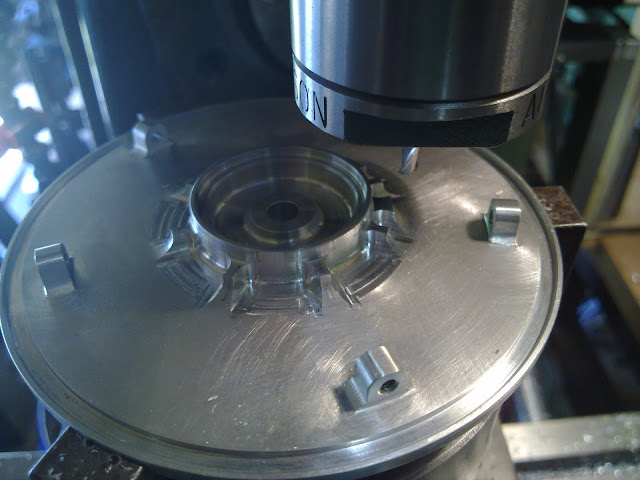
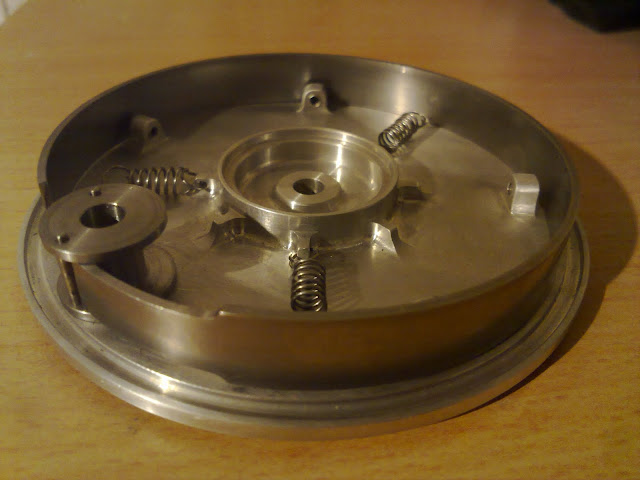
The same tool was used to remove the infill between the webs by rotating the dividing head back and forth:
26062011603.jpg


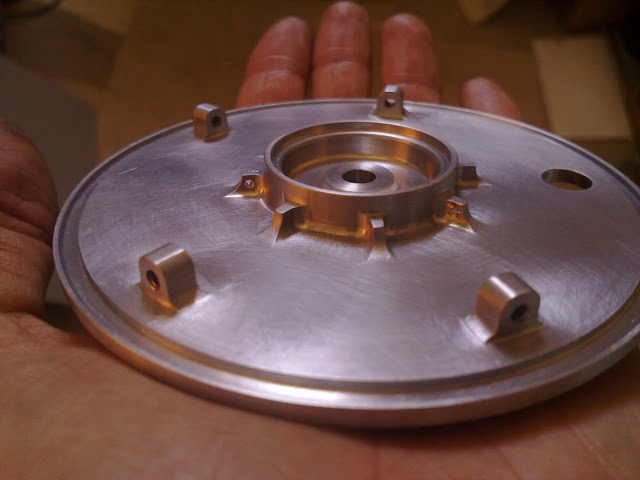
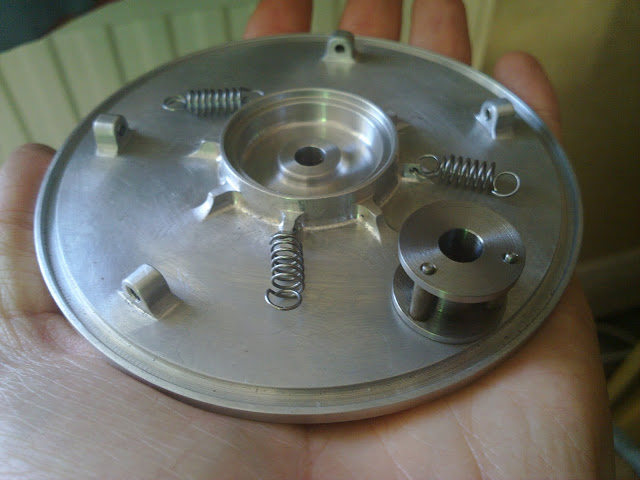
The next stage was to file and blend the newly machined areas so it looked like a casting, here you can see a before and after shot:
26062011604.jpg


They were then set up in the dividing head in the horiztontal position to have the spring holes drilled in 3 of the webs. These springs keep the brake band from rubbing on the drum when not required:
26062011606.jpg

26062011607.jpg


Here is the result so far with home-modified springs in their correct positions, Its starting to look quite good:
26062011608.jpg


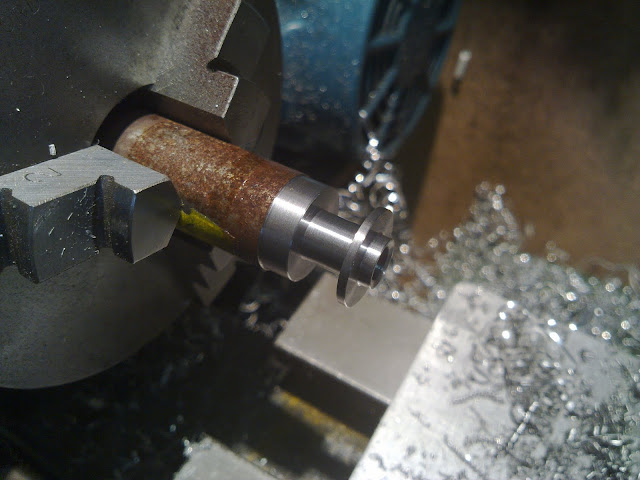
Thats taken me upto lunch on day 2, giving me enough time to start the bobbins which force the brake band apart:
26062011610.jpg

26062011611.jpg

With pins made and ready to be rivited in place once the hinges are made:
26062011612.jpg


I have just found some 1/16" x 1/2" steel strip to make the brake band out of and have located a company that can provide brake material in sheets and thicknesses of 3mm. I will have to machine it down to about 80thou but its looking good.

Hope people are having fun. I have been watching builds take shape on here since easter and they are making me want to not work this summer and just stay in the workshop. I would take it with me but I have so much stuff crammed into such a tight space it would be like trying to carefully take apart a jigsaw puzzle that had been glued together. So, this may be the last update for some time........ Rob,

 
One last quicky update before the workshop is closed for the foreseeable,

The brake band was rolled and begins to make the whole assembly seem complete. Just have the little spring hooks to make and rivet in place, make the set screws and broach 8 splines into the bobbin for it to be complete:-

28062011633.jpg


Also, I had a go at the magnet and side covers for the magneto. I have a CDI unit supplied by SS which im hoping to copy but on two boards so that it can be inserted inside the magneto (a shaft runs through the whole assembly hence the split board). It will run a waste spark system with the coil being hidden up inside the magnet when its hollowed out. There is almost no spare space anywhere but it will be a totally self contained unit with cable operated advance and retard. Detailed photos will be on my website soon.

28062011632.jpg


If anyone is interested in my half scale lodge spark plugs, I will have the drawings complete soonish (2 weeks tops) and will have them available from my site. Have fun all and keep up the good work, im relying on you to give me my engineering fix :)


Back
Top