Grinding parting tools

Home Model Engine Machinist Forum

Help Support Home Model Engine Machinist Forum:

This site may earn a commission from merchant affiliate links, including eBay, Amazon, and others.

pkastagehand

Well-Known Member
Joined
May 1, 2011
Messages
173
Reaction score
32
I see a few threads on parting and the setup on the lathe but only found 1 on grinding the tool and it looked different than the tool I am trying to use.

I have one the QC tool posts with the tool holder and blade (imports). The top surface of the blade has that bevel along one edge to help hold it in the tool holder. It is about 1/8" wide. I am finding nothing in my books or online that shows the geometry for these. Anyone point me to some pictures?

Paul
 
This video will show you how and why.
[ame]http://youtu.be/82LtUTBmxwQ[/ame]
 
Thanks for that link. I've looked at some other Tubal Cain videos but hadn't thought of him for this. Very useful and informative.

But he still didn't address the issue of that beveled corner and how that affects the cut. Maybe it acts like the carbide tool he showed that causes the chip to curl a bit so it clears the slot better? Or does the one with the bevel on one top corner need to be ground with a back rake or something to get rid of the bevel?

Paul
 
parting tools for holders are pretty basic. there is a the T style and the taper style . they are flat on the top and only ground on the end. the end should favor the right hand side so the right and side cuts first this keeps the nip on the parent metal instead of on the part. A trick you will not see anywhere else is you can grind a thin slot in the end make it look like a snake tongue. this can dampen vibration. a cutting disk on a dremel tool works well for this.
Tin
 
pkastagehand said:
Thanks for that link. I've looked at some other Tubal Cain videos but hadn't thought of him for this. Very useful and informative.

But he still didn't address the issue of that beveled corner and how that affects the cut. Maybe it acts like the carbide tool he showed that causes the chip to curl a bit so it clears the slot better? Or does the one with the bevel on one top corner need to be ground with a back rake or something to get rid of the bevel?

Paul

Hi Paul,

If by bevel on one edge you mean that the tip of the cutting tool in ground to a 5 degree angle to the right then the purpose is to be able to part off the piece and then continue to advance the tool to get rid of the nib that otherwise would be left on the remaining stock. Think of it as a facing tool. Other than this I have no idea, you could also try and grind a little groove on the top tip of the tool to help the swarf curl away from the cutting surfaces, almost all of the carbide indexible tool tips have either one or both of these features. If you wish to grind the groove it is best achieved with a dremel and a carbide grinding wheel, the depth of the groove is quite shallow. See the link below for the tool geometry.
http://www.aloris.com/index.php/pages/Carbide Insert Cut-Off & Grooving.html
 
I like the "P type" parting tools, they're T shaped and the middle of the top has a little dip and the sides are relieved from the vertical a couple of degrees. You usually present them to the work with about 4-5 degrees rake and I grind about 6-7 degrees relief in the front. That makes it that only the cutting edge touches the work so there's no friction to eventually jam things. The dip in the top helps to 'crunch' the chip a bit so it's narrower than the cut and so clears well.

Generally, if I'm not using the GT type carbide I'm using a .093 P type parting tool (if I'm cutting small brass tubing I'm likely to use either a Kaiser Thinbit or a Nikole tool, they both go down to razor blade thickness). If I think I need a really sharp tool I'll use the P type and hone it right be using it - it's needed on aluminum bronze and works well on other bronzes.
 
Here is a section view of my tool. Note the bevel across the top. Do I have to sharpen that flat and provide back rake? This bevel runs the length of the tool and I presume is for helping anchor it in the holder.


parting tool by stagetech56, on Flickr

 
pkastagehand said:
Here is a section view of my tool. Note the bevel across the top. Do I have to sharpen that flat and provide back rake? This bevel runs the length of the tool and I presume is for helping anchor it in the holder.


parting tool by stagetech56, on Flickr

Hi,

I am no expert at grinding tools but if the cross section shown is the front of the tool as presented to the stock then I think you might have an issue with placing the tool on the center line. The parting tools sre usually only sharpened at the cutting edge.
 
I have never seen one made like that. when it comes to paring tools only buy good ones like from LMS Warner or a name brand from MSC,enco etc. I bought one from harbor freight there was no real geometry cut into it. where di yours come from??
Tin
 
Hi Paul
I have just seen your request and feel I may be able to help.

I have used the QC type parting tool holder with blades as you show sectioned for many years. Indeed I currently have three holders containing similar blades set up.

It appears to me that the bevel you are refering to is that for the clamp that holds the blade into the holder to register against and apply a certain amount of down as well as inwards force.

To use the blade needs grinding back on the top surface for as long as you desire (in front of the clamping area) removing the top surface to below the bevel. You can apply a degree of back rake at the same time too if you desire. Grinding down too far will have the effect of reducing the blade width and so limits the depth the tool can be plunged. The same applies to too much top rake - as you grind the front to re-sharpen the height of the blade gradually diminishes.

This is the reason I have aquired three tool holders over the years - all ground to suit differing widths/lengths using the same blade sizes.

Hope I'm reading your question correctly and that that that helps some

Regards - Ramon

 
I have blades like that as well, Ramon has it right. Just grind it flat with a bit of rake.

Vic.
 
Ramon said:
Hi Paul
I have just seen your request and feel I may be able to help.

I have used the QC type parting tool holder with blades as you show sectioned for many years. Indeed I currently have three holders containing similar blades set up.

It appears to me that the bevel you are refering to is that for the clamp that holds the blade into the holder to register against and apply a certain amount of down as well as inwards force.

To use the blade needs grinding back on the top surface for as long as you desire (in front of the clamping area) removing the top surface to below the bevel. You can apply a degree of back rake at the same time too if you desire. Grinding down too far will have the effect of reducing the blade width and so limits the depth the tool can be plunged. The same applies to too much top rake - as you grind the front to re-sharpen the height of the blade gradually diminishes.

This is the reason I have aquired three tool holders over the years - all ground to suit differing widths/lengths using the same blade sizes.

Hope I'm reading your question correctly and that that that helps some

Regards - Ramon

Hi Ramon,

I am sure that your advice is correct, what I don't understand is how an advantage is gained from manufacturing a blade with such profile if it has to be ground flat again?

Regards,

A.G
 
Hi A.G.

I don't think it is intened for any advantages as such merely a manufacturing process. Unlike an inserted tip blade or some other types of HSS blades they are not bought as 'ready to use'.

I have just been out to the workshop and took these which may be of help....

DSCN4506.JPG

The left and centre holders have blades as described by Paul. The broken, central one was ground to 1/16th width back about 3/4" which, with a little side rake on each side made it rather thin. As you see a momentary lack of concentration lead to it's disappearance :eek:

DSCN4507.JPG

This is the most recent holder bought with blade as supplied. This has only been ground on the top and front faces and is, for all intents and puposes, 'full width'.

DSCN4508.JPG

This is the original holder bought circa late seventies and still has the original but now very short blade. As you can see this has the bevel ground all the way across the top face as is the spare blade.

Hope this helps explain a little more - if nothing else it's motivated me to regrind that broken blade ;)

Regards - Ramon
 
Hi Ramon,

Thanks for taking the trouble to post the photos.

Regards,

A.G
 
Lensman,

My parting tool is slightly different from pkstagehand's diagram, in that where his shows a horizontal element on the top (and only one bevel), mine has a pair of bevels rising, to a peak (though not dead central on the blade). I don't grind it flat when sharpening the tool and it works fine! Ramon's is different to mine in that his only appears to have a single bevel.

My blade came as part of a SOBA set.

Regards Tom
 
As Ramon has shown, there are no such things as 'magic' parting off tools that will do every job.

The longer you are in this game, the more you collect, and you will soon find that you need specific grinds for specific jobs and materials. Just doing one type of grind will only get you through the job you are doing at the time. Parting off say a larger diameter or different material, you will most probably have to regrind the tool to a different shape.

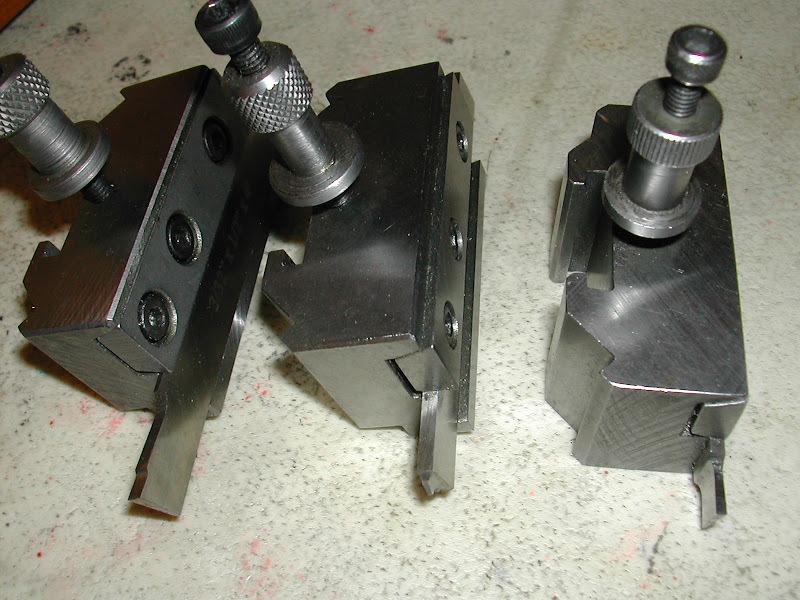
I must have at least a dozen knocking about my shop, all geared to certain types of job and materials, no one is a favourite as such, just a couple are more 'universal' than others, and so tend to get used a little more often.

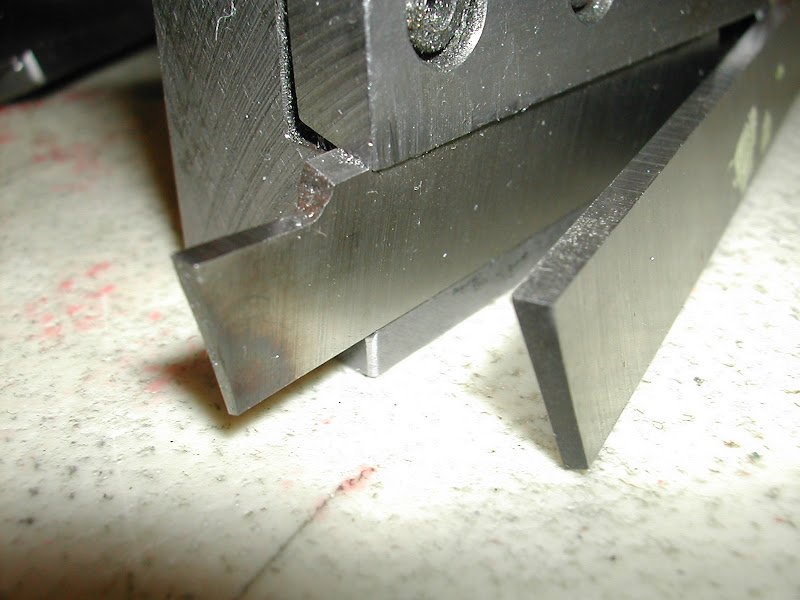
A good example is just by putting a tiny "chip breaker" groove at the back of the cutting edge can sometimes transform the way a tool will cut certain materials.

There is a lot of experimentation and experience required to get your head around parting off, and getting good results most of the time, so don't worry too much in the early stages of your learning curve. It is only like any other machining regime, where you have to get the 'feel' for the job in hand. Some people struggle all their lives with parting off, whereas most mainstream machinists, it is nothing that needs to be concerned over.
Eventually things will 'click', and all of a sudden, parting won't be such a thing to be feared.
I personally never had any problems with parting, because in my early learning days, I was so naive, I didn't realise that it could be a problem. I just did it to how I thought it should be done.

At times, just too much theory can be pushed at a subject, and so cloud over what is trying to actually be achieved.

Do I do this, or that? Should I have top rake or not? etc etc. Whereas really, you should be looking at your material and diameter, and set the tip up as you would for normal turning, say no top rake if cutting brass etc, and as experienced is gained, you will automatically know how to grind your parting blade to do the job. No more, no less.

Then you only have to get over the fear of plunging in almost as fast as you can go. Once you can do that, you've got it cracked.

Just as a side note, anything over 1/2" diameter, I just part off using my power cross feed, without even thinking about it, and that is not boasting, I'm just trying to let you know that it really is that simple, nothing to worry about at all.


John
 
tomfilery said:
Lensman,

My parting tool is slightly different from pkstagehand's diagram, in that where his shows a horizontal element on the top (and only one bevel), mine has a pair of bevels rising, to a peak (though not dead central on the blade). I don't grind it flat when sharpening the tool and it works fine! Ramon's is different to mine in that his only appears to have a single bevel.

My blade came as part of a SOBA set.

Regards Tom

Hi Tom,
This is very inyteresting as I have not seen one of those, is there any chance that you could post a photo of it, I am just curious.

Regards,

A.G
 
Lensman,

Photos as requested:-

End-on showing the "peak" running along the top of the tool.

Regards Tom

Parting tool.JPG
 
Lensman,

And side view - pretty much as per Ramon's (but without the shaped tip).

Regards Tom

Ptoolside.JPG
 

Latest posts

Back
Top