Finishing the Phil Duclos Odds and Ends

Home Model Engine Machinist Forum

Help Support Home Model Engine Machinist Forum:

This site may earn a commission from merchant affiliate links, including eBay, Amazon, and others.

cl350rr

Well-Known Member
Joined
Jun 23, 2009
Messages
198
Reaction score
6
Hello all.

I have a few engines in the "not yet finished" stage and decided that the only way I was going to make the time to finish them any time soon was to sign on here, learn a few things and complete the parts I have been putting off so here we go.

first I am amazed at the tooling, craftsmanship, enginuity, and photography I have seen so far on this forum. I am really not all that blessed in any of these areas so please bear with me...

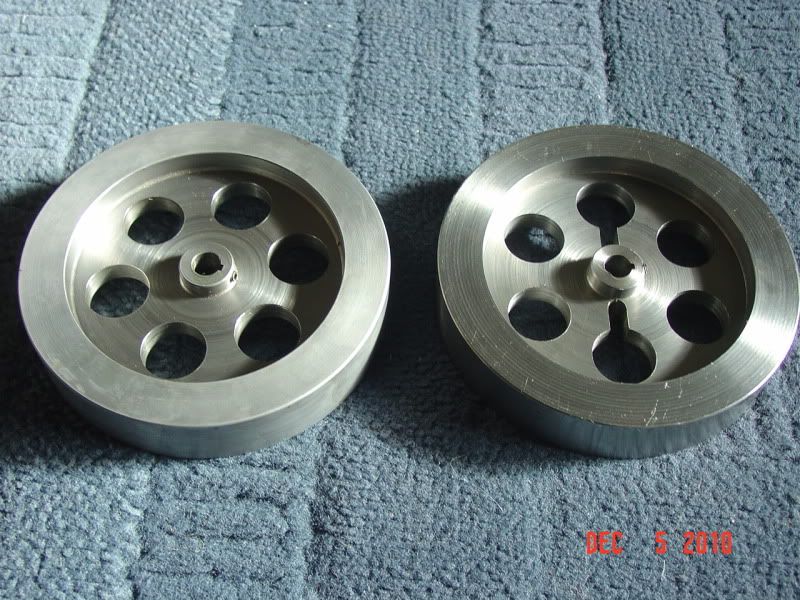
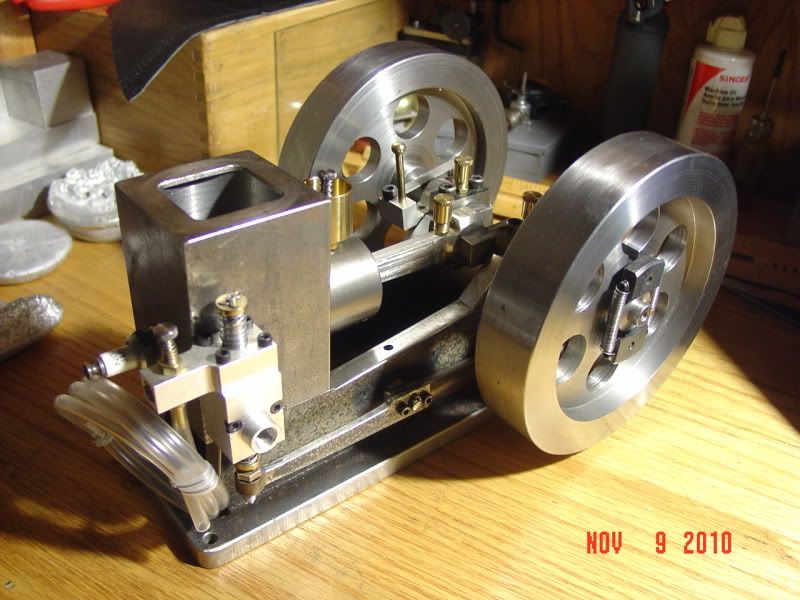
I have been dabbling in machine work for about 30 years now, buying and selling lathes and a milling machine. when I bought my sherline "inside shop" equipment a few years ago, the fellow I bought them from offered me a couple of incomplete engines for a few dollars more. one of the engines was this odds and ends hit and miss engine. he had completed the frame, flywheels, crank, rod, piston, rings and bearings. he handed me the cam gear which is the point he had stopped.

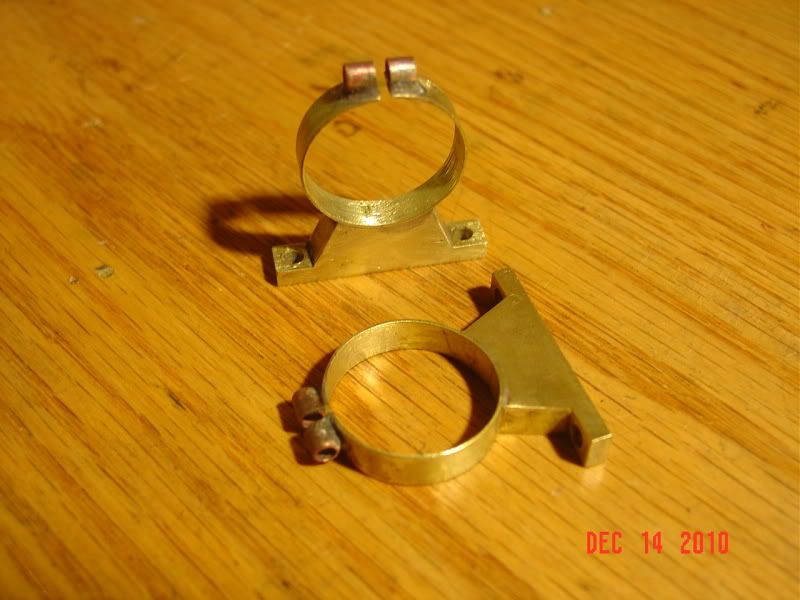
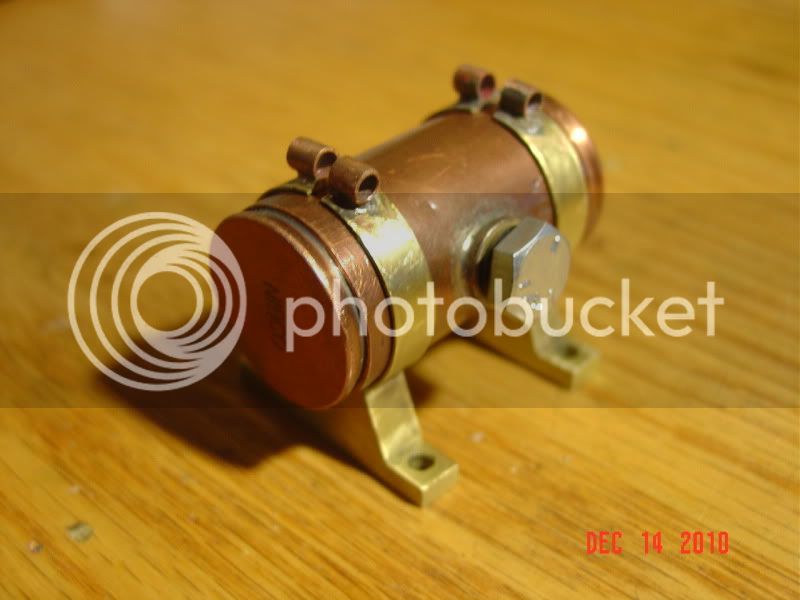
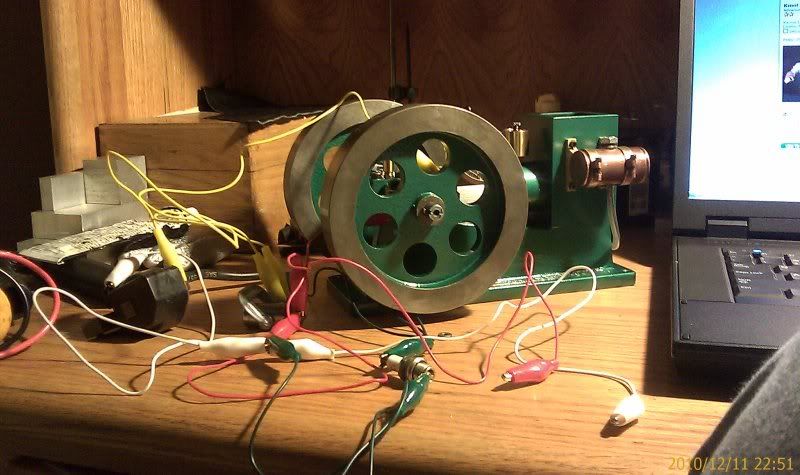
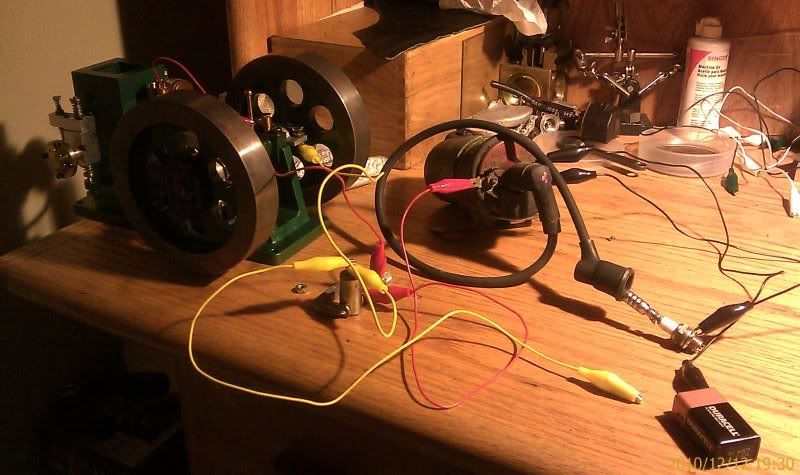
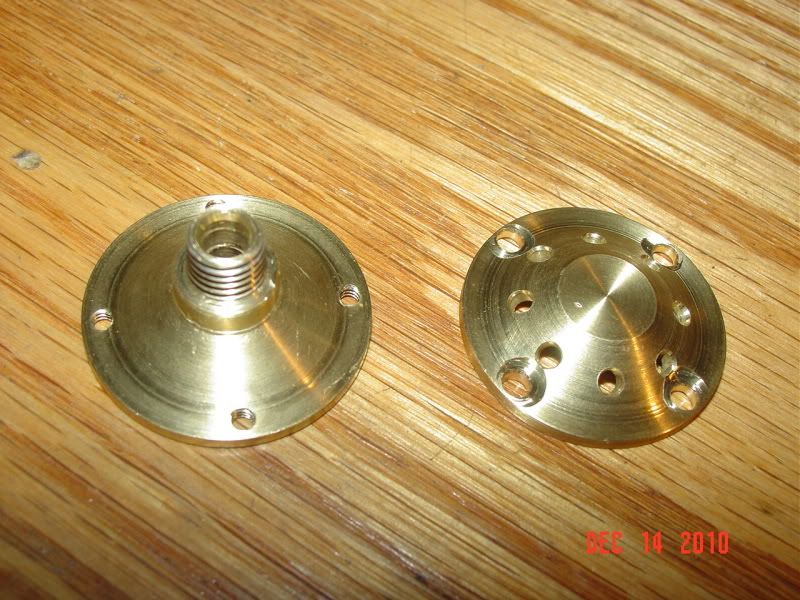
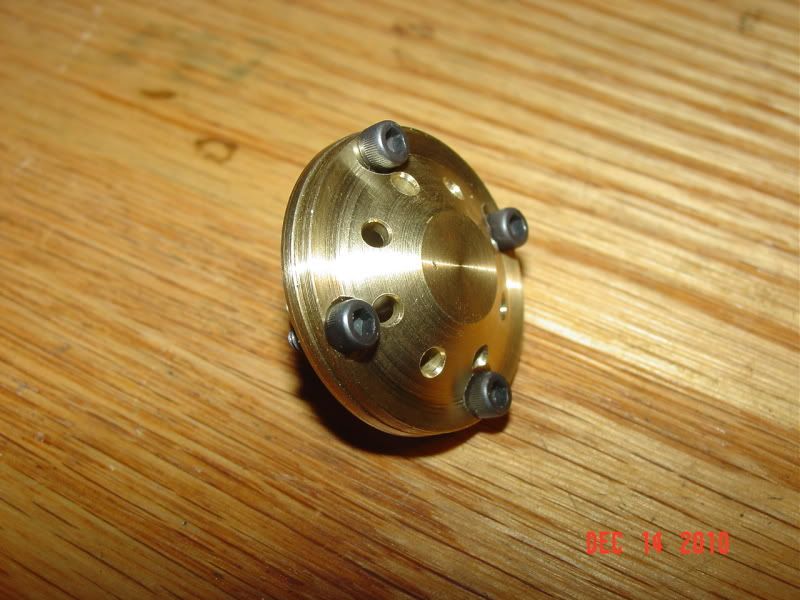
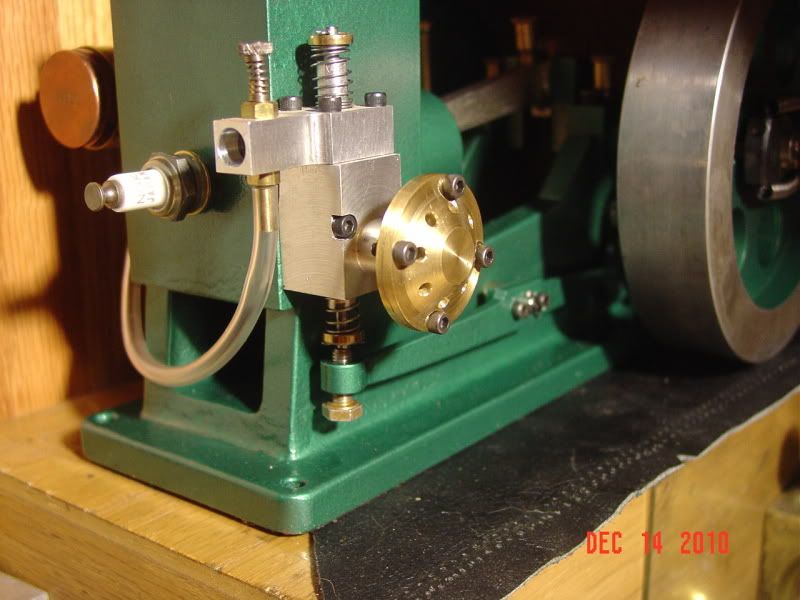
I took it from there and completed a few small parts each winter when I had time. this picture shows where I started this winter's push to complete the engine:
oddsandends.jpg
 
Fine looking engine cl !! Here's to a long enough Winter so that you'll have it running by Spring. By the way, both the craftsmanship and the photography look great to me,

Bill
 
Thanks Bill.
first on the list of to-do's was a muffler. I grabbed the largest brass round stock I had which is a bit smaller than the muffler in the plans. I figure if I'm gonna make it a bit different, I might as well make it the way I like it so...
oddsandends002-1.jpg

oddsandends003-1.jpg

that was 3 weeks ago, the engine has been painted since:
oddsandends005.jpg
 
Beautiful engine, Randel. I've not seen any better examples of the Odds N Ends! My only question is, why are you trying to make it quieter??? ;D

Chuck
 
Super Nice Randel :bow: :bow: :bow:

I'm kinda partial to Duclos' engine.

Of course, we all await the video :)

Jeff
 
Chuck: thanks for the kind words, the muffler is so when it's running on the mantle in the evening, it will not disturb the wife's TV shows ;)

Jeff: thanks, I have seen the videos of your engine in action and it looks and runs great. I am still working on how to post a video but hope to attempt fire soon... I will video when it runs

So, next on the list was fuel tank mounts. I built the tank last winter out of some copper pipe fittings and some brass turnings. I liked the way it came out but just could not seem to settle on the right way to mount it to the side of the engine.

that's how I wound up on this forum, I came across Bob Sorenson's Nina build while googling one afternoon and was taken in by his mastery of silver soldering. I saw how he made straps to hold around a round part of the engine and that's what I needed to mount my fuel tank. Thanks Bob :)

a few chips, flux, some acetynene, a rigged up holding fixture and:

oddsandends006.jpg


oddsandends008.jpg


oddsandends009.jpg


still need to make the strap screws and brighten them up but you get the idea
ya just don't know how rough this stuff looks until you see it in a close up pic :-[
 
Looks brilliant Randel, can't wait to see it run.

You're right, the pictures always make components look worse than they are. Yours are good on the pics so must be brilliant in real life!

I'm always disappointed when I take pictures of my stuff.

Nick
 
Thanks Nick, I guess my eyes aren't as good as the camera ::)

so, i was sitting there wondering what to do next when this voice inside my head said... "paint it".

another voice said "don't paint till it runs or you'll jinx it"

still a third voice said "don't listen, you should plate it"

well if you have looked closely at the pictures you have probably noticed that the flywheels were a nice shiney pollished steel in the unpainted state and turned a dull gray when the paint was applied... what happened?

I decided that nice pollished unprotected steel would eventually look rusty and grubby so I busted out my nickel plating solution and my electroplating machine and brush plated the rims and center hubs of the wheels before I painted them. the wheel on the left in this photo is plated, the right is not. once it is running (fingers crosssed) I will pollish up the nickel and we shall see what I got.


oddsandends001-2.jpg
 
The other night I decided to tackle the ignition system or at least concept it out to see if I could make it work. I started out with a weed wacker coil but soon figured out it would not work:-\

IMAGE_185.jpg


so I dug out my trusty Bosch coil out of an unsuspecting BMW. the setup looked like this:

IMAGE_186.jpg


and the result:

http://s147.photobucket.com/albums/r312/cl350rr/Engines/?action=view&current=VIDEO_009.mp4

I realize I am turning the engine the wrong direction in the picture but I was so charged to get spark I didn't care ;D
 
I wanted my spark plug wire to look like something vintage to look like it should be on a hit and miss engine so... I started looking for plug wires. unable to find what I wanted, I found a scrap of brass:

oddsandends010.jpg

drew some lines:
oddsandends011.jpg

drilled some holes and trimmed excess:
oddsandends013.jpg

cut, nibbled and filed to final shape:
oddsandends014.jpg

bent to shape:
oddsandends017.jpg

soldered to lead and I was all set, until I figured out that I had soft brass and it would not spring back as needed so I beat the tar out of it with a hammer until it was work hardened and it works well enough to stay for now:
oddsandends018.jpg

oddsandends020.jpg

 
Well I gave it a go at starting the engine last night. when I filled the tank with fuel, It started leaking out of the carb ??? found out that I had not drilled the seat deep enough in the fuel meetering tube so the needle valve could not close off the fuel. flooded the cylinder so I was out of business.

I had a 6 volt lantern battery hooked to the ignition, is that enought juice? it seems to give a good spark outside of the cylinder but not sure what's going on inside.

I redrilled it and got a good seal this time. by now it was dark and I had no more fuel so I just tried to start it with the remaining in the cylinder:

on a happy note, it did pop a few times, thought it was my imagination at first as I was spinning the flywheels for all I was worth but then i could smell a bit of burnt fuel so I know I'm on the right track.

more when I can get some fresh fuel mixed up

Happy Holidays

R
 
Well I'm stumped. I've been cranking on this thing for 3 days and cannot get it to fire. i have good spark, I am getting fuel into the cylinder and can get it to burp but not with enough authority to turn the crank enough to keep running. I suspect I don't have enough compression. I can turn it on the exhaust stroke and it will make it about half way up the compression stroke then it stops, no bounce back. if I pull the plug out it turns freely and will easilly turn several revolutions before stopping.

I did not make the cylinder or the rings. I suspect the rings were bought rather than made by the PO. the ring gap is .007, they don't look to have been heat treated and the gap when not in the cylinder is about .040 on one and .030 on the other.

looking for ideas.

been thinking of putting some kerosene in the cylinder with the plug out and turning it over with a drill to try to seat the rings...

R
 
Sounds like when I made my Briesch olds and Schaffer Lil' York. I remember having a sore thumb and wrist. I found that initially putting a liberal amount of oil through the spark plug hole and retrying, I got them to run a short burst (smokey to!) The Olds was not getting the homemade rings sealed, and the lil york, I remade the piston to a .0007" diametral clearance and no rings. Both run fine with much tweaking. I was surprised with what a little adjustment how much of an impact it would make. I also remember when they would die out, I would manually oil them at the back of the piston, and they would run a little longer for me to tinker with an adjustment, be patient, you'll get it, Merry Christmas!
Jeff Marx
 
I seen your post of the video of the spark plug. In the video your cranking it backwards. I know it could be designed to be that way, but typically they go the other direction. Please verify the proper rotation.
Jeff marx
 
When I get to "test mode" I cross drill the end of the crankshaft for a .093 split pin, then make up a fixture to go into my variable speed electric drill. The fixture is 1/8" larger in diameter than the crankshaft, with a hole large enough to just slip over the end of the crankshaft, with a slot from the open end just large enough to fit around the split pin. voila'---Instant electric starter. And when the engine does start to run on its own, just pull the drill straight back away from the engine to disengage it.
 
Jeff,
thanks for having a look, I realized I was turning it the wrong way after I watched the video the first time but I was soo stoked to see a spark I didn't care.

yesterday I removed the cylinder and honed to give a better surface inside. I then took the rings out, heat treated them to give a bit more wall pressure, polished the od and sides of them and reinstalled.

that increased the CR somewhat, adding oil like you mentioned did help and I was able to get it to burp on each compression stroke but the ring gap is about .008 and I can hear alot of leakage past the rings (they are probably not round).

I ordered some cast iron in various sizes from Speedy Metals and am going to give ring-making a try when it arives, that will give the blisters a chance to heal :'(.

Stay tuned for updates

Randel

 
Brian Rupnow said:
When I get to "test mode" I cross drill the end of the crankshaft for a .093 split pin, then make up a fixture to go into my variable speed electric drill. The fixture is 1/8" larger in diameter than the crankshaft, with a hole large enough to just slip over the end of the crankshaft, with a slot from the open end just large enough to fit around the split pin. voila'---Instant electric starter. And when the engine does start to run on its own, just pull the drill straight back away from the engine to disengage it.

Great Idea Brian.

I did attach a variable speed drill to the crank stub that sticks out past the ignition side flywheel, removed the plug and valve block, added some WD-40 and spun it over at various speeds to see if it would seat the rings but it had little affect.

I will give the electric starter option a go if it doesn't work right away with new rings.

HH

Randel

 
randel are you sure that you do not have valves that are not sealing, or that you do not have some carbon built up on the exhaust valve. i had that happen on my powerhouse, due to the timing being off. i ran mine with a drill to get the rings seated and to get it to bonce. good luck and keep at it. jonesie
 
jonesie said:
randel are you sure that you do not have valves that are not sealing, or that you do not have some carbon built up on the exhaust valve. i had that happen on my powerhouse, due to the timing being off. i ran mine with a drill to get the rings seated and to get it to bonce. good luck and keep at it. jonesie

Jonesie,
thanks for the ideas. I have removed the valve block and covered the port with my finger and with no leakage possible it still will not bounce.

Randel
 
lookie what Santa just left on my doorstep...

oddsandends002.jpg


I smell cast iron ;D


good thing I have a cat to keep it from rolling off the desk
 
Back
Top