Engine turning experiment

Home Model Engine Machinist Forum

Help Support Home Model Engine Machinist Forum:

This site may earn a commission from merchant affiliate links, including eBay, Amazon, and others.

dgjessing

Well-Known Member
Joined
Feb 16, 2010
Messages
295
Reaction score
9
So I was having a few beers with a machinist friend yesterday and he described the process of engine turning to me. Today I've tried it out:

eng_turn%20016.jpg


Started with a little disk of thick leather and glued it to an aluminum arbor. Dab some valve grinding compound on it and press into the work in a neat pattern (spinning, of course :)). I like it!
 
That looks great Dave and can certainly spruce up model bases, etc. IIt seems that most people these days refer to it as engine turning just as you did. I have also heard is referred to a damasceening but not sure if that is the same thing ir not...maybe someone else can weigh in. I think that term may have come from and may even be more related to the process and appearance of damascus barrels on old rifles or shorguns. Whatever its called it looks good!!!

Bill
 
I've seen it described many times, but never as simply as that.

Your picture gives it a lot of depth. It looks great!
 
Hi all, in my school metal work class many years ago, we called it spot polishing and yes it looks great.
we experimented with various sized spots and found that if you are a very patient person with nerves of steel, a spot of about 5-6mm or around 1/4" looks like magic.
Of course we cheated with a cut out piece of flat bar with half holes cut into one edge at about 3mm centres and clamped to the subject work, was utilised as a guide which was then moved down by 3mm and sideways by the same 3mm and then repeated until you have covered the area of metal that is required to be decorated, we also used to only do an area that became a panel in the middle of the work which looked very impressive too.
Cheers
Graham
 
Very slick - another great trick to add to the box-o-knowledge
 
Here is a chap that makes a living at it.
A very nice chap at that, he was very forthcoming when I contacted him about what lubrication he used to get such consistent results, as I was using kerosene (paraffin)/ 3in 1 oil mixture at the time, but now I use WD 40 on all materials, which was his recommendation, plus I now use Craytex all of the time.

http://www.cs.ucr.edu/~eamonn/et/et.htm

These two pictures show an engine base I made, taken from two different lighting angles, and as you can see, from each perspective, the pattern looks totally different. It is that holographic effect that you should be aiming for

resurrect24.jpg

resurrect23.jpg


The main reason for why I use engine turning so much is that it doesn't show fingerprints, which a polished surface will do. But I do start off with a totally flat and smooth surface to begin with, even though engine turning will cover up small scrathes or even tinier machining marks, but any more than that, you should use this stuff first.


polish.jpg


John


John I have tried using cratex a few times also and it works well but seems to load up after a while giving inconsistent results. Does the WD-40 help avoid that or do you still have to "dress" the end of the cratex periodically?

Bill
 
I have also heard it called jeweling. I would think that a stiff wire brush could be used on softer metals like aluminum.
Alan
 
Hi - am I pleased this subject came up as it's resulted in finding the start of oxidisation on something that could have got a lot worse if left.

Like some of the previous posters I have always known it as engine turning and without in any way wanting to appear disparaging to those who find it appealing I confess it is not a surface finish I particularly like nor would apply for decorative purposes but please - that's just a personal thing.

Some time back (too far back :eek:) I started a Bentley rotary engine and upon seeing a full size version in the London Science Museum it had 'horror of horrors' two surfaces that were engine turned.

Reading this I thought I could add a little as to what was used so out came the box where it all languishes and the steel part has some small but very nasty black spots begining to take hold. Just in time then ;)

This is the Ali thrust box cover
DSCN4486.JPG


and the steel Rear Support
DSCN4487.JPG


I used a small round piece of Garry flex abrasive block clamped in a split brass sleeve and run at low speed (420rpm) in the pillar drill.
DSCN4481.JPG


The abrasive was cut by plunging a sharpened brass tube through it. Parafin was used as a lubricant and I remember it cutting very fast, the joy of the Garry Flex was not having to keep recharging or loosing definition as it wore. Definition was purposefully kept light - I was a reluctant advocate you may recall ;) but perhaps too light as I notice that trying to remove said oxidisation with a piece of Garryflex it soon removed the effect. Looking at it I think will need recutting. The parts (of the project) will now have to all come out and get checked over so this thread has certainly proved beneficial if not exactly as intended.

Hope this adds a little more

Regards - Ramon


Actually, engine turning is used a lot amongst people who use what I despise the most, firearms.

They engine turn the bolts in their rifles, not for decoration, but for the same reason as hand scraping surfaces on machines, which isn't just to get them perfectly flat, it helps to retain a very fine film of oil on the treated surface, so reducing surface friction.

They usually use fine steel brushes as their rotary 'scratching' medium.

Just to answer Bill's question.

I use Cratex bobs, reduced in width to give me the correct pattern I want to make, say 1/2" stepped over by 1/4", or 6mm stepped over by 3mm. Doing it that way, keeping things to simple full numbers or fractions, the correct designs can be produced.
I don't suffer with loading because I keep the job permanently wetted over the whole area I am working on. If you don't do that, you can easily get very patchy results, where the bob is cutting dry, which results in clogged bobs as well. You can usually tell when it has happened, you will get nice shiny circles interspersed with the odd dull one, and it looks awful.

To do something about the size of the one I showed takes about 3 to 4 hours of very strong concentration, and about half a dozen bobs.


John


Gabby said:
Of course we cheated with a cut out piece of flat bar with half holes cut into one edge at about 3mm centres and clamped to the subject work, was utilised as a guide which was then moved down by 3mm and sideways by the same 3mm and then repeated until you have covered the area of metal that is required to be decorated,

So, is it a rule of thumb to use a 50-60% of diameter for spacing?
 
There are no rules regarding engine turning. You simply experiment and figure out what looks good (to you), the product you are producing, and the size of the tool you are using to produce it.
 
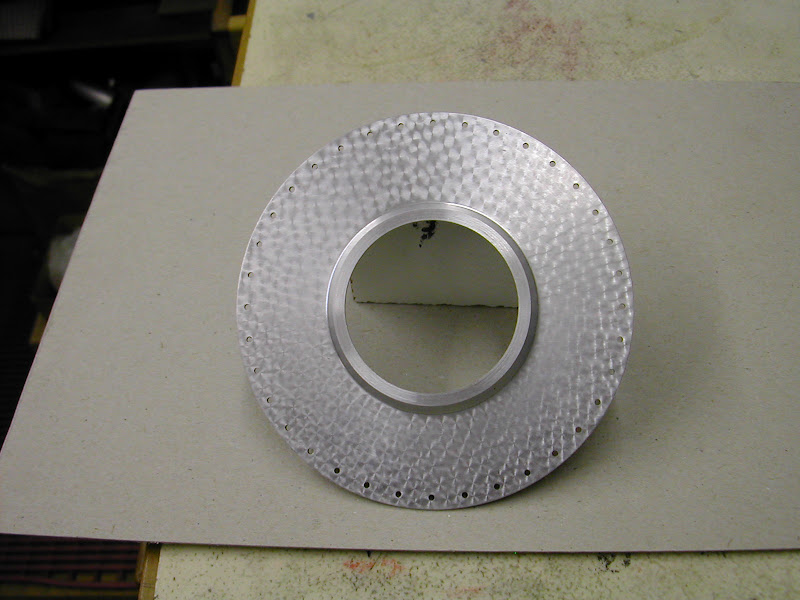
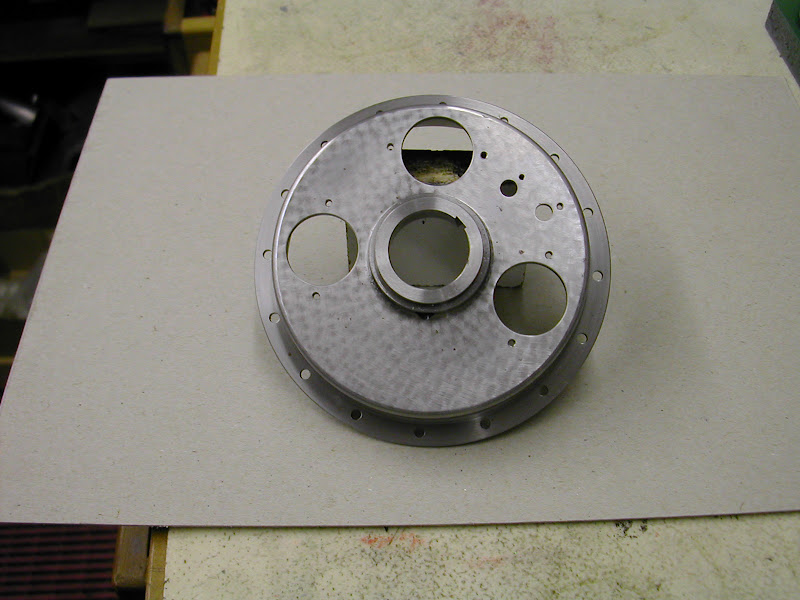
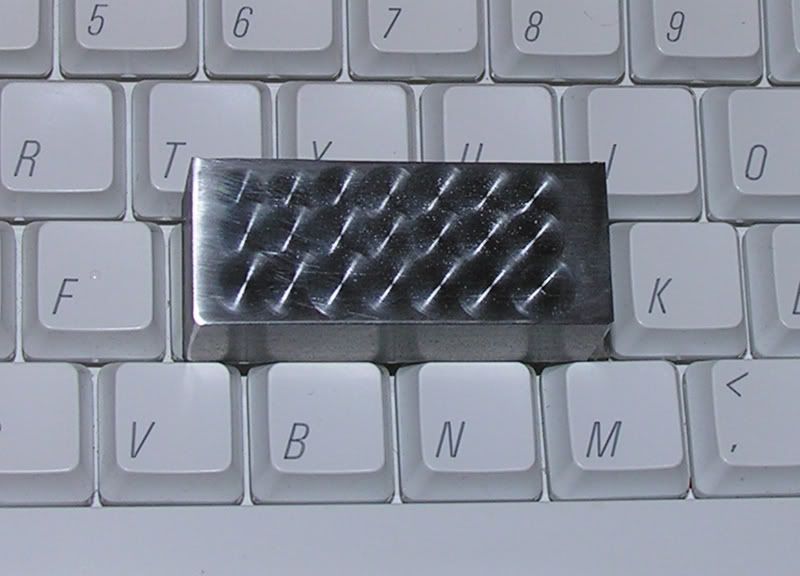
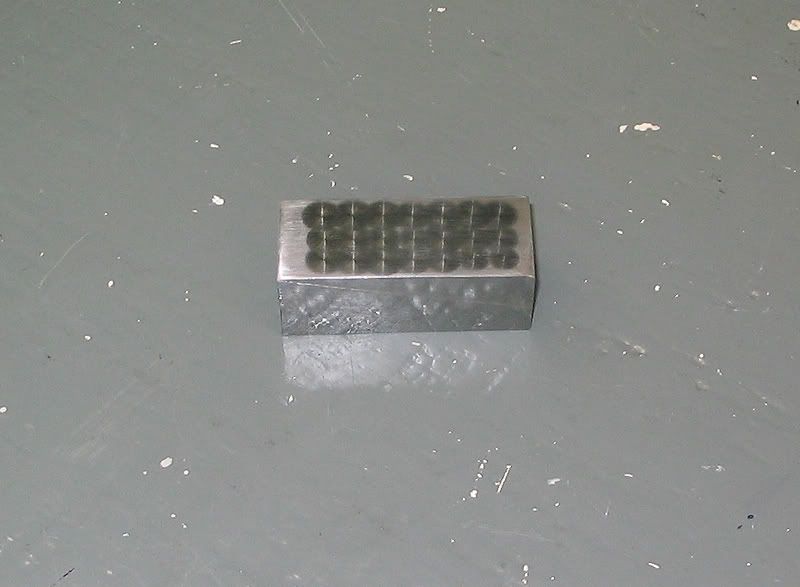
It all depends what you are after, I use a fairly simple approach of 1/2 diameter moved forwards and sidewards, starting from the job centre line, and work exactly the same from each side, but it has to be done exactly, otherwise it just looks to be a mish-mash.

You could put a square down in the form of four touching circles, then one over the top, right in the middle of the four, but again, very time consuming AND it needs to be accurate.

If you have a look at some of the designs on this commercial site, and click on a couple on the first two rows, they tell you what ratios were used to obtain that particular pattern.

http://www.fpmmetals.com/Architectural.htm

You could draw up your own using graph paper. If you don't have graph paper, design and print it free on here (save this link in your favourites for when you need it again)

http://www.printfreegraphpaper.com/

Then when you have your design, use it on the metal.

But make sure you have a quiet few hours, as one slight mistake can ruin hours of work, because most times, you just can't put it right, it will look a real eyesore, and you have to wipe the whole lot off and start again. DAMHIK

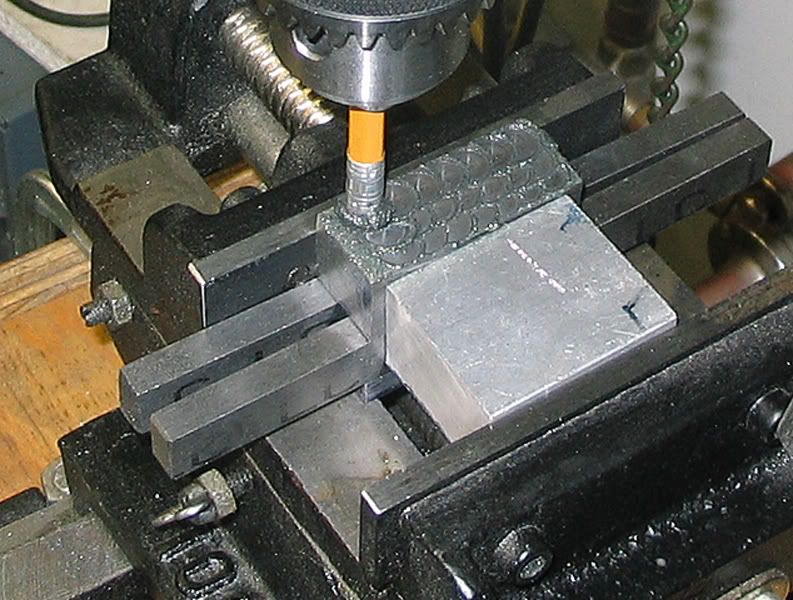
BTW having a DRO on your mill makes life 1000% easier when it comes to doing engine turning on flat sheet.

Many moons ago I did a bit of a teach in on how to do it, but I just don't have the will at this time to find it. Maybe someone can do the search for it.


John
 
Bogstandard said:
Actually, engine turning is used a lot amongst people who use what I despise the most, firearms.

They engine turn the bolts in their rifles, not for decoration, but for the same reason as hand scraping surfaces on machines, which isn't just to get them perfectly flat, it helps to retain a very fine film of oil on the treated surface, so reducing surface friction.

They usually use fine steel brushes as their rotary 'scratching' medium.

You are correct John. Personal opinions aside... Not only does jeweling aid in retaining lubricant but it does add to the appearance. One of the reasons I am involved in this hobby is to improve my machining skills which will in turn help me to improve the accuracy of my "despised items" for target competition. (my mother always said my mouth was my worst enemy ;D ) Hopefully by summers end I will have a "one off custom" 1911 target pistol in .22 cal. And yes, the barrel will be jewelled.
Alan
 
Certainly doesn't hold a candle to Bog's work, but I did a base for my new in-line twin:

eng_turn%20021.jpg


;D

Used a wood dowel instead of the leather pad this time - longer lasting, seems to me.
 
So I've been in the shop today and I couldn't resist trying the pencil.

While I was there several of you had a lot to say about this subject. Thanks especially to Bogstandard.

FWIW:

EngTurn_Test_1002B.jpg


I used the pencil and some old valve-grinding compound I had on hand. I did this as quickly as possible (minimal sanding of the metal before the treatment and count to six at each location) and I have no doubt I could do this better. What I did have trouble with is taking a photo that does it justice.

EngTurn_Test_7883C-1.jpg


EngTurn_Test_1006C.jpg


--ShopShoe
 
miner49r said:
I would think that a stiff wire brush could be used on softer metals like aluminum. - Alan
If memory serves, there is a scene in the movie "The Spirit of St Louis" where Charles Lindberg (Jimmy Stewart) is in the Ryan Aircraft plant watching the construction of the plane and they are engine turning the cowl using a wire brush.

This is a test panel made by me some 48 years ago to prepare (as a teenager) to engine turn a new dash board for a 1953 MG-TD. The material is stainless (should have been tempered aluminum) and the rounds are approximately 3/4" diameter. The grinding pads were 1/8" belt leather in a CRS arbor. The finished dash is long gone and looking back it was a bit sloppy compared to today's standards, but I learned a lot. In striving for consistency in appearance from round to round I learned that the leather pads didn't last long and keeping them consistently supplied with abrasive was spotty at best and was the primary source of poor consistency. My abrasive choice was "Clover Compound", and for those of you not familiar with Clover it is an alum oxide automotive valve and general grinding compound which is available in a wide range of grits. It is abrasive suspended in a light petroleum grease matrix. What I learned which vastly improved consistency and sped up the process was to apply the abrasive evenly to the metal, not to the leather pad. In that way the leather pad would automatically be loaded with about the same amount abrasive every time it touched down and you go from dot to dot without stopping to re-apply abrasive (and wondering if you applied about the same amount as last time.)

ENGTURN.jpg
 

Latest posts

Back
Top