


Sshire
Well-Known Member
- Joined
- Jun 29, 2011
- Messages
- 935
- Reaction score
- 259
"When all you have is a hammer, everything looks like a nail"
Abraham Maslow, "The Psychology of Science", 1966
An air engine made on a mill
A few weeks ago, I posted about the possibility making an engine with only a mill.
My lathe is still a month from delivery and wanted to make an engine. The replies ranged from "learn your mill" to "the round parts can be made on a mill" and "make the engine's square parts until the lathe comes in."
Since my total machining experience is 3 weeks with a Sherline mill, (that's when I realized that, for me, the Sherline, as beautifully made as it is, was too small for some things that I wanted to do).
I now have a PM20 mill with Accurite DRO and a PM1127VF on order (both Precision Matthews branded Weiss machines)
So I made square stuff. I have V-blocks in sizes for which there is no possible use, a vise stop (I guess in case it starts), sets of small jackscrews, machinist's clamps, and brackets for the patio canopy to bolt it to the concrete so it doesn't end up on my neighbor's car like it did last year.
Wait a minute. "the mill can be used as a lathe?" Tin Falcon
I've got a box of lathe stuff from Enco (no lathe but lots of stuff).
So here it is, 5 days, a very nice collection of bent and/or misthreaded 0.125 piston rods, 4 pistons that almost fit and an oval-shaped cylinder from overzealous vise pressure (maybe I could make an oval piston to fit.)
Will it run? Is the suspense building?
Thanks to Milotrain, Metalmad, Crab, AHEG1220, Seagar and Tin Falcon for not telling me to wait for the lathe.
Here's my build of "Slim Sam" from Stan Bray's Book, "Making Simple Model Steam Engines."
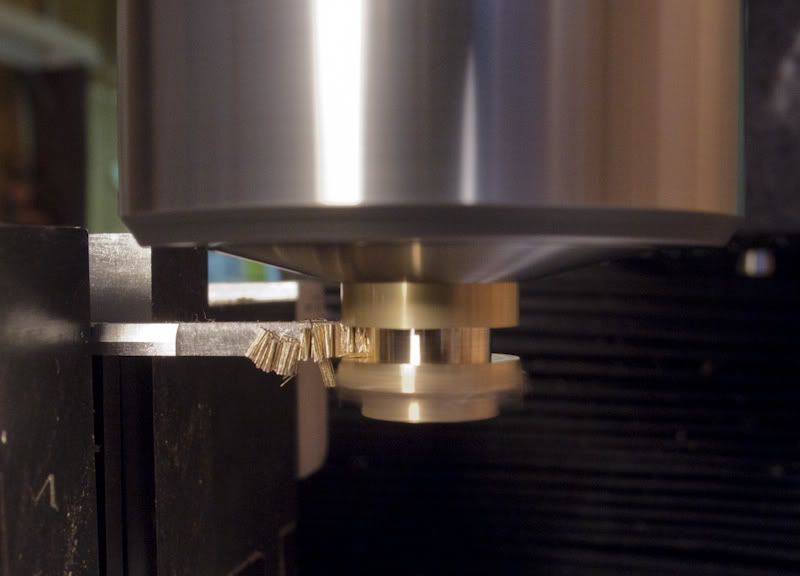
I figured that if I tried the "turning" parts first and had a complete meltdown, I'd shelve the whole idea. Here's the cylinder after the first cut with Arthur Warner HSS inserts.
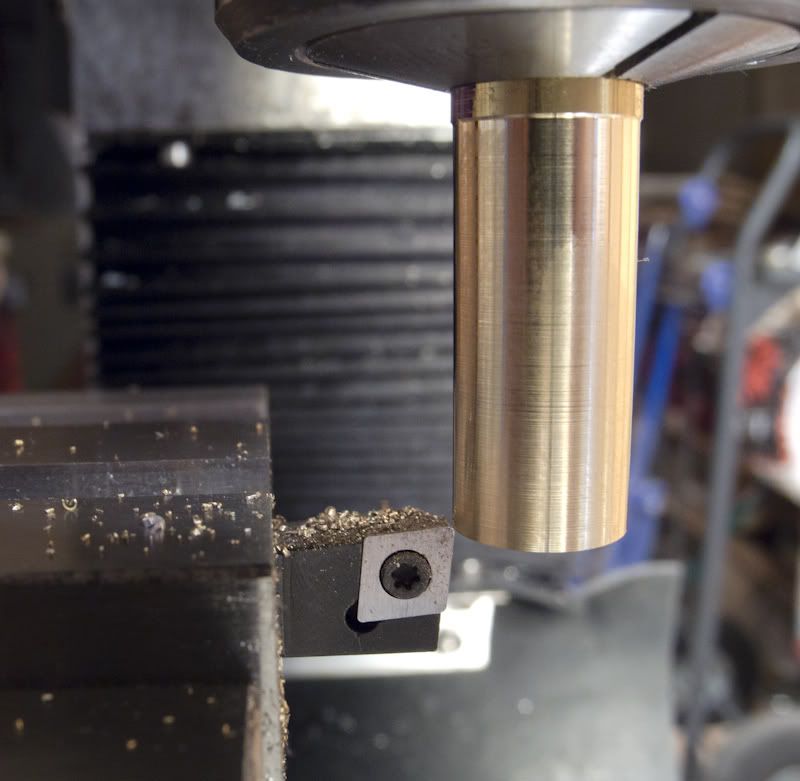
It worked!!
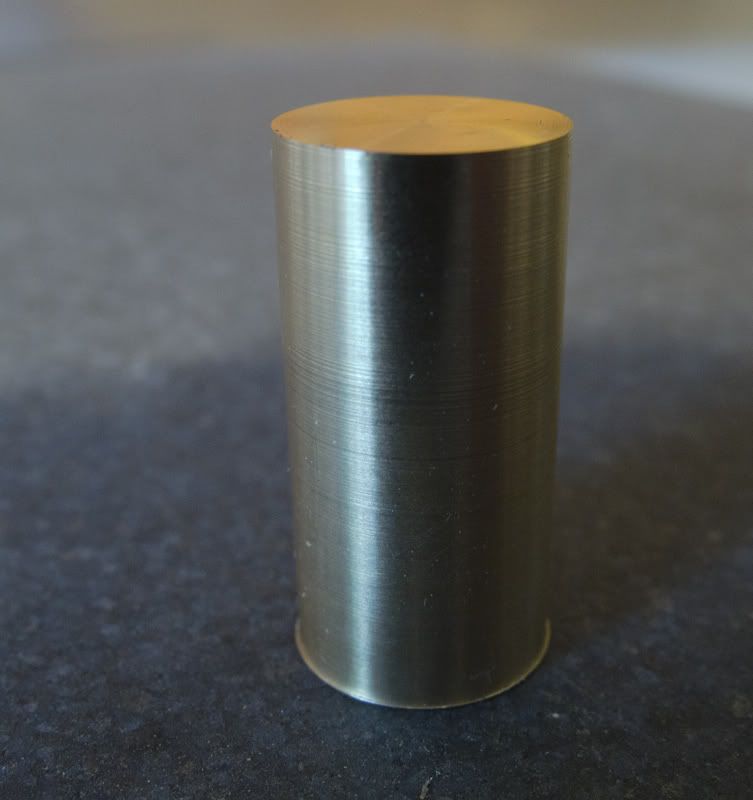
The cylinder at final diameter. Since I have no actual frame of reference, I thought the finish was pretty good but what do I know?
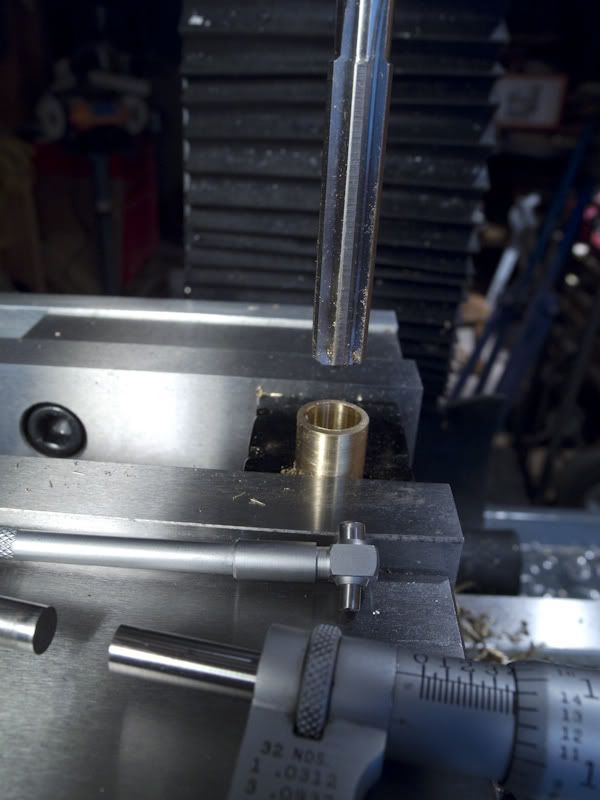
Reaming the cylinder. I kept the bore gauge and micrometer close by.
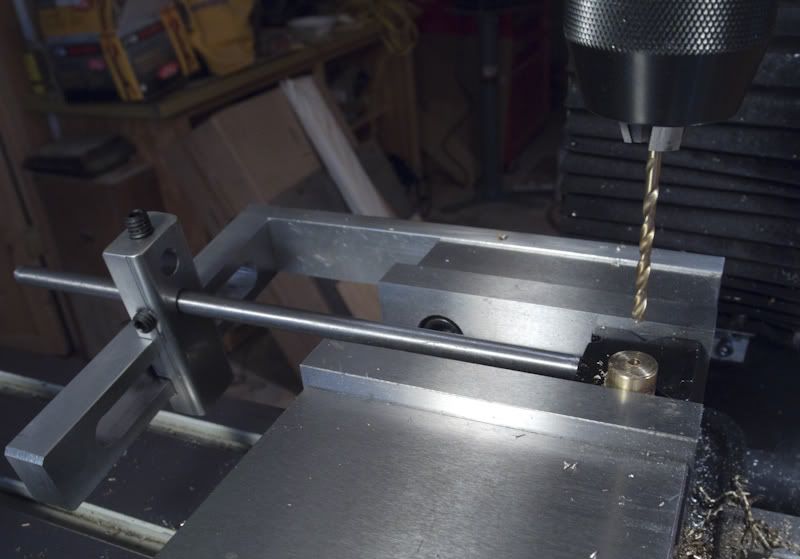
I cut a piece of brass for the piston and end cap. Then spot drilled and made a hole for the piston rod.
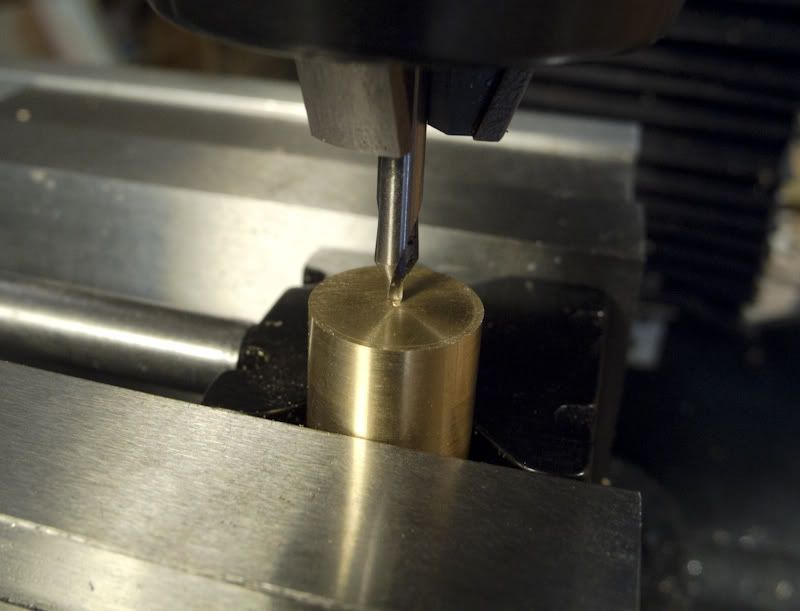
Since most of you have actually seen a hole drilled, I included this picture to show off my vise stop. Although you can't see it, I cleverly restrained from drilling all the way through to avoid having a hole in the cylinder cap. I assumed that this would prevent the engine from running.
Since the piston and cylinder end cap are the same diameter, I turned the brass rod down to size. Cut, check with micrometer, cut, check with micrometer, rinse and repeat.
Parting the piston (again HSS.) After reading every post related to parting and the related horror stories, here it is. Verrry light cuts and squirting lots of coolant.
and the end cap.
Did I mention that I drilled the piston just a wee bit bigger than I needed for a press fit of the rod? I did remember reading a post (I have read almost all of the back posts except the old "For Sale" notices) about knurling to expand a rod for a press fit. Back to the box of stuff for the still-not-here lathe to find the knurling tool that I was sure I had bought. Back to HMEM to read knurling posts. Chucked the piston rod in a collate then figure out how to clamp and adjust the knurling tool.
Next part is the crank. Sliced off a piece of 12L14 (don't you love it when you start boring your friends with exotic metal nomenclature?)
In addition to reading (what seems like) thousands of posts, reading the complete works of Rudy Kouhoupt, watching the entire filmography of Tubalcain on Youtube, I've actually tried to grind HSS. I had won the Tubalcain model (Criterion DBL-202) boring head on Youtube and tried it once. The finish was similar to a course file only worse. I read Mr. Bogstandard's method for grinding a toolkit for a boring head.
Wow!! Thank you, thank you John!
In Stan Bray's book, he refers to the piece at the other end of the rod from the piston as the "Big End." Is it really called that? Seems like it could be an endless source of bad jokes. He suggests that it can be made a bit more "interesting" if one were to turn the end round on the lathe. I accept the challenge Mr. Bray and I don't yet have a lathe. But I do have a 6" rotary table. (boy was everyone correct when they said I'd spend more on "tooling" that I did for the machine)
So, remove heavy vise and replace with heavier rotary table. OK. I can clamp it like this. No that will mill the clamp. How about like this? No, that would mill the other clamp. Finally figured it out and was reaching for an end mill when I remembered a a fragment of another post from mklotz. Marv, I love your posts and I bet your C code would be really helpful but my Macs aren't having the .exe. If I wasn't having so much fun with this metal stuff, I'd load up a C compiler and tweak your source so it would run with Mac libraries.
Oops, I hijacked my own post.
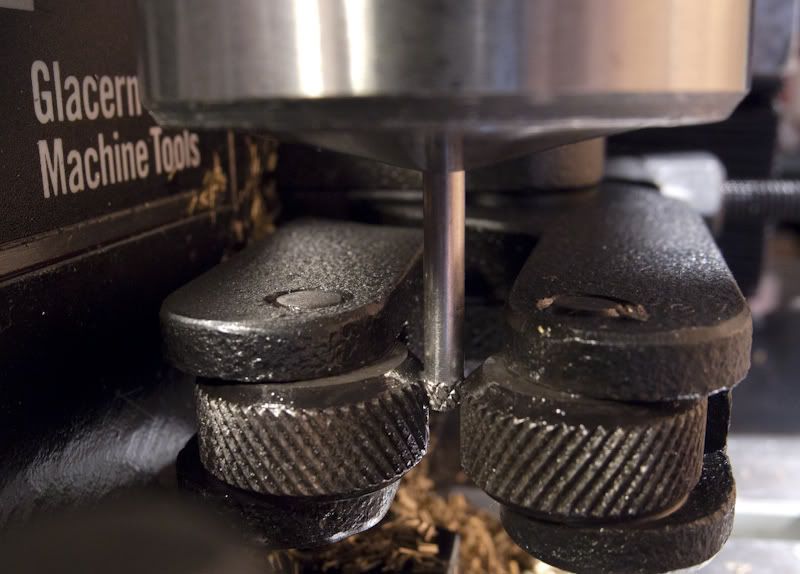
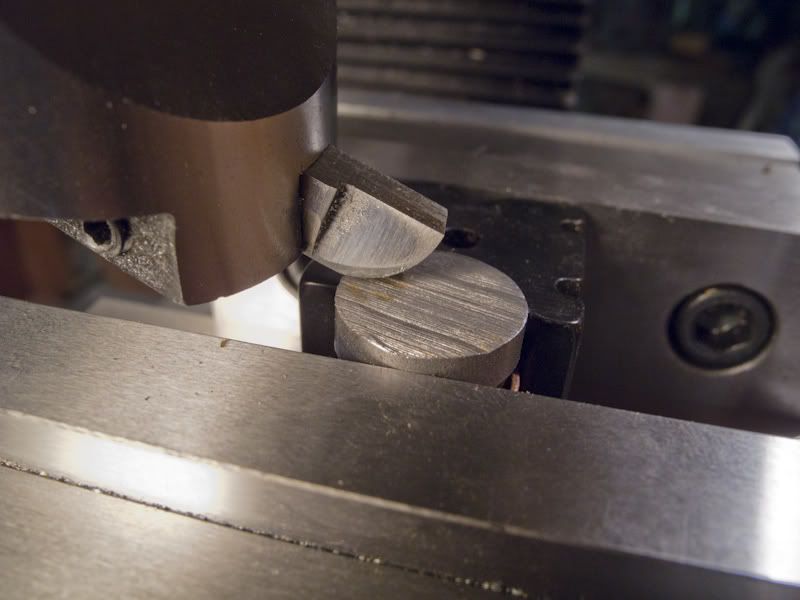
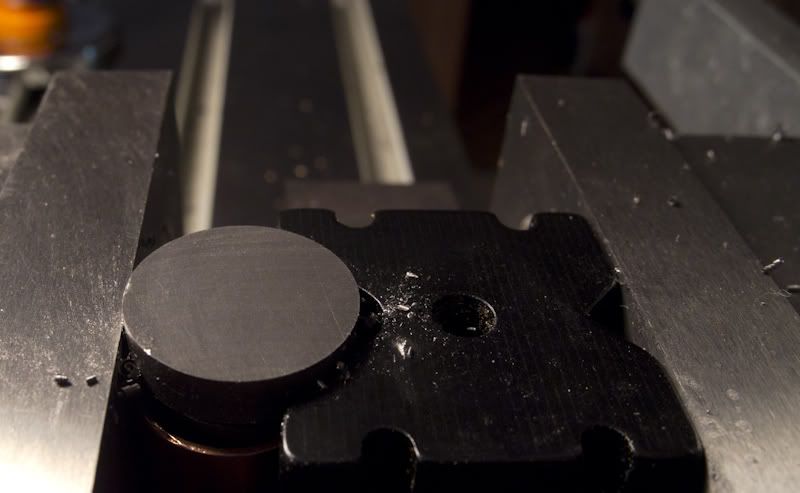
(IIRC) Marv suggested using a rotary file instead of the end mill and here it is in action.
and done
I needed do some "lathe" milling on the flywheel and since it's 1.00" diameter and since my largest collet is .75", I needed a mandrel. Yes, it's the tool to make a part (mklotz level 1.) Drill rod, drilled and tapped here.
The flywheel mounted on the new mandrel.

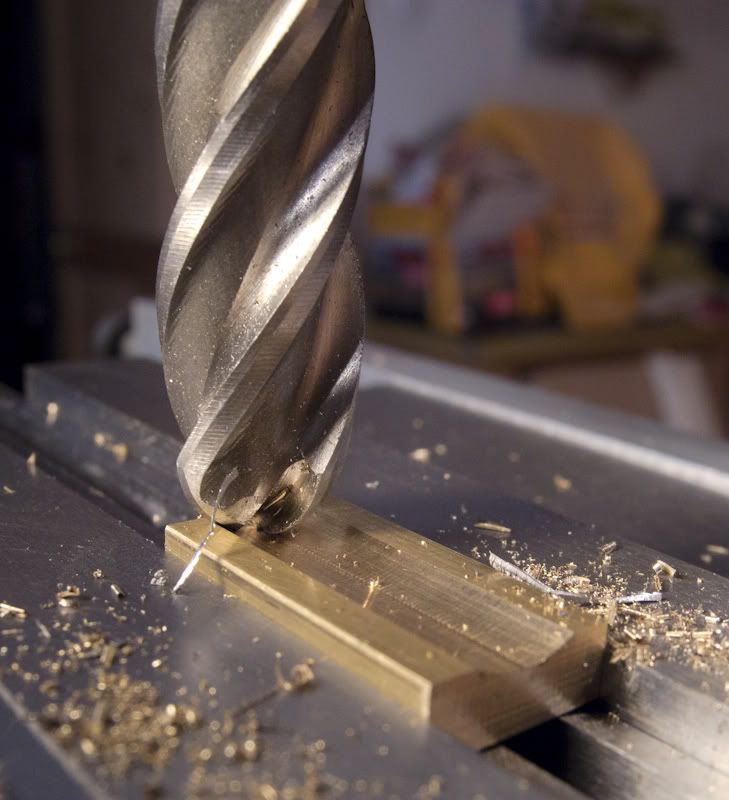
The port block is to be silver soldered to the cylinder and a .25 radius ball end mill should give a good fit to the .50" cylinder O.D.
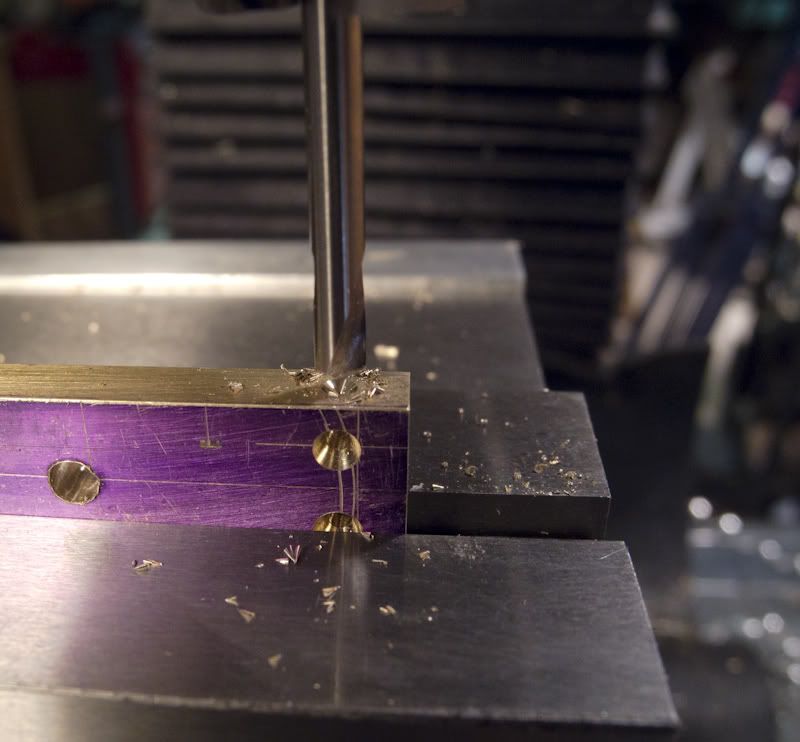
Next is drilling the frame for the ports. I was extra careful here so I laid everything out and then drilled and crossdrilled.
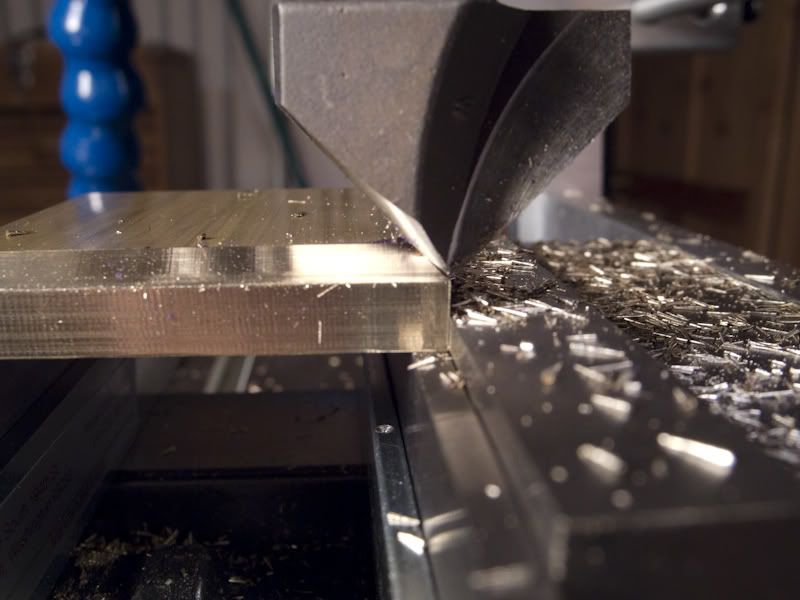
The base is a 2"x2" piece of brass which I thought would look good with a bevel. I've been building furniture for a long time and have a bunch of HSS router bits and thought I'd see how they would work on brass. I used the procedure from Bogs' post of last week and the bevels matched all around. The finish isn't too bad.
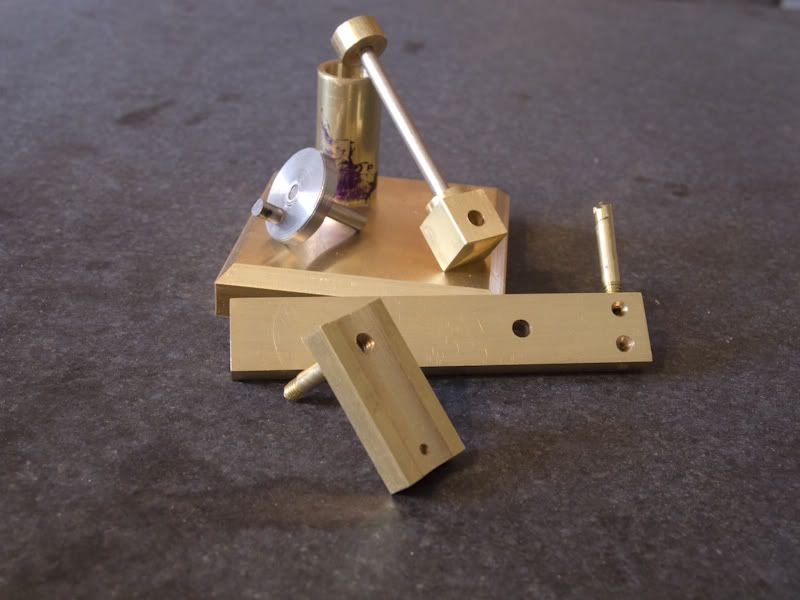
So after 5 days I've got these bits (forgot to include the flywheel in the photo)
I have learned a great deal by building this and a few universal truths.
1. Building a small, simple engine is possible on a mill.
2. Make parts over until they're as perfect as they need to be.
3. Slow down. I'm not on piecework.
4. Never, every, under any circumstances use Harbor Freight taps and dies. Although their 4x6 bandsaw with a bit of tuning is a great deal for the price and I can't imagine doing this with a hacksaw.
Still some polishing to do but here it is now.
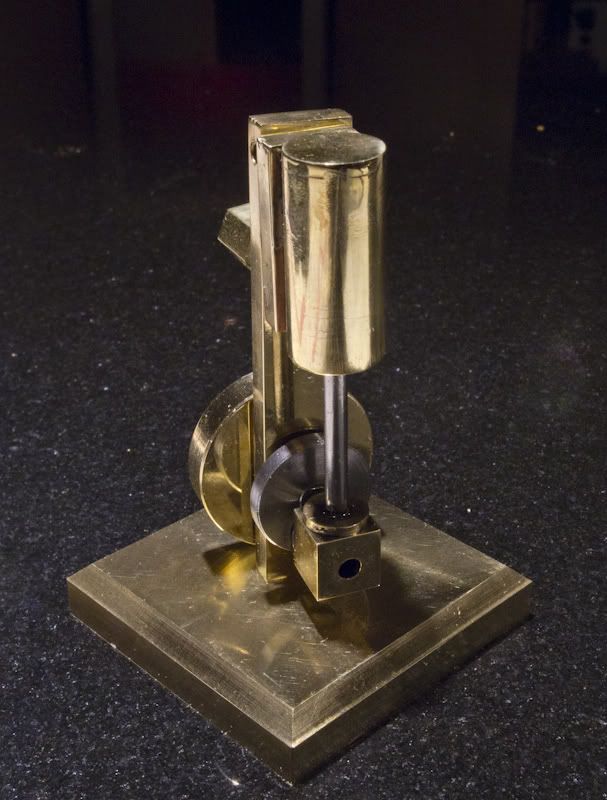
I'll post a finished photo and video in a day or two.
And yes, it is a runner!
Best
Stan
Abraham Maslow, "The Psychology of Science", 1966
An air engine made on a mill
A few weeks ago, I posted about the possibility making an engine with only a mill.
My lathe is still a month from delivery and wanted to make an engine. The replies ranged from "learn your mill" to "the round parts can be made on a mill" and "make the engine's square parts until the lathe comes in."
Since my total machining experience is 3 weeks with a Sherline mill, (that's when I realized that, for me, the Sherline, as beautifully made as it is, was too small for some things that I wanted to do).
I now have a PM20 mill with Accurite DRO and a PM1127VF on order (both Precision Matthews branded Weiss machines)
So I made square stuff. I have V-blocks in sizes for which there is no possible use, a vise stop (I guess in case it starts), sets of small jackscrews, machinist's clamps, and brackets for the patio canopy to bolt it to the concrete so it doesn't end up on my neighbor's car like it did last year.
Wait a minute. "the mill can be used as a lathe?" Tin Falcon
I've got a box of lathe stuff from Enco (no lathe but lots of stuff).
So here it is, 5 days, a very nice collection of bent and/or misthreaded 0.125 piston rods, 4 pistons that almost fit and an oval-shaped cylinder from overzealous vise pressure (maybe I could make an oval piston to fit.)
Will it run? Is the suspense building?
Thanks to Milotrain, Metalmad, Crab, AHEG1220, Seagar and Tin Falcon for not telling me to wait for the lathe.
Here's my build of "Slim Sam" from Stan Bray's Book, "Making Simple Model Steam Engines."
I figured that if I tried the "turning" parts first and had a complete meltdown, I'd shelve the whole idea. Here's the cylinder after the first cut with Arthur Warner HSS inserts.
It worked!!
The cylinder at final diameter. Since I have no actual frame of reference, I thought the finish was pretty good but what do I know?
Reaming the cylinder. I kept the bore gauge and micrometer close by.
I cut a piece of brass for the piston and end cap. Then spot drilled and made a hole for the piston rod.
Since most of you have actually seen a hole drilled, I included this picture to show off my vise stop. Although you can't see it, I cleverly restrained from drilling all the way through to avoid having a hole in the cylinder cap. I assumed that this would prevent the engine from running.
Since the piston and cylinder end cap are the same diameter, I turned the brass rod down to size. Cut, check with micrometer, cut, check with micrometer, rinse and repeat.
Parting the piston (again HSS.) After reading every post related to parting and the related horror stories, here it is. Verrry light cuts and squirting lots of coolant.
and the end cap.
Did I mention that I drilled the piston just a wee bit bigger than I needed for a press fit of the rod? I did remember reading a post (I have read almost all of the back posts except the old "For Sale" notices) about knurling to expand a rod for a press fit. Back to the box of stuff for the still-not-here lathe to find the knurling tool that I was sure I had bought. Back to HMEM to read knurling posts. Chucked the piston rod in a collate then figure out how to clamp and adjust the knurling tool.
Next part is the crank. Sliced off a piece of 12L14 (don't you love it when you start boring your friends with exotic metal nomenclature?)
In addition to reading (what seems like) thousands of posts, reading the complete works of Rudy Kouhoupt, watching the entire filmography of Tubalcain on Youtube, I've actually tried to grind HSS. I had won the Tubalcain model (Criterion DBL-202) boring head on Youtube and tried it once. The finish was similar to a course file only worse. I read Mr. Bogstandard's method for grinding a toolkit for a boring head.
Wow!! Thank you, thank you John!
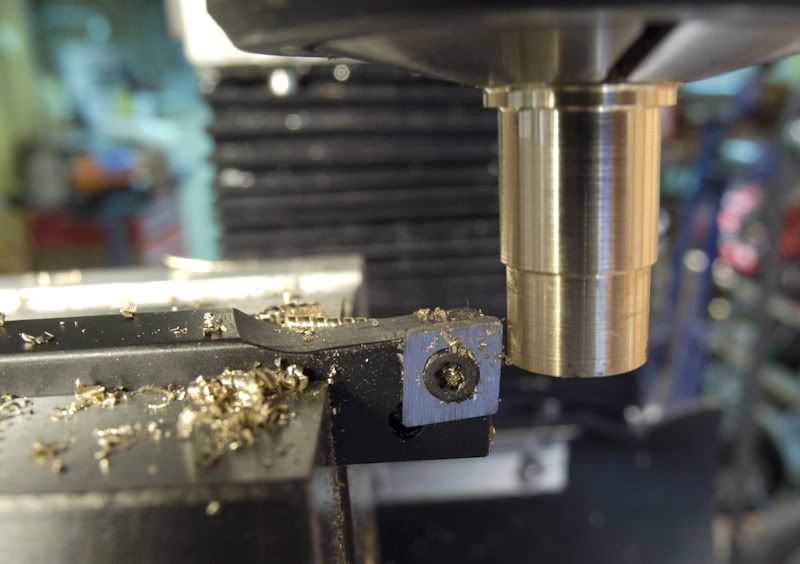
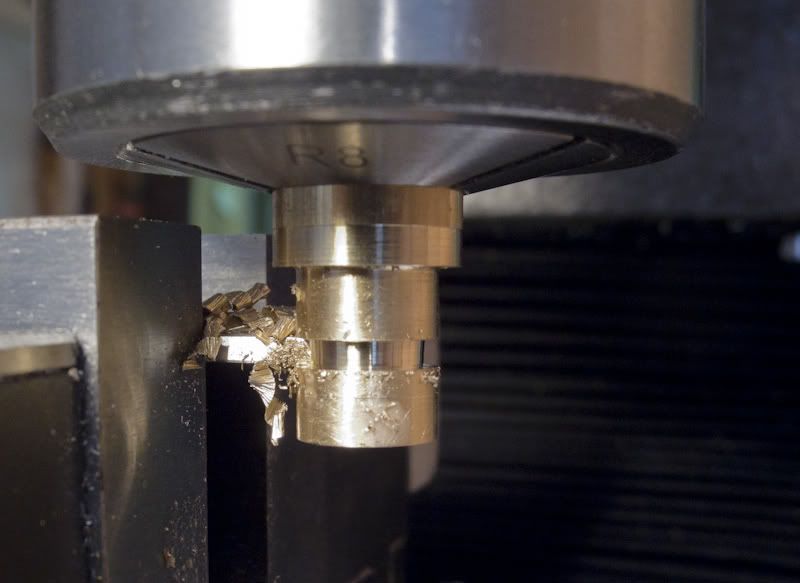
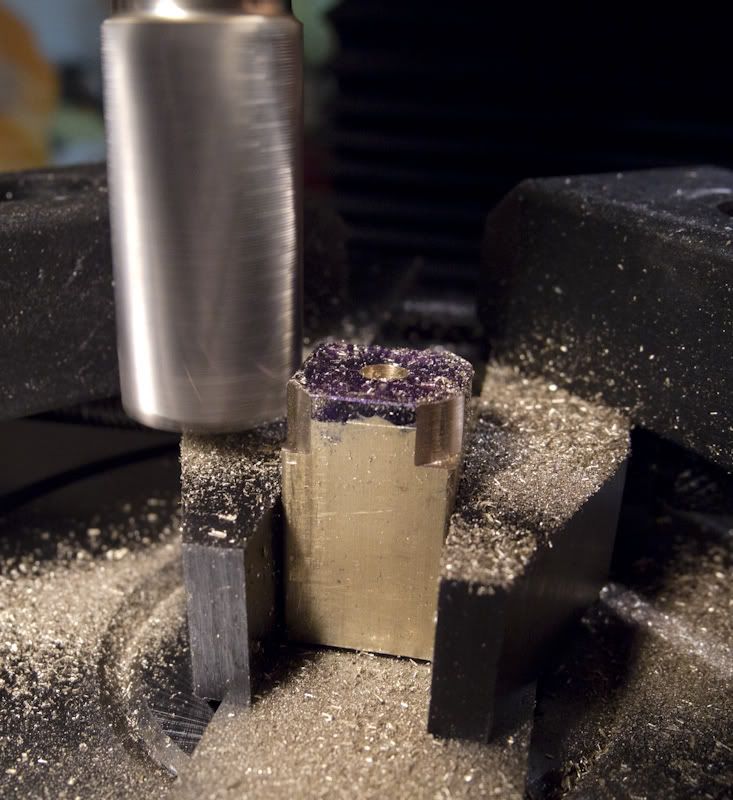
In Stan Bray's book, he refers to the piece at the other end of the rod from the piston as the "Big End." Is it really called that? Seems like it could be an endless source of bad jokes. He suggests that it can be made a bit more "interesting" if one were to turn the end round on the lathe. I accept the challenge Mr. Bray and I don't yet have a lathe. But I do have a 6" rotary table. (boy was everyone correct when they said I'd spend more on "tooling" that I did for the machine)
So, remove heavy vise and replace with heavier rotary table. OK. I can clamp it like this. No that will mill the clamp. How about like this? No, that would mill the other clamp. Finally figured it out and was reaching for an end mill when I remembered a a fragment of another post from mklotz. Marv, I love your posts and I bet your C code would be really helpful but my Macs aren't having the .exe. If I wasn't having so much fun with this metal stuff, I'd load up a C compiler and tweak your source so it would run with Mac libraries.
Oops, I hijacked my own post.
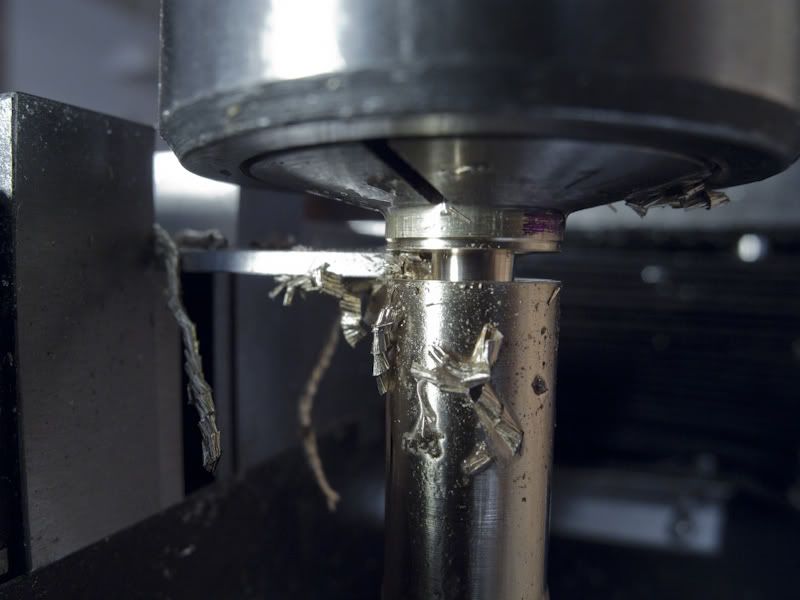
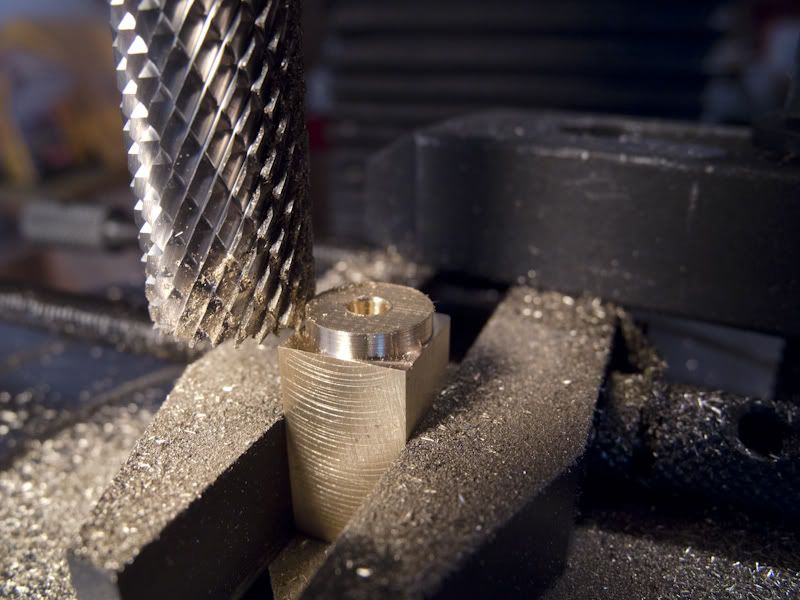
(IIRC) Marv suggested using a rotary file instead of the end mill and here it is in action.
and done
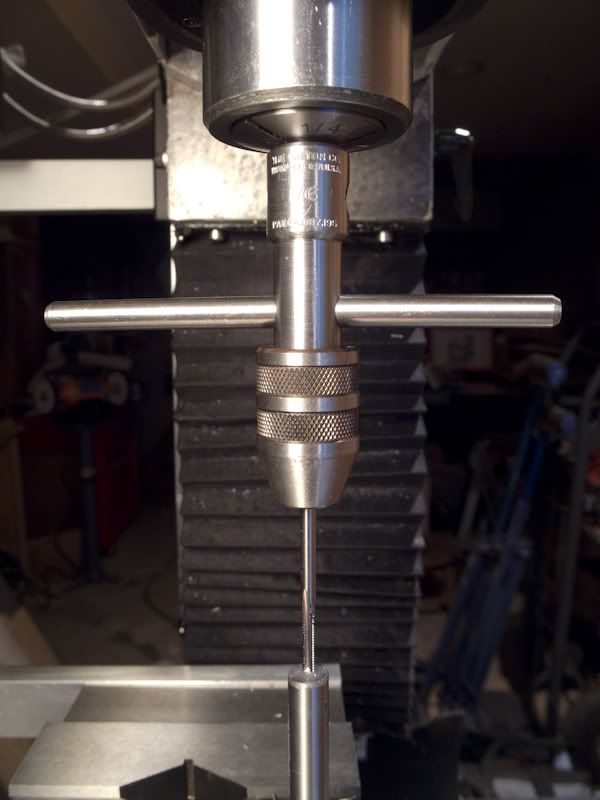
I needed do some "lathe" milling on the flywheel and since it's 1.00" diameter and since my largest collet is .75", I needed a mandrel. Yes, it's the tool to make a part (mklotz level 1.) Drill rod, drilled and tapped here.
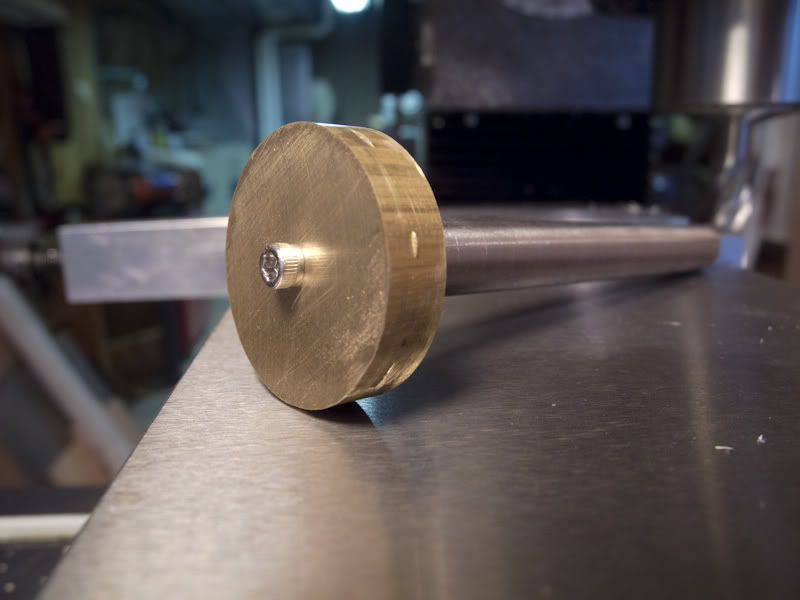
The flywheel mounted on the new mandrel.
The port block is to be silver soldered to the cylinder and a .25 radius ball end mill should give a good fit to the .50" cylinder O.D.
Next is drilling the frame for the ports. I was extra careful here so I laid everything out and then drilled and crossdrilled.
The base is a 2"x2" piece of brass which I thought would look good with a bevel. I've been building furniture for a long time and have a bunch of HSS router bits and thought I'd see how they would work on brass. I used the procedure from Bogs' post of last week and the bevels matched all around. The finish isn't too bad.
So after 5 days I've got these bits (forgot to include the flywheel in the photo)
I have learned a great deal by building this and a few universal truths.
1. Building a small, simple engine is possible on a mill.
2. Make parts over until they're as perfect as they need to be.
3. Slow down. I'm not on piecework.
4. Never, every, under any circumstances use Harbor Freight taps and dies. Although their 4x6 bandsaw with a bit of tuning is a great deal for the price and I can't imagine doing this with a hacksaw.
Still some polishing to do but here it is now.
I'll post a finished photo and video in a day or two.
And yes, it is a runner!
Best
Stan
") . Now I almost know.
. Now I almost know.