Building Elmer's Fancy

Home Model Engine Machinist Forum

Help Support Home Model Engine Machinist Forum:

This site may earn a commission from merchant affiliate links, including eBay, Amazon, and others.

arnoldb

Well-Known Member
Joined
Apr 8, 2009
Messages
1,792
Reaction score
12
Well, Rocker fever has passed, but Engine Building fever definitely not...
I started on Elmer's Fancy, and will build as close to original plans as possible, but to the highest finish I can :)
Deviation from the original build plans will be to make shafts, holes and screws to the closest metric equivalents, I'll be using aluminium for the column and might "personalise" the flywheel.

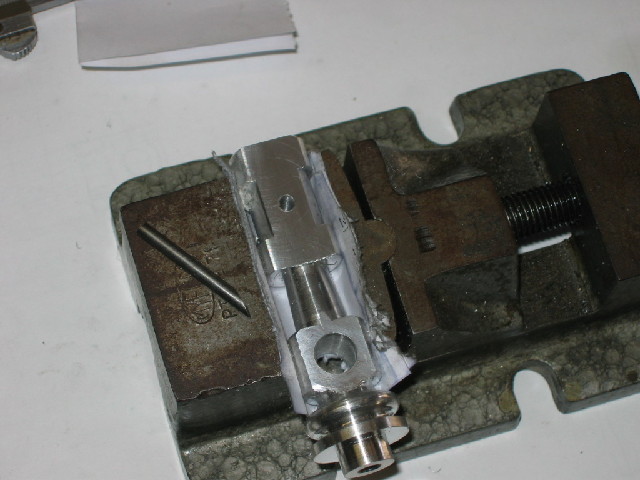
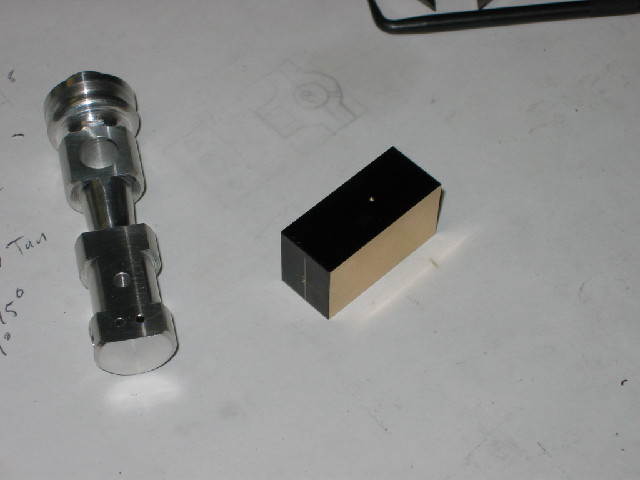
Started with the column - turned the bottom dowel, turned space for the decorative foot, and turned the rest down to 5/8" up to the chuck as suggested by Elmer. Then laid out for the rest of the detail:
smaller-IMG_1156.JPG


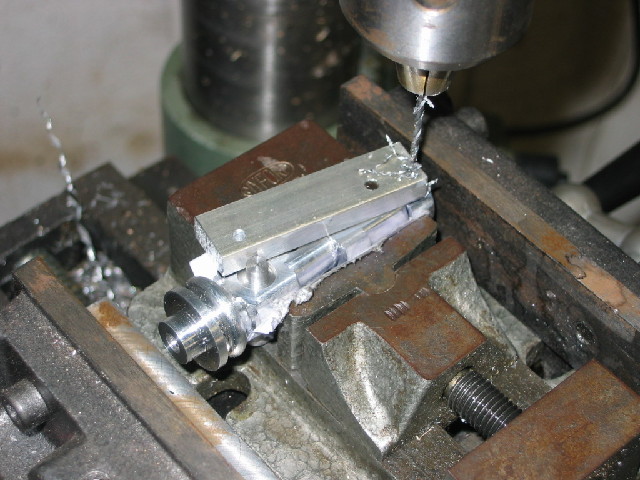
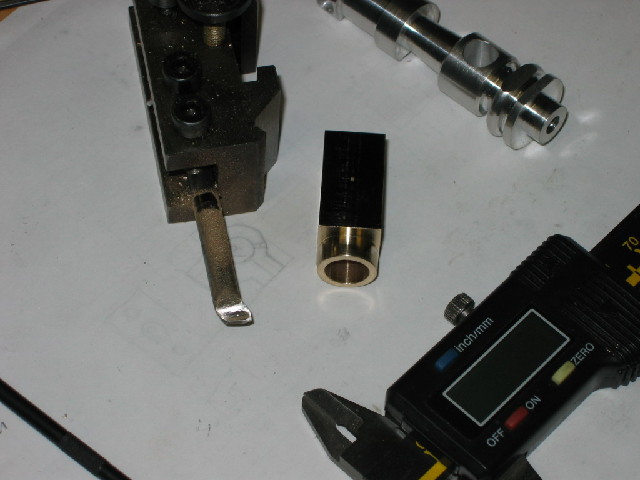
Part-way through turning the detail:
smaller-IMG_1159.JPG

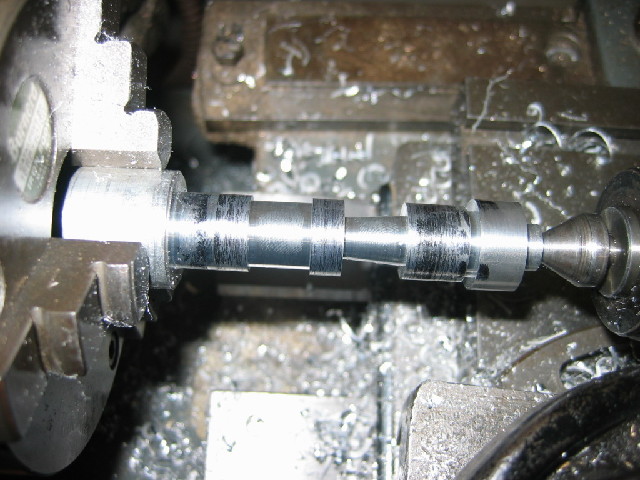
Nearly made a boo-boo on the taper bit; calculated the angle at which to set the topslide from Elmer's dimensions (nice doing trigonometry for a change), but forgot to halve it! Fortunately I realised this in time, as the initial cut angle just looked wrong.

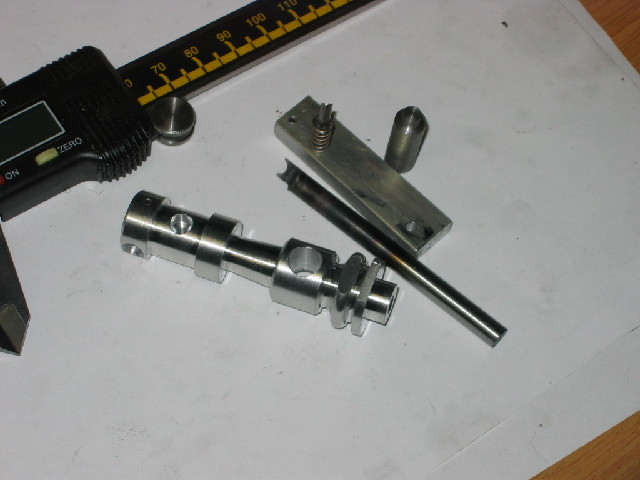
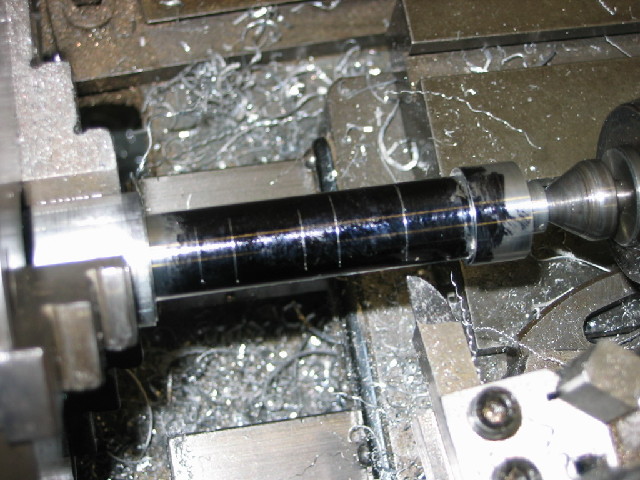
This is where I stopped tonight:
smaller-IMG_1162.JPG

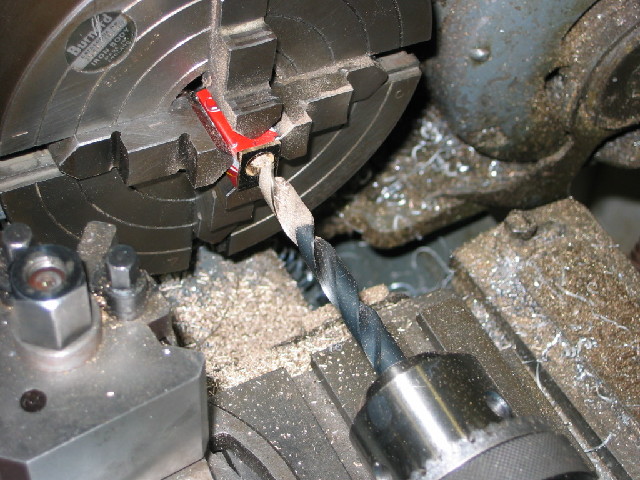
To turn the round part at the foot, I just took a piece of 6mm silver steel, drilled a 4mm hole through it at a slight angle; then used the bench grinder to grind it to shape to make a form tool. Then heat treated it and a final couple of pushes over the oilstone & it worked a treat :) - forgot to take a picture though.

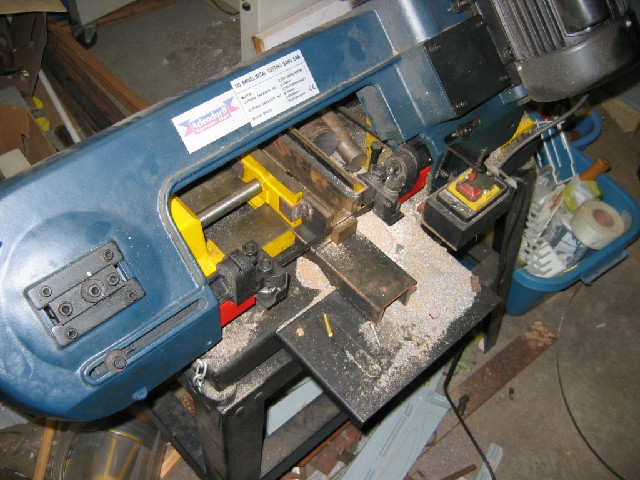
Wanted to carry on today, but had to stop due to severe chatter & cold feet - not on the project, but on my body ;) - It's terribly cold here in Windhoek today and my workshop's not very warm ;D

Regards, Arnold
 
WOW ! If one piece looks that nice, I cant wait to see the rest
 
NO NO NO No No No no no no


Going to the Docs, see if there is a shot to be had to avoid the new strain of mental illness, if not

A thou or 2ml of Tequila should be sufficient self medication till the new strain passes. :)

Looking good though

Robert
 
Foozer said:
NO NO NO No No No no no no
Going to the Docs, see if there is a shot to be had to avoid the new strain of mental illness, if not
A thou or 2ml of Tequila should be sufficient self medication till the new strain passes. :)
You're not SUPPOSED to fight it, Foozer! ;D
 
WOW ! If one piece looks that nice, I cant wait to see the rest
Thanks very much BMyers - I'll try to keep it that way :)

Regards, Arnold
 
Robert, Vernon & rleete

This seems to be new strain - must have originated with Robert though.
Some other members also caught it - the "build it & bling it" strain ! Rof}
My previous symptoms were to "just get the dang thing built" - now I want to make it & make it purty :big:
Ah well, if you can't beat it, join it ! :big:
 
Hi Arnold,
great looking column,brings back memory's of the fun i had building my Fancy
Regards Rob
 
Thanks very much Rob :)
Regards, Arnold
 
Did some more work on the column today.

I don't want to spoil the finish on the column, so clamped it with paper as protection in the vice, and set about milling the flats using the vertical slide on the Myford:
smaller-IMG_1166.JPG


Flats finished, drilled & reamed holes for the main bearing and pivot shaft. I don't have a 3mm reamer yet, so made a d-bit reamer from some 3mm piano wire for the pivot hole:
smaller-IMG_1167.JPG


Next up I made the drill-jig and spacer bush, then drilled the ports; just clamped the myford's machine vice in the cross-vice in the drill press & went for it:
smaller-IMG_1168.JPG


Then, with the machine vice still in the drill press cross vice, I rotated the column 90 deg in the machine vice and cross-drilled the hole for the steam connection.
After that, the machine vice went back to the vertical slide on the Myford, column turned another 90 deg, and milled the flywheel clearance on the foot of the column, as well as drilled out the spring clearance for the pivot shaft. I found a spring that I hope will work.
Ended here tonight: column complete (except for base), and special bits & bobs needed to get to this stage.
smaller-IMG_1169.JPG


Don't know if I will find shop time during the week to carry on; if not I'll have to wait for next weekend.

Regards, Arnold
 
Hi Arnold

Looking great ;D nicely shown stage by machining methods.

Have fun

Stew
 
Thanks Stew!

nicely shown stage by machining methods.
Thanks; could get more detail, but would bore everyone to death showing tramming in the vertical slide each time I need it Rof}
Kind regards, Arnold
 
arnoldb said:
Thanks Stew!
Thanks; could get more detail, but would bore everyone to death showing tramming in the vertical slide each time I need it Rof}
Kind regards, Arnold

On the lathe? That gets old real quick. Glad its just not me who has that fun time :)

Robert
 
Foozer,

its a fatal disease, and there is no known cure.... ;D

Just accept it an move on.....

Dave
 
Foozer said:
On the lathe? That gets old real quick. Glad its just not me who has that fun time :)

Robert
Yep - on the lathe; you know the feeling: 30 minutes setup for a 5 minute job. Makes one try and think ahead to get as many of the milled parts as possible done in one go ;D

Regards, Arnold
 
Arnold,

A column worthy of holding up Nelson Mandela's front porch. :bow: :bow: Well I think I'm on the right cotinent anyway ::)

Best Regards
Bob
 
Maryak said:
Arnold,

A column worthy of holding up Nelson Mandela's front porch. :bow: :bow: Well I think I'm on the right cotinent anyway ::)

Best Regards
Bob
Thanks Bob - much appreciated. Right continent, - a quick hop across the border and I can present it to him; might be a bit short for his mansion though ;)
Kind Regards, Arnold
 
Managed to get some more done; not much, but some.

I was running low on raw material for this build, so I splurged on a 400mm length of 25mm square brass stock - bigger than I need, but that's all the supplier had.
After recuperating from the price-shock on Monday and Tuesday ;D , did a bit on Wednesday:

For the engine's cylinder, I sawed off a piece of the brass square at just over the needed 1 1/4" (to allow facing off the bandsaw marks). As the cylinder requires a rectangular profile along the length, I then sawed off another piece on one of the sides leaving just over the required 1/2" thickness. No way I was going to turn the unneeded just-under 1/2" slab into to swarf. Next photo shows the last cut - I made some add-on parts for my bandsaw to work with smaller pieces. (It also shows I REALLY need to clean the saw :hDe: )
smaller-IMG_1171.JPG


After that I just faced the block to size and marked out & punched for the cylinder bore and pivot shaft - as I stopped last night:
smaller-IMG_1172.JPG


This evening, I bored the cylinder - first center drilled, drilled 4mm with frequent back-outs, then drilled 9.5mm (just under size) being VERY careful to go to the right depth:
smaller-IMG_1173.JPG


Then bored out using the silver steel boring bar I made a couple of weeks ago (that thing is HANDY!) For the finishing passes with the boring bar, I just locked the myford's carriage to the leadscrew & used the leadscrew handweel rather than the apron wheel; it makes for an easier and more controllable fine-feed. Then turned the outside down to leave the tubular extrusion like in Elmer's plans. Stopped here for now - boring bar, bored cylinder & boring photo:
smaller-IMG_1174.JPG


Regards, Arnold
 
arnoldb said:
boring photo:

:eek: ........... Most certainly NOT boring Arnold .......... the column alone is worthy of it's own thread and then you have the boring bar and finished cylinder .............. top class work feller ........... gives us something to aim at 8)

CC
 
Great work Arnold Thm: really nice job of both parts, its great making then using the tool, did you forge over the end of the silver steel first , then grind it to shape ?
Regards Rob
 
Back
Top