Brian Builds the Kerzel Hit and Miss I.C.

Home Model Engine Machinist Forum

Help Support Home Model Engine Machinist Forum:

This site may earn a commission from merchant affiliate links, including eBay, Amazon, and others.
Instead of drilling a screw, would it be easier to make one from brass and then press the needle into that? Mine was also a 2-56.

DSCN1684s.jpg
 
Not for me, Steve. I have just about 'Hit the wall" in terms of my own machining capabilities, and definitly in terms of my chinese lathes capabilities.
 
Metal Butcher said:
Brian, on the loose bearings. Mike up your crank journals and see what the exact size is. The reamed holes may have been to large. Material diameter varies from batch to batch. I have some stress proof that's taged .3125" but mikes up @ .3105"! Also they may have been touching on a few high spots (or canted) giving the impression of a good fit but after a short run in the small high spots on the bearings or journals come down quick and show a loose fit. The bronze couldn't have worn out, this stuff doesn't wear out that fast, unless they didn't give full support.

To fight these battles, under size, oversize, and decimal reamers are your friend. Drill bits are the enemy you can't trust! :D

-MB

MB--I pulled the con rod cap off tonight and miked the journal. It miked at 0.372" dia. Then I pulled the rod completely and bolted it up to a peice of 3/8" cold rolled that was "right on" 0.375"---and it was snug as a bugs ear!!! I wouldn't have thought that .003" would give so much "sloppiness" but thats what it was. Thats an easy fix. I expect that I will find the same on the crank journals. That too SHOULD be an easy fix, because I made the crank from 0.375" cold rolled and loctited 0.437" sleeves on in the journal areas. If my sleeves are undersize, I will apply a little heat, slide them off and make a new pair of sleeves. EDIT---Pulled the crankshaft, and my sleeves are right on the money at 0.437" dia. But---for some really weird reason the bushings are measuring 0.442" I.D. The bushings were reamed to 0.437 in place, but I suppose its possible that my finish on the sleeves wasn't up to snuff and that they opened up the bore on the bronze bushings from the hour of "running in" I did with the electric drill, even though I used lots of lubricating oil. Gee Whiz---This is just like forensic pathology!!!
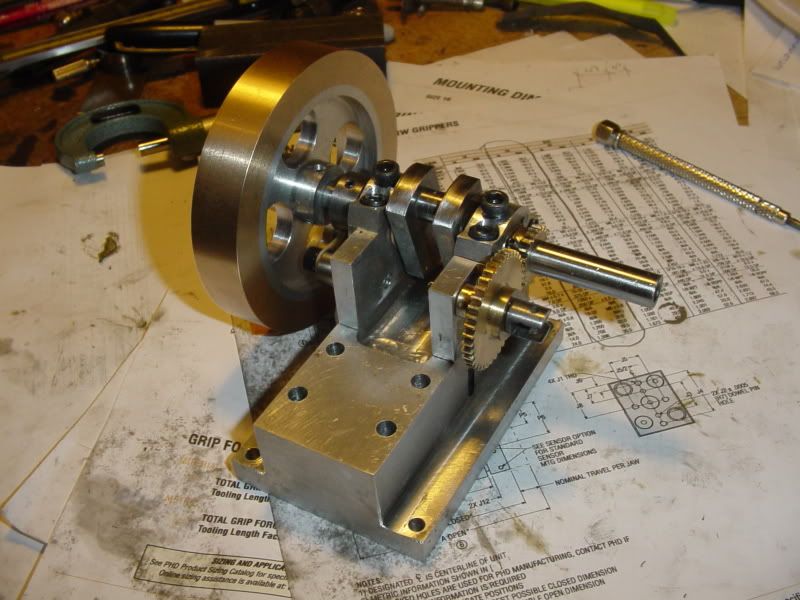
 
Brian, when I drill small holes like this I usually put the small bit in a small chuck with an arbor on the back, I put that arbor in the tailstock chuck with light pressure, just enough so I can move it freely in and out. Then using finger pressure, I drill the hole, only allowing it to drill about .010-.020" at a time, backing out the drill bit every time to clean it. These small drill bits have very little space for the shavings to go.

These are brass screws, right? Can brass be hardened? perhaps these screws are.

Kel

 
Brian Rupnow said:
Gee Whiz---This is just like forensic pathology!!!
Its forensic mechanology. Yeah, I just made that up, but it fits. :) Lucky enough that I get to do that in my day job.
 
Tonight I made up a new set of bronze main bearings and reamed them in place. My Lord, what a sweet difference.-No shake, no wobble, smooth as can be when I turn that crankshaft. I have no idea how the old bushings became oversize by about .003' to .005" but it certainly made for a "sloppy" feeling engine. It must have been a sub quality finish on my crank journals that toasted the first set of bushings----of course now they are as smooth as glass from the "wearing in". I will make a new conrod bushing tomorrow night and then do my final reassembly. I ordered a Traxxas Pro15 carburetor today from the same hobby shop that sold me the carb I'm running on my Webster. I would really much rather run my own "built myself" carb, but if I find it impossible to finish the needle valve, I don't want to fart around forever waiting to see this engine run. The engine really had to come apart anyways to address some "final fit" issues that were "speed-passed" during the main building thrash. One thing about these little engines, it only takes about 15 minutes to completely disassemble them. If I don't run into any unforseen disasters, I could be running within the week.
NEWMAINBEARINGS001.jpg
 
I'm thinking of possibly taking a slightly different approach with the needle valve. If I find it not possible to drill the brass screw for the needle (and thats looking like what may happen), I may take a steel #2-80 x 3/4" long s.h.c.s. and build a simple jig to grind a needle point on it with my stationary bench grinder. This whole carburetor building gig is brand new for me, and I'm not good with stuff this small.---and if that fails too, I do have the Traxxas on order.
 
Brian, I think you have a great idea there.

FWIW I think if you put the screw in the lathe and turn the needle on it, it might be a little easier to get the needle and threads concentric. I made a needle this way using a dremel to grind the needles point.

Kel
 
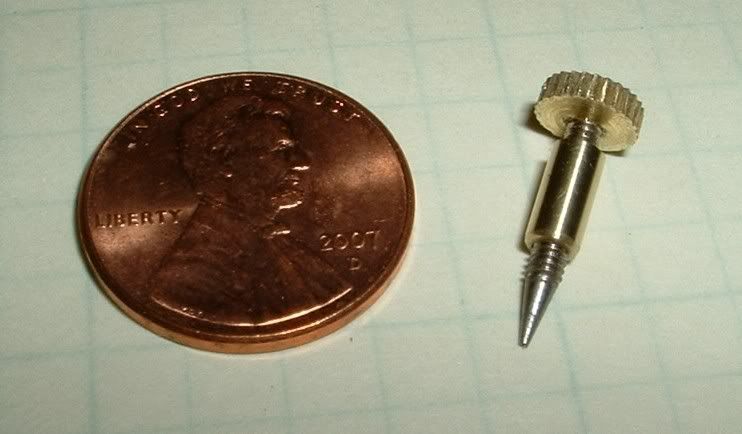
Brian, I made one like that too. Took a 2-56 screw and turned a point on one end. Then cut off the head, threaded on a knurled piece of brass tapped for 2-56, and soft-soldered it where the head was. The tip of mine is not nearly as fine as your needle was, but it works for me. (The brass sleeve it's screwed into fits in one side of the carburetor body.)


NeedleValveAssemblyDetail.jpg
 
The engine is back together with all new bearings. Much "stiffer" than it was. All I lack is a needle valve. I have a couple of back up plans. ITS GETTING CLOSE!!!!
 
I had the engine firing today, but my home built sparkplug gave up the ghost early in the game. I "borrowed" the Traxxas Pro 15 carburetor off the Webster, and had it not been for the home built sparkplug I am pretty confident it would have ran. Where does one look to find small sparkplugs in North America. I'm damn tight for room in around my valve towers, and I may need to build an adapter sleeve because my sparkplug thread is 5/16-28. I can bore the head out and sleeve in a 1/4" thread if I have to. Somebody was suggesting a plug with a 1/4" thread, but I don't know what his source was.----Brian
 
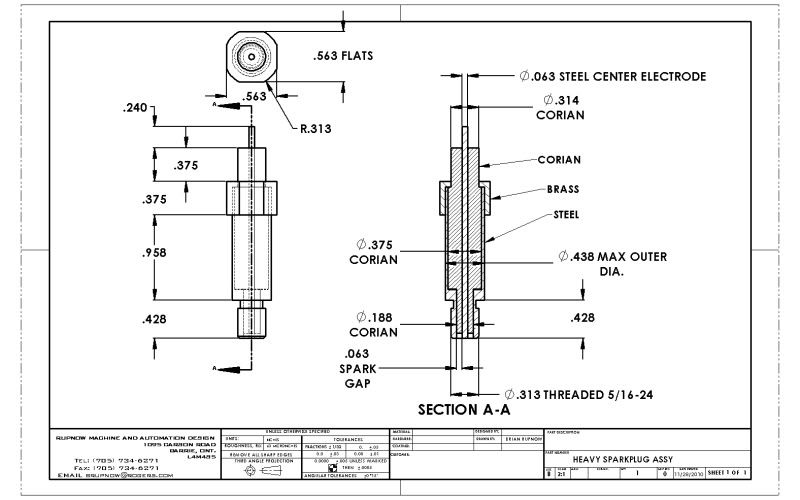
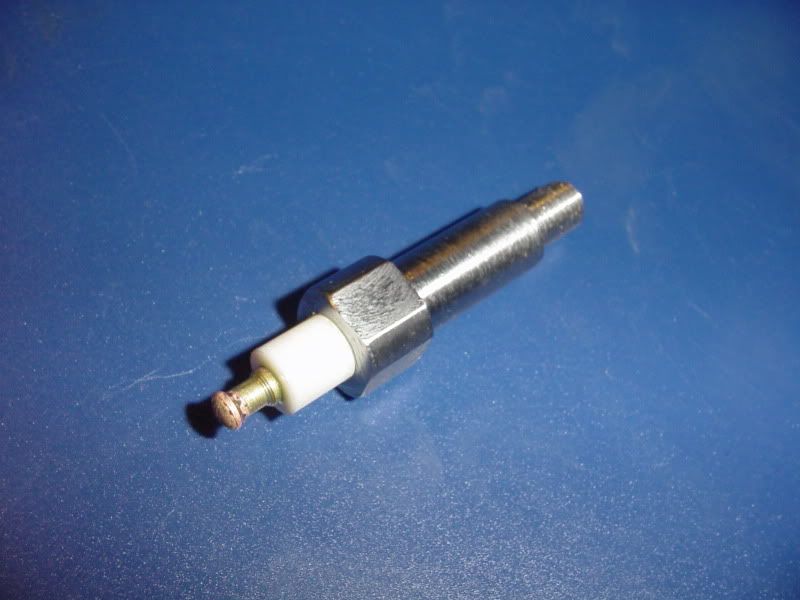
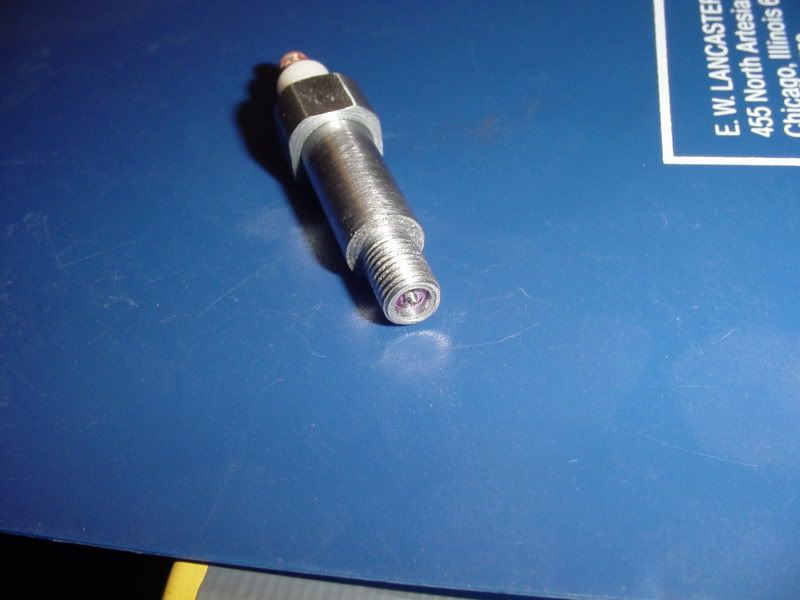
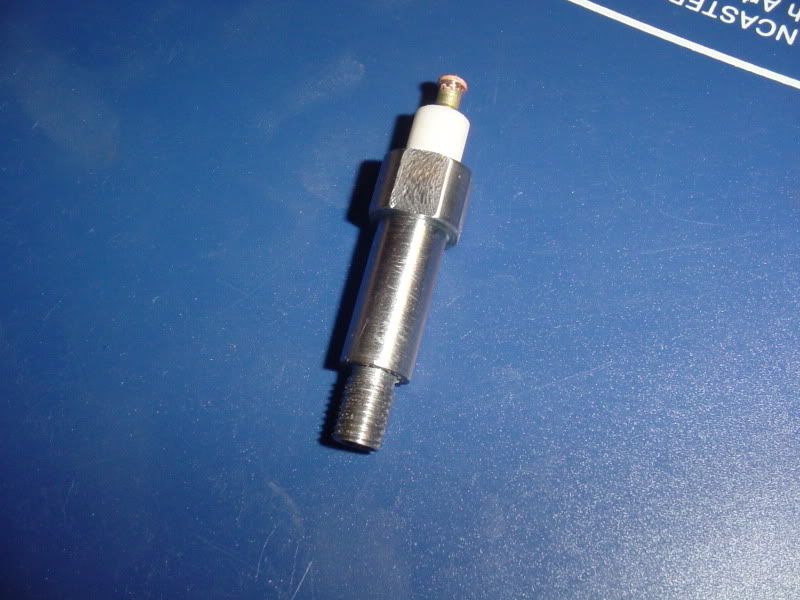
One more thing to try before I run out to buy a sparkplug.--If I could buy one that matched the threads already in my cyl. head with a really skinny body I would buy one, but I am going to have one more kick at the can and build a much heavier sparkplug. I will still use the Corian, but with a much heavier diameter center electrode (1/16") which shoud help stiffen the Corian and keep it from breaking so easily. The body will be larger in diameter, and mostly round. The spark gap is large, but this is a low compression engine and I can easily jump a spark across 1/4" of air gap on my test bench. This engine will depend mainly on loctite for assembly.
HEAVYSPARKPLUGASSY.jpg
 
Brian Rupnow said:
Somebody was suggesting a plug with a 1/4" thread, but I don't know what his source was.----Brian

I think that was me back on page 2 of this thread, I see you have foind a US source for them.

You can get M8 plugs, some of the commercial large RC plane engines use them, you may just get away with retapping your 5/16 thread for one of these.

Jason
 
I just did a "test fire" of the plug on my workbench. More spark there than a lightning storm!!! I'm going to find it very difficul waiting untill tomorrow to test fire the engine with the new plug.


AAAWWWW Go on! You know you wanna! :big: :big: :big:

Ron
 
Stop torturing us! Get the camera, and fire that puppy up.
 

Latest posts

Back
Top