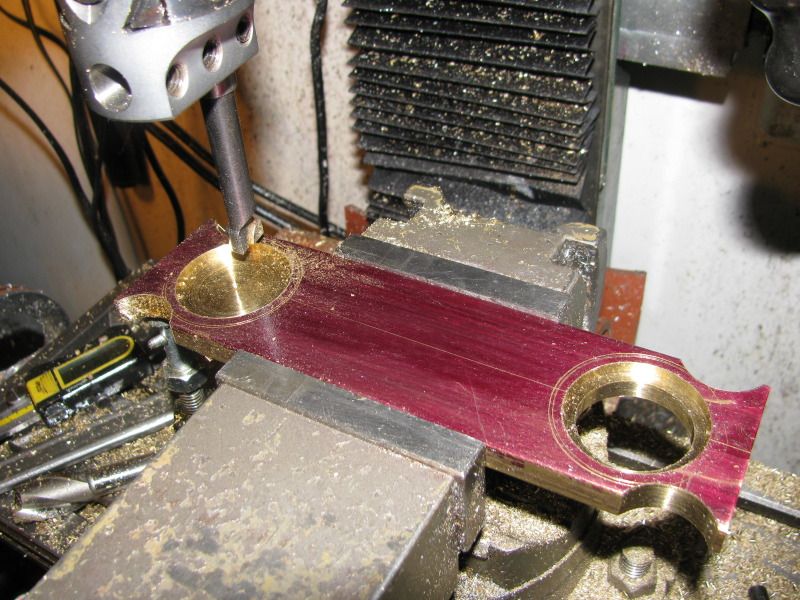
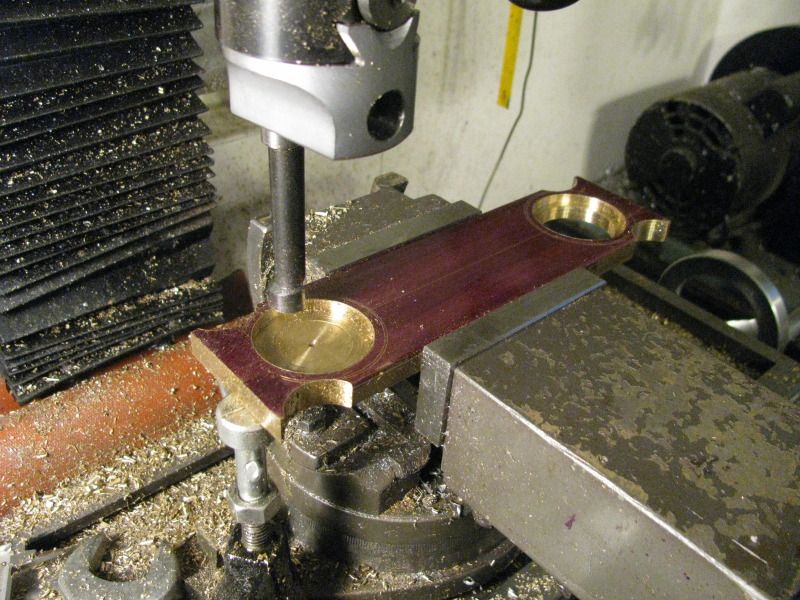
Just for the heck of it, here are a couple of shots of the gas tank end stands coming to life. I start with one bar set up in the vice and work from both ends. I have a couple more holes to put in in this set-up, then I will cut them out.
Brian you might check the Electric supply houses for your glass. They are used for break glass shutdown switches. I will look at my shop Monday and see if I have any and will let you know. The engine is really shaping up and I have enjoyed your post and photos.
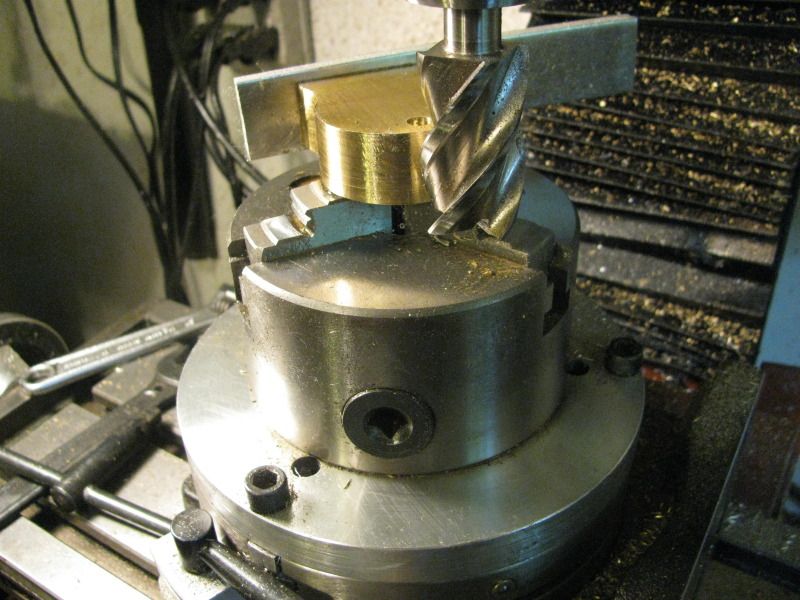
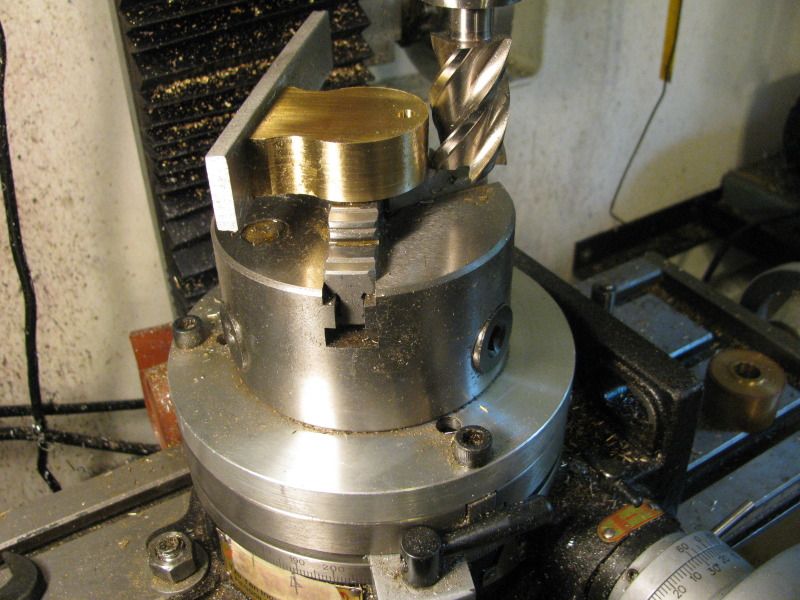
I decided to turn the large diameter of the gas tank stands on the rotary table. In order to have them be consistent I drilled and tapped the mounting holes in the bases and bolted them to a scrap peice of aluminum plate. I inserted the tips of the chuck jaws into the center hole which is cut all the way throughh the one gas tank end stand for a sight glass, and expanded the chuch to clamp internally.You can't see it in the picture but I rested a small flat washer on the first "step" of the chuck jaws to act as a spacer and keep the milling cutter from cutting my chuck jaws.
And there we have a very nice gas tank. Its not soldered nor polished yet, but the end stands do bolt down where they are supposed to on the base, and I think once I get a bit of polishing done on the tank it will look pretty classy!!
A good glass shop should be able to cut a circle for you Brian. We had them made as consumables for some oil field equipment. They'd cut any dia we needed. They have wet belt sanders to even finish the edges.
Greg
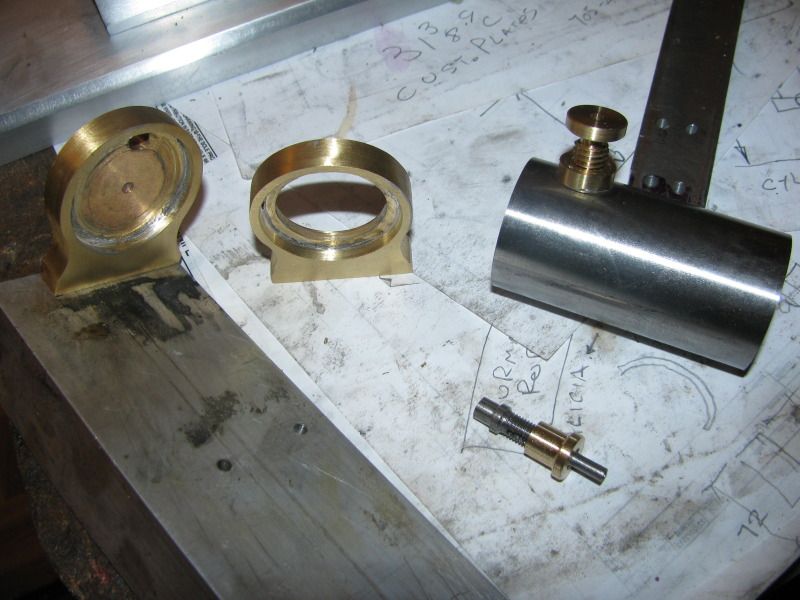
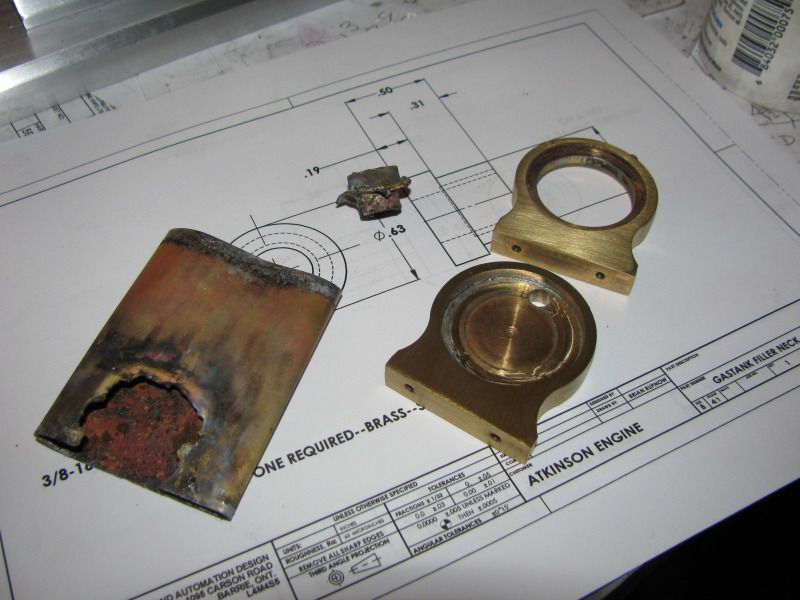
Sometimes you eat the bear----Sometimes the bear eats you!!! Yesterday the bear tore a large steak out of my butt!!! My cheap brass gas tank made from a 0.023" wall peice of sink drain plumbing was a total wash. First it went oblong when I soldered the filler bung in. Then I thought I could be smart and squeeze it back into shape and fill any gaps with solder (convinced myself it wouldn't show).---What you see are the ultimate results. I managed to save the end stands. Today I bought a peice of 1.5" O.D. steel tube with a 1/8" wall (brass was just too damned expensive) and will start again. Bah!!! Humbug!!! Nah Nah BooBoo----Brian
Just for the heck of it, here are a couple of shots of the gas tank end stands coming to life. I start with one bar set up in the vice and work from both ends. I have a couple more holes to put in in this set-up, then I will cut them out.
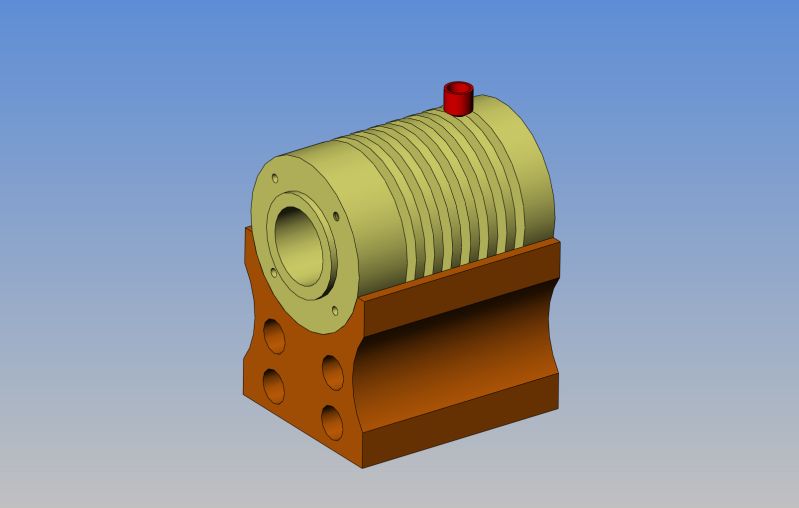
Well, here's a beginning. The first thing I notice is that Jan used a 24mm bore, and I only have a 7/8" (22.22mm) reamer. Since I have more faith in my ability to get a good consistent reamed finish than a good consistent bored finish, I THINK I will design this with a 7/8" bore. Jan calls up grey pearlitic cast iron for the cylinder, and since I haven't worked with that before, I may try and use it, depending on cost.
15/16 is closer than 7/8, and 1" is closer to "volume size" than the 7/8 is too, by a respectable amount. If the only problem is not having a reamer, let me know and I'll donate one of each size to the project. I've got extras. Too many extras in fact.
Brian--Considering the cost of reamers, that is a pretty magnificent offer!!! However, its a bit late in the game now, and I have my piston and cylinder long since finished. However, thank you kindly for dropping by to say hello, and for the offer.---Brian
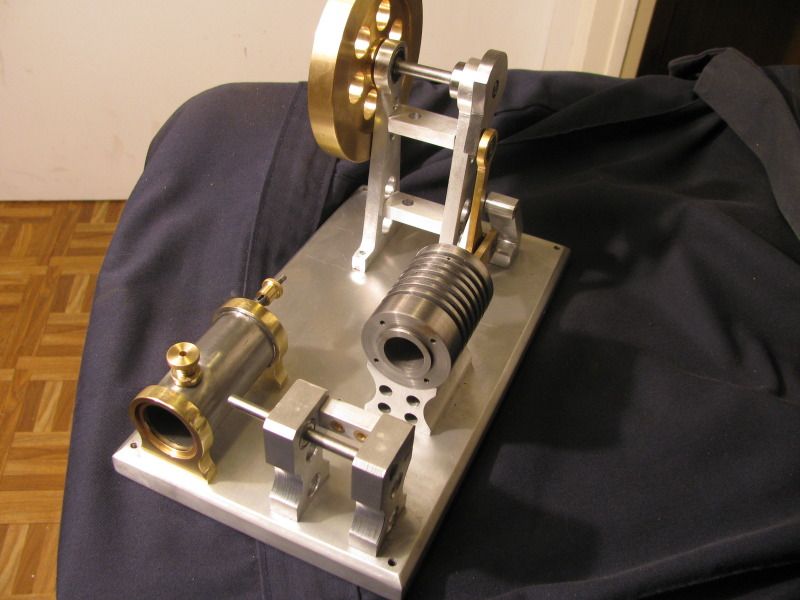
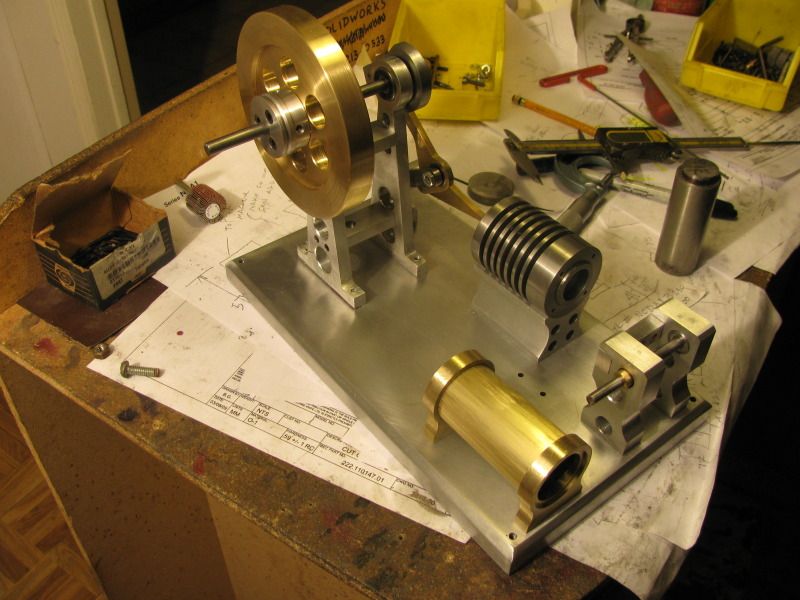
Well, thats not quite as pretty as brass would have been, but its together and as far as I can tell it doesn't leak. You can see that I haven't installed the "sight glass" in one end yet, but I have finished the two air adjusting screws that screw into the top of the filler cap and onto the vapour discharge line. All in all I'm satisfied, considering how it all went to Heck on me the first time around.---Brian
Thank you Brian for staying around to share what you are doing with us. I just got back on after the big change and the first set of posts i read was this one, I love the way you problem solve and share that with us. It shows me the different ways of achieving the same goal.
I will be staying here also in a wait and see mode
Sorry about your mishap with the tank. I guess these things happen to all of us. Just out of curiosity, what material are you now using for the tank and did you soft solder it?
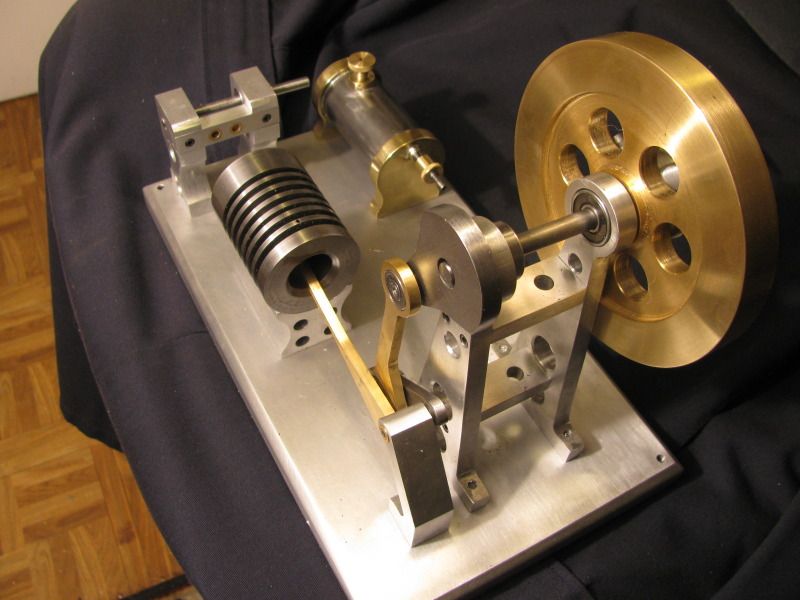
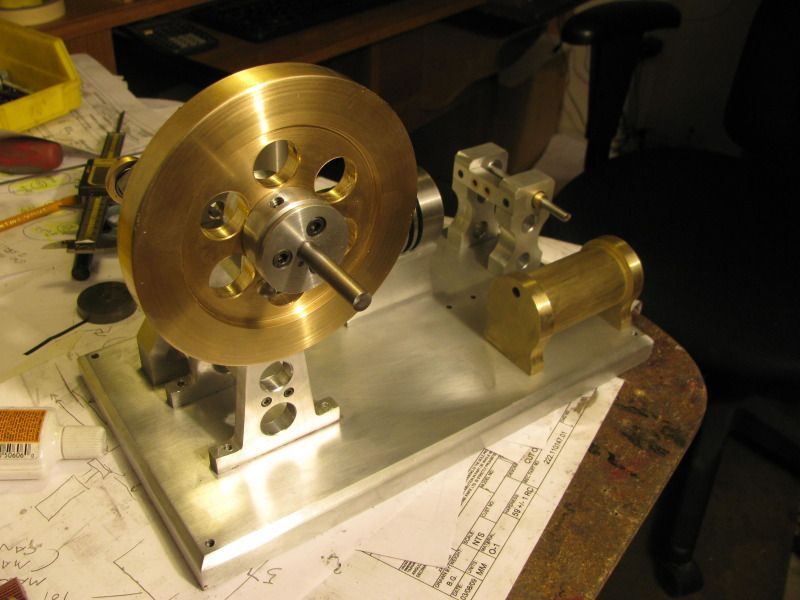
Ladies and Gentlemen---Now Playing!!!! First video showing mechanical movements of the Atkinson engine. It will amaze you as it has me. Now filmed with the aid of my magic light reflecting parasol and 500 Watt bulb!!!
Sorry about your mishap with the tank. I guess these things happen to all of us. Just out of curiosity, what material are you now using for the tank and did you soft solder it?
1018 mild steel. I silver soldered the filler bung to the steel tube,and the outlet to the brass end stand and soft soldered the tube to the brass end stands. The steel tube is 1.5" o.d. x 1/8" wall thickness.


 Glad the tank shell is the only lost work. Now we know that plumbing supplies are not what they used to be...