


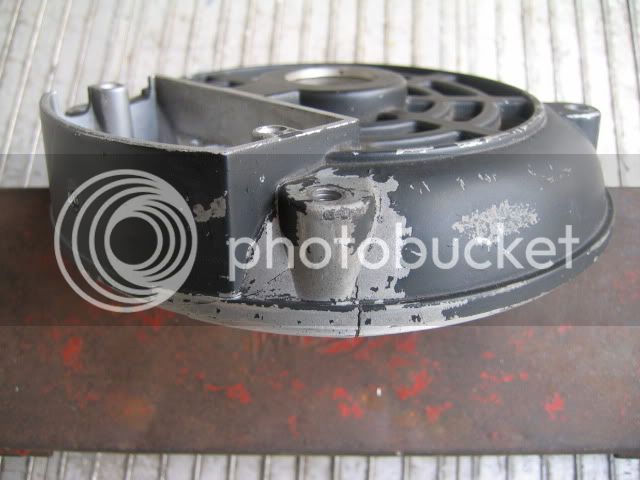
I knocked my 6 x 4 bandsaw over a while ago and it landed on the end cap of the motor. The die cast aluminium end cap hardly looks damaged, but it distorted enough for the rotor to slightly contact the windings and for the motor to no longer work.
The motor on this import bandsaw is a .25kw/ 1/3Hp imperial pattern motor. Australia went metric nearly 40 years ago, and replacement imperial motors tend to be scarce and expensive.
My options at this stage were 1) buy a new or used imperial motor and just bolt it in, 2) buy an equivalent metric motor, remake or modify the mounting plate and pulley, or 3) buy a 180 x 40 aluminium round and make a new end cap. Option 3 won as it had the lowest capital outlay and the highest amount of fun learning opportunities.
First step was to turn the OD of the round to the correct size. I drilled a 20mm hole through the round and set a piece of 20mm cold rolled in the chuck, protruding about 25mm from the face of the chuck. Then I impaled the aluminium round on the cold rolled and pressed it against the chuck with the live centre as hard as I could. To make sure I had enough drive, I put double sided tape on the chuck jaws, an idea from one of Bog's posts I think, quite some time ago.

After turning the OD, 166mm, I faced as much of the end as I could with the same set up. This is outside end, most of it is going to be milled away before I'm done, but at this stage it provides a true surface for when I flip the piece in the jaws and start turning the inside.

I flipped the piece in the chuck, I can hold it conventionally with the outside jaws now, faced it to thickness, 38mm, and roughed out what I could of the inside. There will be a lot of rotary table work to do to finish the inside. The most important part of the project happens at this stage. First, part of the OD has to be turned down to fit into the motor housing, and once that is done, the bearing housing has to be bored. You will notice the part is marked so it goes back into the jaws in exactly the same place.

The motor on this import bandsaw is a .25kw/ 1/3Hp imperial pattern motor. Australia went metric nearly 40 years ago, and replacement imperial motors tend to be scarce and expensive.
My options at this stage were 1) buy a new or used imperial motor and just bolt it in, 2) buy an equivalent metric motor, remake or modify the mounting plate and pulley, or 3) buy a 180 x 40 aluminium round and make a new end cap. Option 3 won as it had the lowest capital outlay and the highest amount of fun learning opportunities.
First step was to turn the OD of the round to the correct size. I drilled a 20mm hole through the round and set a piece of 20mm cold rolled in the chuck, protruding about 25mm from the face of the chuck. Then I impaled the aluminium round on the cold rolled and pressed it against the chuck with the live centre as hard as I could. To make sure I had enough drive, I put double sided tape on the chuck jaws, an idea from one of Bog's posts I think, quite some time ago.
After turning the OD, 166mm, I faced as much of the end as I could with the same set up. This is outside end, most of it is going to be milled away before I'm done, but at this stage it provides a true surface for when I flip the piece in the jaws and start turning the inside.
I flipped the piece in the chuck, I can hold it conventionally with the outside jaws now, faced it to thickness, 38mm, and roughed out what I could of the inside. There will be a lot of rotary table work to do to finish the inside. The most important part of the project happens at this stage. First, part of the OD has to be turned down to fit into the motor housing, and once that is done, the bearing housing has to be bored. You will notice the part is marked so it goes back into the jaws in exactly the same place.


