Arnold on Elmer's #43

Home Model Engine Machinist Forum

Help Support Home Model Engine Machinist Forum:

This site may earn a commission from merchant affiliate links, including eBay, Amazon, and others.

arnoldb

Well-Known Member
Joined
Apr 8, 2009
Messages
1,792
Reaction score
12
I've been out of the shop for quite a while now due to non-shop-related burn injuries to both my hands. After spending a most frustrating 5 weeks just watching TV and waiting for things to heal up, I'm ready for the shop again, and wanted a fairly simple project to get back into the swing of things.
I tossed a number of Elmer's engines in a hat, and drew #43 ;D

Once again, I'll be using metric fasteners and shafting to suit my needs, and I won't necessarily be making all pieces exactly to Elmer's plans.

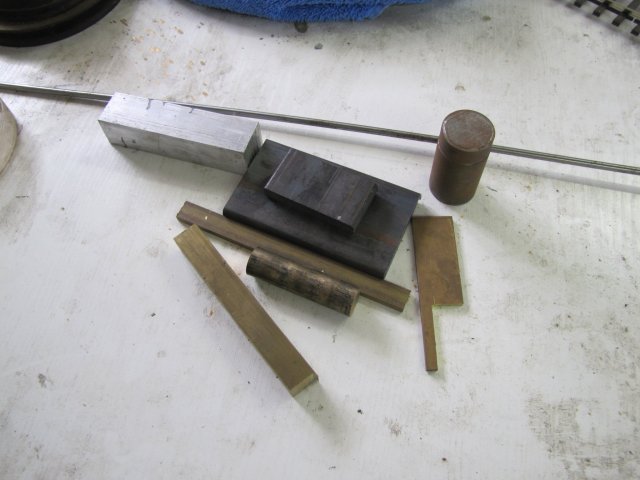
On Friday I started assembling whatever I could scrounge to start the build:
normal_2426.jpg


Friday afternoon saw the base done from some hot-rolled steel bar:
normal_2430.jpg


The column followed on Saturday - also from hot-rolled; I went for a single angled side on each side instead of having a parallel bit at the top of the column. I just used a pair of drills to get a suitable angle to mill it off at:
normal_2431.jpg


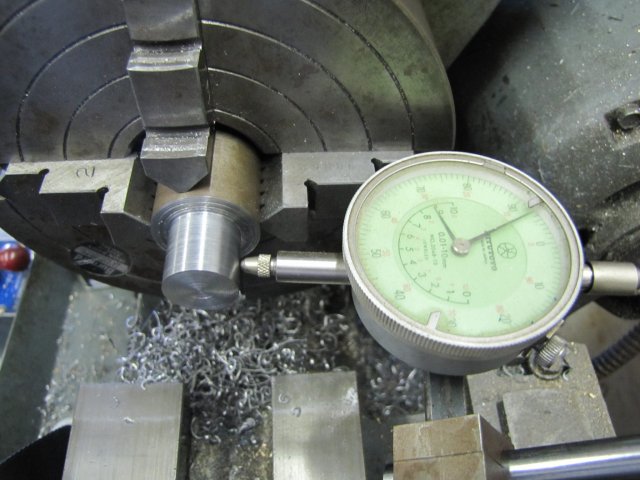
Main bearing was a very quick turning, reaming and parting job from phosphor bronze:
normal_2433.jpg


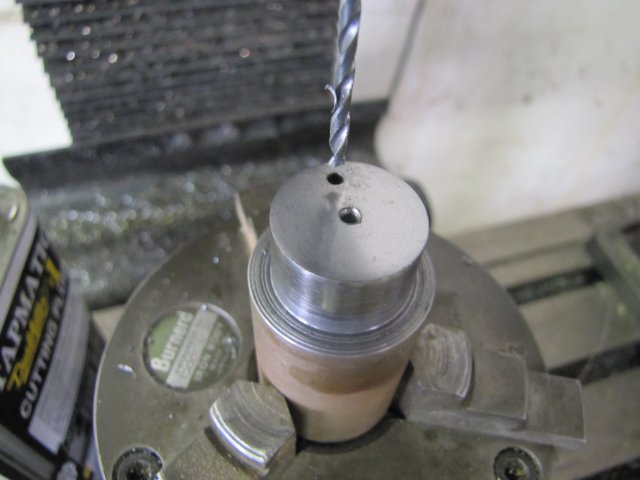
Instead of making the reversing slide from solid, I turned up a bit of brass to 5mm diameter, and drilled a 5mm hole with a generous chamfer into a bit of steel off-cut:
normal_2435.jpg


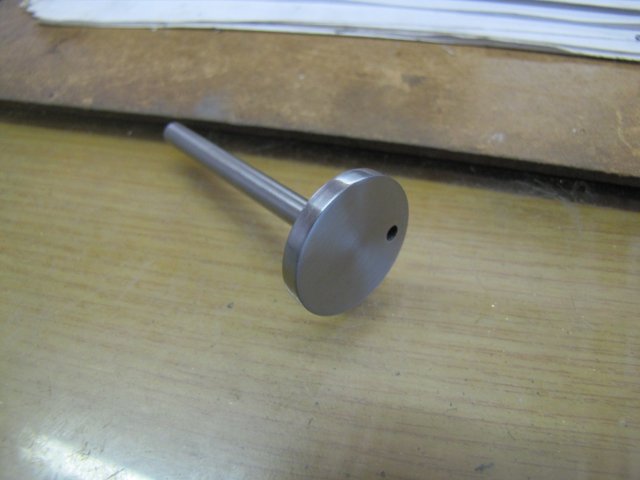
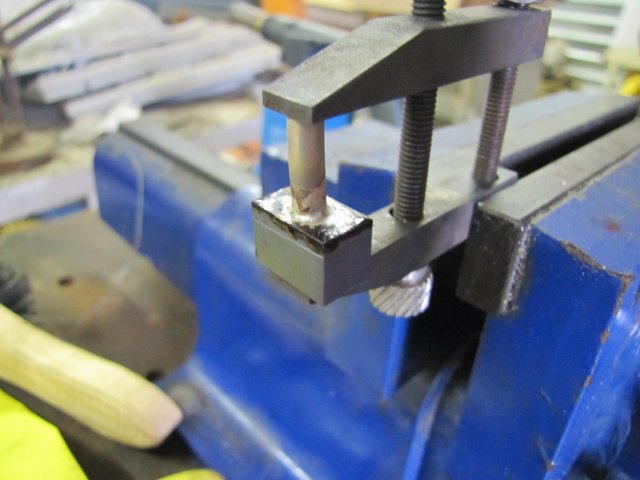
Out with the torch and the silver solder, and joined together:
normal_2436.jpg


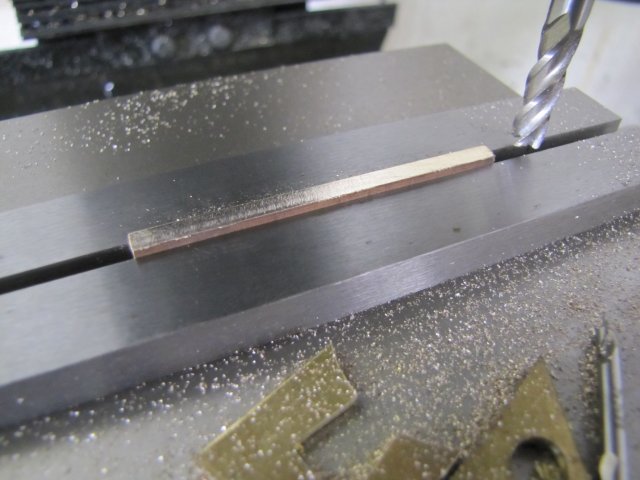
Then I just mounted the lot in the collet chuck on the rotary table, and milled out the slot in the steel bit:
normal_2437.jpg


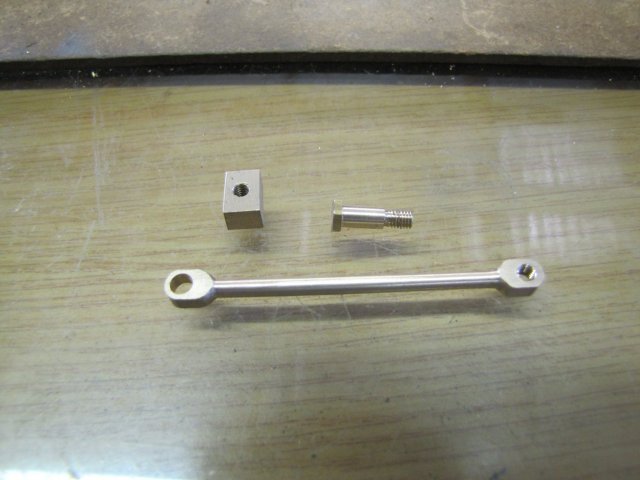
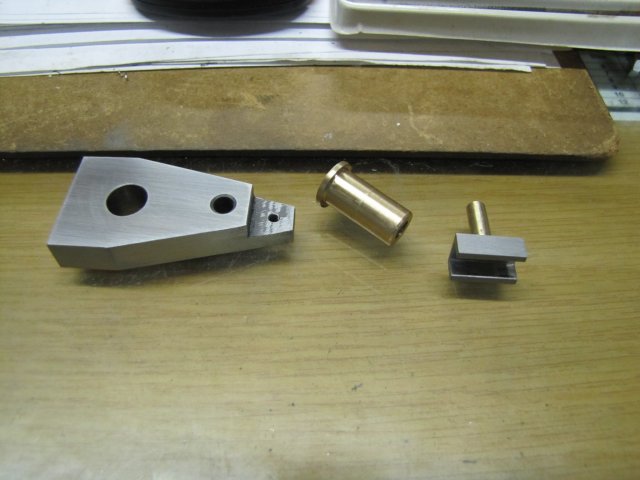
For Saturday, I ended up with this handful of bits; not much, but some progress:
normal_2441.jpg


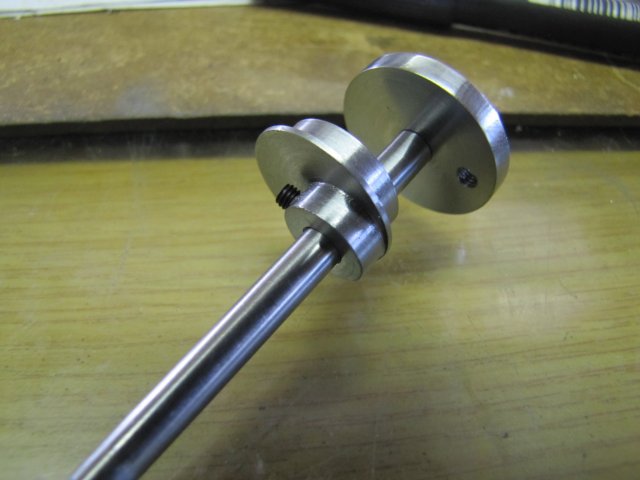
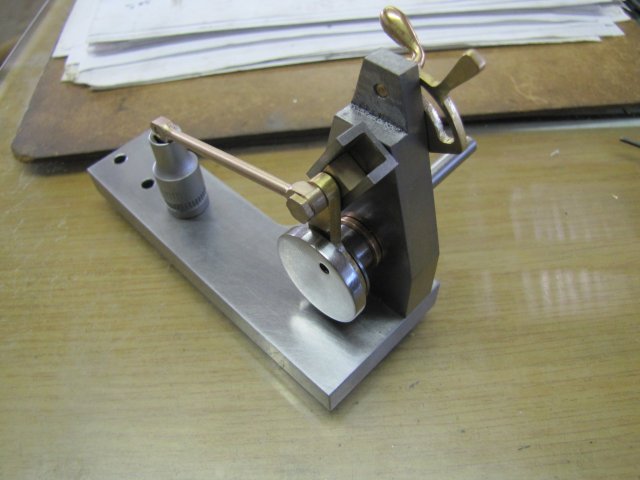
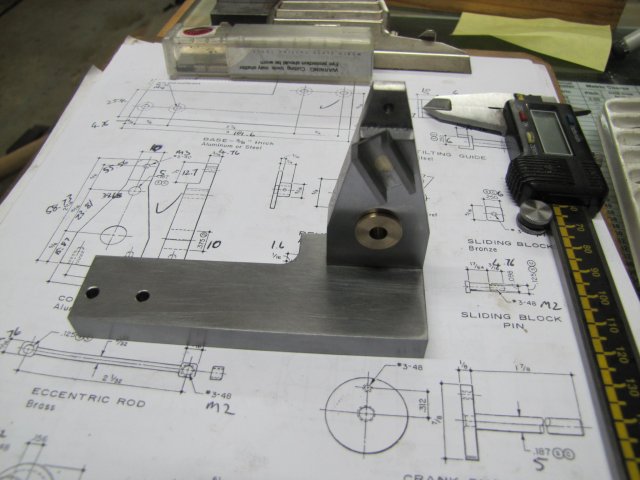
At least the whole lot fits together like it should :big::
normal_2442.jpg


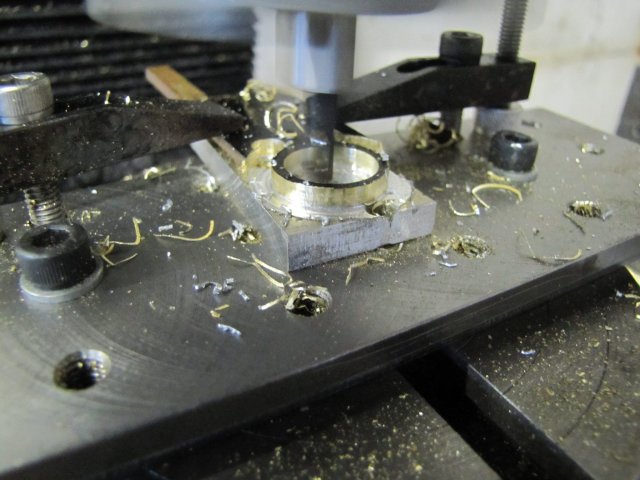
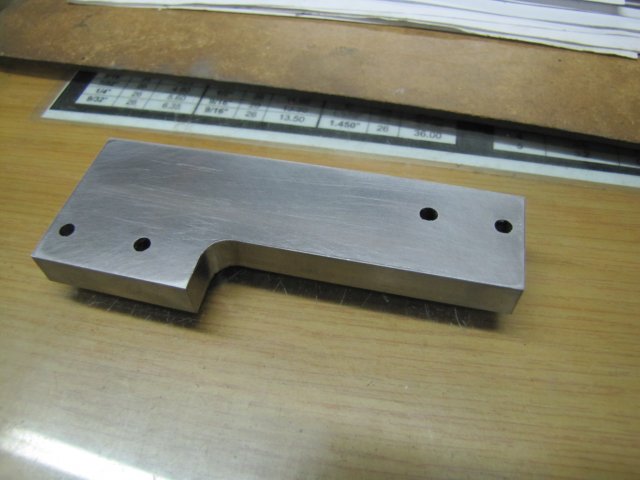
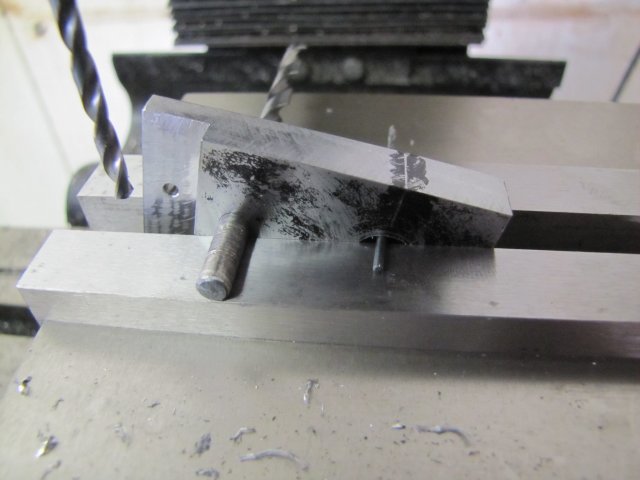
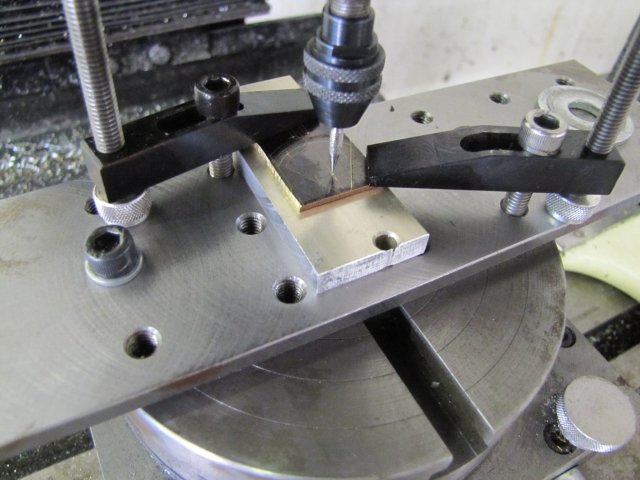
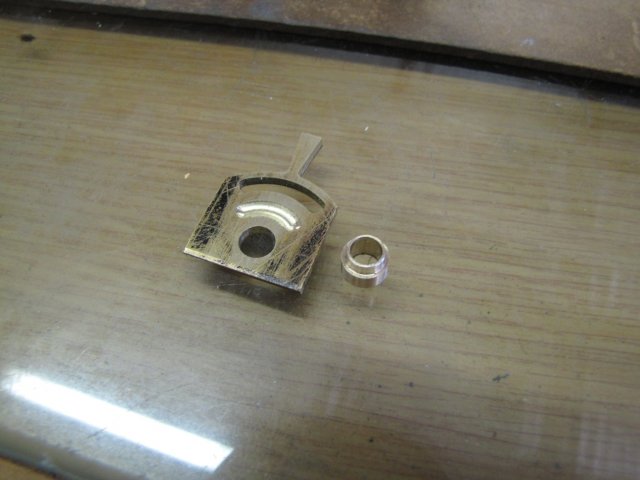
This morning, I started with the reverse lever - just laid it out, centered the RT on the mill, mounted the fixture plate, and clamped the workpiece to that on top of some scrap aluminium, and centered on the pivot hole:
normal_IMG_2443.JPG


A little while later, after some judicious drilling and milling:
normal_IMG_2445.JPG


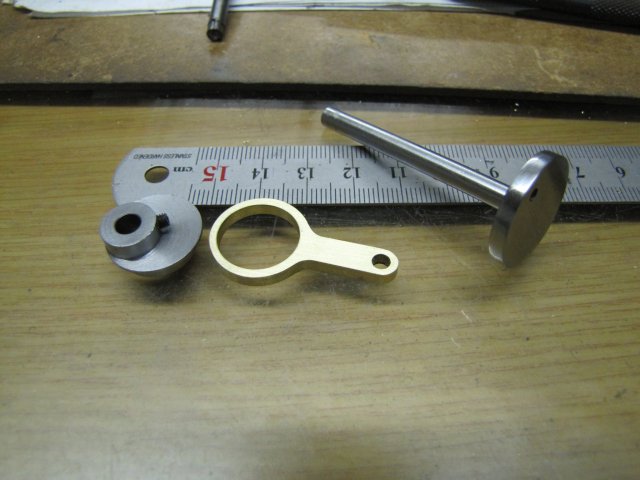
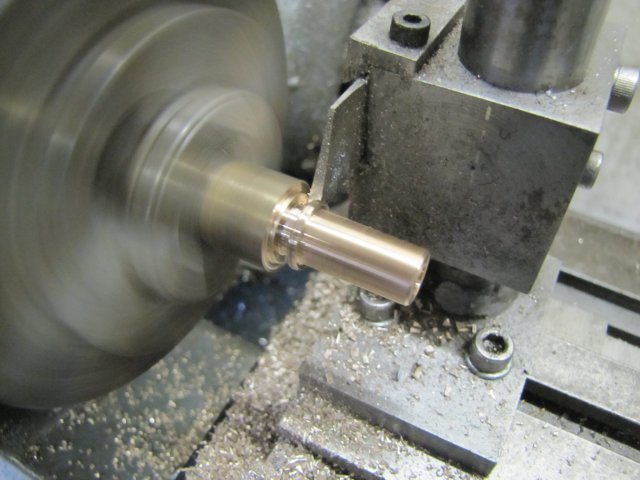
Then I turned up a bush to fit the hole drilled in the reversing lever and to fit the reversing slide's shaft:
normal_IMG_2447.JPG


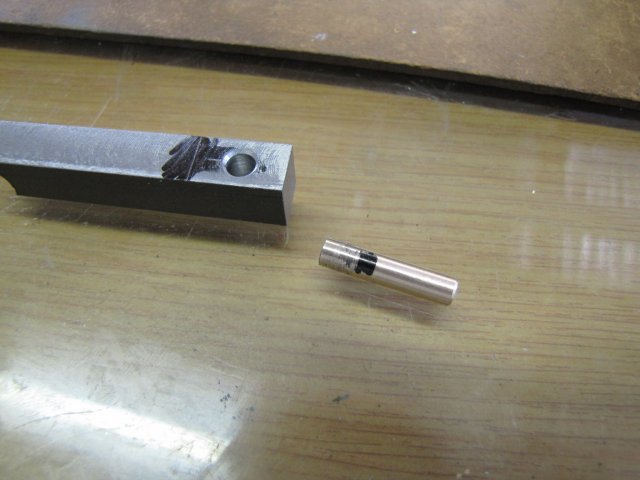
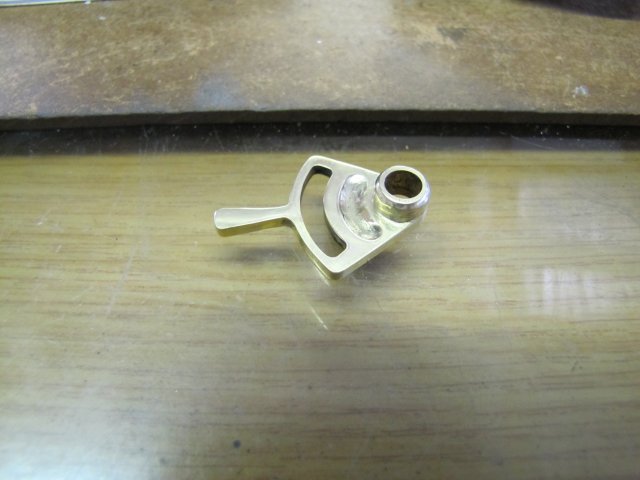
And silver soldered the two together and cleaned things up a bit:
normal_IMG_2448.JPG


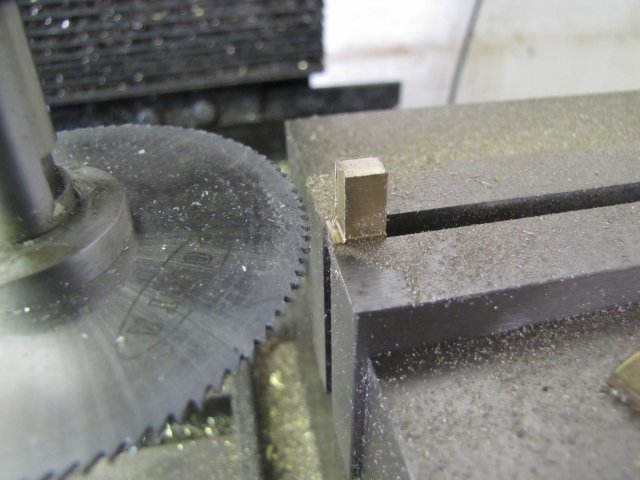
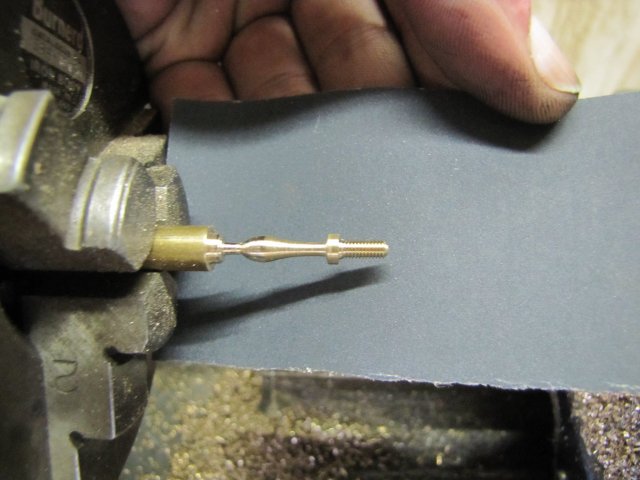
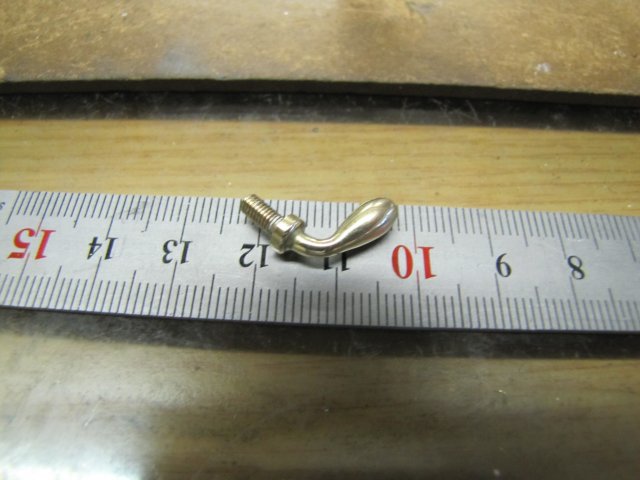
Zee's bane followed... A bit of ornamental turning and shaping with a small file:
normal_IMG_2450.JPG


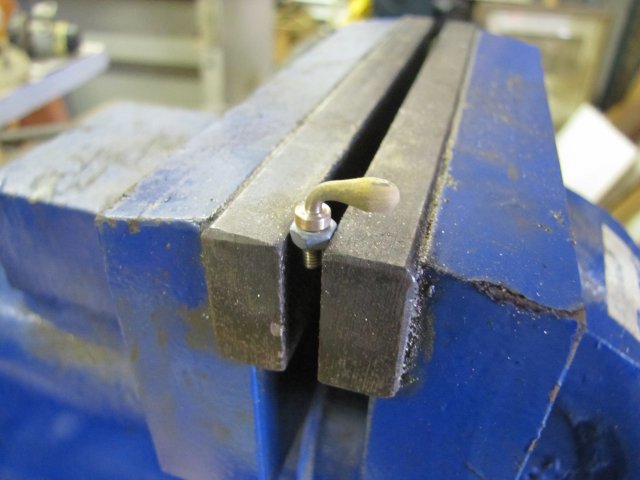
Screwed into a nut, heated bright red hot on the thin part with a small torch, and bent over with gentle pressure from a bit of flat steel while keeping the stem red-hot. Bent like a charm ;D:
normal_IMG_2452.JPG


Trying to get a bit of a polish on the inside of the corner is a problem, but some rope (the type that butchers use to tie up a roast) dipped in metal polish quickly gets into the back bits:
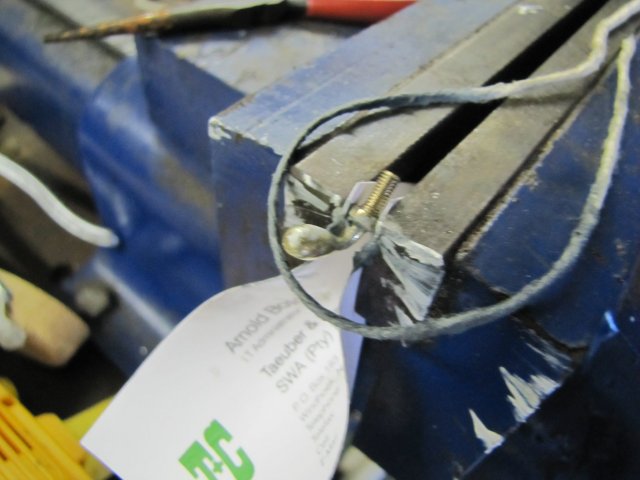
normal_IMG_2453.JPG


Handle done:
normal_IMG_2454.JPG


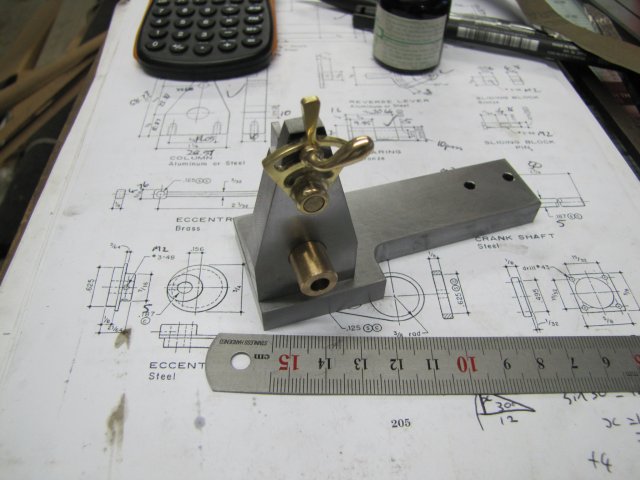
And today's assembly shot:
normal_IMG_2455.JPG


Regards, Arnold
 
Yeah mate, I too am glad that you are back in the hunt again. I was beginning to wonder if something had happened to you. It is ALWAYS a real pleasure to see what you are accomplishing in the shop. This #43 will be a real beauty when you are done. Nice work so far. :bow:

BC1
Jim
 
Great start to what promises to be a fine engine. Glad to see that you are back in your shop

I will be following this build closely.

Eric
 
Wonderful progress Arnold, and I'm glad the hands are better now. Nice result on that reversing lever and especially the handle!!

Regards,
Bill
 
Good to see you back on form Arnold!!!

Great progress so far!
I can see that this is going to be another excellent engine!!! ;D

Andrew
 
Nice work Arnold your threads invariably hold new tips.

Sorry about the hands - glad you are all healed up and back on form.

What happened ? fell into the braai after too many Windhoeks ?

Regards,
Ken
 
HI Arnold
Glad u are on the mend :)
that engine looks great so far :bow:
Pete
 
Great looking build that I will eagerly follow. A reversing engine is on my short list, so this may be it.
And what a great way to choose it, tossing the numbers in a hat.
 
Many thanks Gents, it's really good to be making chips again :) Sometimes a little reality check makes one appreciate the good things in life even more.

"What happened ? fell into the braai after too many Windhoeks ?"
Not exactly... Was at a friend's place and the Braai was lit with turpentine. Knocked the open bottle over spilling the stuff all over and caught fire. Instead of ending with a belly full of Windhoek and braaivleis, I ended up with a saline drip and hospital food ::) I hope that's the last time in my life I have to do the "burning man" impression; from now on I'm taking along my own braai lighters :big:.

Today's little bits...

A start on the crank web from some hot-rolled rod - drilling the tap-hole for the crank screw on the rotary table as it was convenient:
normal_IMG_2456.JPG


After parting it off, and pressing onto some 5mm silver steel and a bit of cleanup, the crankshaft was done:
normal_IMG_2457.JPG


For the eccentric, I cleaned up a bit of the same hot rolled rod as for the web, and used a dial indicator to get the correct offset:
normal_IMG_2458.JPG

Then it was a fairly simple turning job to finish it off.

With the mill still centered over the RT, I couldn't be bothered to crank the table back to the vise for drilling the grub screw hole in the eccentric, so I just used the drill press:
normal_IMG_2460.JPG


The completed eccentric on the crank shaft:
normal_IMG_2461.JPG


The eccentric strap followed; I strayed a bit from Elmer's design and just kept to the crucial dimensions. Here I'm boring it to fit the eccentric:
normal_IMG_2462.JPG


Today's bits; looks like I'm on a "make three bits per day" streak :big::
normal_IMG_2463.JPG


Tomorrow might be less done, as I have to attend to some matters in town... At least, a part of those concern getting some new "toys" for the shop ;D

Regards, Arnold
 
Arnold,

You are doing a GREAT job on this. I have also started this engine as my first (I want to understand the valve action). I am on a slower learning curve and keep detouring to other projects. You can bet I am following this.
 
Arnold,

Sorry to read about your accident :mad:

Good to see you back in the shop and hard at it. :D

Best Regards
Bob
 
Ouch! Sorry to hear about the hands. #43 looks to be coming along very nicely. Great job (as usual ;D )!

Cheers

Jeff
 
You`r doing an amazing job!
And i love the detail of the handle, it looks great!

Norberto
 
Thank you Gents :)

Yesterday I didn't get anything done as I was shopping around in town and had to attend to some other matters. This morning, I collected the results of said shopping around ;D:
normal_IMG_2466.JPG


That broke the 3-part streak, but at least I got three bits done for today:

First up was a block of phosphor bronze milled to 0.1mm over size on the bearing surfaces for the sliding block and then slit off:
normal_IMG_2467.JPG

I carefully filed the bearing surfaces flat to remove the toolmarks, and then flat-lapped it on some 600 grit emery to be a good smooth-sliding fit in the tilting guide. Took 10 minutes to machine the block and a good 30 more minutes to finish it off...

Next the eccentric rod; I milled some brass to size for width and depth and left it a couple of mm over-long:
normal_IMG_2468.JPG

After squaring up, I drilled and reamed the one end, and drilled and tapped the other end.
Then I centered it up in the 4-jaw on the lathe and drilled a tiny hole for tailstock support, and carefully turned it down length-wise. Sorry, no pictures :-[

A bit of 5mm hex brass was used to turn the "eccentric pin" from; Elmer shows slotted screws for these, but I prefer hex-head screws. Finished bunch 'o bits for the day:
normal_IMG_2469.JPG


And assembled:
normal_IMG_2471.JPG


Regards, Arnold
 
Awesome stuff!!!! ;D

Now it is starting to look like something!!

Thanks for putting in the time it took you to complete the tasks!! ;D
You know what i am talking about!!!

As always excellent work!

Andrew
 
looking great mate
umm that curved slotted thingy with the handle is giving me ideas with my ignition ring on the "Sow"
I always planed to slot it to make timing easy,but a handle now that's interesting!!
Pete
 
Great work as usual Arnold. Nice bit of shopping.

A word of caution on that compressor - I have one very similar.

You should start and stop it with the control valve (red button) as this depressurises the pipe (between compressor & check valve entry port to reciever) and gives the compressor just enough "unloaded" time at startup to get up to speed.

If you start it from the mains (when pressurised) it will stall and burnout.

I mention this because I left mine unattended - there was a power failure whilst the machine was in the run cycle - when the power came back on it stalled and burned out.

I have introduced a pinhole leak into my connecting pipe which depressurises the line in about 10 seconds after shutdown. Of course a power failure of less than 10 seconds can still cause a stall (again you have to be unfortunate if it happens during a running cycle).

You can have similar stall and burnout problems because of undervoltage "brownouts" we are suffering in our neck of the woods by Eskom - I'm not sure how reliable your electrical supply is up there. I've added a manual relief valve to the line which I can open, start the compressor and close again once it is up to speed for starting under brownout conditions.

As a precaution I try not to leave mine on whilst unattended.

FYI

Ken
 

Latest posts

Back
Top