Hi Rip'
A year or so ago I set up to try my first attempt at anodising. I used a small fixed voltage power unit, a bath of sulphuric and aluminium hanging wires. Though I had semi success in actual anodising as the surface became hard and non conductive it would not take a colour. Taking a good look at things I made four improvements which dramatically improved the success rate.
These were in order.....
1, The acid was probably too weak at approx 10% so this was increased to 20%
2, The acid tank itself was immersed inside another tank containing water and this water was heated using an aquarium heater to about 28C
3, The power unit was replaced by a variable one which improved the current rate to surface area ratio
4, The aluminium hanging wires were replaced with titanium. I consider that this was the single most improvement to really step things up a cog. Ali hanging wires anodise with the part and the joint between wire and part can become less or even non conductive
It is very important to ensure the piece is scrupulously clean. Caustic soda is often reccommended but washing soda will do just as well and is
much safer but the water/soda solution does need to be hot. I used de-ionised water throughout
Cold definitely affected the initial test parts too but gave some a very smooth finish but one which would not take a colour of any kind.
I began by using Dylon fabric dyes which proved a total failure. Apparently the Dylon dyes that did work originally are now discontinued.
I bought 'proper' anodising dyes off ebay which worked well but the part needs to be left in for several minutes to take and for the colour to intensify
I then tried Parker green writing ink and the uptake was instantaneous - almost like a chemical reaction it was so fast. The next engines I did I used writing inks throughout with the same results.
Here's some pics of the project
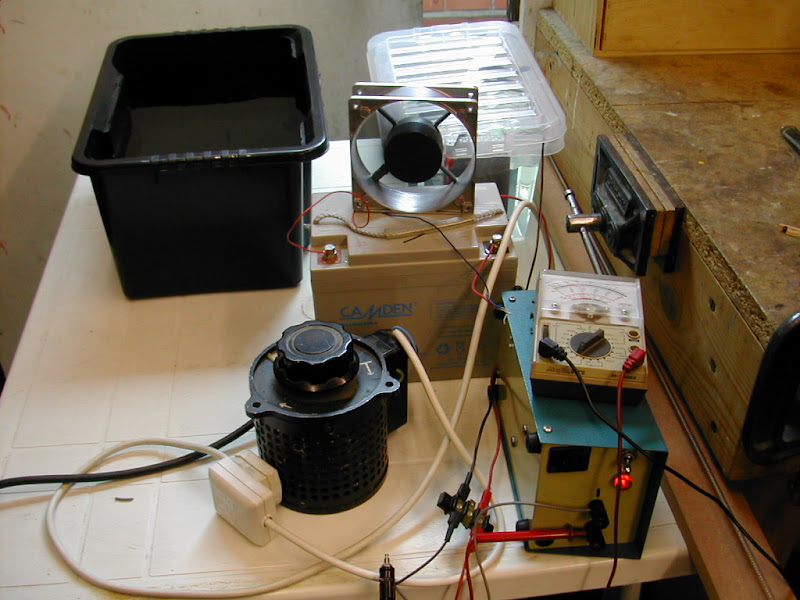
This shows the original set up using the fixed power supply and this time a variac in an attempt to get some control
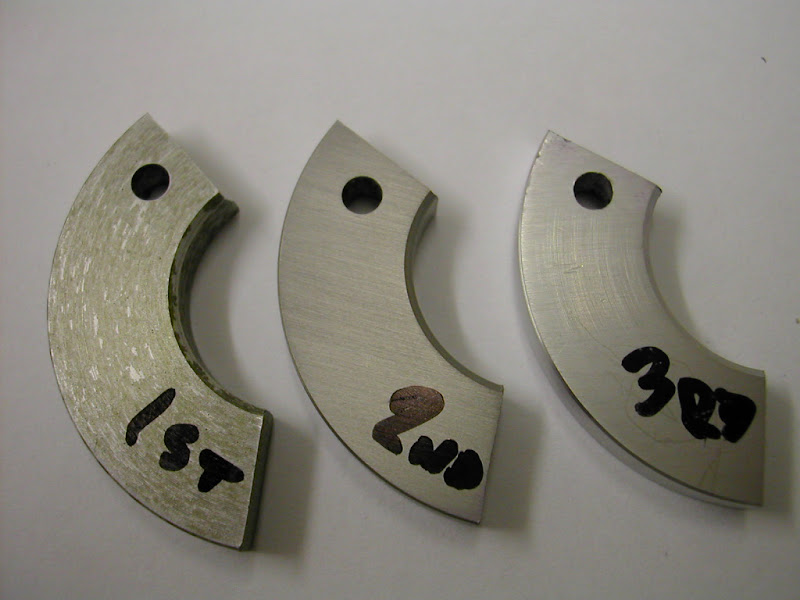
These are the first test pieces
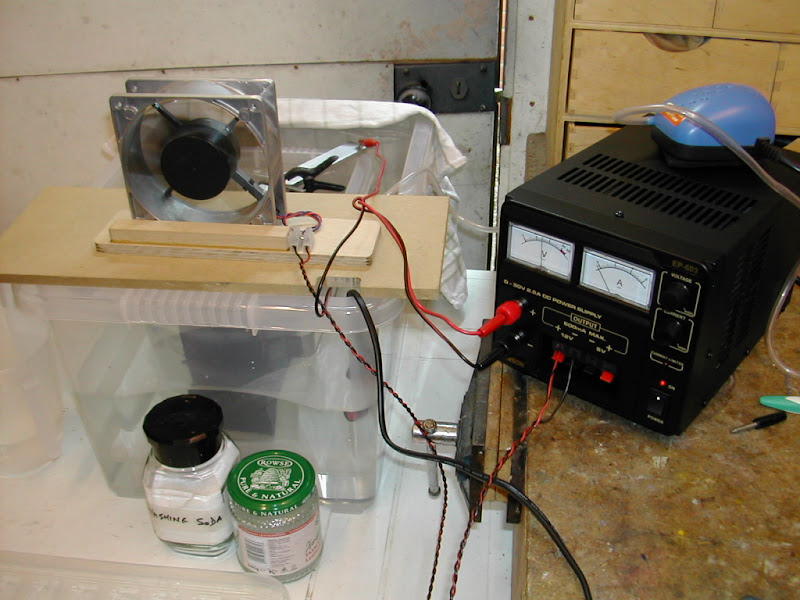
This is the second set up with heated tank and the new PSU. Given the other improvements - particularly the titanium hangars - I'm sure the original PSU would do the job. Note the aquarium pump to agitate the ano tank - just a crimped piece of ali tube with a few small holes drilled in it. The fan is to get the fumes away - not very pleasant to breathe at all
First success - test pieces done first. The 'blue' head on the left is from using
green Parker writing ink - as bought. The green head is from using the 'proper' anodising dye
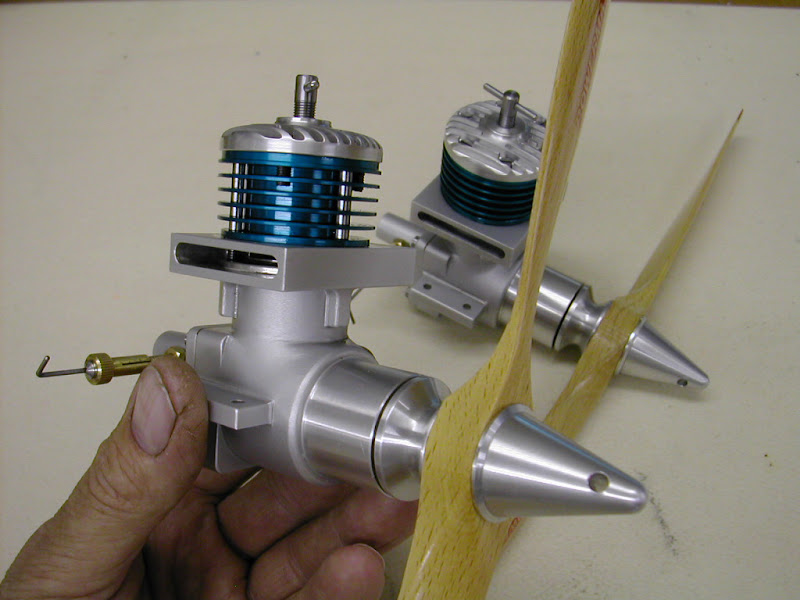
First engine -very pleased with the outcome
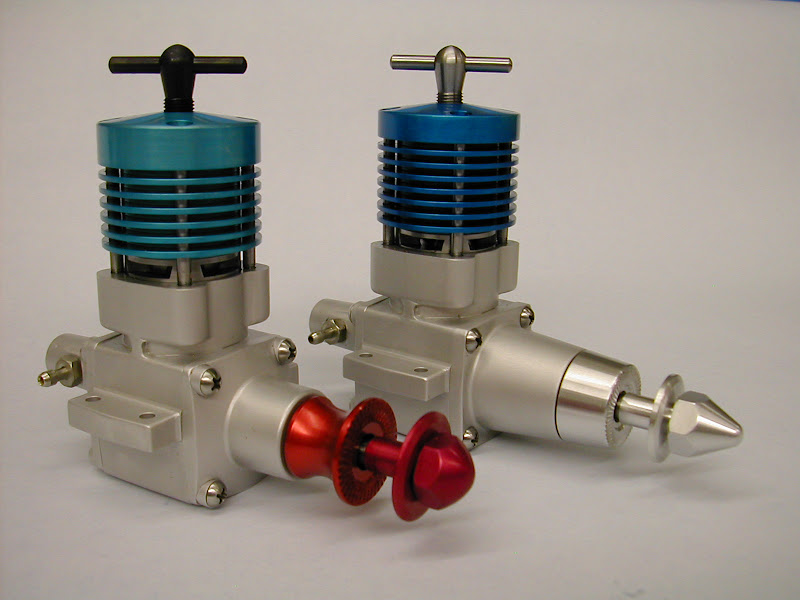
The latest two engines. Both heads were done with the same blue writing ink- Watermans South Sea Blue. The lighter blue was intentional and was the original ink diluted by 50% four times. ie each dilution was halved and diluted by 50% - it was still too powerful for the very light blue intended! The darker blue was from the second dilution and was just as hoped for. The red was basic Parker red diluted 50%.. Though it doesn't show too well in this image the spinner nut and prop washer are a darker red than the prop driver. They were all done at the same time for the same duration - (important if you want the same colour from very small quantities of dye) but this was put down the the likely hood that the material was two differing types of ali.
It's not a difficult process once you get yourself sorted out. Oh yes titanium is expensive - a good source is to seek some welding rods - the frequently show up on ebay and are ideal for the job
Well I hope that is of use to you and indeed anyone else intending to give it a go. Any further questions please ask - only too happy to help
Don't forget to post your results
Regards - Ramon