A "Poppin" for Christmas

Home Model Engine Machinist Forum

Help Support Home Model Engine Machinist Forum:

This site may earn a commission from merchant affiliate links, including eBay, Amazon, and others.
Since I'm trying to work out a surface-finish issue with my lathe, and my reamers and other bits came in, I got back to work on the "standard". I was making two, but after forgetting to add half the diameter of my edge-finder to the location of the crank-bearing-bore I ruined one :wall:.

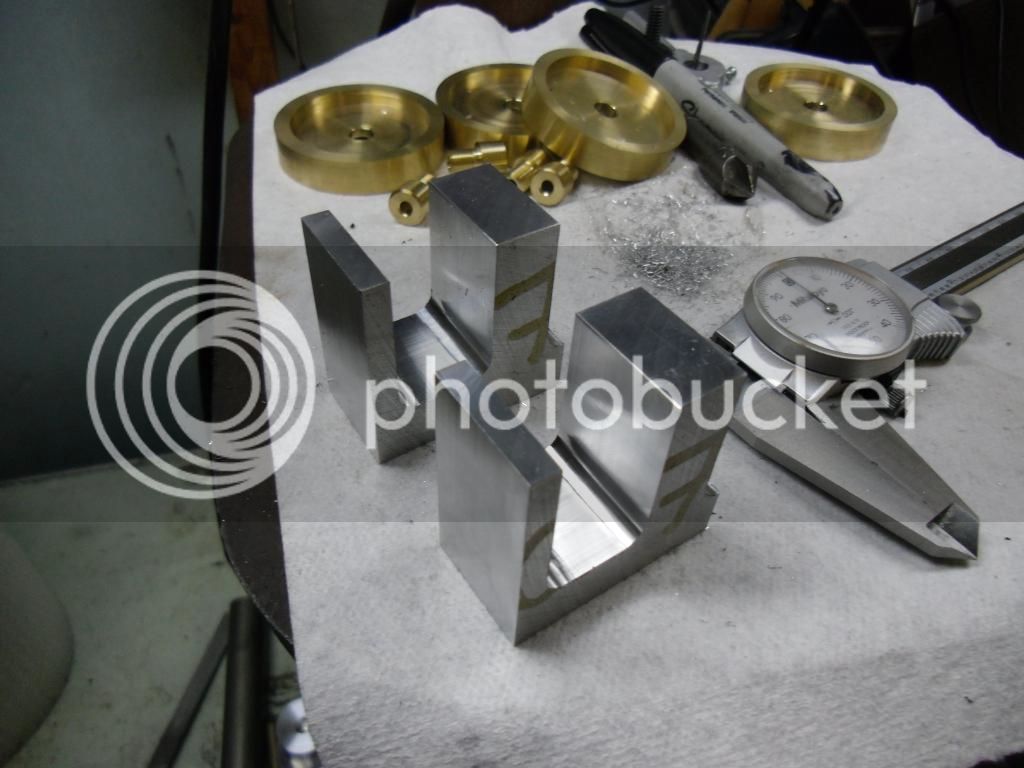
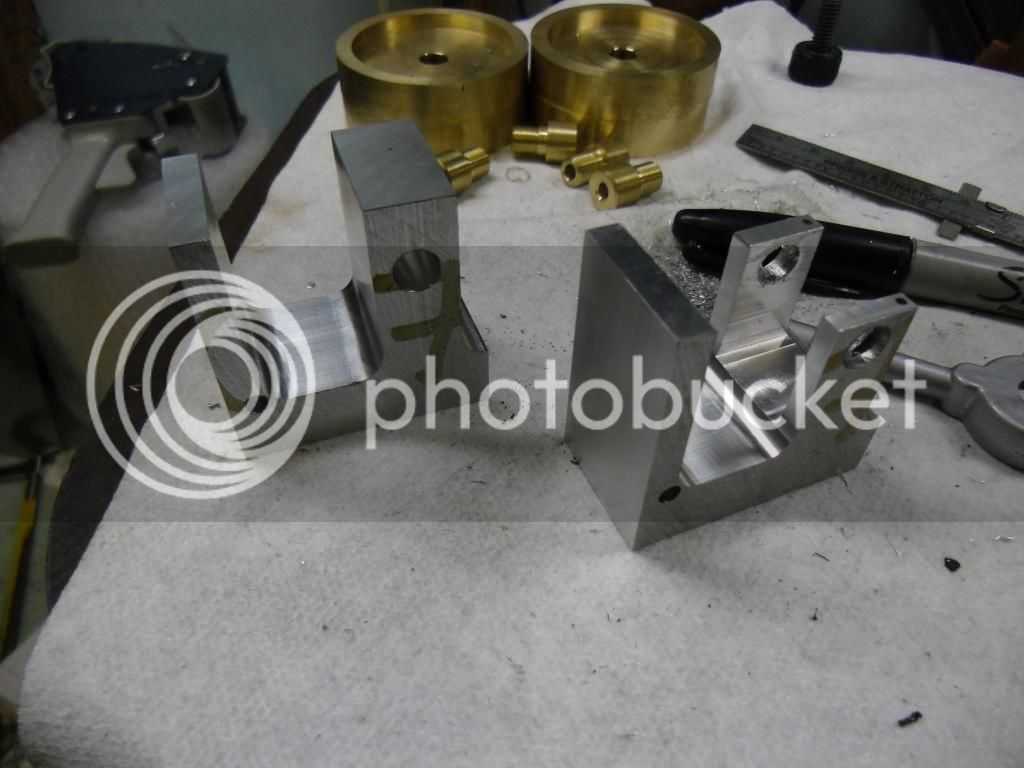
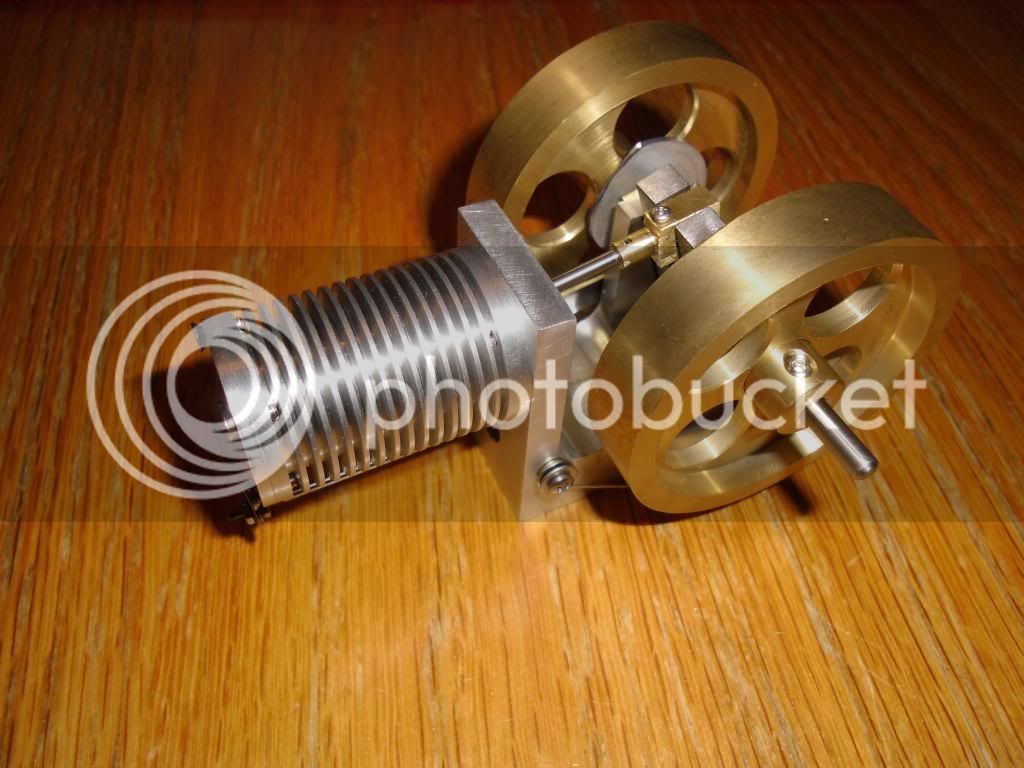
Christmas is getting close, and I don't need mine to run by then, so I just forged ahead with the other standard good thing I was working on two). Here it is, complete except for the radius around the cylinder mount and the counterbore for the valve rod.

The only issue, which you can't see, is a .046" drill bit is currently broken off in one of the crank bearing clamp holes :(. It's a Ti-coated HSS bit, so I'm going to take a shot at the "Alum" trick this evening. Wish me luck :)

Standard.jpg
 
You have to make one more standard, would it be quicker to make two more than to remove the drill?

Jim
 
If I have to re-make it I'll make 2, but I'm hoping that I can dissolve the bit with the Alum trick which doesn't really require any great time or effort on my part. Of course I'd like to make another one, I'm not entirely happy with this one, but I don't have any more 1x2 aluminum and it would take me a lot of time to start totally from scratch.
 
Sounds like a couple of good reasons to me. And Dad is not going to be too picky when he unwraps it on xmas day.

Jim
 
Oh man, Christmas is coming up fast and I still have so much to do (in addition to a few woodworking projects for my wife and others). Fortunately it turns out I won't see my Dad until the 29th, so that gives me a few extra days breathing room. Anyway, I spent all last week in Texas, so I didn't get to work on it until this weekend. The alum trick failed (guess Harbor Freight bits aren't made of steel :rolleyes: ) so the first order of business was a new standard. Actually it took 6 more to get it right. I screwed them up for a variety of reasons; math errors, an accidental climb milling incident, etc. I was rushing, so I took a breath and tried really hard on the last 2 and got them. I also got a little smart and finally machined up some brackets for the DRO that had been sitting on a shelf for at least a year, which really helped get everything right.

CIMG6037.jpg


I had to make it out of 2" x 2" aluminum this time, having run out of the 2" x 1.5" I was using before. Made quite a mess.

CIMG6036.jpg


CIMG6038.jpg


CIMG6039.jpg


CIMG6041.jpg


Thoroughly sick of working on a second standard I took a break after the hardest parts were done and turned to the crankshafts. I also spent some time making a collet-closer for my lathe so I could turn the tiny shafts for the cranks.

Here they are glued up with Loctite 680 and drying inside the house (where it's warm):

CIMG6042.jpg


I assume for a little engine like this I shouldnt need to pin the crank, right? After my previous luck with tiny drill bits in aluminum I'm leery to try drilling this stainless. Both the shafts and the throws are 303, which is pretty soft as far as stainless goes, but still. Maybe I'll get brave sometime in the next couple days and try it anyway.
 
with the small diameter drill bits did you try running them at a high rpm? the smaller the bit the faster they need to turn in order to work correctly and not break on you
 
Yeah, I was running them pretty fast. 1800 rpms I think, but I'd have to double check what speed my bridgeport is capable of in 3rd high. I didn't have any trouble with the first hole. I think I may have gotten a piece of aluminum stuck to the end of the bit. I cleaned the chips off, but the second hole just didn't seem to drill as easy as the first, and then I heard the crunch :(
 
Making 6 to get 2 strikes a resonant chord. I am trying to make 3 heads for a Tiny IC engine and have an impressive (well, I am not impressed) collection of sinkers for when I give up and go fishing. But I am pleased to know that you are making progress. Dad will be pleased.

Jim
 
Yeah - making practice parts is very familiar territory for me too.. lots of those frames in the scrap aluminum drawer too. Also - drilling small holes in stainless is really hard due to the stainless work hardening if you pause just a moment. Lots of broken drills so I gave up pinning the joints. I ended up remaking my crankshaft without pins (needed to start over due to craters left behind from drilling attempts) and its holding up quite well to abuse.

Mike
 
The time is flying by! Between Christmas parties, decorating/cleaning the house, and working on my wife's present it seems like I never get to the shop. Last night after the kids' pageant at church I snuck out for a couple hours of work.

I machined a blank for the connecting rod big-ends. I turned two ends of a piece of 1/2" brass rod to .160" and bored the hole for the rod. Then I flycut two sides until the whole thing was 3/16" thick. now I can cut off the little pieces of the connecting rods and make the big pieces from what's left and they'll match up (I hope).

I also went ahead and pinned the cranks. I'm a worrier, and I knew if I didn't I'd always be waiting for the loctite joint to fail. If it was just for me that'd be fine, but this is a present and it's gotta stay together. Went quite smoothly actually. I bought some small (.059") stainless brad nails at the hardware store, and I drilled all 4 joints for a slip fit and used 680 loctite to glue the pins in. Once it's dry I'll nip off the ends of the pins and then take a few thou flycut off both sides of the cranks to make the pins disappear.

So much to do still, though :eek:

Connecting Rod Big End Blank.jpg


Pinned Cranks.jpg
 
C'mon Leatherman, you can do it!! Just be VERY careful making interrupted cuts on those crankshafts (how do I know?).

Jim
 
Woohoo, two nights in a row I manage to get in a little shop time. I flycut the sides of the cranks to smooth out the pins, and then finally cut out the middle of the crank with a small endmill. I also made some good progress on my pair of connecting rod ends, shown below the cranks.

2012-12-17_21-04-06_57.jpg
 
Well, I'm still plugging away on this. As I mentioned, I won't see my Dad until Saturday so there's still a chance. Things haven't gone quite according to plan, and I've left a lot of the 'fiddly' stuff until now, so progress is slow. I have gotten a lot of good work in the past few days. I finished the flywheels with the holes/chamfers, tapped the hubs for setscrews, made the connecting rod (a bit different since I'm using a graphite piston), tapped both ends of the cylinder, made the head, and cleaned/polished some of the finished parts. I've still got most of the valve-train to make, and tomorrow is basically my last real day to work on this, so we'll see what happens.

CIMG6051_zps10d94c13.jpg
 
Hi ya J L,
I have just got back from a short break and have discovered you have really got on with the build, did you make your presenting time? now i have the "poppin" bug and have started to build a couple just because they look and sound great, i have managed to make the barrels and pistons so far, mine are all brass as that is what i had on hand so now i just have to keep the focus on getting the rest of the parts up also my standard will be steel as once again that is what i have on hand.
So i hope you got yours done on time,
as for me, I hate time constrictions like your build ha ha.
cheers
Gabby
 
I did present it to my Dad, but unfortunately it wasn't yet a runner. I got the whole engine finished, but I didn't have time to make a burner or get it mounted to a base yet. I tried running it with a BIC lighter but it wasn't happening. Here's the engine as it sits now:

CIMG6059_zps2eaf9e8b.jpg


CIMG6058_zpsc3d83c85.jpg


It makes a decent 'pop' when you spin it over but it wasn't really even trying with the lighter. I suspect that even once I finish a burner it will need some fiddling. The current valve is .003" steel, the .002" I used for the first one warped with I tried running it. There were a lot of surprising little headaches at the end. Threading the 1/16" rod to #0-80 was tough, and so was the cam (surprisingly). I ended up making the cam out of aluminum because it was easier to shape the profile on, and I made a ball-bearing follower instead of the steel roller in the plans.

The whole engine turns very very easily. Easily enough that the crank will always fall back to the rod end when it stops. I got it "running" with a straw jammed into the head and blowing into it in time, so I think I can make it run the "right" way eventually.

The saga continues!
 
See, I knew you could do it! The Poppin looks superb. What was Dad's reaction?

Happy New Year (tomorrow)

Jim
 
Wow I hope your dad can see past the "not running yet" thing 'coz that looks cool and I guess by now it is a runner.
Cheers
Gabby
(dunno about the counter sunk screws on the head though)
 
Haha, I knew someone would notice the screws. The hardware store ran out of #2-56 x 1/4" panhead screws so I put those on just to get it together. I'm replacing them before it goes back to him.

Nope, not a runner yet. I'm working on a nice wooden base and a burner before I try tweaking it enough to run.
 
Hi ya J L, Sorry for pointing out the obvious, good idea to make the burner for the engine then it would have the right volume of heat (more than a bic lighter) and with luck you may not have to tweak much at all.
Happy new year
Gabby & family
 
Well, sadly I have to report that at this time the Poppin still does not run. It does spin longer with a flame than when simply spun by hand, so I can assume that it is sort of trying to run, but alas no sustained running. I have two things I need to try. I'm going to make a small riser for the engine so I can get the flame closer without hitting the valve rod. This is actually called out in the plans, but I didn't have the time or see the necessity before this. I am also going to re-make the valve again and polish the cylinder head more finely and make sure I'm getting a good seal there. I know I'm getting a fairly good seal because if I spin the engine backwards, such that the valve shuts when the pistons is approximately half way down the cylinder, the engine stops turning in less than 1 revolution due to the suction. I thought this was enough to make it run, but apparently not.

On the issue of timing, I have tried many possibilities but am always open to suggestions. I notice that if I advance the timing too far the engine will stop itself much faster even when turned by hand, from the suction against the closed valve before piston reached BDC. The engine does not even attempt to run at this setting. If the timing is retarded too far, such that the valve doesn't close until nearly the bottom of the stroke and then remains closed for 75% of the return of the piston, the engine spins very freely by hand but makes a strange wheezing noise from the piston pushing air past the valve. I assumed this was too far retarded, and adjusted the timing to a sort of sweet spot that offered the most revolutions when spun by hand before the wheezing occurred.

At the moment I'm running my burner on white gas (Coleman fuel) which is blackening the cylinder had a bit but has not caused any residue inside the engine. I'll dump it out and change to pure alcohol as soon as I find some.
 

Latest posts

Back
Top