


arnoldb
Well-Known Member
- Joined
- Apr 8, 2009
- Messages
- 1,792
- Reaction score
- 12
A year ago this same weekend, I pulled my finger from you-know-where, and built my first running engine
I thought a celebration was in order, following the same rules: Build an engine from start to finish in one weekend. I was wondering whether to build a wobbler of my own design or one of Elmer's ones and mentioned this to Rob Wilson. He promptly suggested Elmer's #8 - Scotty. This turned out a good suggestion (Thanks Mate ;D), as this would also be my #8 engine, and would give a good workout to the new skills I learned in the past year, as well as make use of my significantly improved tooling arsenal.
So I started, and finished the #8 ;D. It took a bit of planning; some parts had to be made before others to allow loctite to cure overnight and so on, but I worked out a sensible approach, and collected materials. This is not a full build log like I usually do; most photos are of finished components, but I did add one that I thought worthy as a tip.
Finished engine photos and video is at the end of the post.
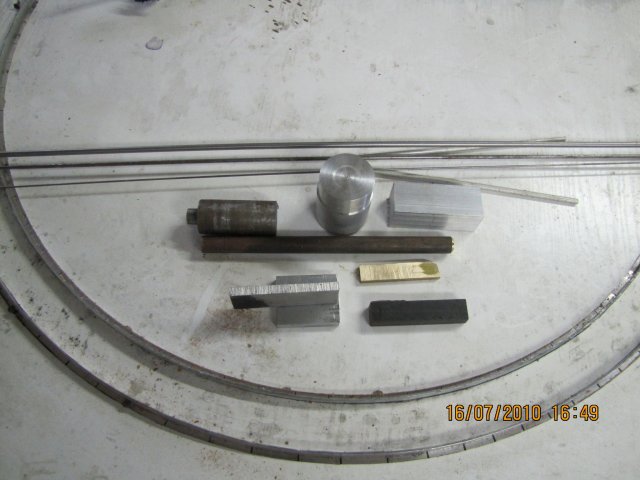
Friday afternoon after work started with this bunch o' bits:
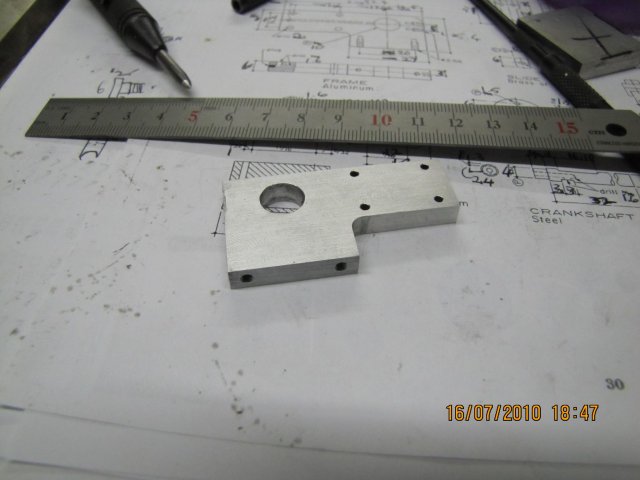
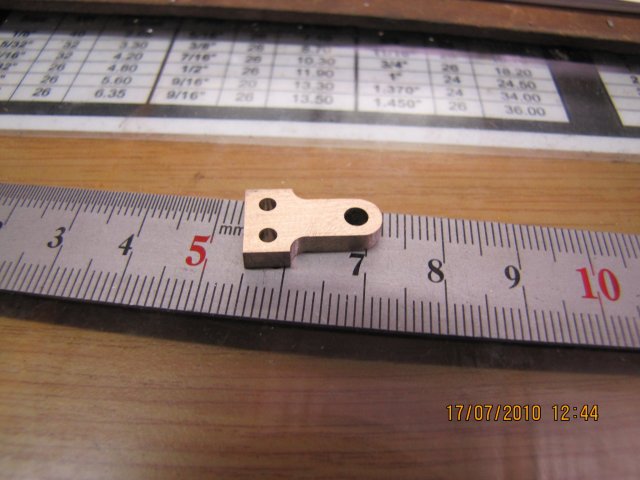
One of the bits of 6mm ali plate was machined into the engine frame:
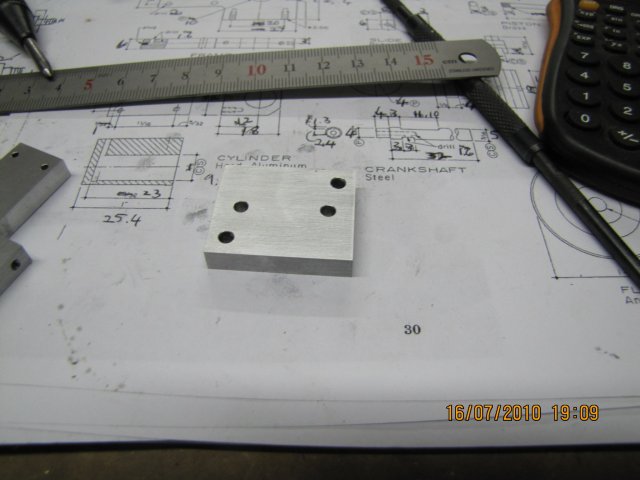
Another bit of ali became the base:
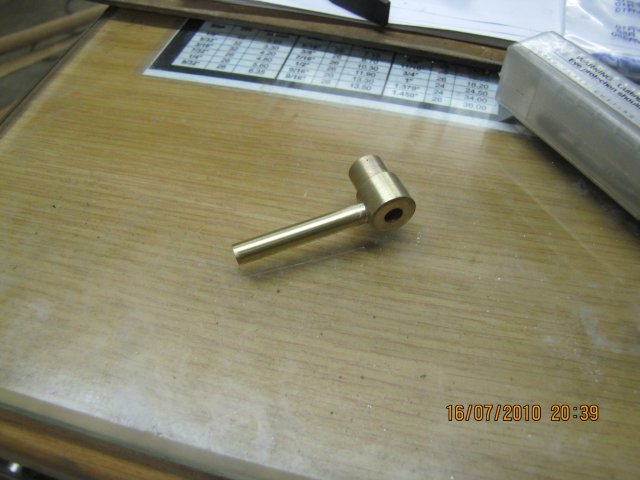
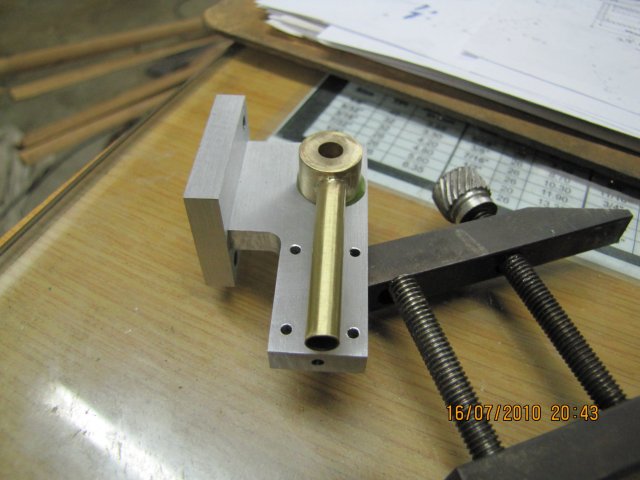
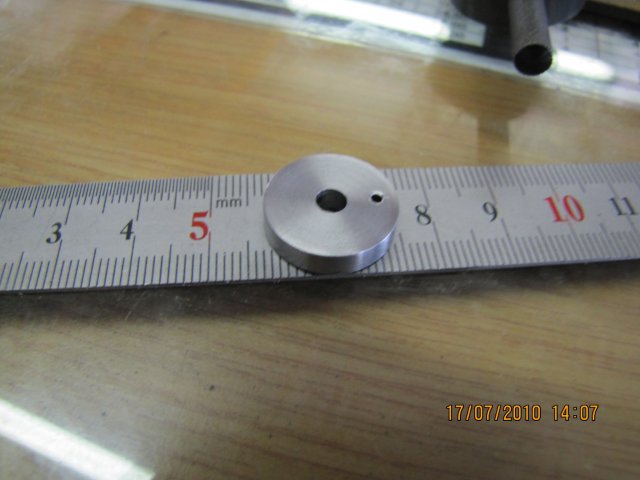
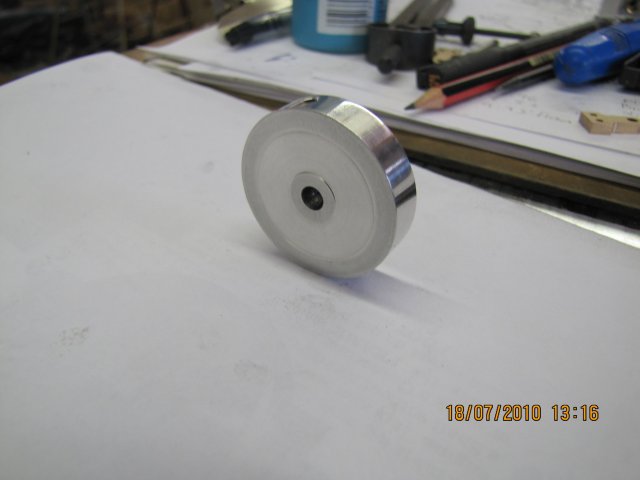
Then I turned the bearing, cross drilled it for the air supply passage and silver brazed a bit of 5mm brass pipe to it:
Stopped work for the evening with the bearing pressed into the frame with a bit of high strength retaining compound to cure overnight:
Saturday I started by cross drilling the steam passage through the frame and bearing, and made a plug from ali to close up the open end on the frame:
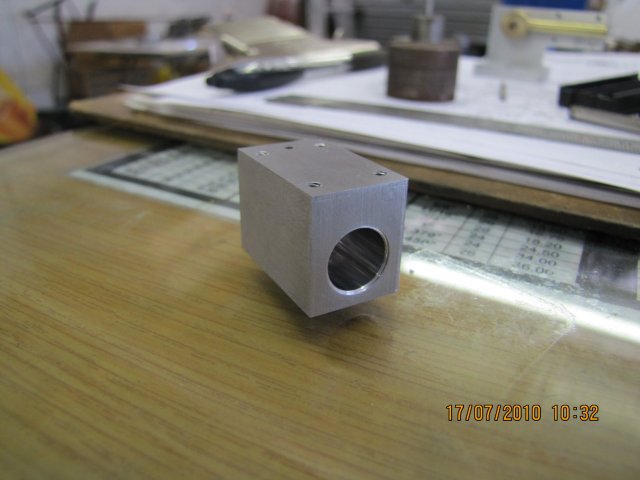
A while later, the cylinder block followed:
Next the piston and rod; as the rod I had available was 3mm music wire, I didn't bother to thread it for screwing into the piston like Elmer is wont to do; I just drilled the piston center on size for the rod, cleaned everything thoroughly, and silver brazed the rod to the piston; much quicker!:
The rod guide followed next; this is the only part I made a booboo on and had to re-do it:
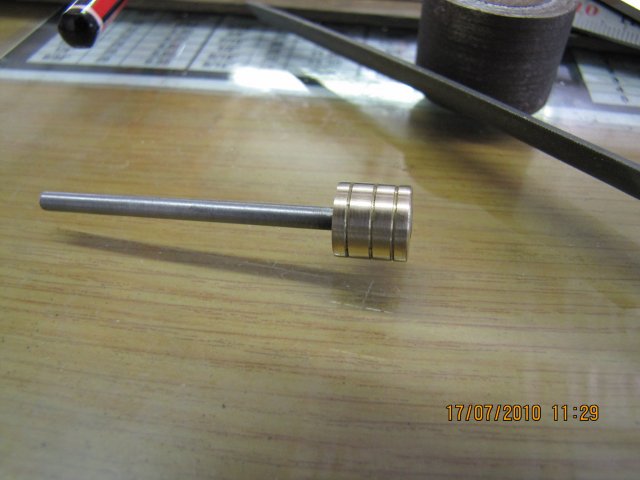
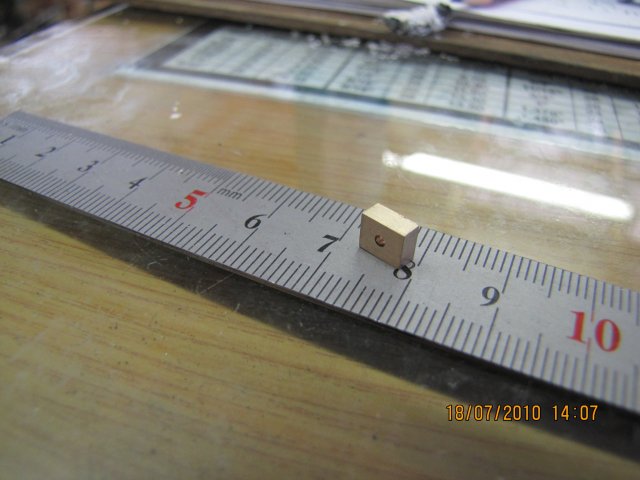
The crank disk followed:
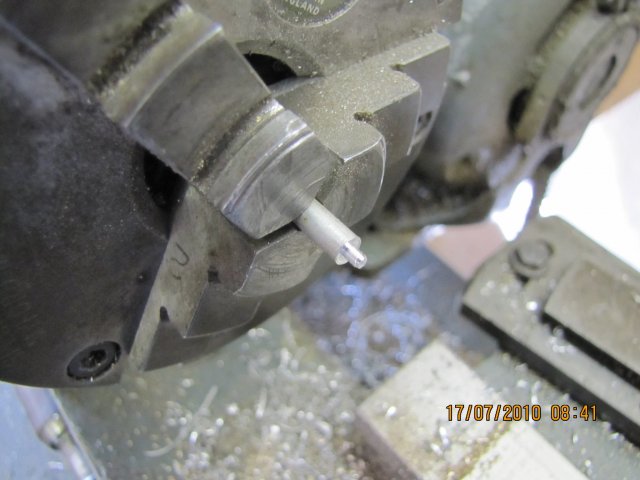
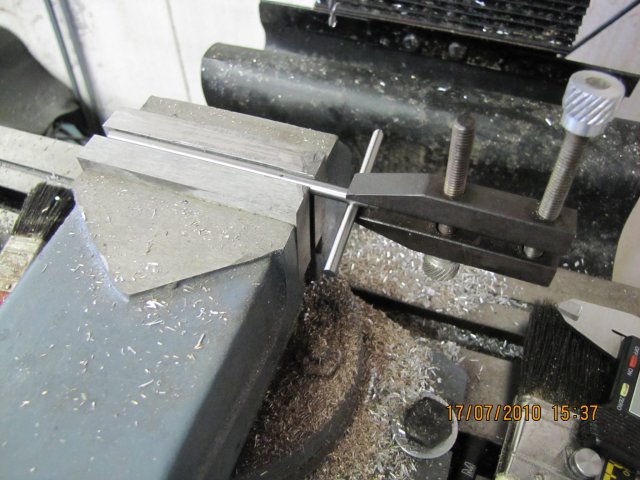
Next I started on the main shaft; it had to be drilled for a length, and two flats machined on it 180 degrees apart to make the valve for intake and exhaust. To make sure the two flats were 180 degrees apart, I clamped a bit of rod to the first flat after I machined it, and turned in the vise; it was then easy to check by measuring down to the mill table that both ends of the clamped rod was equidistant from the table:
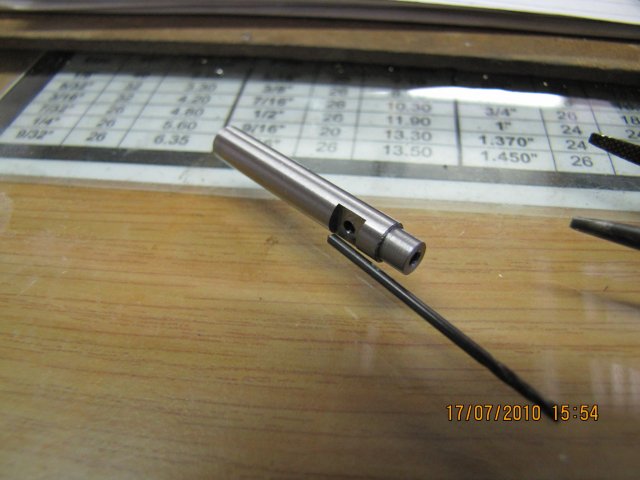
The finished shaft; poor picture, as it does not show the longer flat at the back...:
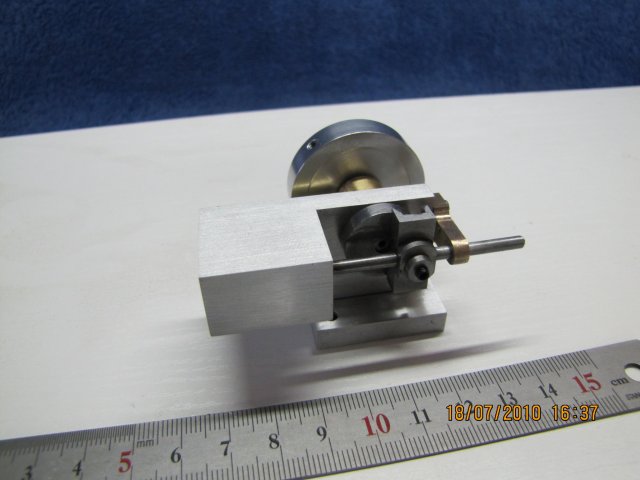
While the going was good, I milled and then turned the yoke from a bit of HRS and stopped for Saturday:

This morning I made the flywheel after I re-made the faulty rod guide:
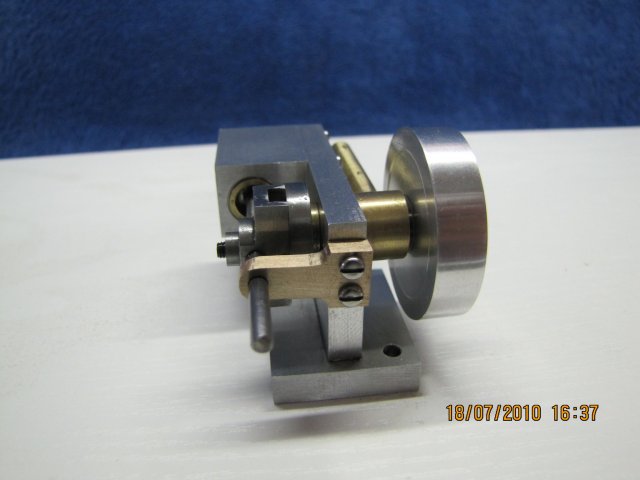
The slide block was made from a bit of phosphor bronze; I didn't bother to lay it out; just used direct readings from the mill and a couple of calculations - it came out spot-on ;D:
Then I assembled everything, and had a bear of a time to get the engine to run. I traced some binding to the yoke which was just a tad tight on the crank disk; some sanding on emery relieved this. The piston was also a bit tight in the cylinder - it fit perfectly yesterday, but the cylinder block was a lot colder today, and had shrunk enough to cause a bit of binding, so I took some more metal off the piston with some fine emery. Then I added copious amoints of oil everywhere, and turned the engine over for a while with the main shaft gripped in an electric hand drill. After a while, things loosened up nicely, and the engine started on air - though it required about 20 psi. After another 20 minutes of running, it was down to less than 5 psi to keep ticking over.
If anybody want to build this engine, I'd suggest a steel / cast iron / brass flywheel; the aluminium one appears a bit light. I think I'll make a steel flywheel at a future date for the engine, as it is very near to being breath powered - it just needs a bit more momentum.
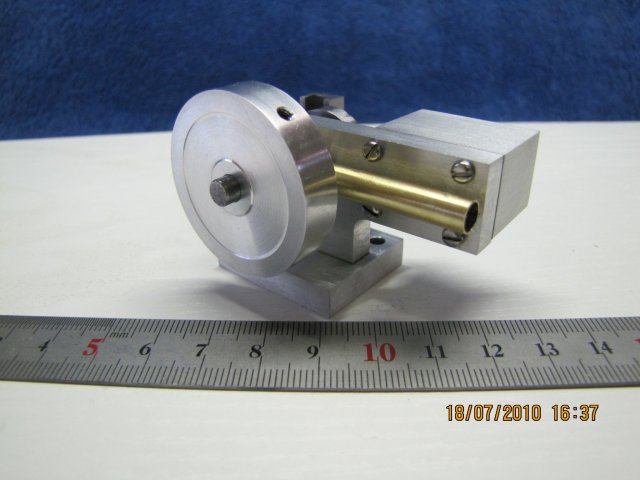
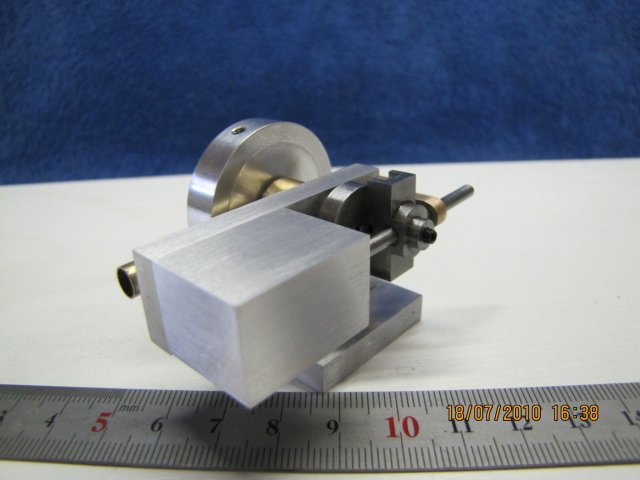
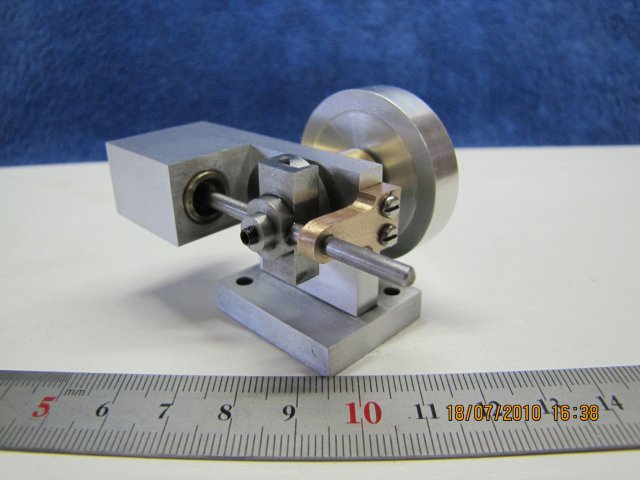
Photos of the completed engine:
And the video; this engine is not counter balanced, so it needs something solid to hold it down; I used a small drill press vise:
[ame]http://www.youtube.com/watch?v=C8YMhDmRwVo[/ame]
This was a nice personal challenge ;D - next up I'll make a boring head, and then I'll notch things up with either an IC engine or a flame gulper.
Many Many thanks to all the good members here on HMEM who have contributed your knowledge and experience - directly and indirectly !
Thanks for checking in !
Regards, Arnold
I thought a celebration was in order, following the same rules: Build an engine from start to finish in one weekend. I was wondering whether to build a wobbler of my own design or one of Elmer's ones and mentioned this to Rob Wilson. He promptly suggested Elmer's #8 - Scotty. This turned out a good suggestion (Thanks Mate ;D), as this would also be my #8 engine, and would give a good workout to the new skills I learned in the past year, as well as make use of my significantly improved tooling arsenal.
So I started, and finished the #8 ;D. It took a bit of planning; some parts had to be made before others to allow loctite to cure overnight and so on, but I worked out a sensible approach, and collected materials. This is not a full build log like I usually do; most photos are of finished components, but I did add one that I thought worthy as a tip.
Finished engine photos and video is at the end of the post.
Friday afternoon after work started with this bunch o' bits:
One of the bits of 6mm ali plate was machined into the engine frame:
Another bit of ali became the base:
Then I turned the bearing, cross drilled it for the air supply passage and silver brazed a bit of 5mm brass pipe to it:
Stopped work for the evening with the bearing pressed into the frame with a bit of high strength retaining compound to cure overnight:
Saturday I started by cross drilling the steam passage through the frame and bearing, and made a plug from ali to close up the open end on the frame:
A while later, the cylinder block followed:
Next the piston and rod; as the rod I had available was 3mm music wire, I didn't bother to thread it for screwing into the piston like Elmer is wont to do; I just drilled the piston center on size for the rod, cleaned everything thoroughly, and silver brazed the rod to the piston; much quicker!:
The rod guide followed next; this is the only part I made a booboo on and had to re-do it:
The crank disk followed:
Next I started on the main shaft; it had to be drilled for a length, and two flats machined on it 180 degrees apart to make the valve for intake and exhaust. To make sure the two flats were 180 degrees apart, I clamped a bit of rod to the first flat after I machined it, and turned in the vise; it was then easy to check by measuring down to the mill table that both ends of the clamped rod was equidistant from the table:
The finished shaft; poor picture, as it does not show the longer flat at the back...:
While the going was good, I milled and then turned the yoke from a bit of HRS and stopped for Saturday:
This morning I made the flywheel after I re-made the faulty rod guide:
The slide block was made from a bit of phosphor bronze; I didn't bother to lay it out; just used direct readings from the mill and a couple of calculations - it came out spot-on ;D:
Then I assembled everything, and had a bear of a time to get the engine to run. I traced some binding to the yoke which was just a tad tight on the crank disk; some sanding on emery relieved this. The piston was also a bit tight in the cylinder - it fit perfectly yesterday, but the cylinder block was a lot colder today, and had shrunk enough to cause a bit of binding, so I took some more metal off the piston with some fine emery. Then I added copious amoints of oil everywhere, and turned the engine over for a while with the main shaft gripped in an electric hand drill. After a while, things loosened up nicely, and the engine started on air - though it required about 20 psi. After another 20 minutes of running, it was down to less than 5 psi to keep ticking over.
If anybody want to build this engine, I'd suggest a steel / cast iron / brass flywheel; the aluminium one appears a bit light. I think I'll make a steel flywheel at a future date for the engine, as it is very near to being breath powered - it just needs a bit more momentum.
Photos of the completed engine:
And the video; this engine is not counter balanced, so it needs something solid to hold it down; I used a small drill press vise:
[ame]http://www.youtube.com/watch?v=C8YMhDmRwVo[/ame]
This was a nice personal challenge ;D - next up I'll make a boring head, and then I'll notch things up with either an IC engine or a flame gulper.
Many Many thanks to all the good members here on HMEM who have contributed your knowledge and experience - directly and indirectly !
Thanks for checking in !
Regards, Arnold
