3 1/2" Gauge 2-4-0 Locomotive

Home Model Engine Machinist Forum

Help Support Home Model Engine Machinist Forum:

This site may earn a commission from merchant affiliate links, including eBay, Amazon, and others.
Beautiful sound. Ought to be in a sound machine for sleeping or meditating.
 
hi, fantastic motion, really nice. I am looking at buying a half done one of these, with motion and frames done, boiler aswell, any advice would be welcome
 
Stew,
I can't tell you how pleased I am to see a 3.5"ga Jumbo project come alive again. When I first became active in live steam, as a teenager, my first mentor had just about completed an LBSC Jumbo chassis and I was inspired. Unfortunately he and those who controlled our local club decided to go 7.5"ga-only, and neither of us were in a position to build our own track facility, so his Jumbo was hung on his workshop wall and mine was never begun. Some years later I recalled that chassis and went back to see if it was till there with perhaps the notion of completing the locomotive but it had long since been traded away.

That mentor was a meticulous craftsman and superb machinist having spent his life as an aircraft and later aerospace machinist and inspector and as I recall there was an error in the drawings, which distressed him greatly, because it caused him to have to move a screw hole in the frame plates. My recollection is that it was either a screw hole for a valve gear hanger shaft or an upper crosshead guide support. IIRC the hole had to be moved forward.

A few years ago, Aster Hobby, Japanese maker of fine Gauge 1 locomotives, issued the Jumbo in three liveries and the entire production was quickly sold out.

Anyway, fine work so far and I'll be watching with great interest for future notes on your progress.


JUMBO2.jpg


JUMBO2.jpg
 
Hi Chaps

Thanks for your kind remarks.

Bit of an update on my problems with the slide valve, I posted a summary of the problem on the Model Engineering web site, and got some good responses, top and bottom of it I shouldn't have changes the slide valve sizes, what I've done is set it for running on compressed air, when on live steam I should keep to the drawing sizes, the travel I've got with the slide valve is correct, its just me not getting the setting correct.

For now I've left things alone I'll pick it up again in ernest in a couple of months, in the mean time I've made a start on the lubricator but this is a bit of a fill in job around another project i have underway.

Hi ROBSO

Only advice I can give is to be wary of the boiler if its home made, if its a commercial boiler with all the certification then go for it they cost about £1000. Hope this helps

Cheers

Stew
 
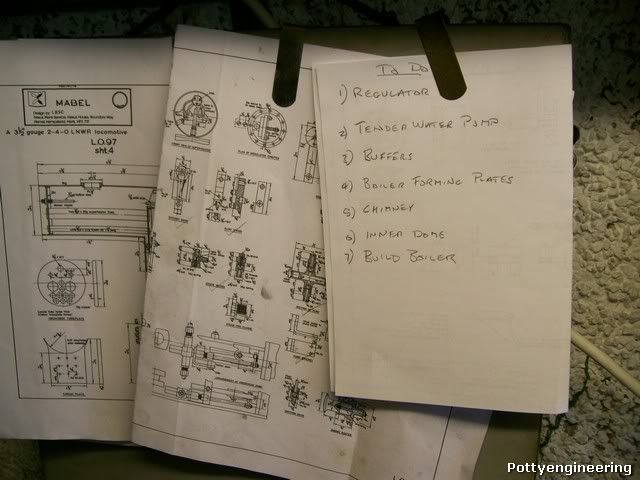
Her we are again as happy as can be etc etc:-----

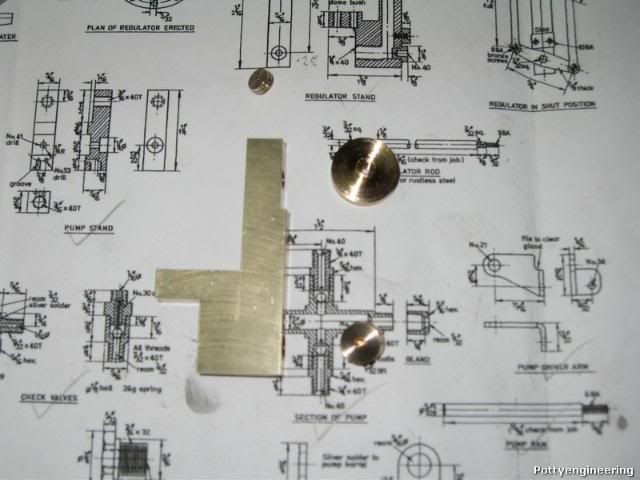
I thought I'd make a start on the lubricator for my loco.

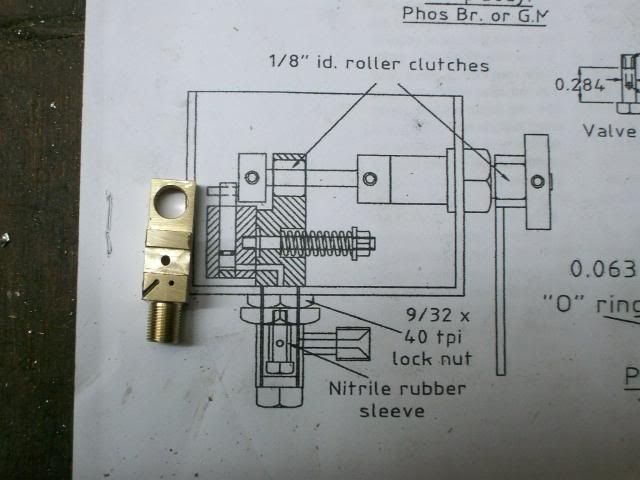
The design as drawn is a ratchet driven osilator pump similar to the little engines we make but instead of driving its driven, so you can use it to pump. I'm going to follow a design recently posted in Model Engineer (22nd May 2009) that uses a much more efficient friction clutch instead of a ratchet and instead of having sprung balls for the none return valve uses a Nitrile rubber valve like the bicycle valves.

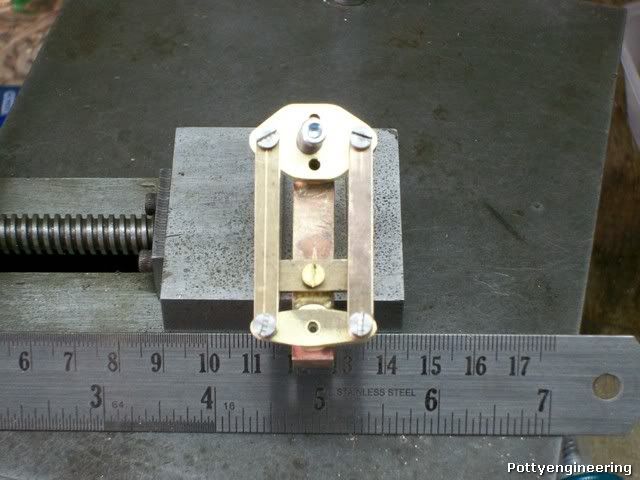
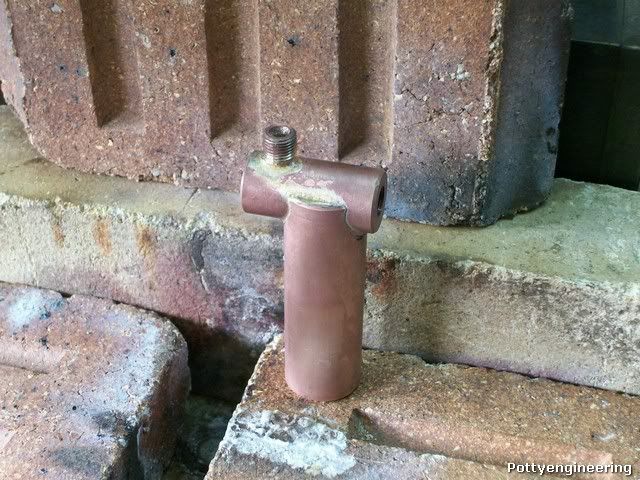
The first bit I made was the stand.

100_2587.jpg


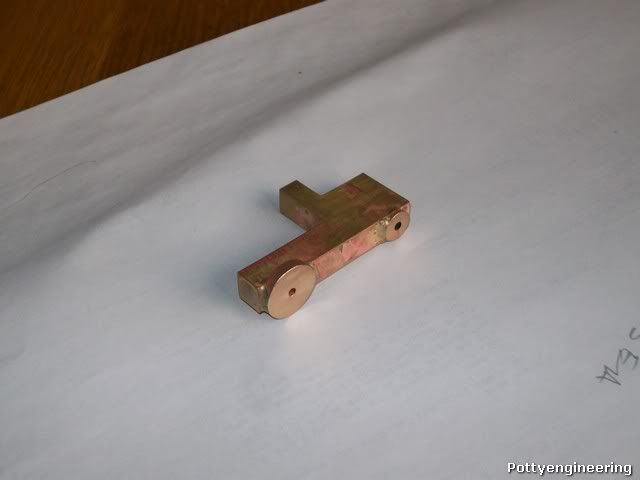
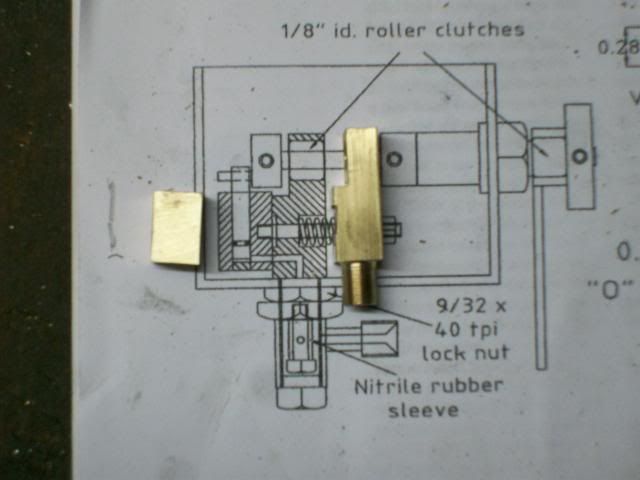
The diagonal groove is where the oil is sucked up into the piston, it then swings over and pump out the other hole on the return stroke.

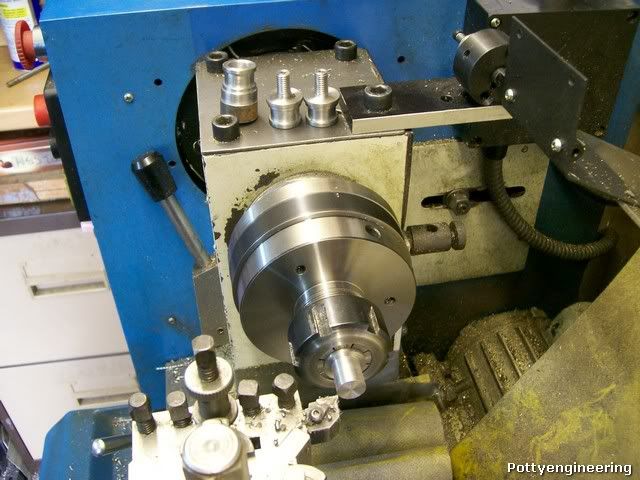
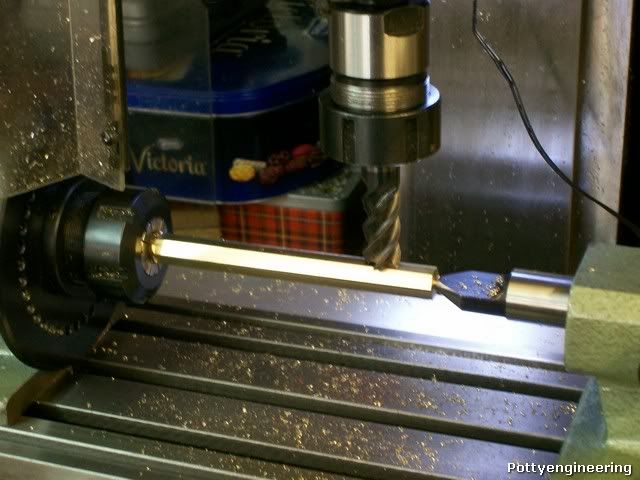
Next bit to be made the piston.

100_2589.jpg


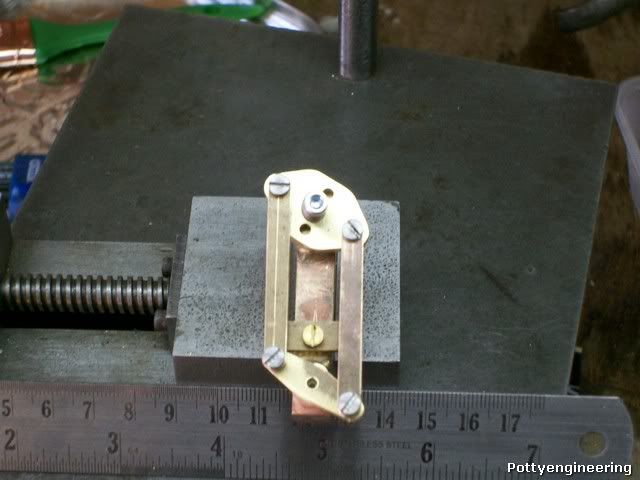
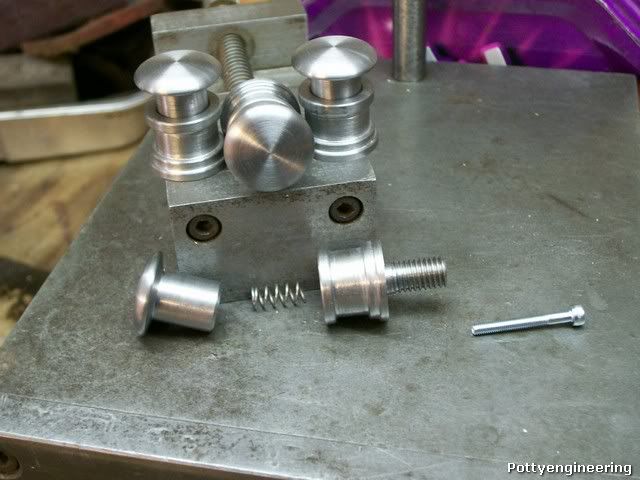
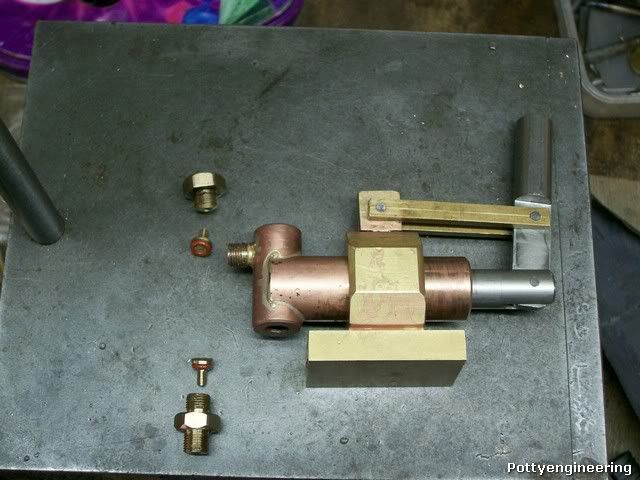
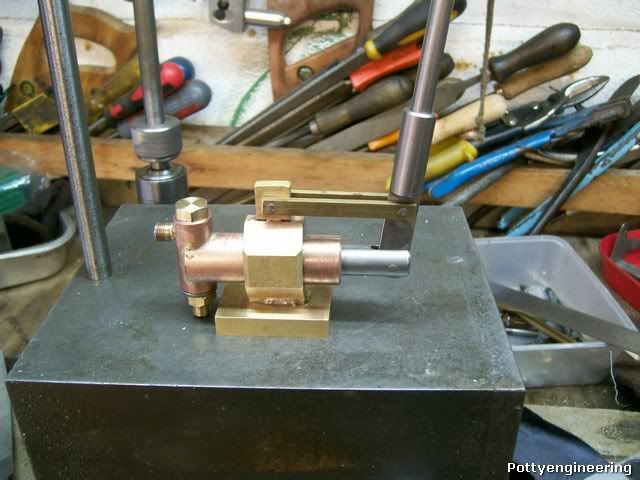
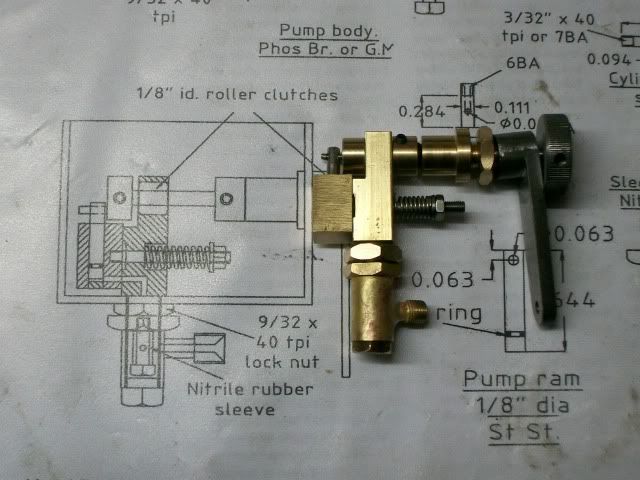
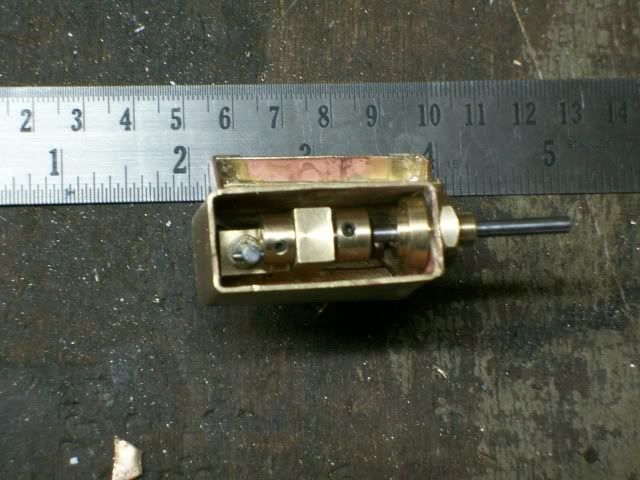
I wasn't too happy with the O ring on the piston, I'd seen another build where the chap had fitted a small stuffing box on the cylinder, so I re-made the cylinder to this design and used PTFE tape to stuff the gland, it seems to work Ok, so this is it all together.


100_2821.jpg


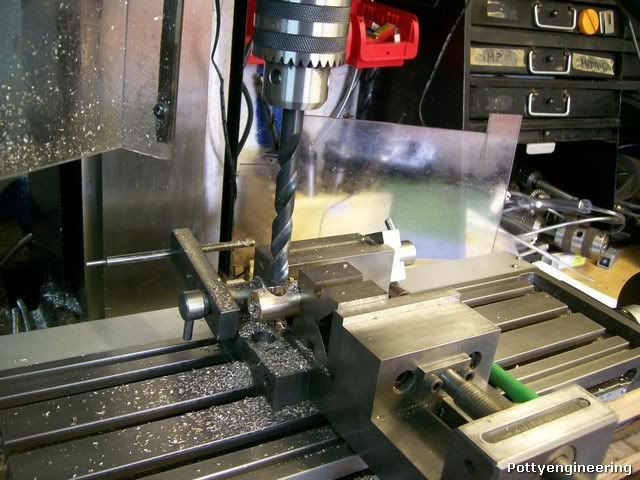
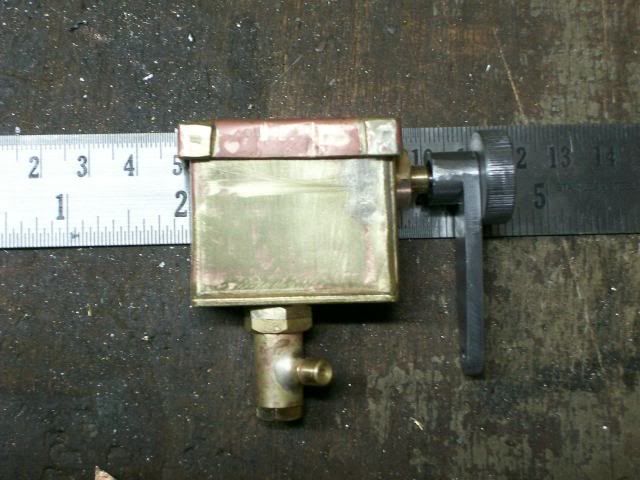
Fabricated an oil tank up, my first attemp from copper was a disaster I think the copper was too thick to get nice neat bends, so re-made out of some nice thin brass I had, this is the lubricator squeezed into the the tank.

100_2823.jpg


100_2825.jpg


Tried it out under drill power I won't run it under loco power with the ratchets until I've completed the water pump then I'll strip everything down and fit both at the same time. This is it running.

[ame]http://www.youtube.com/watch?v=9bVT-Xk5m1s[/ame]


:big: :big: :big: :big: :big: :big:

Have fun

Stew

 
Good going Stew Thm: - thanks for the update :)
I haven't thought of using an "oscillating engine" as an oil pump :big:

Regards, Arnold
 
Thanks for your feed back Arnold

Oscillators are used in a lot of pumping applications, water into boilers, air for ballast tanks in submarines etc etc.


Have fun

Stew
 
Well the loco has been on the back boiler for long enough and I keep getting the od stickpoke about it but I keep getting and side tracked onto other engine builds, so decided that I would have to do something stern to get myself back on track:-


RITE A TO DO LIST

This is it pinned up in the shop, now that's stern stuff *knuppel2*

100_3420.jpg


First part to get started on the regulator stand, you can get a casting for this but decided it could be easily fabricated, its mainly brass with a phos bronze port face.

These are the bits for the stand machined.

IMG_2060.jpg


I then silver soldered the bits together, I was going to take a picture of the soldered stand:p but disaster struck I'd had it in the pickle for 1/2 hr took it out and went to wash it off in the garden pond.

Yes that's correct I dropped it in the pond :redface2:

I've currently got the pump going emptying the pond, it has got me a few brownie points the boss's been on about cleaning the pond out for ages, I haven't told her why I'm doing it. Rof}

A wet and muddy Stew

 
Found it

100_3424.jpg


:big: :big: :big:

Stew
 
:big: Stew; Did you really have to find a reason to clean the pond THAT badly ? ;D

Those To-Do lists have a habit of growing... DAMHIKT. Good start on the regulator stand though :)

Regards, Arnold
 
Hi Stew;
I barely remember this from some months ago. It wasn't that long, I just have a short memory.
It's a beauty, and glad to see some more progress!

I like your new watermark, buddy.
: )

Dean
 
Thanks Chaps pond sorted.

Bin somewhat distracted this week any way got the regulator part finished as it got to fit on the boiler it will nead a bit of fetleing when the boilers built.

So her it is in the Closed position.

100_3430.jpg


And Open

100_3432.jpg


As its out of vew in the boiler i didn't bother with bling but its got it where it counts

Thats one struck off the to do list.

Cheers

Stew
 
Spent a very pleasant day visiting Dave Stilldrilling and vewing some of his engine collection.

Thanks for you'rs and Mrs Stilldrilling,s hospitality Dave I realy enjoyed my visit.

Then job realy hit the buffers well four of them to be correct for the loco just a simple turning job but one that had to be done.

100_3435.jpg


And her's the finished job

100_3437.jpg


Thats another one off the To Do List

Work has now progressed onto the tender hand pump.

For the body I used a bit of Phos Bronze tubing I picked up at the scrappy it was one of those chance finds, luckily the bore cleaned up nicely with a 1/2 " reamer.

Hers the set up for drilling the pump body to take the valve chest.

100_3440.jpg


And her it is all silver soldered together.

100_3441.jpg


Have fun

Stew
 
Absolutely brilliant,the loco and the build,thanks for sharing
Don
 
Thanks Don your comment is greatly appreciated.

On with the tender hand pump.

I needed some Hex bar to make some of the fitting I didn't have any but I have quite a bit of ally bronze, so using the indexer with its tail stop I made it into some 1/2 hex.

100_3447.jpg


I've made a few pump using balls and was never to happy with them so decided to make this one with poppet valves.

Her it is

100_3452.jpg


Tested it out at first it didn't do much then I remembered that they like a bit of back pressure so stuck my finger over the end that did the trick got a eye full of water, made a little reduction cap with a 1mm hole just to test it out, it gave a nice jet over 5 M across the garden.

Her's the completed pump

100_3455.jpg


Thats another strike off the To Do List

100_3456.jpg


Next job up the chimney I've bought a nice bit of 1 1/2" Sq brass for this job, and then I can't escape it any longer I'll have to make a start on the boiler.

Have fun

Stew
 
Stew,
Good show . . . would that I should be making such progress. On the regulator, I have a thought for you. Have you enough port cover in closed position to nick the holes a bit? If you do, a small triangular nick in the leading sides will pre-admit a whisp of steam and reduce the tendency of the engine to make jackrabbit starts when opening up. I've seen some ports done as full teardrops although my experiments tell me that this admits steam almost as quickly as a drilled hole. I've recently finished off a Stroudley type regulator (wot you got there) and I drilled a couple of small pre-admission holes in my plate to make graduated steam admission so as not to be quick to spin the wheels. It will be some time yet before I will know if the holes are too large, too small, or just right.
 
Hi Harry

I've made the top port of the regulator tear drop shape as you suggested, thanks for passing on the tip, I read some ware that LBSC drilled small pre holes in some of his regulator builds.

There seems to be so many different regulator deigns, I've no experience of any of them so just followed the one in the plans as it seamed a simple design.

As I said for the pump I went away from the plans and worked to a design from an article in Model Engineer (4346 27th Feb 09) by Neville Evans, I also used his design for the mechanical lubricator, mainly to get away from ball valves.

Cheers

Stew


On with the Chimney, you can buy a casting for this but I just find the hassle of castings too much, far easyer to make it from solid.

Visited Macmodels and picked up a chunk of 1 1/2" squ free cutting brass I asked for 4" but he gave me a good 6" for the cost of 4".

Her it is in my self centering four jaw, both ends faced with a running centre.


First the chimney was roughed out, then with the help of some radius gauges I ground myself up some form tools.


And her it is with the OD finished, just got to stick a hole down the middle now.


Have fun

Stew
 
Hi Stew;
Your pump sure looks to be very robust. Nice job there.
The chimney is a thing of beauty! Pretty stuff. Good use of those radius tools.

Dean
 
Thanks Dean

Drilling the hole in the chimney small drill then bigger then bigger then 7/8 to take the copper liner.


Then part it off.

Now a bit of forward planning is required the chimney still needs the base flycutting to match the smoke box but I can't do that until I've made the smoke box, it will be an awkward shape to hold its got a 1 1/2 deg taper and all those radiuses and flanges to get round, to machine the taper I set the compound over, so without changing the compound bore out a collar at the same angle.


Split it and you've made a split collar that will perfectly match the chimney taper.

Her it is being used to clean up the base of the chimney after parting off, this will help when I come to set it up to fly cut the rad in the base to fit the smoke box.


Her is the chimney part finished with the copper liner and the collar I'll safely store them away.


That another off the list.

Stew


Latest posts

Back
Top