1/6 Galloway engine

Home Model Engine Machinist Forum

Help Support Home Model Engine Machinist Forum:

This site may earn a commission from merchant affiliate links, including eBay, Amazon, and others.

gbritnell

Project of the Month Winner!!!
Project of the Month Winner
Joined
Jul 16, 2007
Messages
2,986
Reaction score
1,055
I just recently finished building the 1/6 Galloway engine. Everything was made to print along with the needed corrections.
Now I'm trying to get it running, without much luck. The usual elements are correct, compression, ignition, timing etc.
My first question is:
Has anyone built one of these engines?
Are you using the Lunkenheimer style carb on it?
Did you have to make any changes to the spark port from the igniter cavity into the cylinder?
Is the carburetor extremely sensitive and did you modify the needle any to help it.
I've built and run many engines but this one has me stumped.
Any help would be appreciated.
gbritnell
 
I haven't built that engine but I have built a Domestic with that mixer. Everything was right on the engine but it wouldn't run. Turns out I was getting my compression from the mixer and the intake valve was sticking open. Polished the intake stem and it hasn't quit since.
 
George-

I have seen several people run their IC engines at shows on propane.
You could try that, and that would tell you if it is a carb problem or not.

Pat J
 
As Pat says the smaller ignitors can get too wet or soon coke up so propane helps stop this.

J
 
Hi George,
I built the 1/6 scale Galloway a few years ago. I've only have ever gotten it to pop a few times and thats it. Rebuilding the ignitor didn't help. I spent a little time with Dick Shelly at Names a couple of years ago and he related to me that he was having trouble with his 1/6 and he found it was the wiring to the ignitor giving him the trouble. If I recall correctly, it had to do with the type and size and length of the wire to the ignitor. He didn't know why but after changing the wire it ran fine. I haven't gotten back to mine yet, everytime I mess with it I get fustrated because I normally don't have much trouble getting my engines to run. Mine makes good compression and bounces over well but refuses to run. I suspect it is in the carb myself.
I think the next thing I will attempt will be to make a carb like is used on the Associated and see if that helps. I will probably make an adaptor to use a spark plug to eliminate the ignitor. Once I figure out if it is spark or fuel I'll know where I'm at. Just thought you'd like to know it's not just you having trouble. Good luck and please let us know what you find. Dave
 
Hi George,sorry you can't get that engine running, but I'm looking forward to your solutions so that I can get back to work on mine. I made my carb like the ones Phil Duclos used on a number of his engines. Not far enough along to even think about getting mine running.

karl
 
George-

If you have a model airplane engine carb laying around, or some other type of the approximate size that has proven to work well, you could try that as a temporary measure.

For model airplane engines, sometimes I put them on the electric starter and try several things while they are spinning. It is easier to get an engine running and tuned when is is spinning fast.

Sometimes those small carbs are sensitive to fuel levl in the tank, and either the carb overfills, or does not get a steady pressure.

I have used pressurized fuel systems on model airplane engines.

I would try the propane arrangement, since it should tell the story real fast.

Pat J
 
George

A friend of mine bought 1/6 scale at NAMES several years ago. It would run for a few seconds and then quit. There are a couple of us that go to shows together. At the Sandwich fair in the fall he brought the 1/6 along and two of us spent about three hours working on it. We got it going and it ran 6 hours a day for the next four days of the show. It appears to be built to the plans. What we found first was the timing was off, we set it to a bit before TDC by eye.
Also the latch system was not working. It appeared the Flywheel had moved. With a little trail and errror we got that going. Next the carb was really sensitive. we found a sweet spot at about 1 1/2 turns out. The gas tank is mounted such that it is above the carb, no check valve that we can see. The ignitor did not have the pull back spring on top (mount was in place but no spring) which we thought was going to be an issue, but it was not. It uses a 12 Volt battery, and the coil appears to be from a flouesent light. The engine ran at Cabin fever in 2010. It ran at every show we went to continuously until that same Sandwich fair in fall of 2010, on sunday it quit. The ignitor trip broke. It is in my shop for repair as I am using it as a referrence as I build my 1/8 scale.

So at least one of them works and works well.

By the way I was told by a builder who has built several Galloways, that the port from the ignitor needs to be opened up wide and that improves running.


Good Luck

Bob
 
Just one thing about using an electric starter on hit & miss engines, make sure they don't spin it up too fast to through the governor weights out and make the exhaust stay open! Sometimes better with a slower reving cordless drill.

Jason
 
George, just an idea. Not sure if it would help.

Jerry Howell used to say most carburetor problems are ignition.

I wonder if a set up like Bob Shores described in his book "Model Ignition..." for testing spark on a high tension ignition would work for testing igniter ignition.

It is a parallel circuit from coil to ground with an adjustable gap. The spark would jump at the place with the least resistance.

Bob explained that when adjusted right it would spark once at plug and next time at open adjustable gap due to resistance going up from heat at last place it sparked.

Picture is of self contained set up that made and shows adjustable spark gap. gary
ignitiontestsetup.jpg
 
Jason-

That is a good point, those electric starters for model airplane engines do spin at too high a speed for IC work.

The cone from the electric starter could be removed and used on an electric drill, and a temporary nose cone attached to the crankshaft.
They sell some nice brass nosecones for model airplane engines that fit the rubber insert that goes in the front of the cone on the electric starter, and these could easily be temporarily fitted to an IC crankshaft during troubleshooting.

Pat J
 
Pat, we're engineers, we don't buy brass nose cones when we can make a nice one ourselve ;D does not have to be a fancy aero shape just a 45degree cone will do the job

A simple one way catch that engages with the keyway on the end of the crank also works, same sort of fitting you get on a starting handle.

And definately don't use the rubber ring that goes onto an electric starter for use on cars as they spin the engine up 3 to 4 times faster than the direct method :eek:
 
George, You just made my day. After years of looking at your craftsmanship, I feel much better about my engines that I can't get to run
 
Hi Stan,
I'm glad I made someone's day. I thought I corrected all of the design and drawing errors when I was building this thing, apparently not. I suspect it's the carb as the igniter spark is great. I had reservations about the fuel being higher than the needle valve jet when I built it but if others have had success with this setup I guess it will just take more tinkering.
gbritnell
 
You don't need a cone at all to use the airplane starter. You can pull out the rubber insert and turn it upside down and it has a center hole to go over the prop nut and spin the prop directly. Do the same for the flywheel. It will work just fine.
 
George, as you know, I don't know all that much about carburation, but I understand gravity. I would stand to reason that once an engine would fire (if it fired), the intake vacuum, plus gravity on an elevated fuel supply would instantly flood the engine. A temporary fuel tank set up with the fuel level at or below the carburetor would verify if this is the cause of the problem.

This thread reminds me of my wild high school days. A bunch of us would get together for a Friday night drinking party. Every one stood around a garbage can and had a cold beer in hand. A can opener was passed around and each can was pierced on the bottom. We would then tip the beer strait up and pop the pull ring. This male bonding ritual was called 'shooting beers'. The gravity plus carbonation would force the entire beer down in a few split seconds. Great fun! This form of binging would continue as long as their was someone left standing. The winner of course was the last one left standing that didn't succumb to gravity, and end up on the floor! ;D

It could be a similar situation with the Galloway carburetor, but instead of carbonation it would be the intake vacuum.

-MB
 
Quote: "this is one of the weirdest posts i have ever made..................giving ideas to George Britnell............wow"

Yes, the absurdity of me offering anything useful to George does strike me, but then again, even a blind squirrel stumbles across an occasional nut in the forest every now and then, even if it is accidental.

Pat J
 
Metal Butcher said:
...'shooting beers'.

Had a buddy who could shoot six in under a minute. I tried it once and made a mess of my shirt ::)
 
Thanks everyone for the comments. Every day on this earth should be a learning day and I'll be one of the first to stand in line for an education.

At this point I guess I should 'come clean'. The orginal plan for building these engines was to make a machined engine for the buyer who didn't have the tools to do it. The buyer would then do the fine tuning, adjusting, cleanup, paint and polishing.

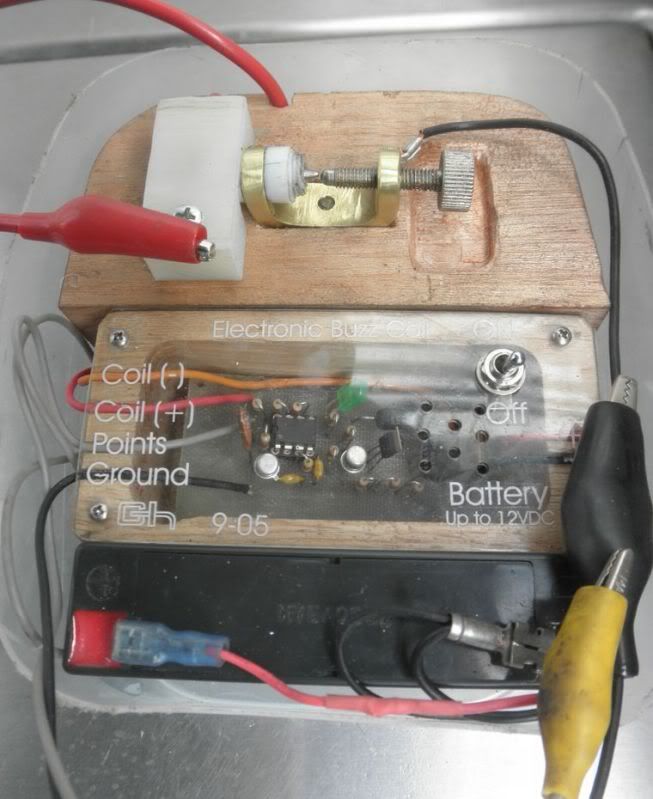
When I finished this engine for the fellows at Ministeam I was asked if I couldn't then get it running. I told them I could but that would add more time to the build and I didn't have a buzz coil or ignition setup for the igniter.

They made arrangements with Roy Sholl from S&S (ignition systems) to take over the engine so he could develop his ignition for the igniter. He would also make up a plug for the igniter cavity that would be tapped for a spark plug. Along with this he would come up with a discreet system for triggering the spark plug, (Hall effect or whatever). This way the builder who couldn't work with real tiny parts could skip the igniter and use a spark plug. Roy is going to document his work and I will then put it on the revised drawings.

Before Roy was given the engine I checked and double checked everything to make sure he wouldn't have problems with the mechanical parts, fit and finish, valve and ignition timing etc.

He started playing with the engine and could get it to fire now and then but not run consistently. This was also somewhat of a learning process for him with this type of engine. We talked back and forth to try to resolve some of the issues he was having. He said that it seemed like the valve in the carb wasn't holding the compression very well. I explained to him that it wasn't supposed to, with the intake valve closed there shouldn't be any pressure at the carb. At this point he said he didn't see an intake valve.

When I first saw the Galloways, kits and pictures I thought the same thing. Where the heck is the intake valve. Well it's actually underneath the rocker pedestal for the exhaust valve. It's a hollow cylinder with the pivot for the exhaust rocker at the top.

While he was trying to work the bugs out of the engine I told him that I would post on the model forums and see if I could get some help. Roy doesn't frequent these sites much. Rather than go through this long winded explanation I just though it would be easier to say that 'I' was having problems.

I got an email from Roy this evening and he said he finally got the engine running for several 3 minute stints. When he said the valve in the carb wasn't holding compression it seems like the intake valve had gotten a small piece of gunk under the seat and was allowing the compression pressure to go all the way back to the carb. He cleaned the valve and he said the engine compression was tremendous as it had been when I checked everything out. The problem he was having now is that the needle valve is so sensitive that about 1/16 turn will go from running to rich.

As some of you have stated the needle probably needs to have a much longer taper to it. I hate to keep harping on it but you would think the original builders would have documented this.

I'm sorry for the deceit but I just thought it easier to ask the questions myself. I will keep everyone up to date on Roy's findings so that anyone building one of these will have the best information available to them.

Thanks a bunch for all the thoughts and ideas.
George
 
Back
Top