1/4 scale V8, first project.

Home Model Engine Machinist Forum

Help Support Home Model Engine Machinist Forum:

This site may earn a commission from merchant affiliate links, including eBay, Amazon, and others.
Hi
Have you tried "cute pdf writer"? (freeware) It installs as a virtual printer,just select it from the printer drop down dialouge, and you can save almost anything as a pdf file.

Cheers

Les
 
keith5700 said:
Lakc, I've drawn up the valve gear but I'm not 100% happy with it. The only doubt I've got is if oil managed to get under the bucket tappets and form a hydraulic lock on startup, as there's nowhere for it to drain away at present.

I'll try and get a pic posted, although the only way I can think to do it, in my non-computerized brain, is to print it off the cad and photograph it.

Keith, excellent engine!!

For the hydraulic problem, machine a groove down one side of each bucket with a corresponding notch on the bottom. That way if any oil is trapped it can flow up and out of the groove.

To grab a photo of your CAD screen simply hit the 'prtscr' key (to the right of the F12 Key) on your keyboard then open Paint (start/all programs/accessories) and hit 'crtl + v'. Save the pic and your done.

What type of finish or process have you used on the Manifold, Intake etc.. ?
 
Wow ! this is looking great ! great to see you went down the quadcam road it will sound unreal!

keep up the great work!


Man, what a stunner!

Some beautiful engineering and machining there Keith.

 
Hi Keith,

How is your project?

I need to see more pictures!!! th_wwp

:bow:

Cheers,

Alexandre
 
Hello there.
Not much progress the last couple of weeks. Had a horrible mouth abscess so not felt like doing much. It's nearly cleared up so I'm back on it today.
Thanks for your interest.
 
Hi Keith,
I've being lurking and admiring a lot of really first class builds on here over the last couple of years, yours is up there with the best. Absolutely fantastic workmanship and eye for detail. Andrew
 
Long overdue update:-

I've been messing around with surface finishes, and outside bits, rather than making pistons etc. but that's the way I work, and it all has to get done eventually, so..

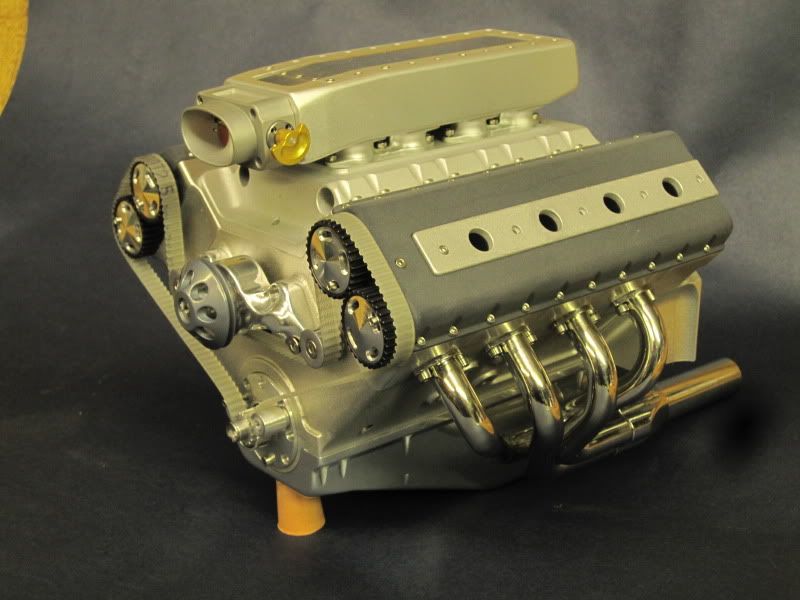
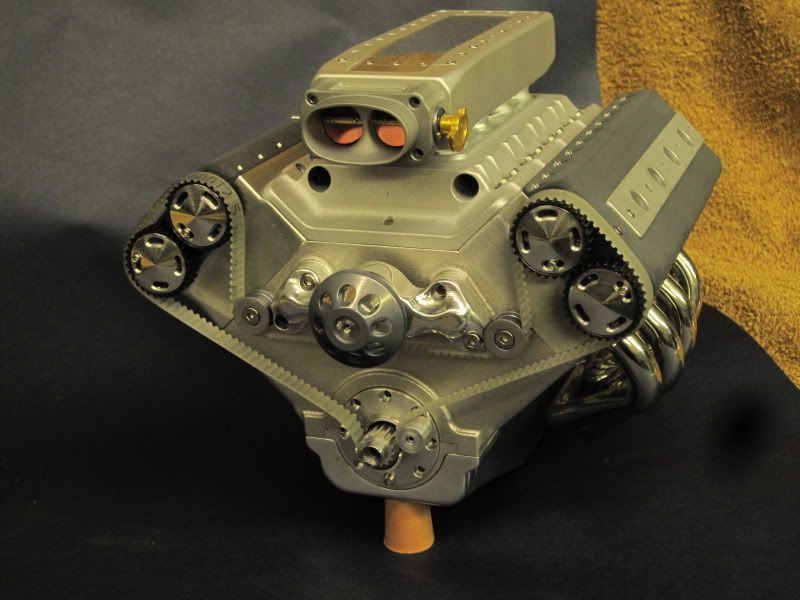
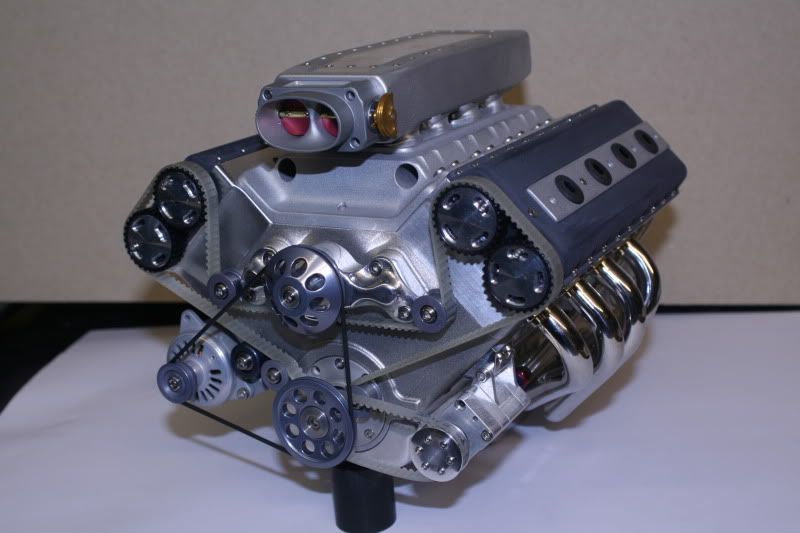
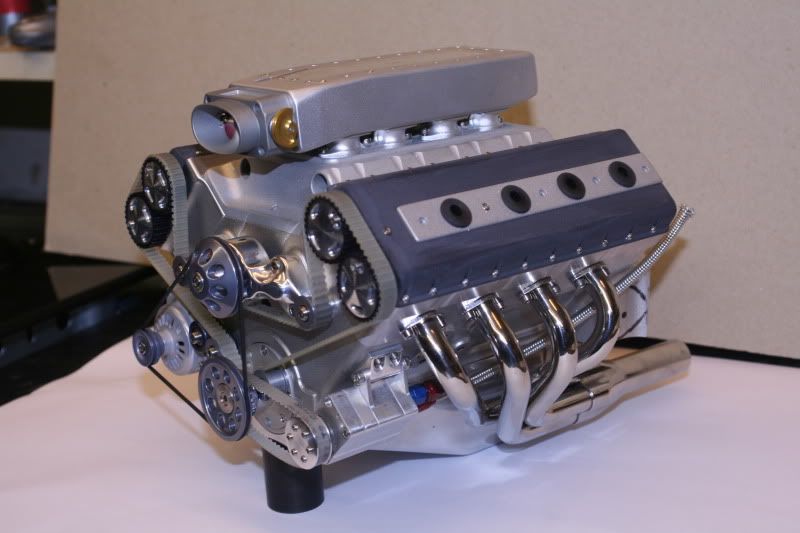
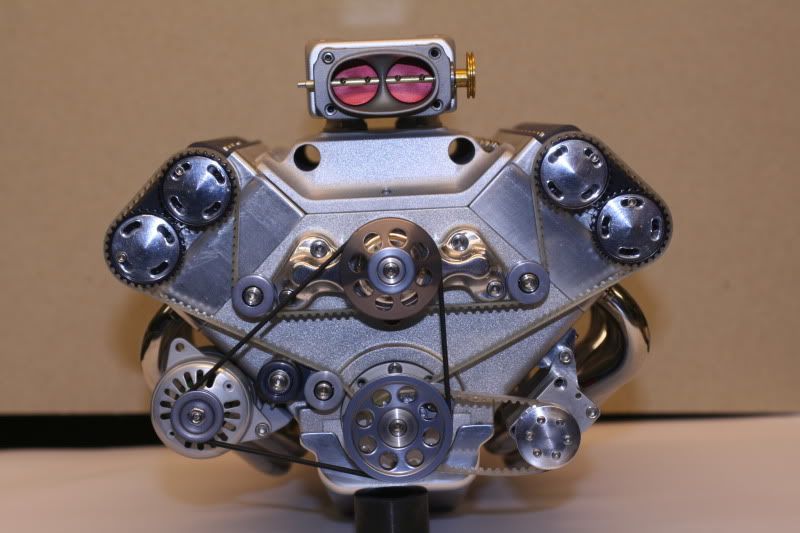
The cam covers have come out weird, but I think I like them. They are alloy, glass bead blasted, then anodised, and dipped in black dye for only about 5 seconds. They have a sort of velvet look to them, although the finish is very hard.
The inlet manifold is blasted with a bigger diameter glass bead.
The water pump pulley is polished, anodised and dyed black for about 2 seconds.
The block is peened with 170 grade steel shot.
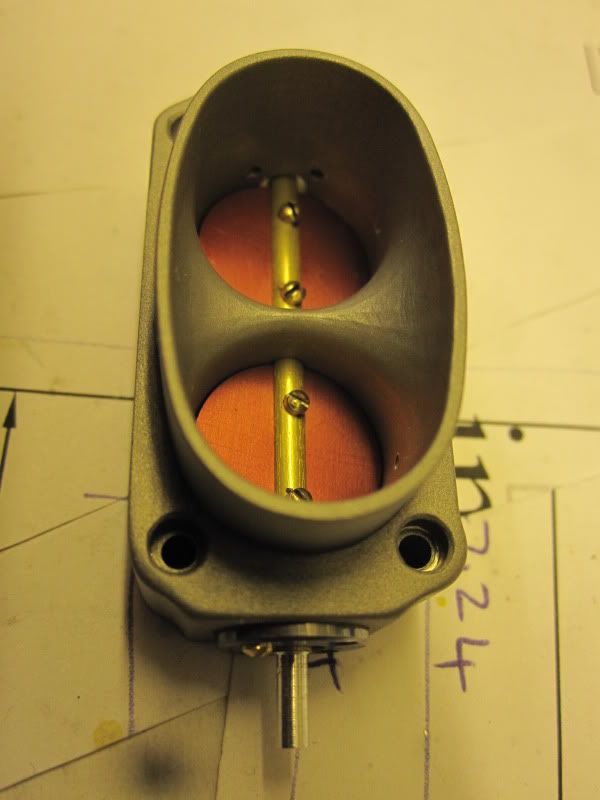
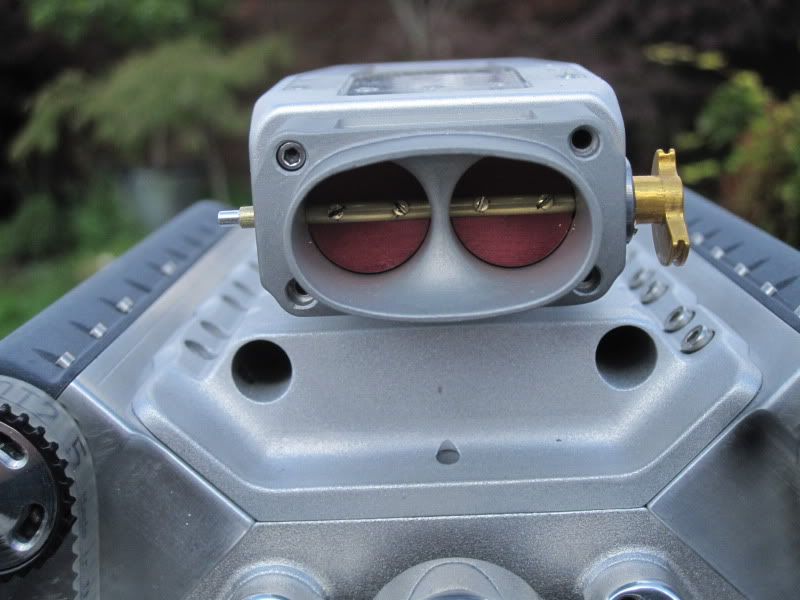
Throttle body bits are anodised and dyed various colours.
Throttle body is small glass bead peened and anodised, with no dye. Anodising seems to make the finish darker if surface is glass peened.

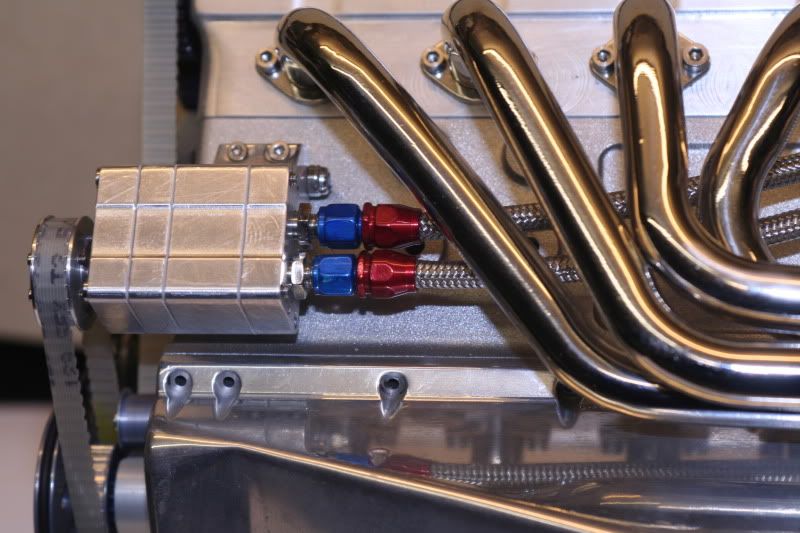
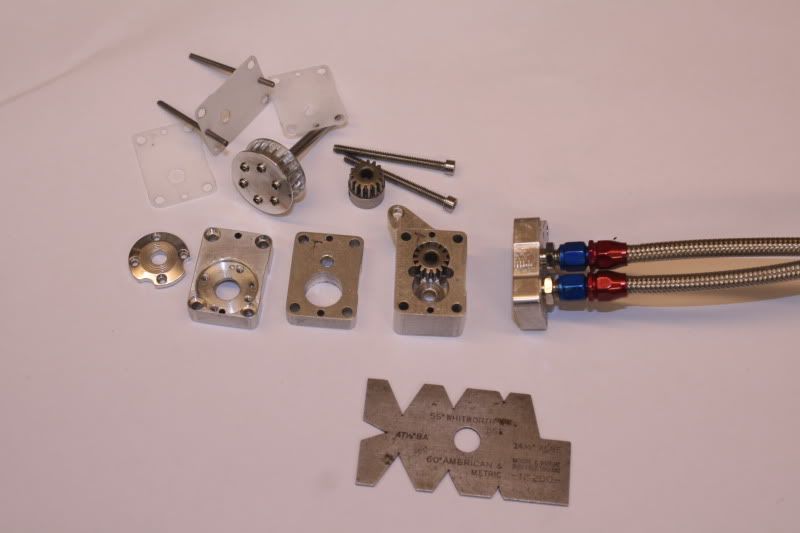
Some pics, hope you like...
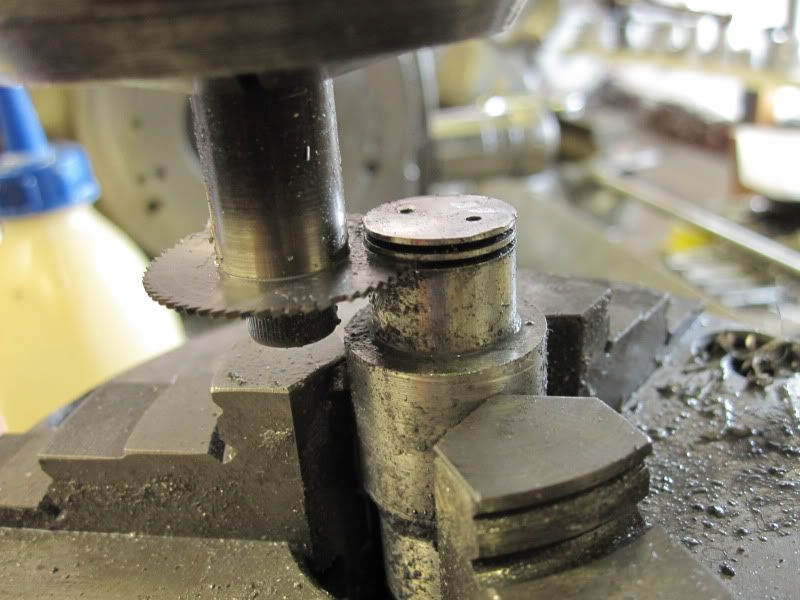
Sawing the discs for the throttle body

008-1.jpg


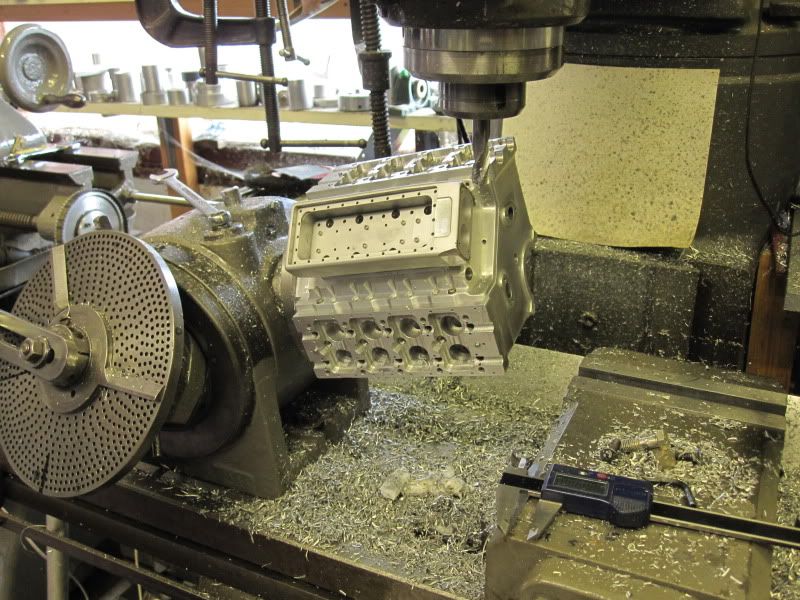
Shaving bits off here and there with the dividing head in compound angle mode

009-3.jpg


011-1.jpg


032-1.jpg


055.jpg


056.jpg


Steve, sorry I noticed you've just put your final pics up. I would have waited a few days if I'd seen yours first.
Apologies again. Yours looks great by the way.
Keith.
 
keith5700 said:
Steve, sorry I noticed you've just put your final pics up. I would have waited a few days if I'd seen yours first.
Apologies again. Yours looks great by the way.
Keith.

No need to apologise. If you have updates, my all means post them.

The cam covers look fine. Loving it!!
 
GDay All,

Keith, that is one beautiful looking engine. The blasting and anodising look superb!

It would look right at home in a 33-34 Ford Phaeton if ya ask me.

I can't wait to see it finished and hear it roar to life.
 

Another truly amazing project. :bow: :bow: :bow:

Maybe in another lifetime I will be able to make a V-8. :big: :big: :big:

Ron
 
So, are you going to put this in a go-kart or something? You'd be tearing up the streets with that. :D

Maybe replace the engine in an ATV. :D

Awesome, just awesome.
 
Well, it's been a while. Been busy on other things. Managed to get a few bits done, mainly on the belt runs, spring tensioner, etc. Then I started the oil pump. The miniature Aeroquip fittings came out ok. The braided hose is 5mm dia. cycle hydraulic hose.
The pump seems to be a bit of a sticking point at the moment. I can't seem to make much headway. Everything is so small, and I keep mucking it up. Anyway, It'll get done soon and I can start on the internals.

I used the internals of a small motor for the alternator. It should generate electricity, but whether it'll be enough to be any use remains to be seen.

Some up to date pics....

007.jpg


011-3.jpg


014-2.jpg


016-2.jpg


027.jpg

 
Keith,
I have only just become aware of your project and would like to say how blown away I am by it .
It's brilliant, just absolutely breath takingly brilliant - even my wife agrees and shes a hard one to impress ;) I simply can't get over your speed of build with the quality produced either. You must be incredibly pleased with the result.

To be able to see work like this is total confirmation of just how valuable a forum can be to us lesser mortals.

Thank you for sharing it, you're an inspiration :bow: :bow: :bow:

Regards - Ramon


people with your skills are dangerous for the comon people and schould be locked away. preferbly in my workshop and you schould be punished by making at least one engine each month. you would be fed three times a day and allowed one hour off to mow my lawn............ th_wav

just kidding ofcourse.
that is some serious work of art you are making there.
Pascal
 
Back
Top