1/3rd scale 5hp Galloway Build

Home Model Engine Machinist Forum

Help Support Home Model Engine Machinist Forum:

This site may earn a commission from merchant affiliate links, including eBay, Amazon, and others.
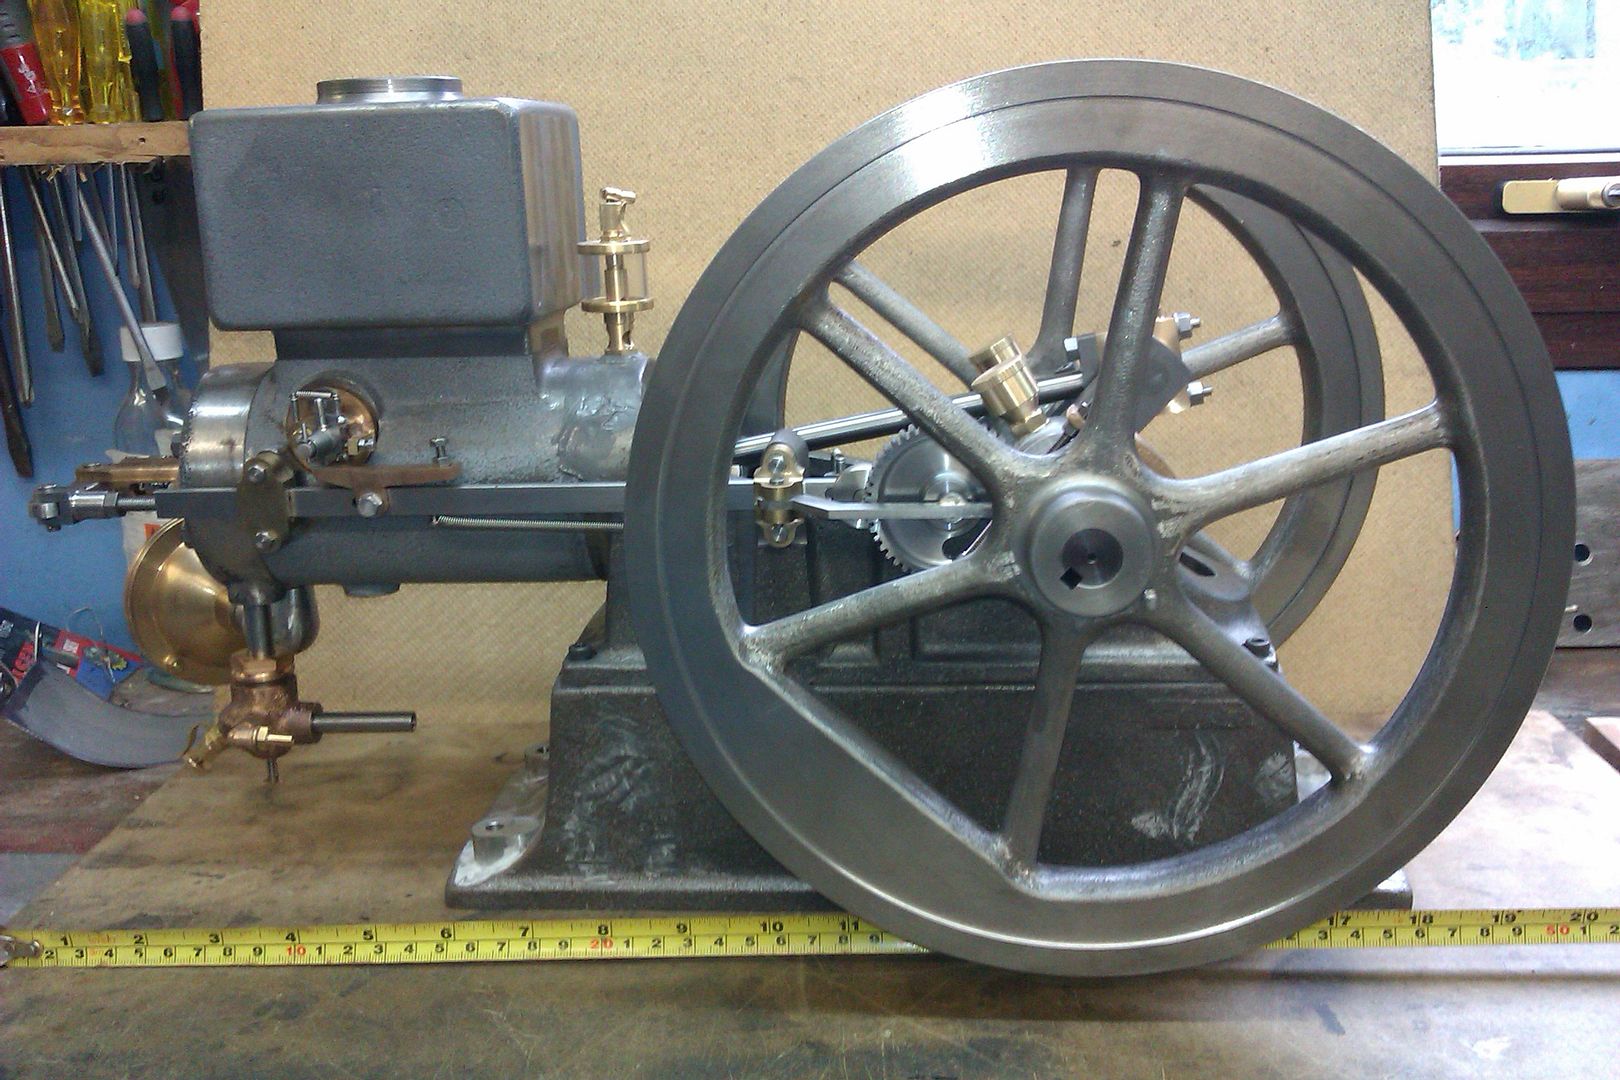
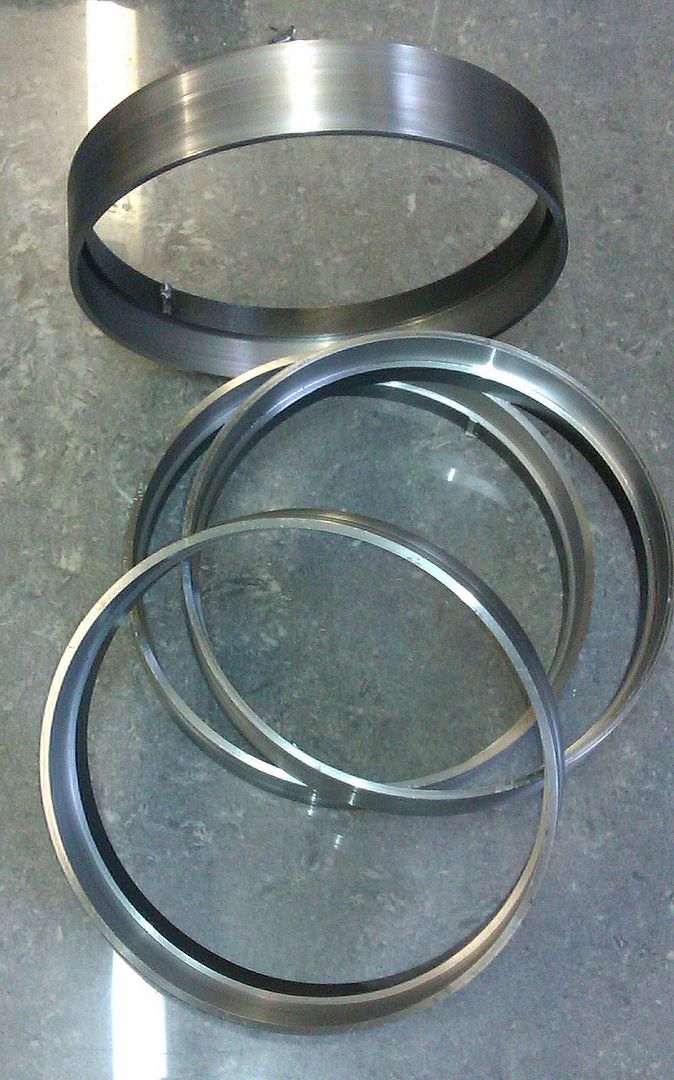
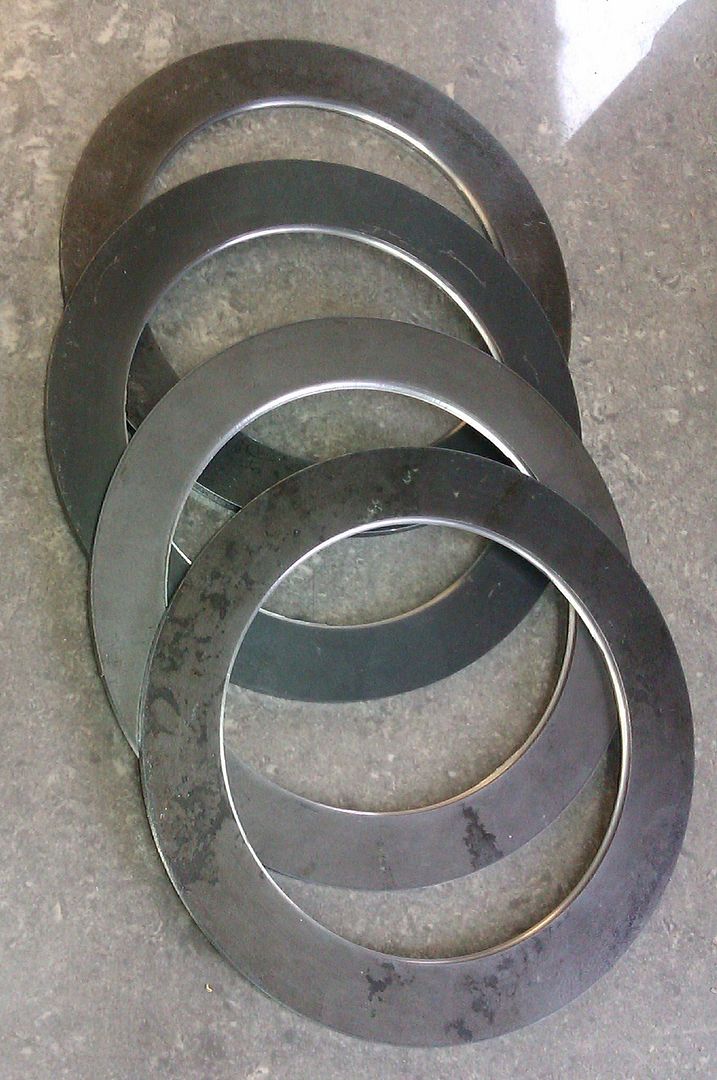
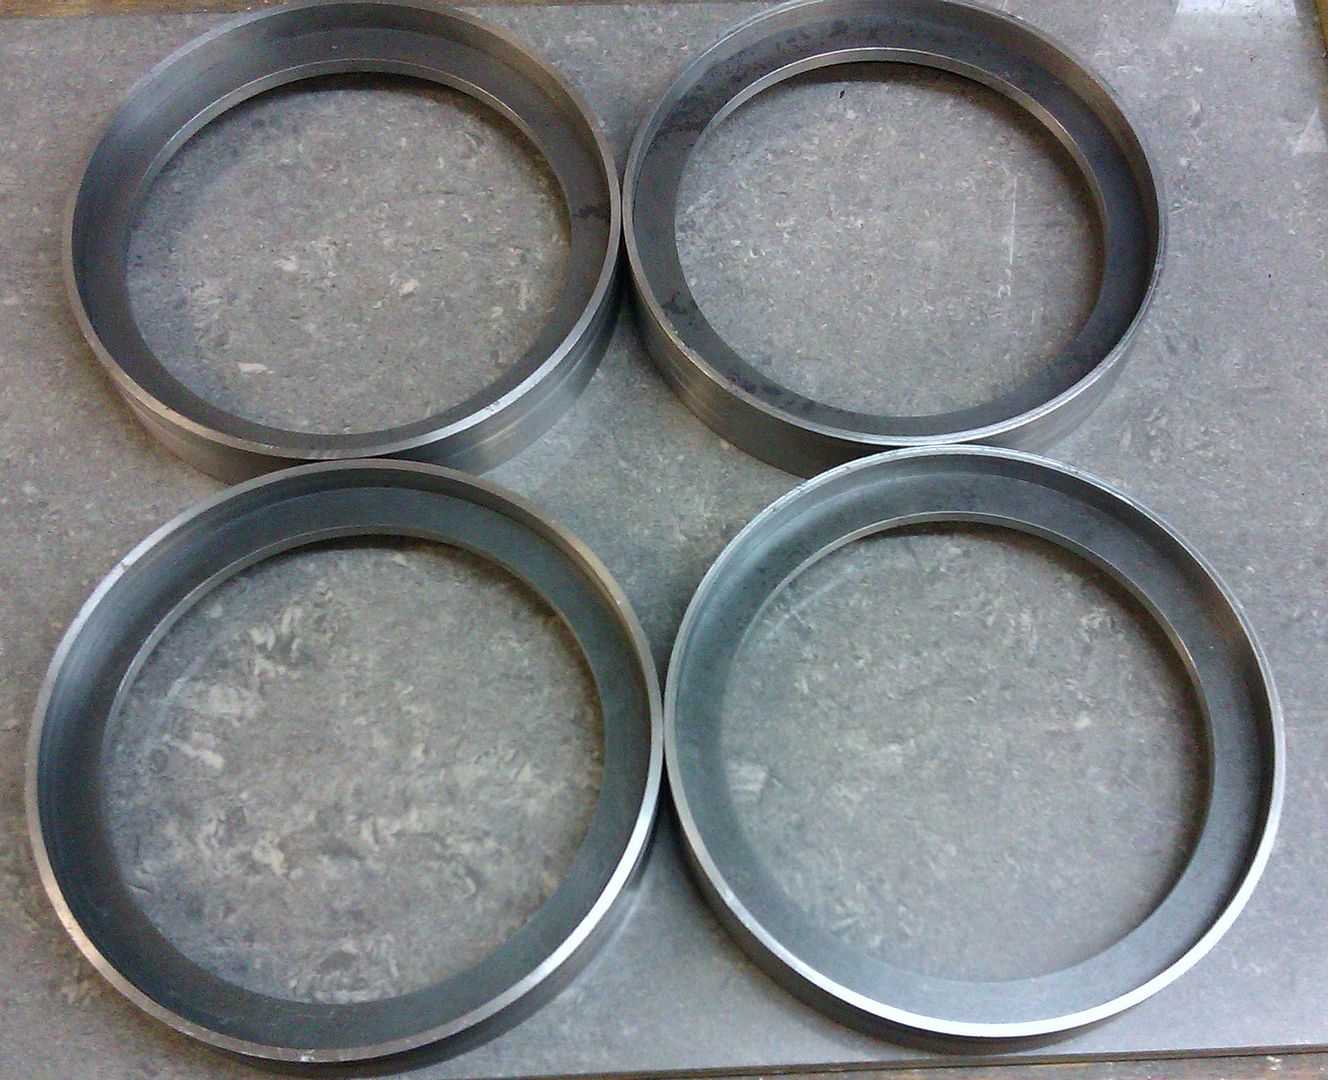
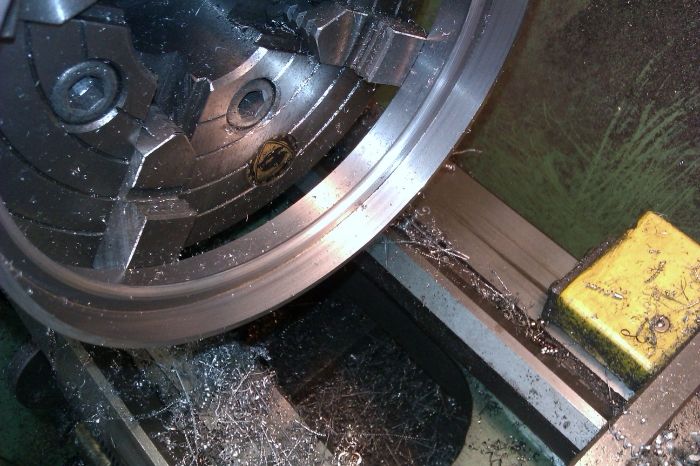
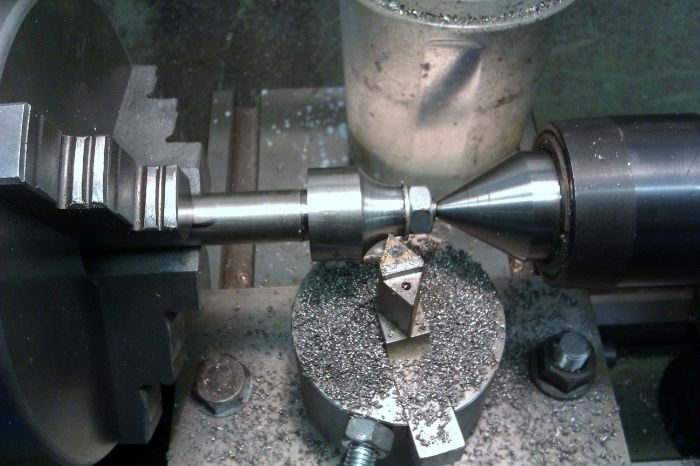
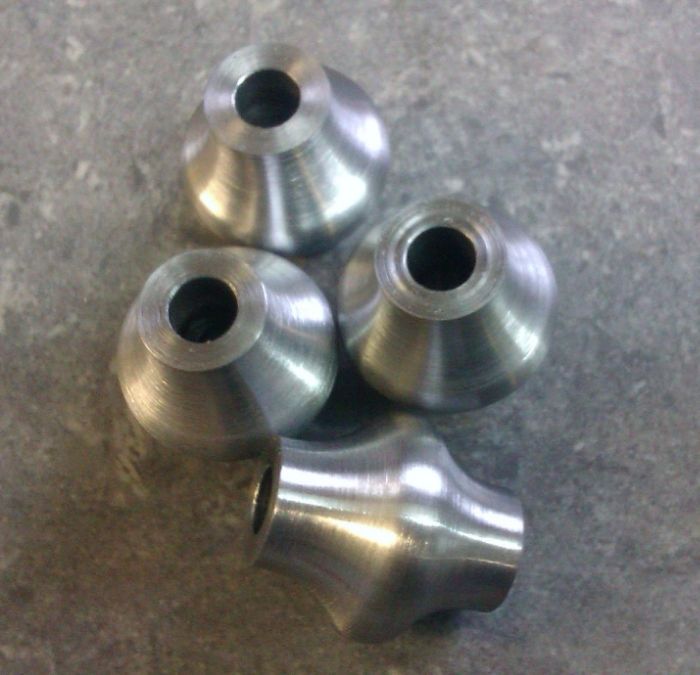
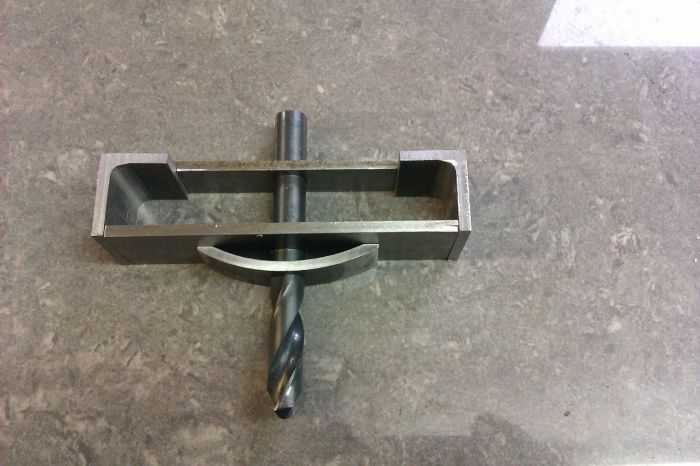
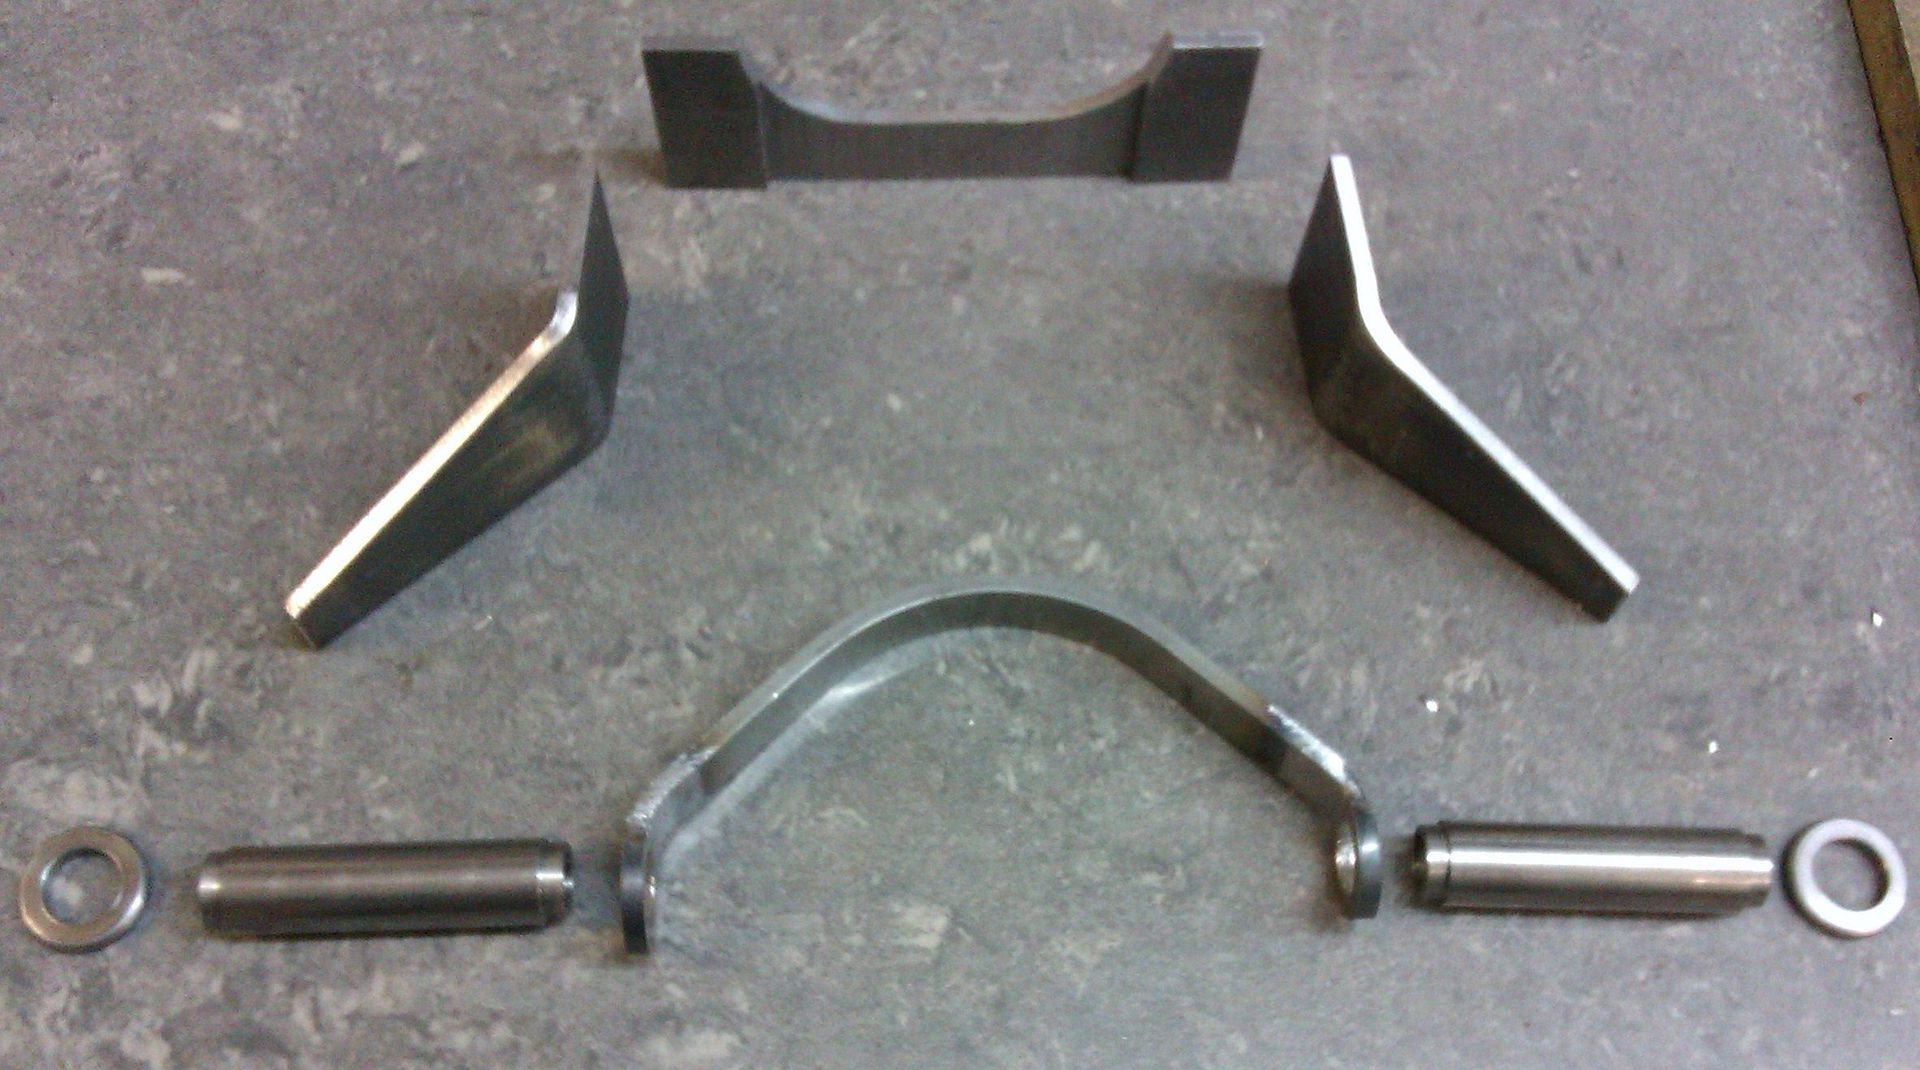
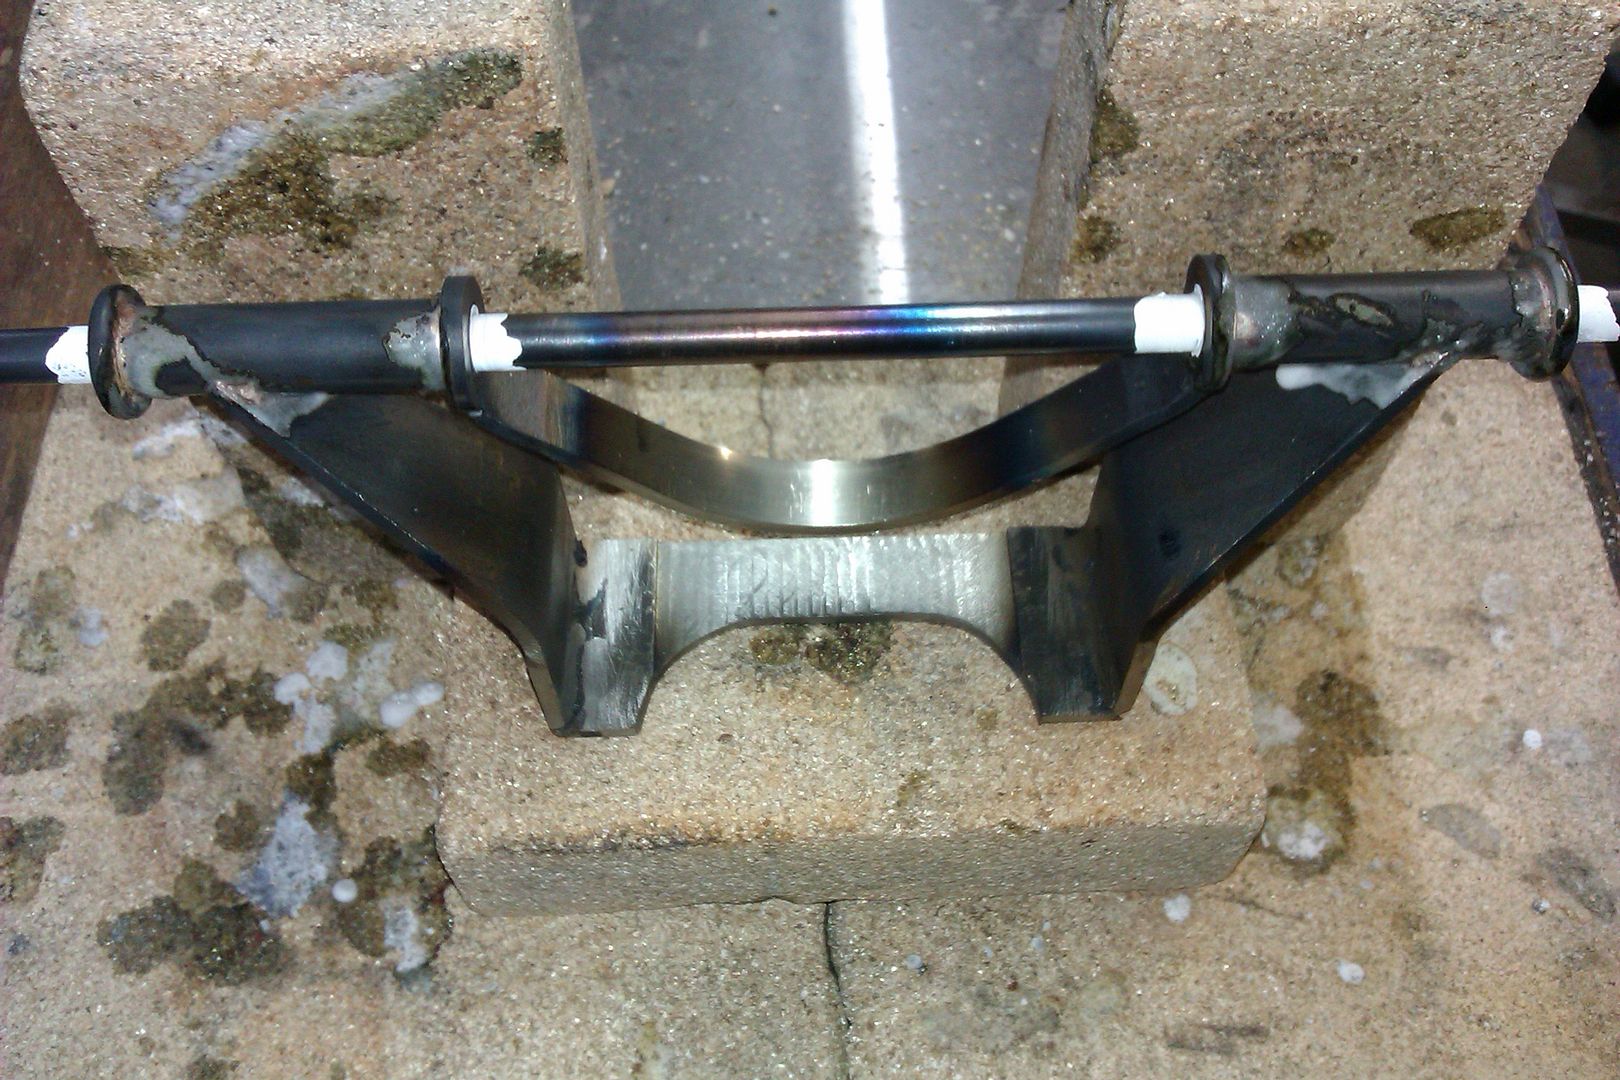
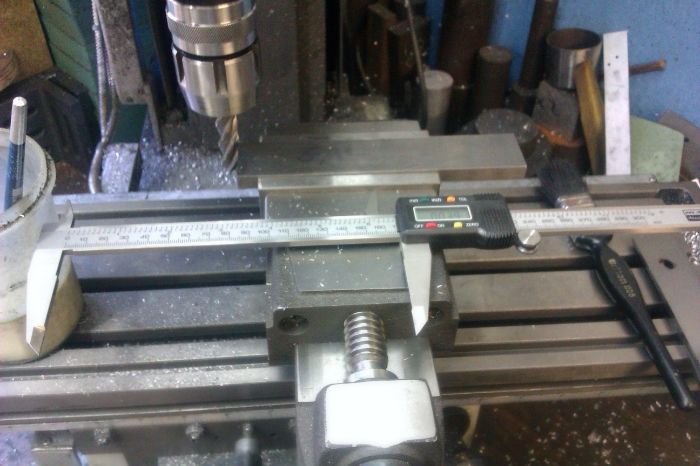
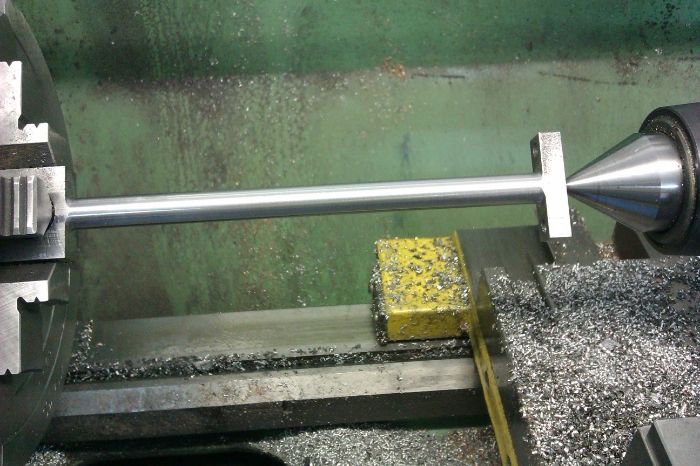
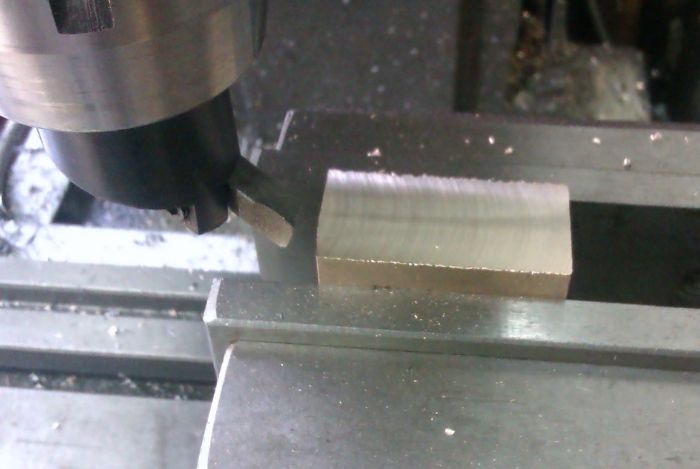
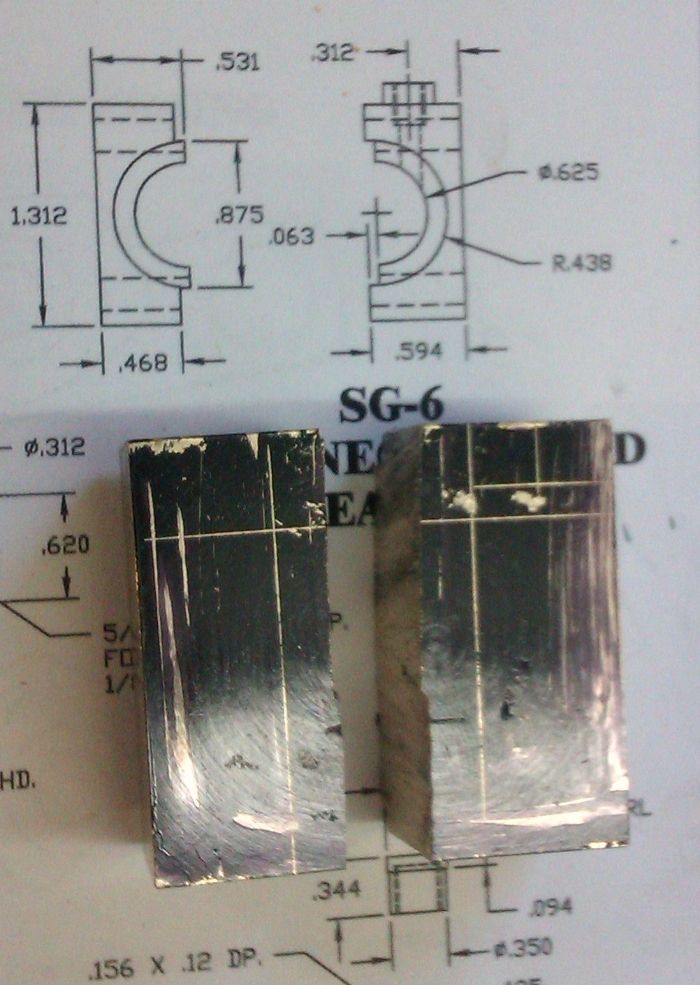
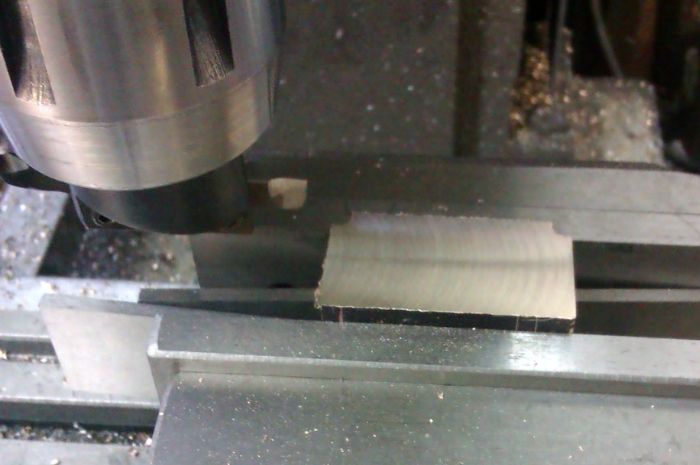
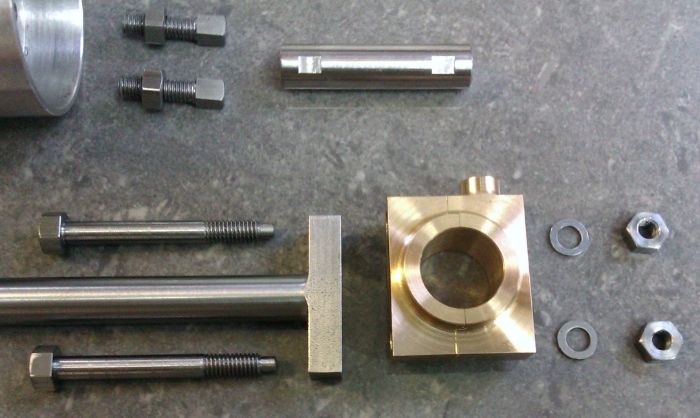
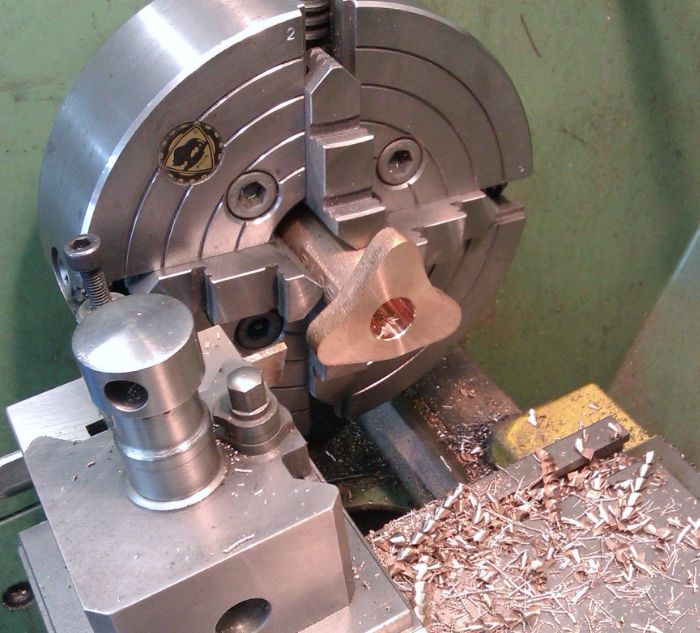
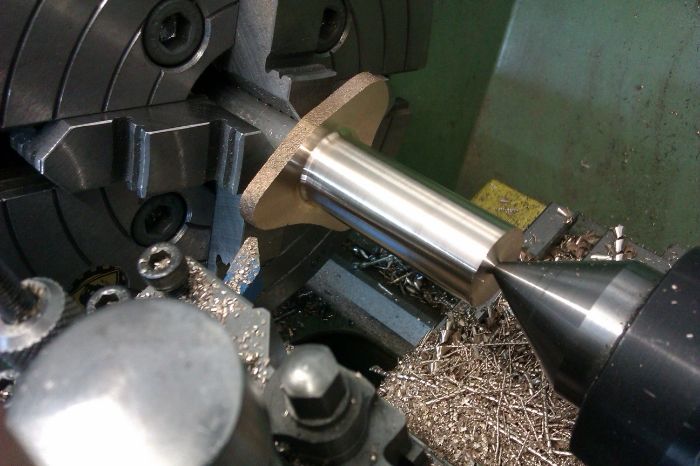
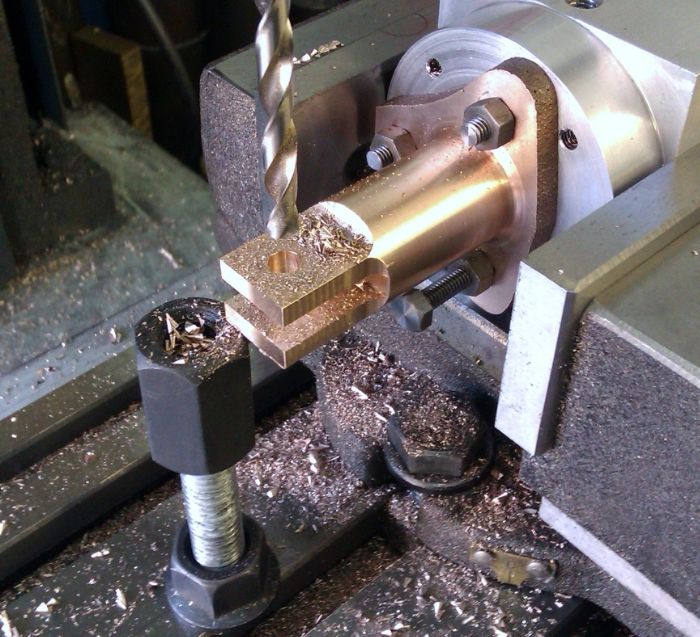
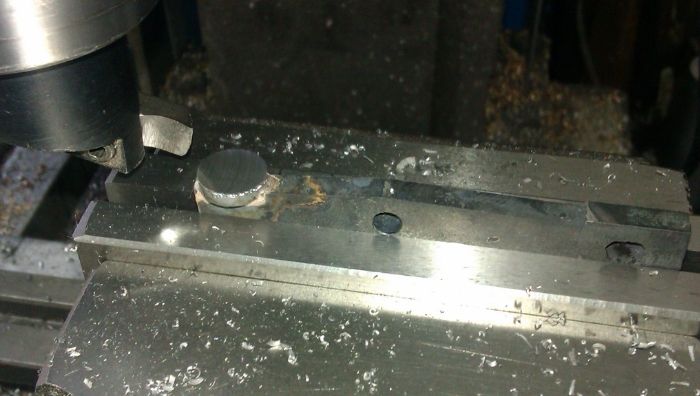
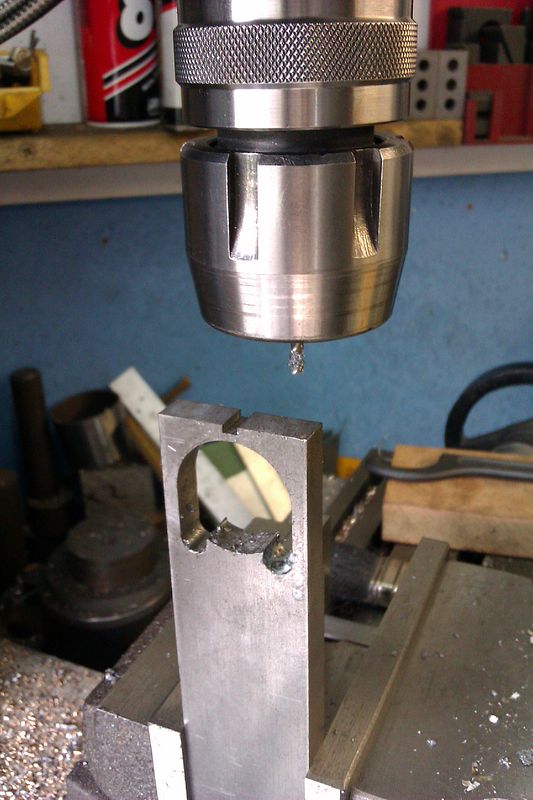
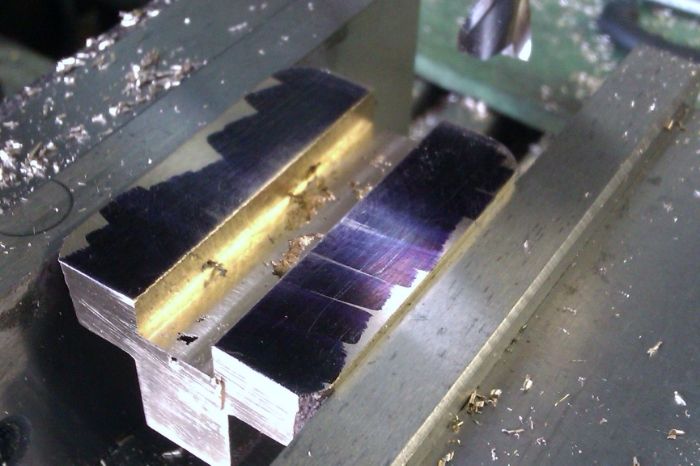
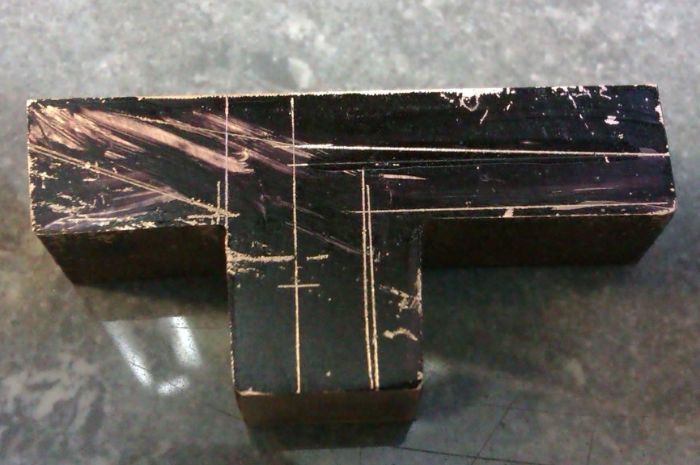
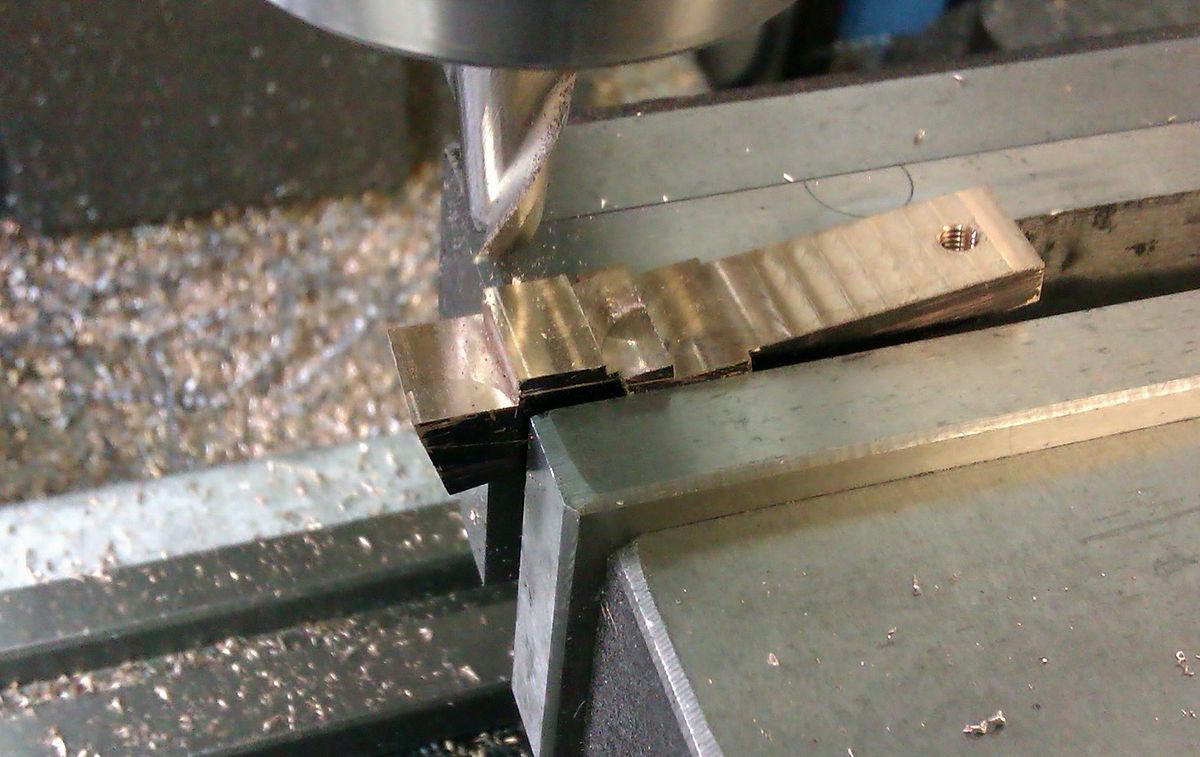
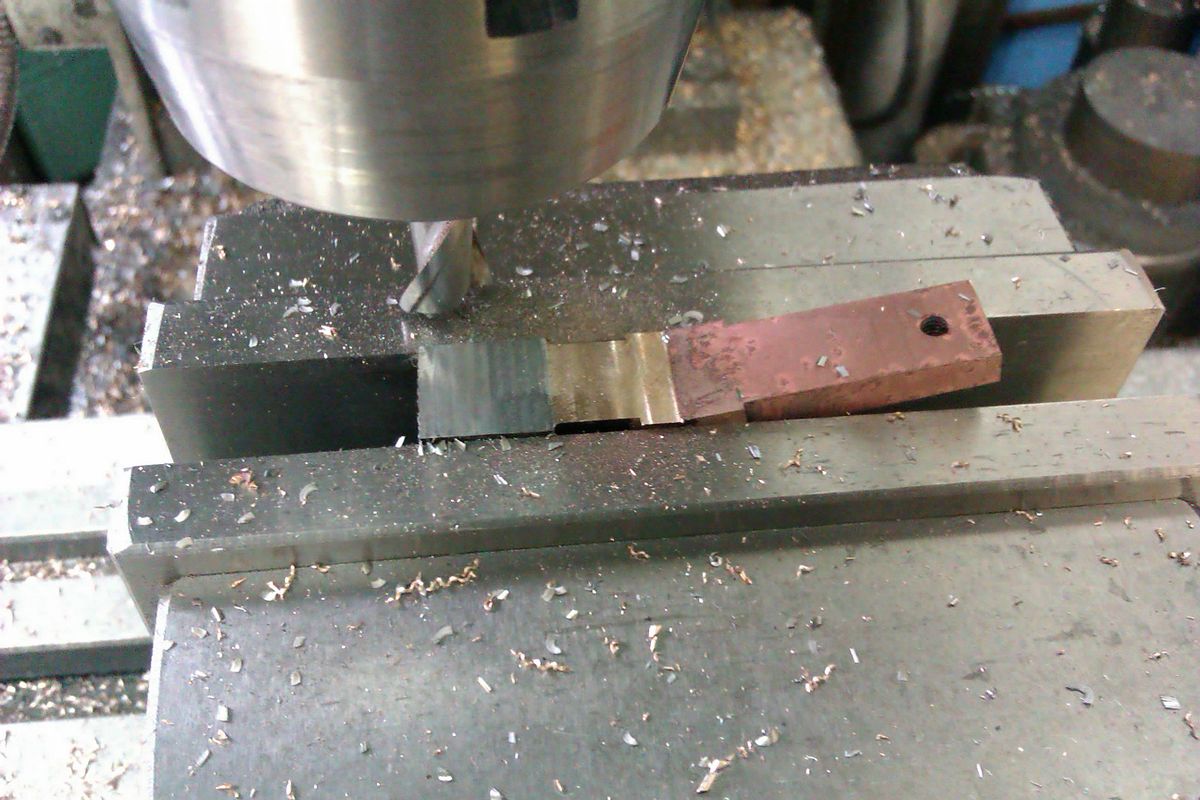
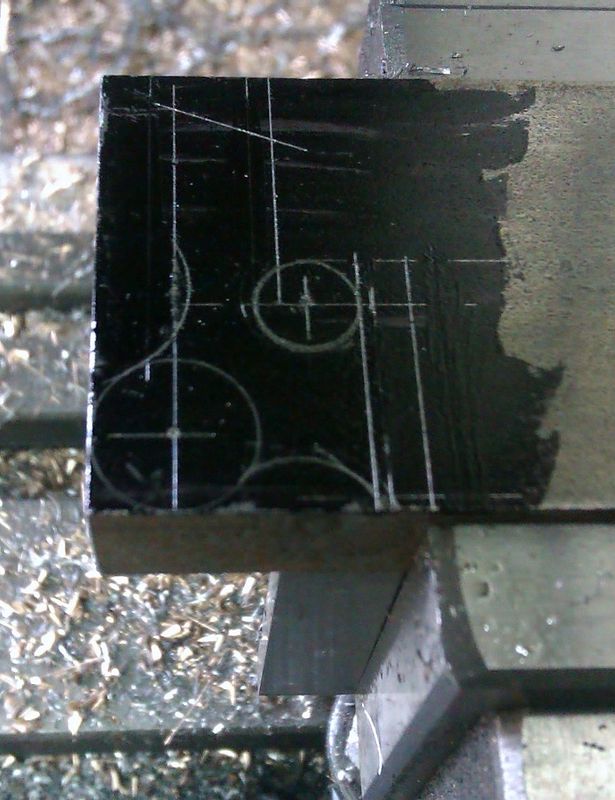
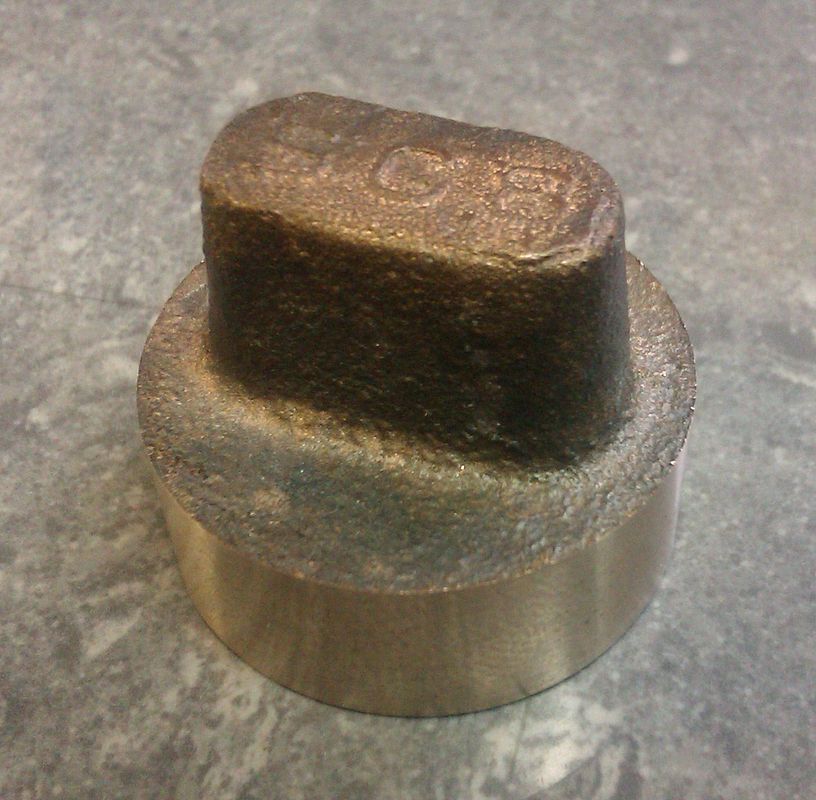
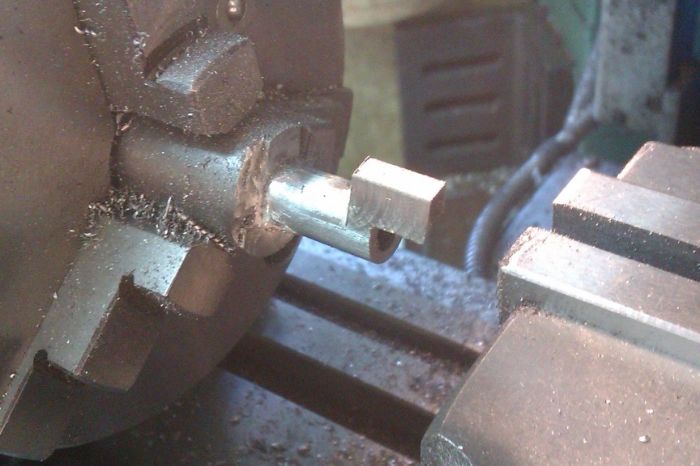
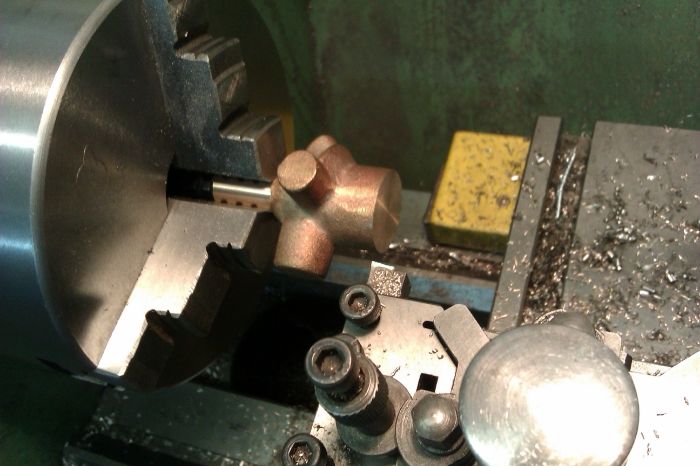
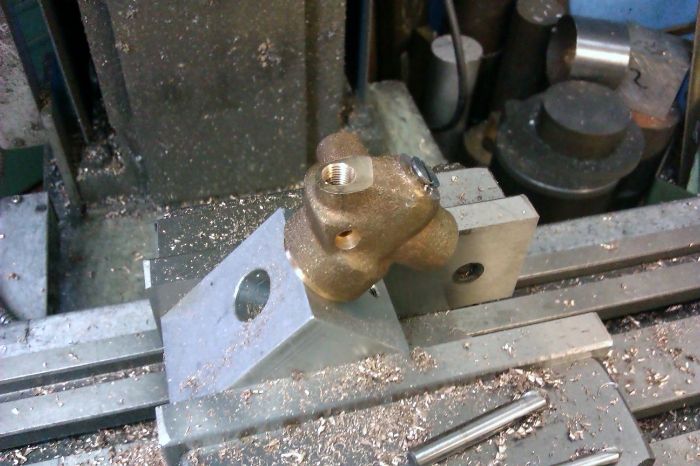
With the crankshaft and flywheels done all that was stopping me being able to play with the engine was the bearings so these were next on the list. A length of 27mm bronze was cut with the hacksaw to get the basic split bearings.

IMAG1816_zps57ad97ea.jpg


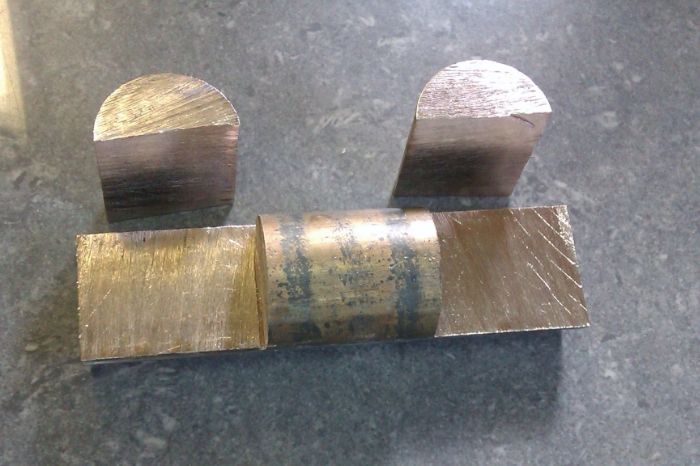
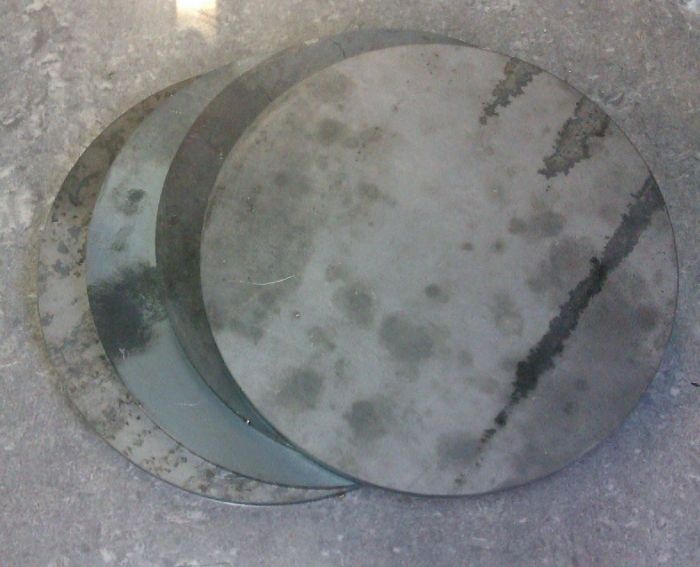
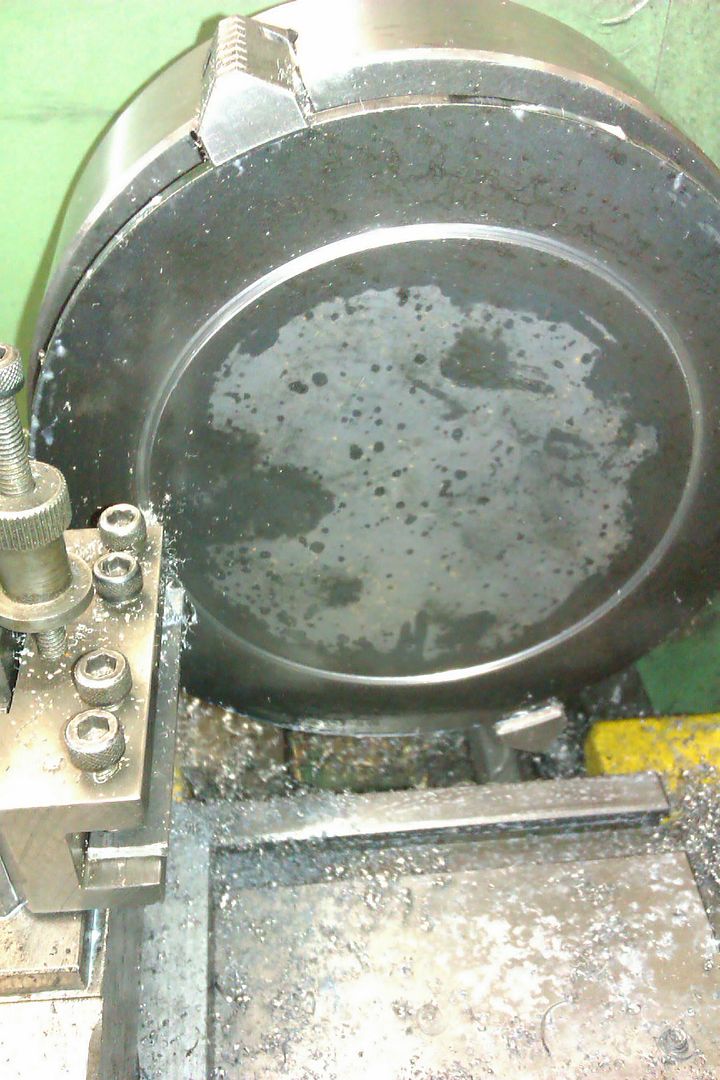
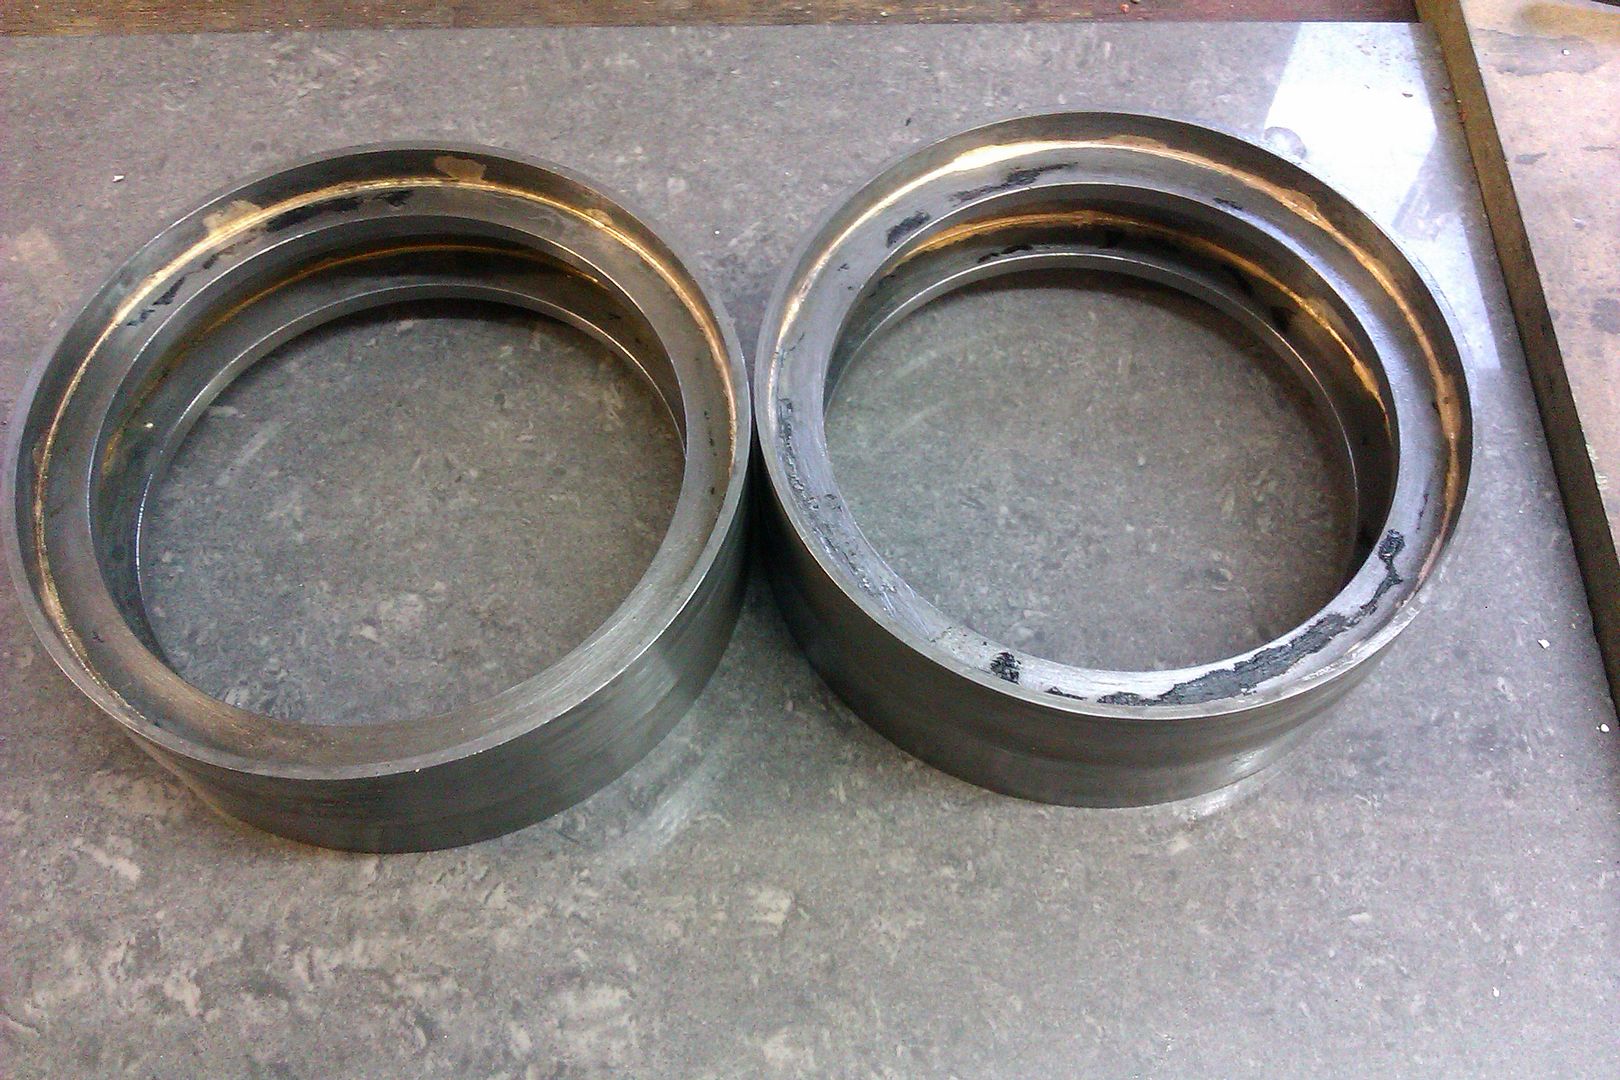
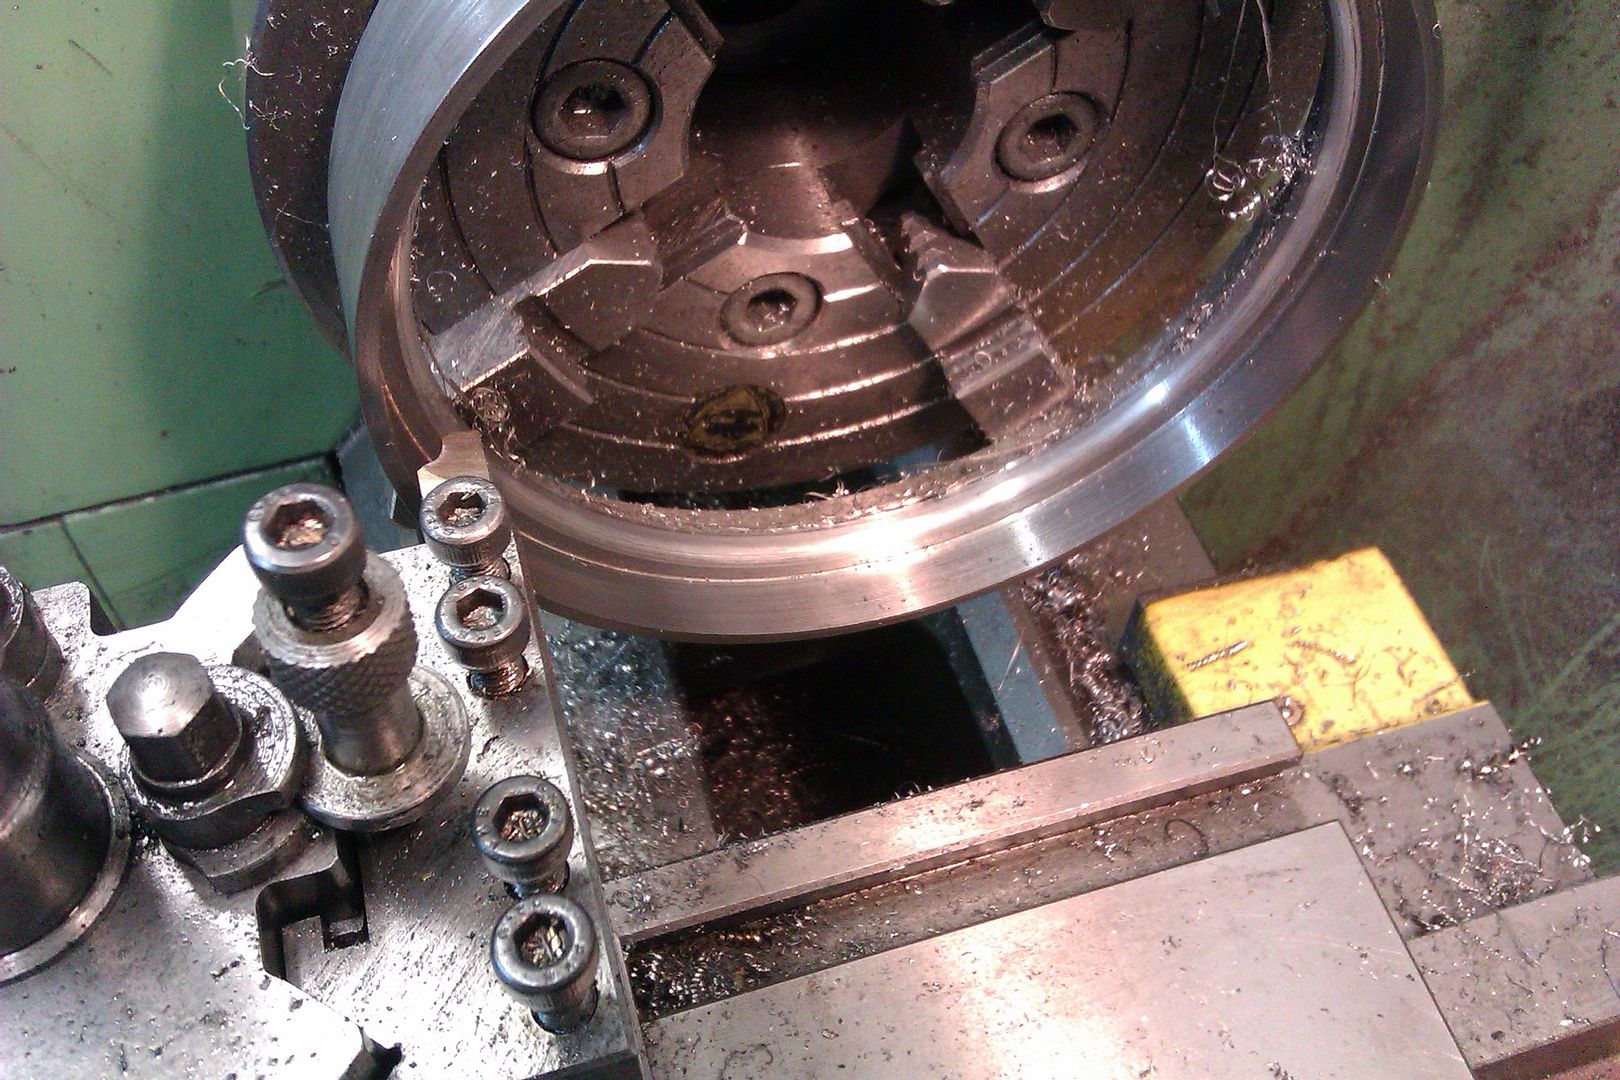
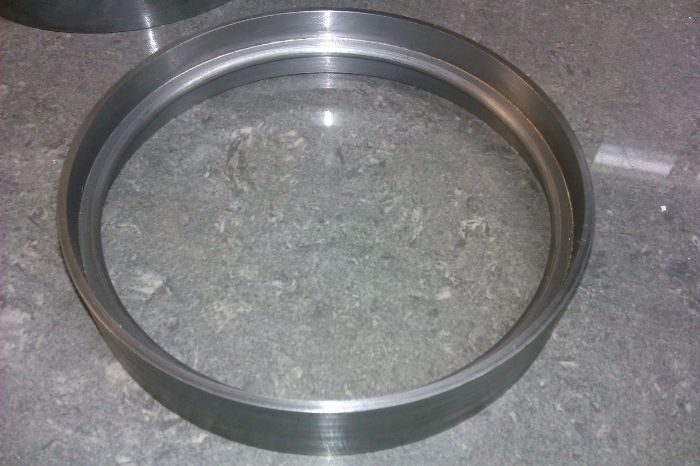
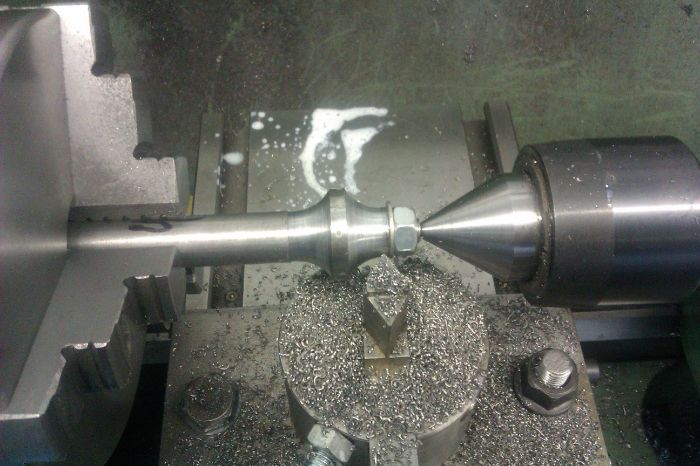
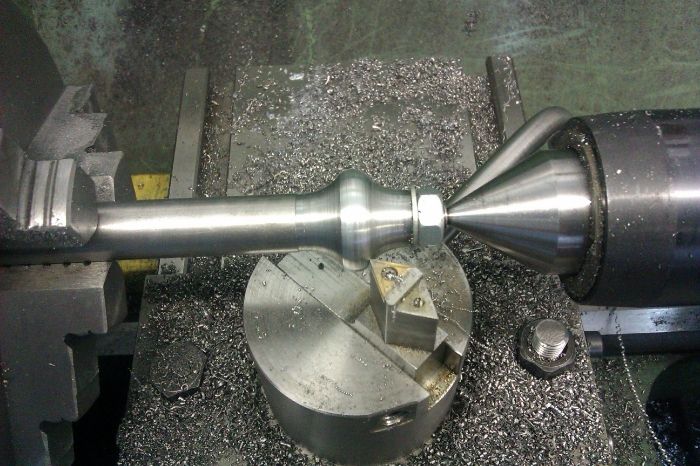
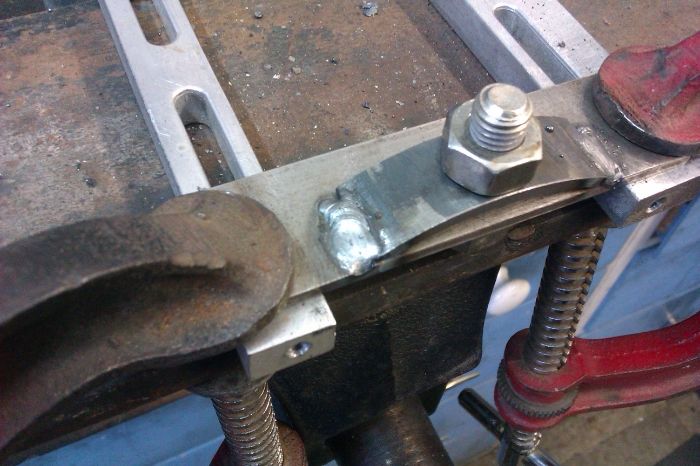
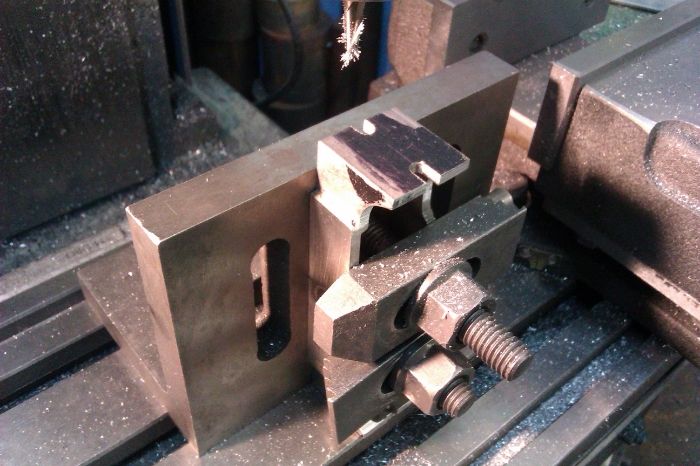
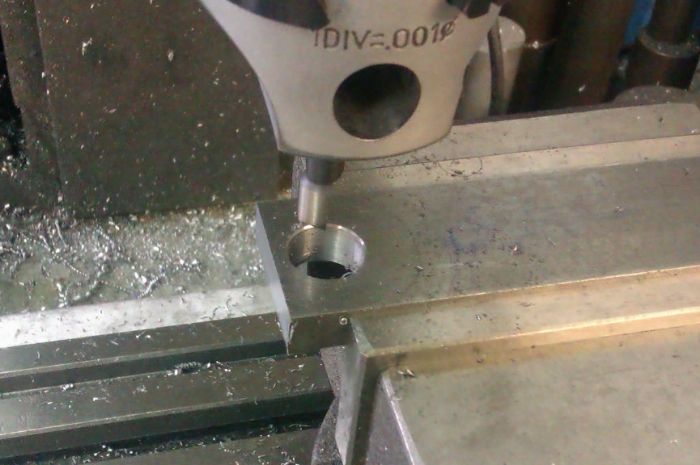
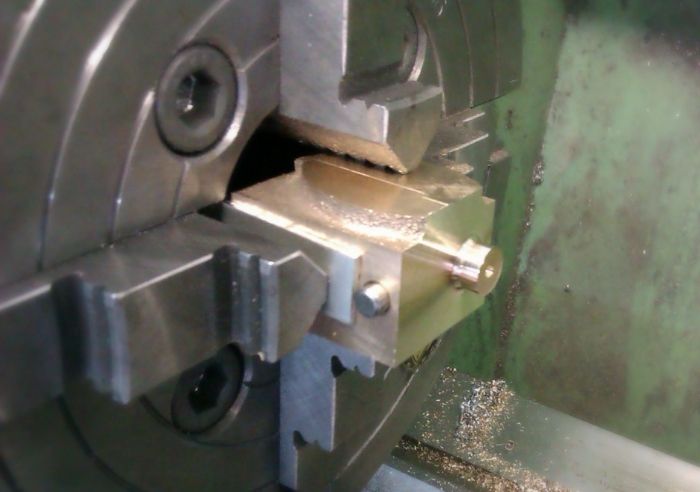
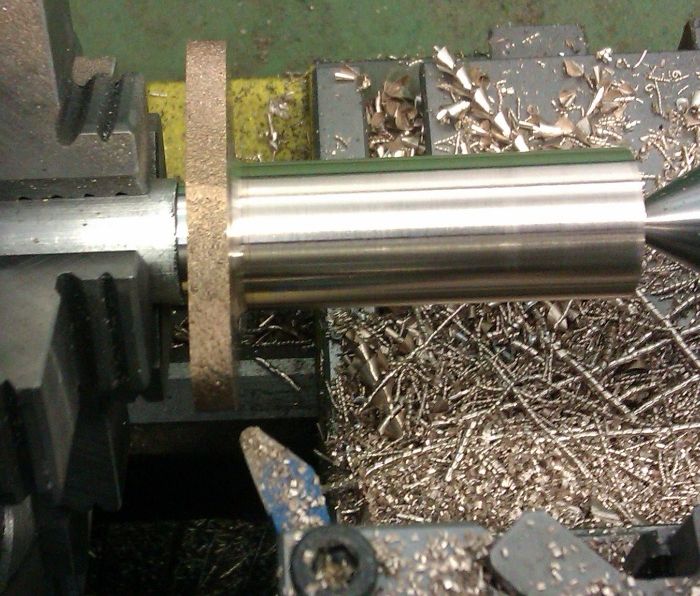
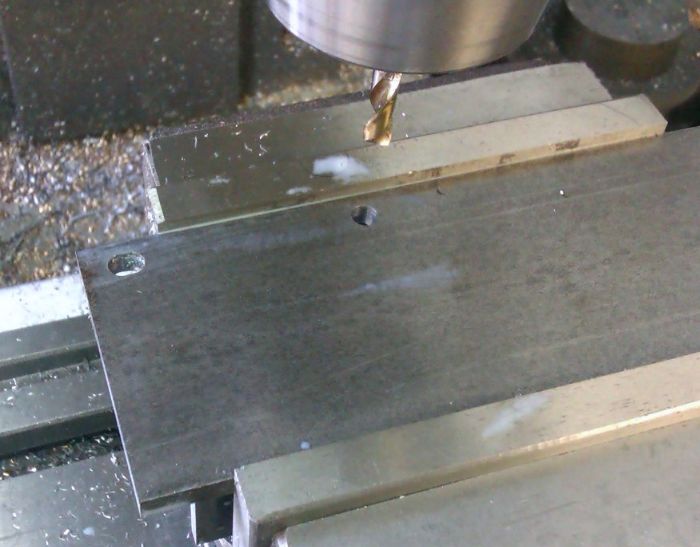
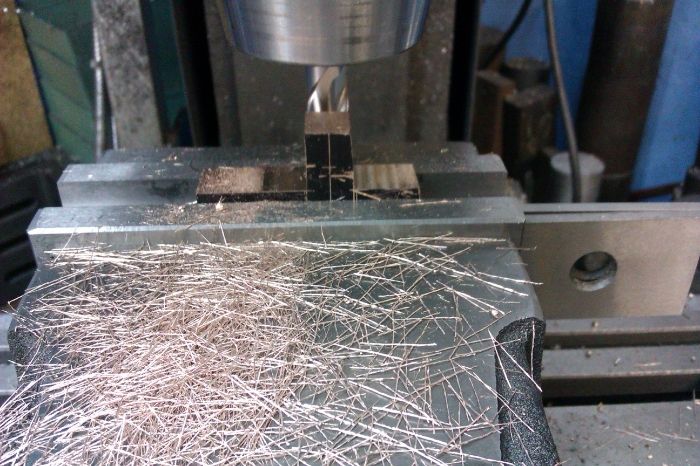
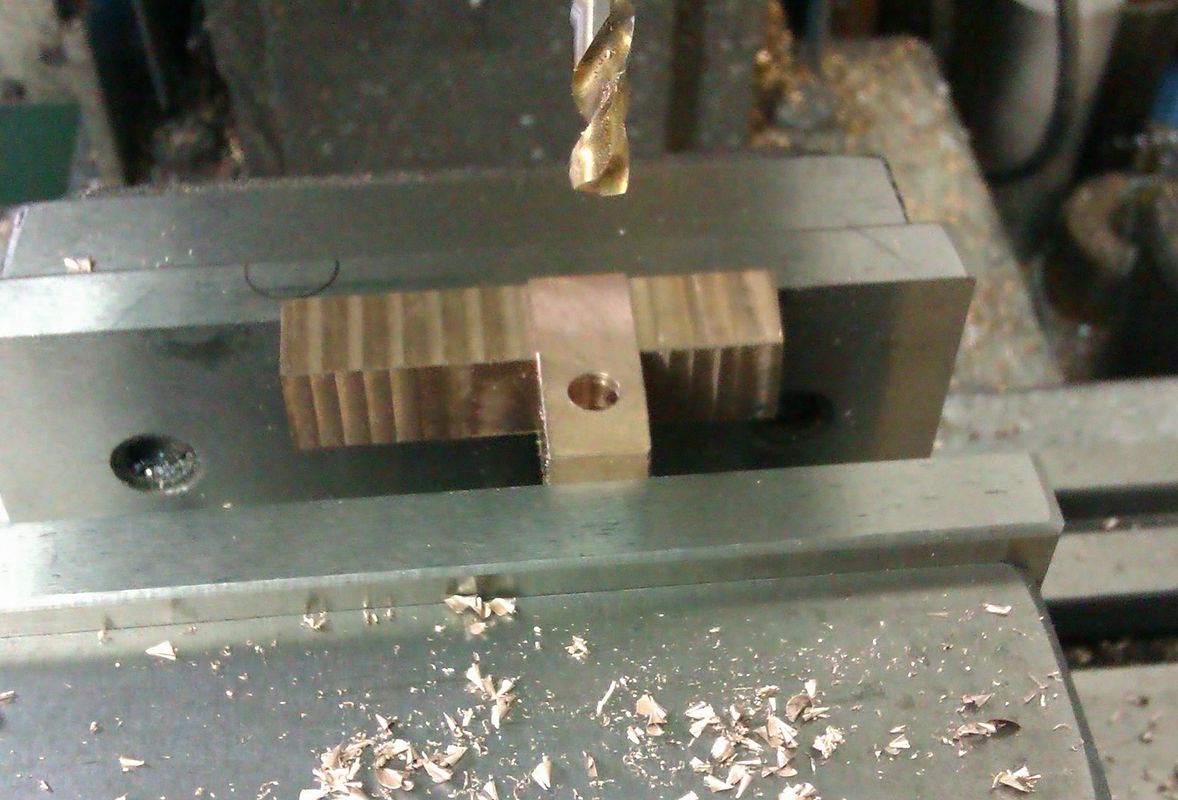
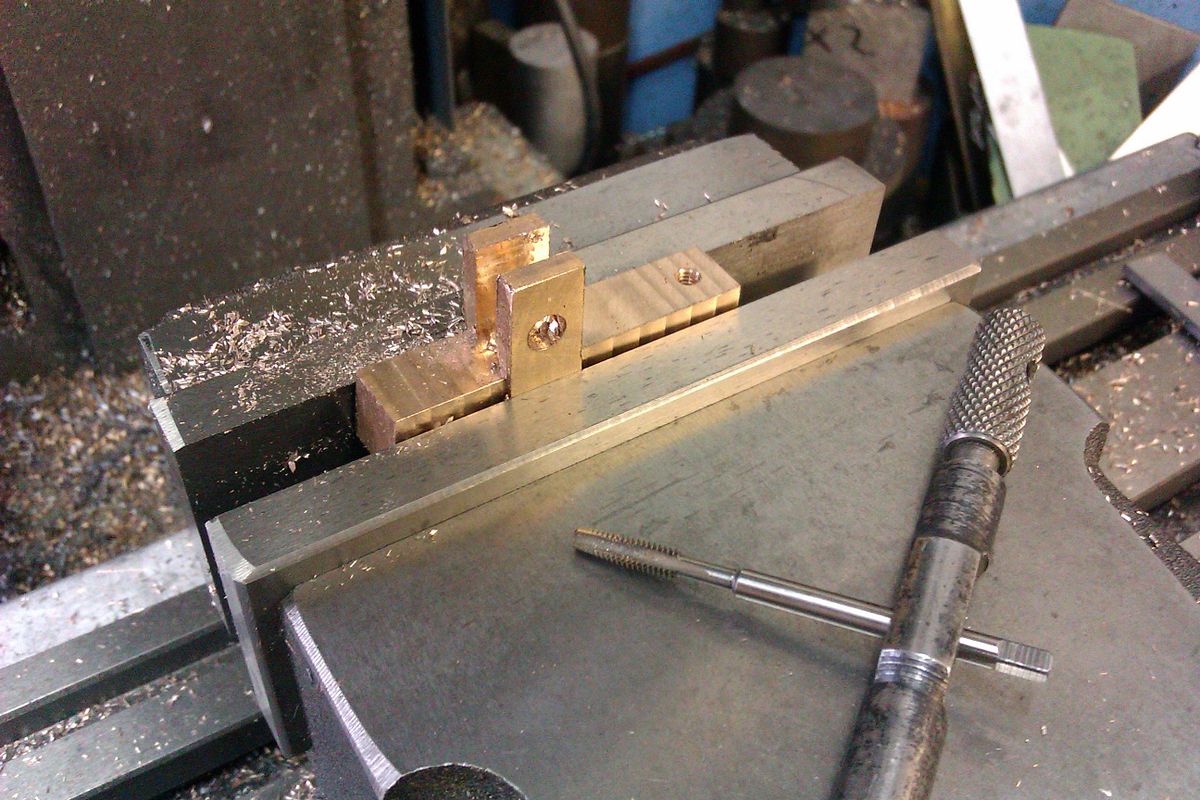
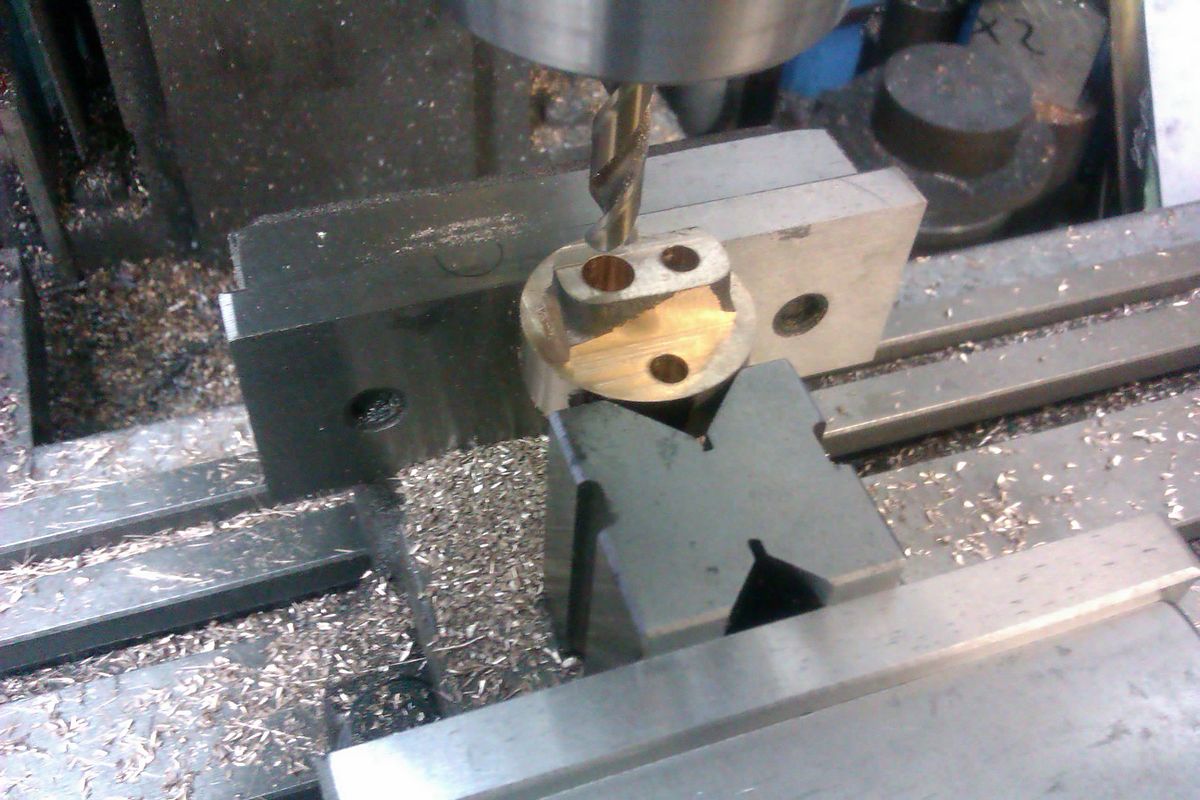
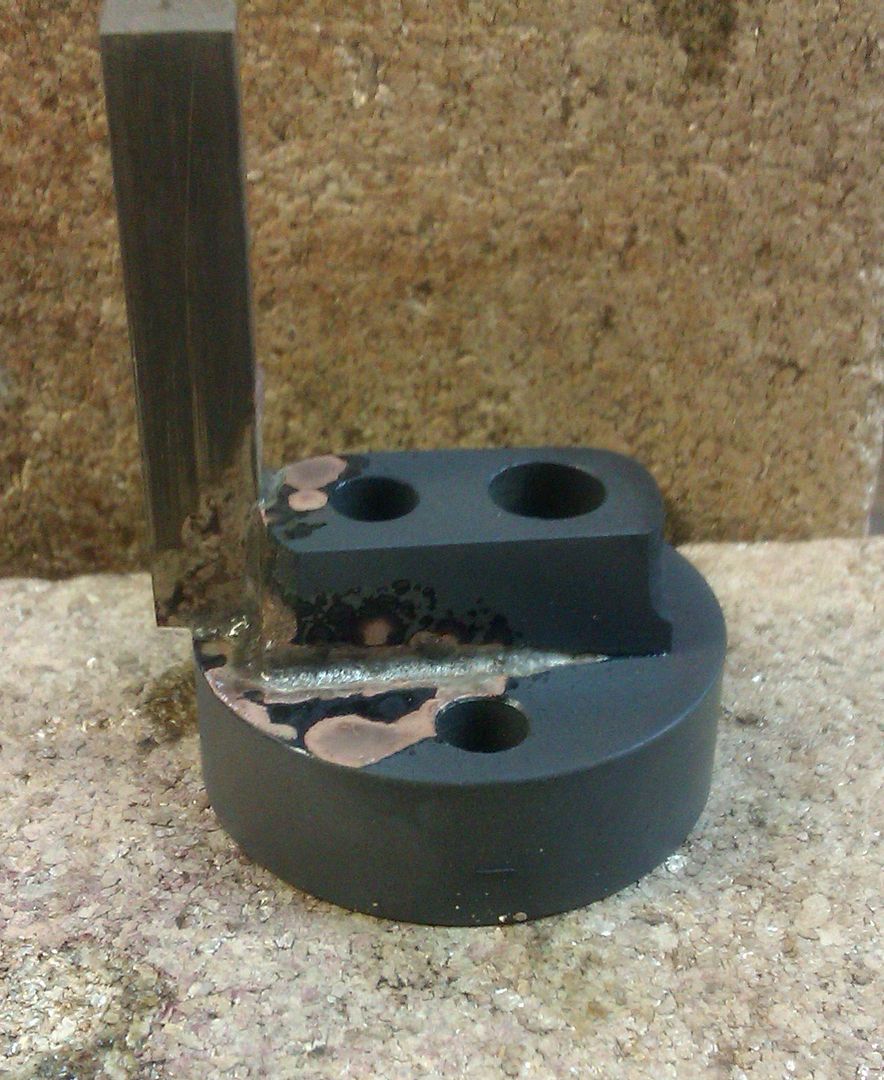
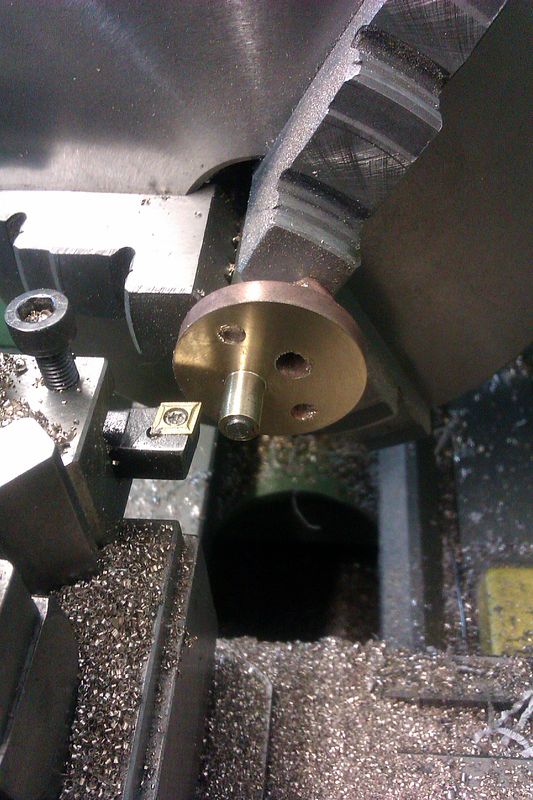
The faces were milled flat and then soft soldered together before transfering to the lathe to machine to shape

IMAG1817_zpsbb624603.jpg


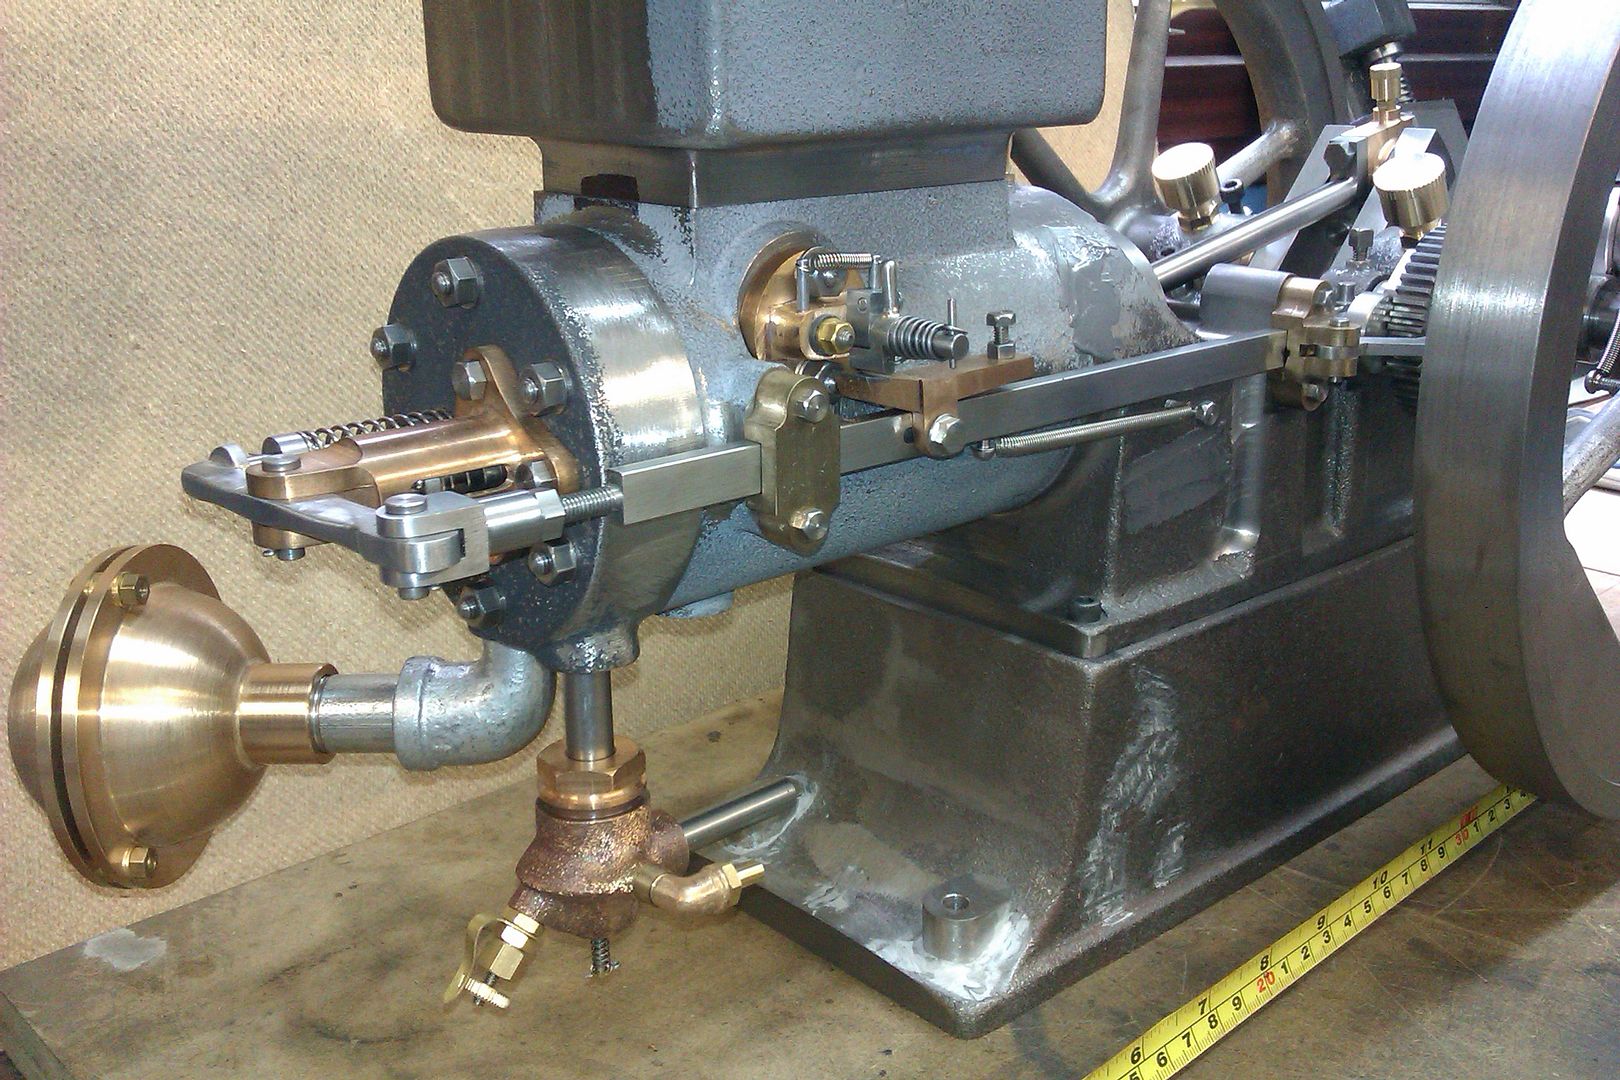
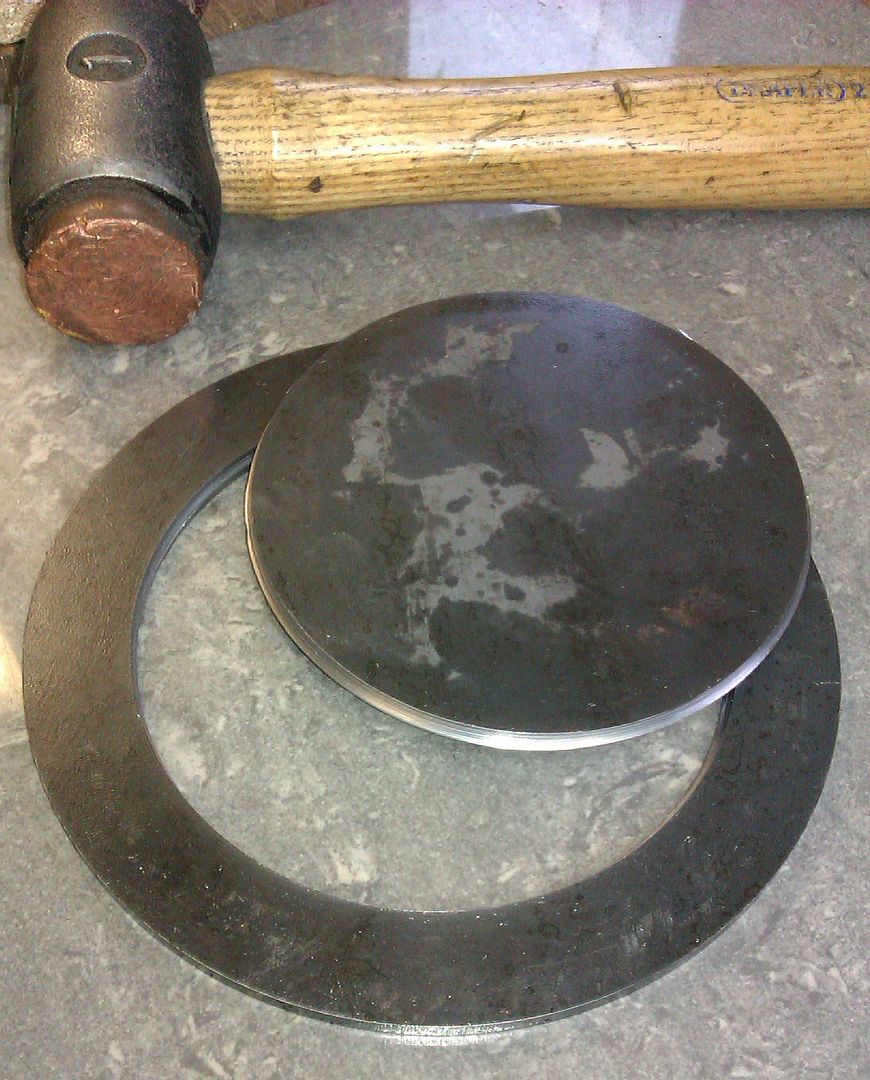
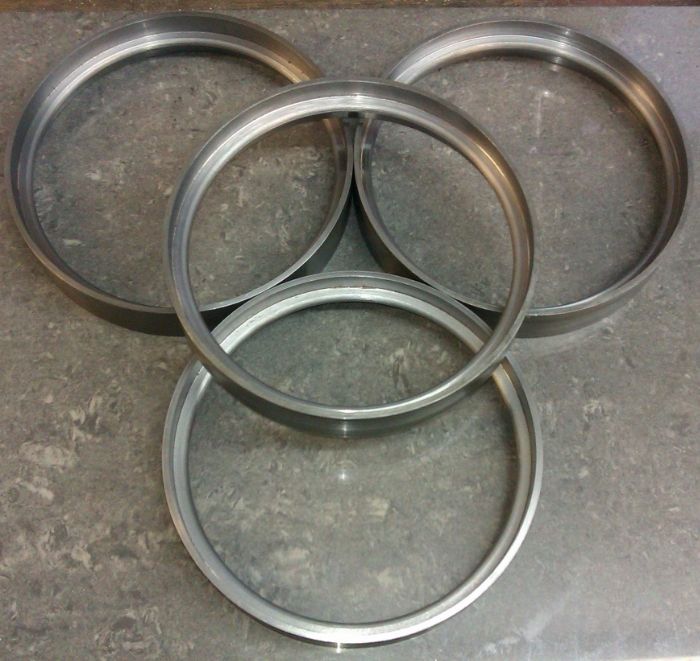
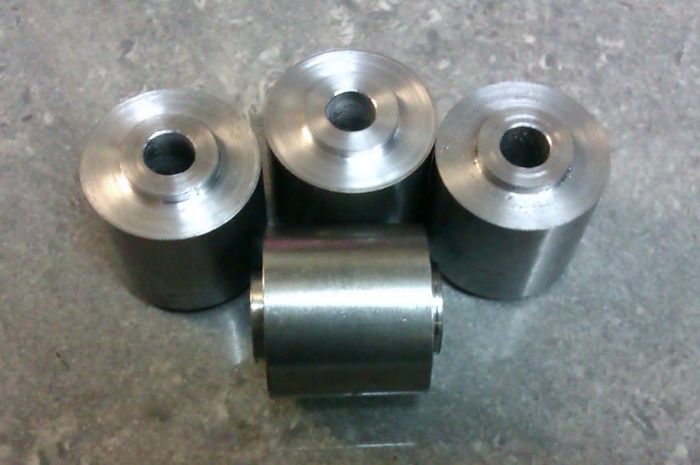
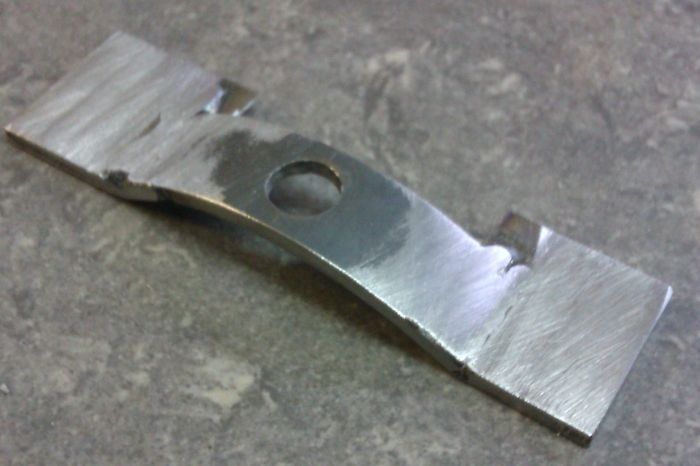
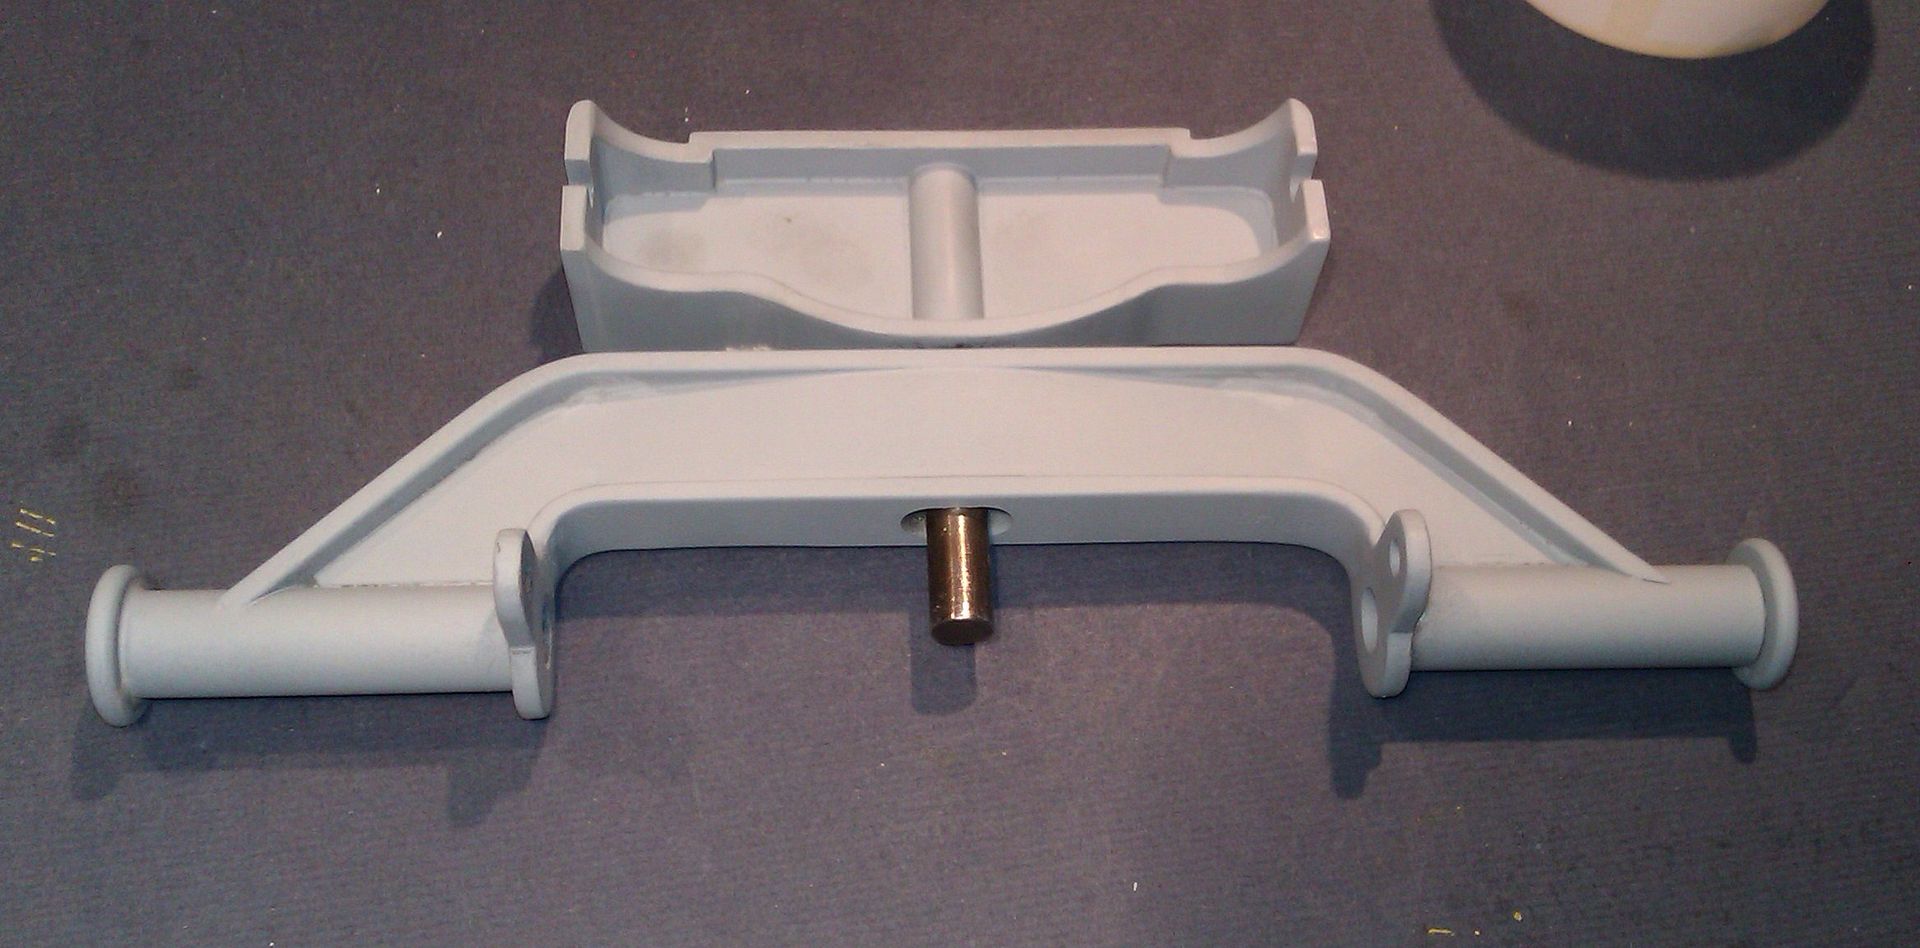
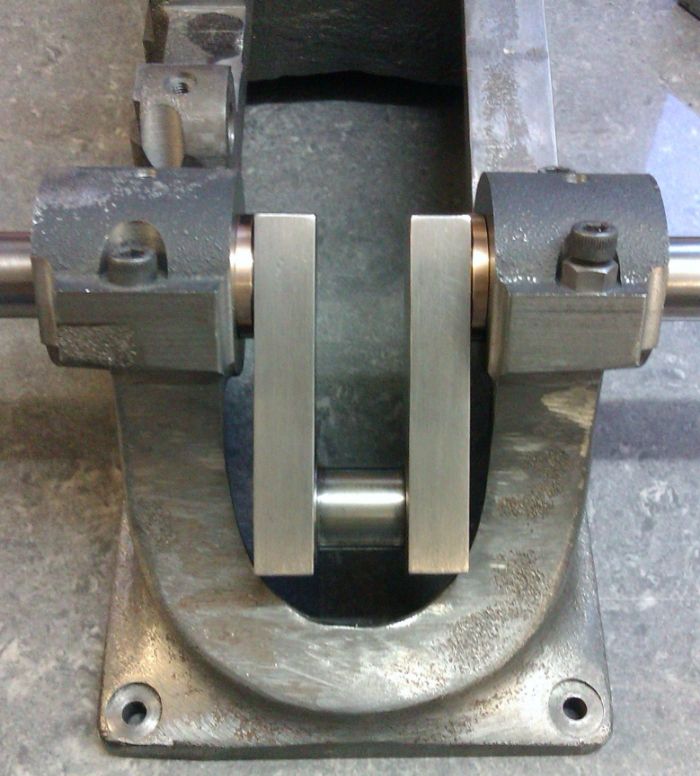
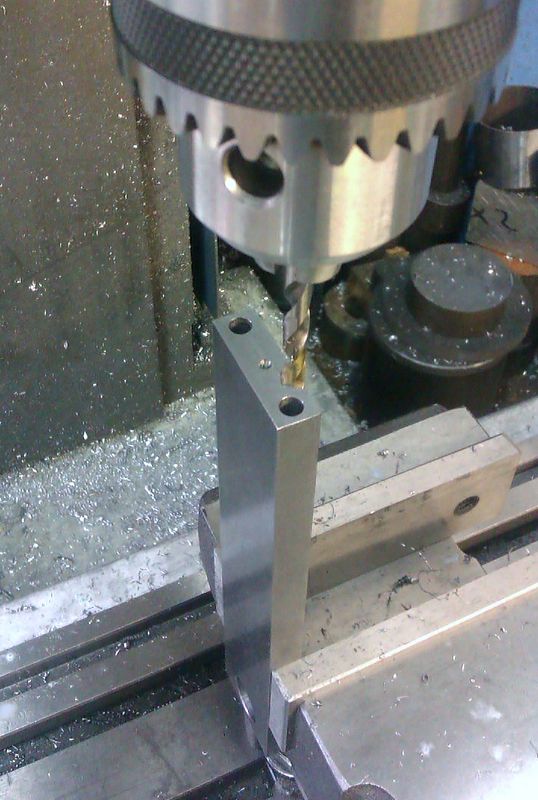
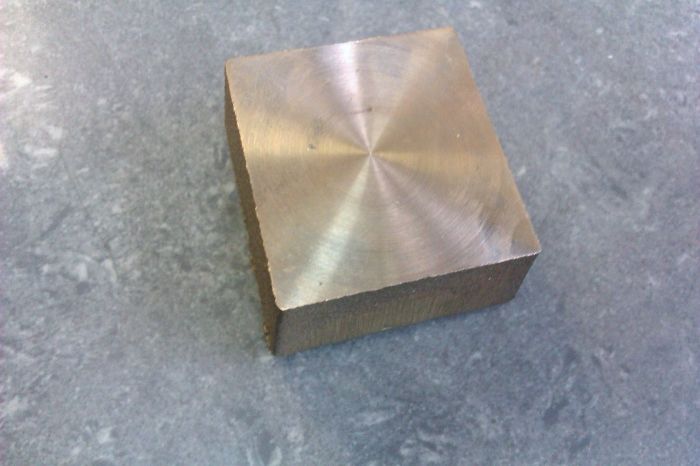
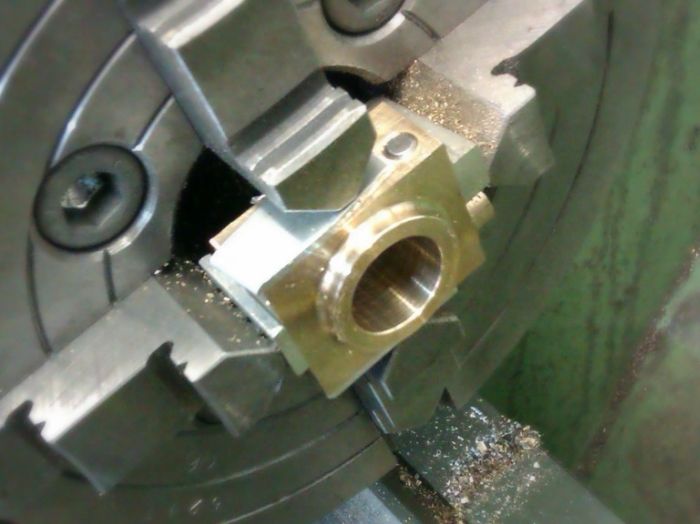
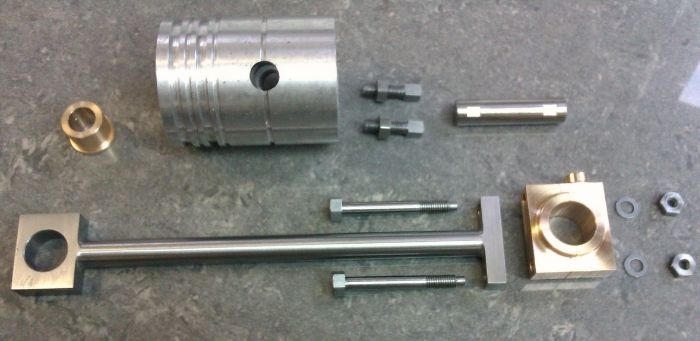
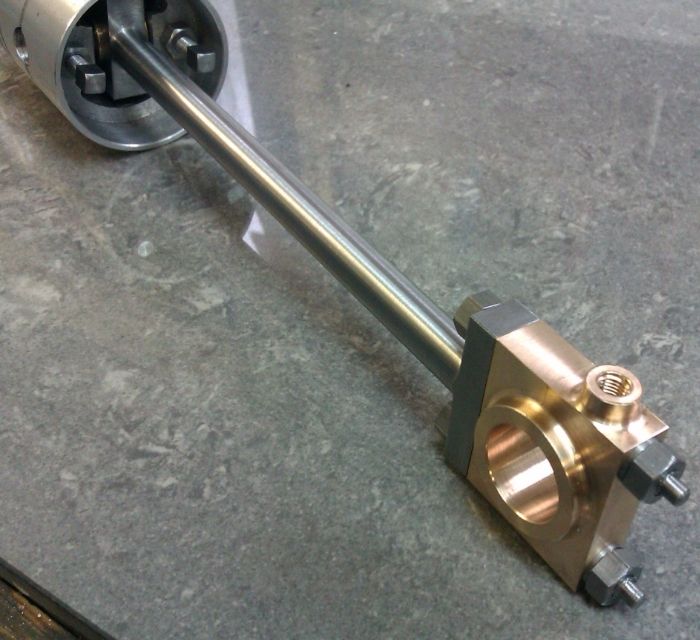
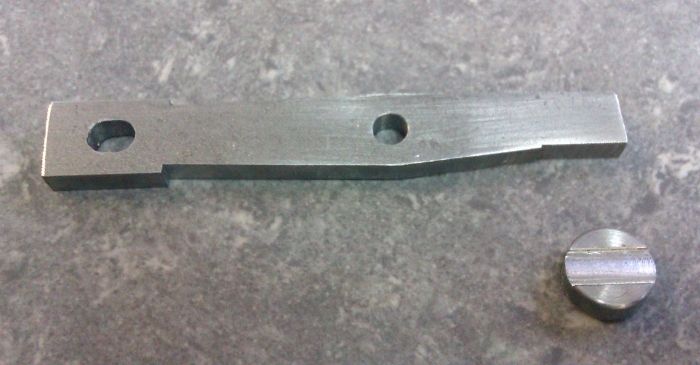
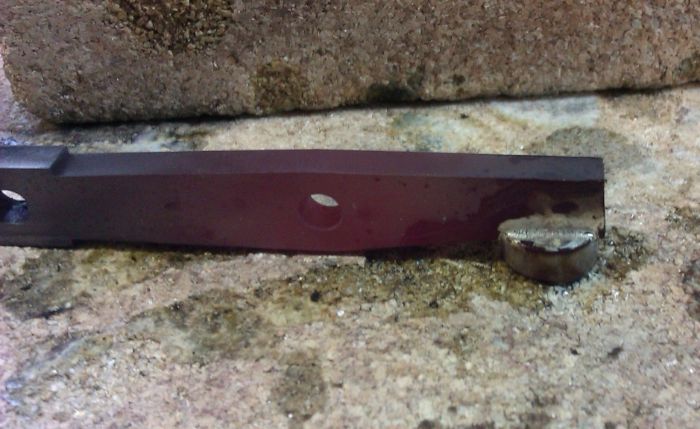
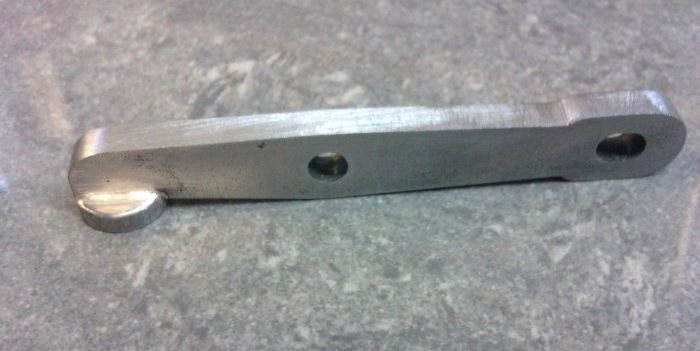
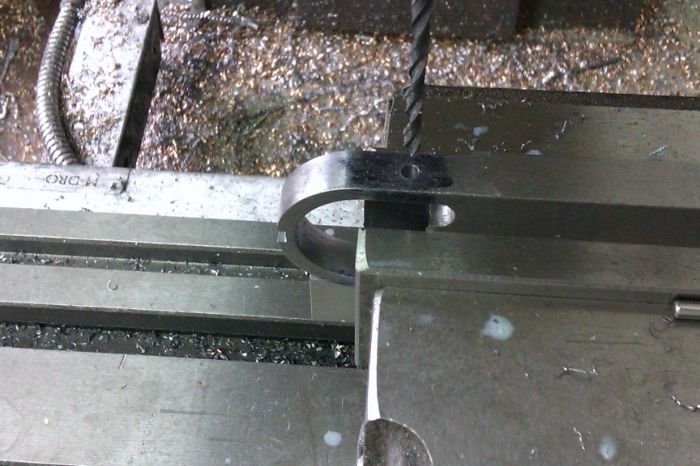
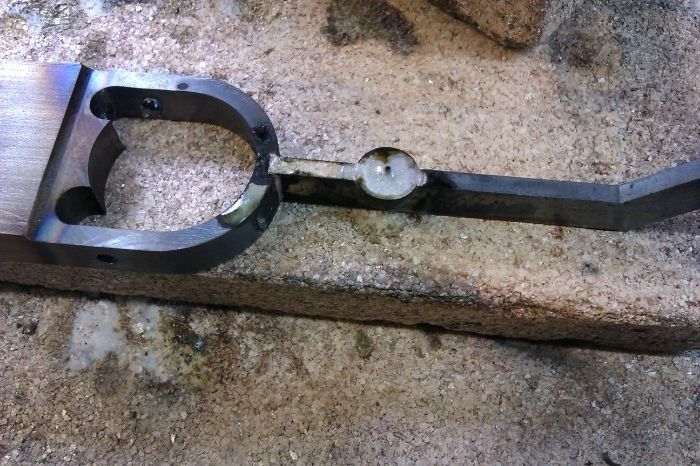
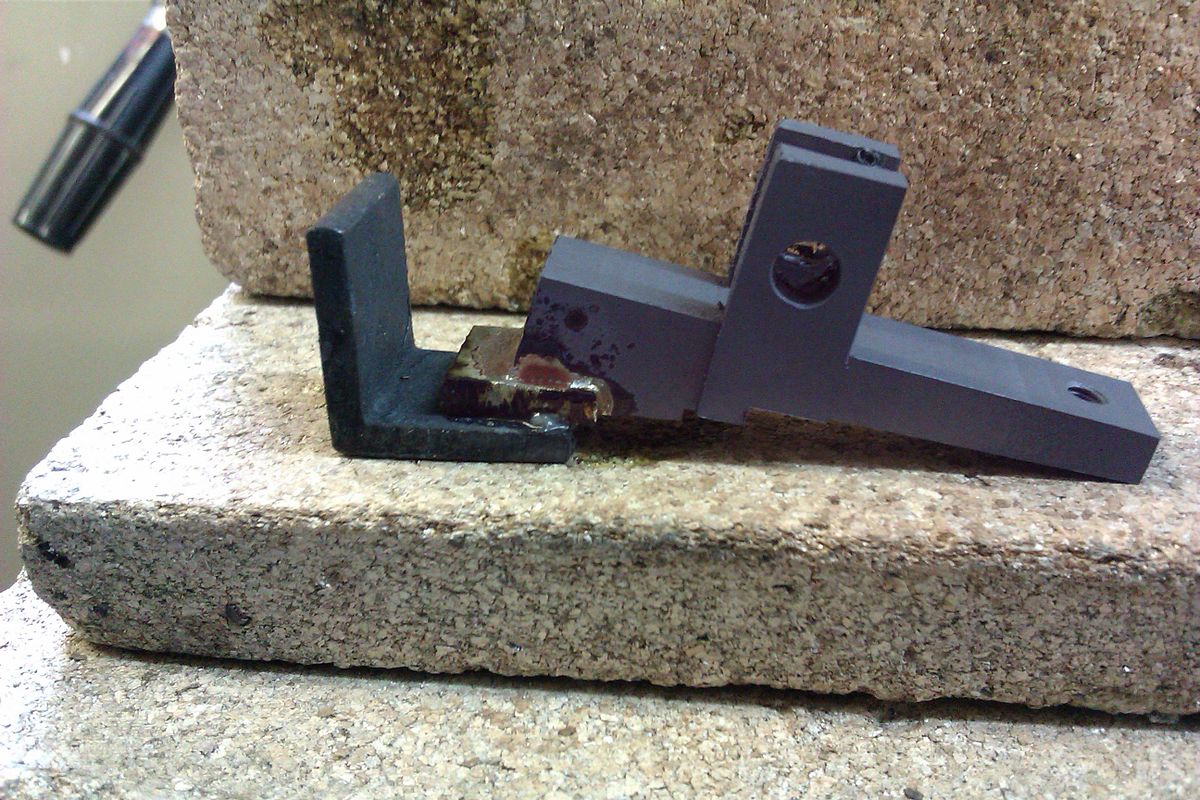
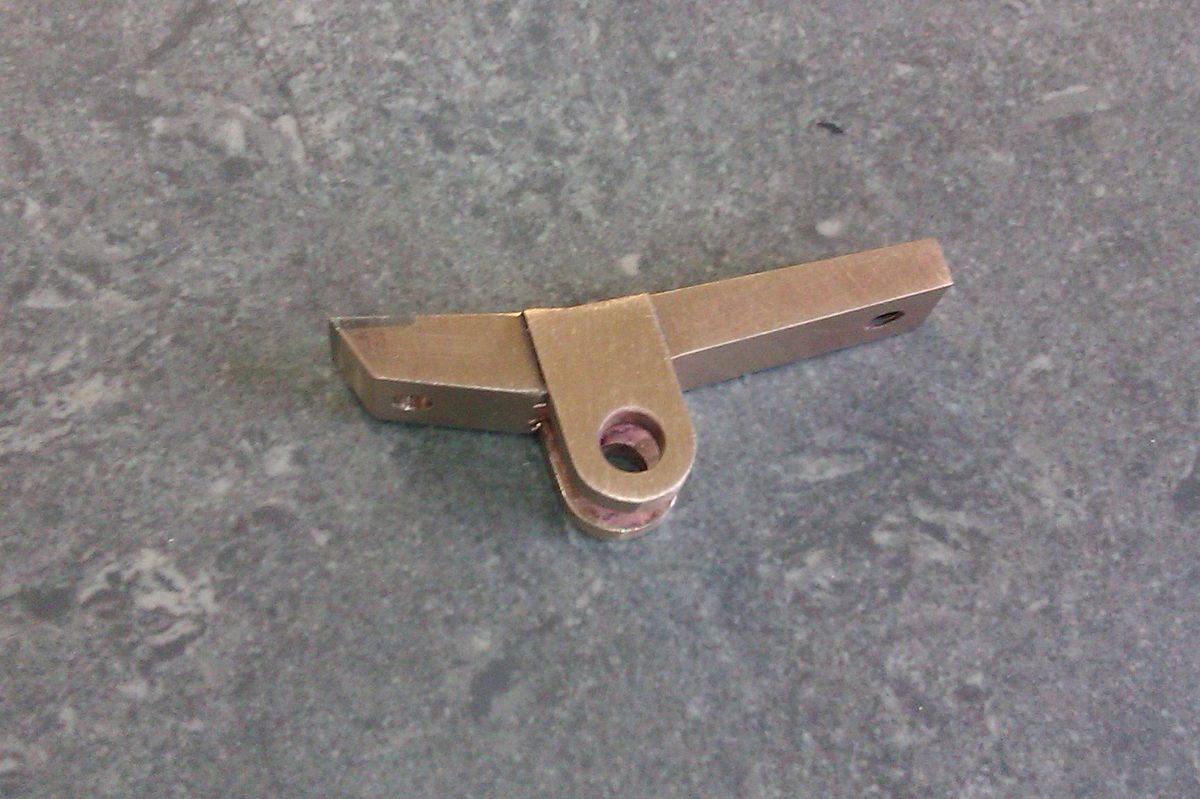
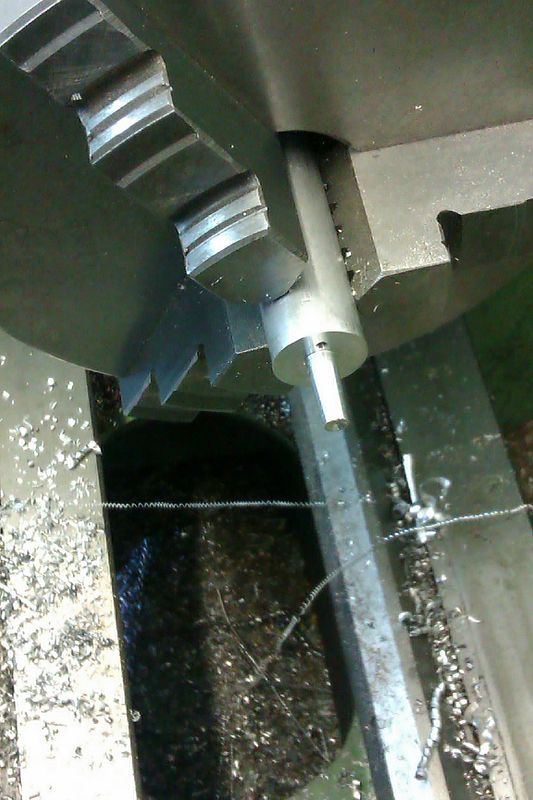
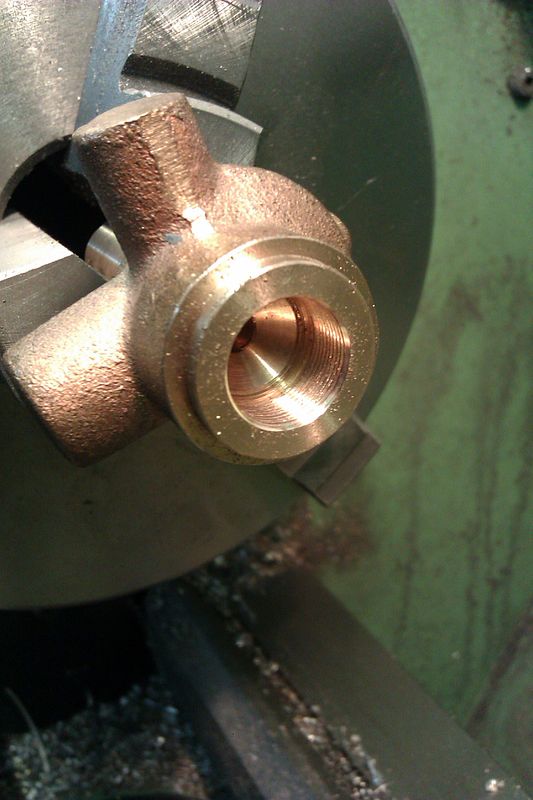
The finished bearings sitting in place

IMAG1818_zpse7ee605b.jpg


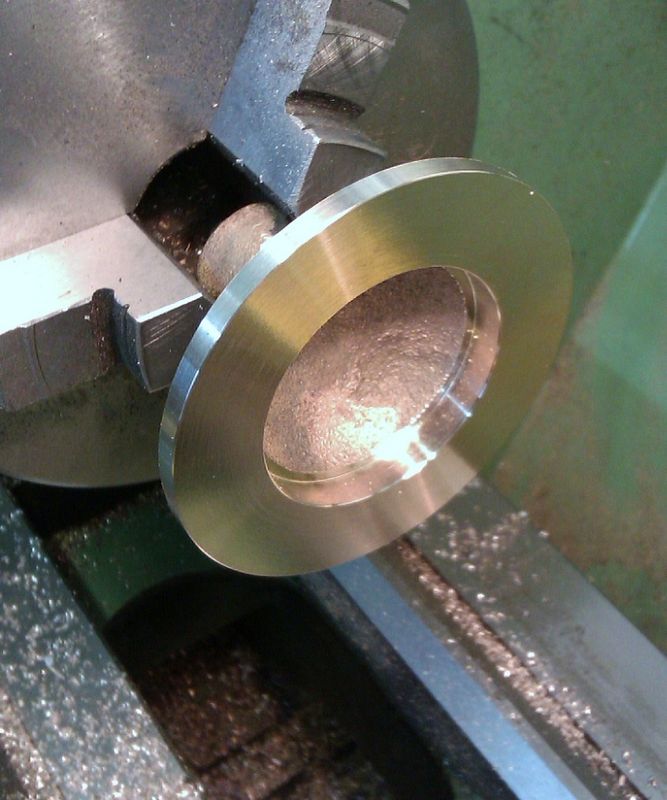
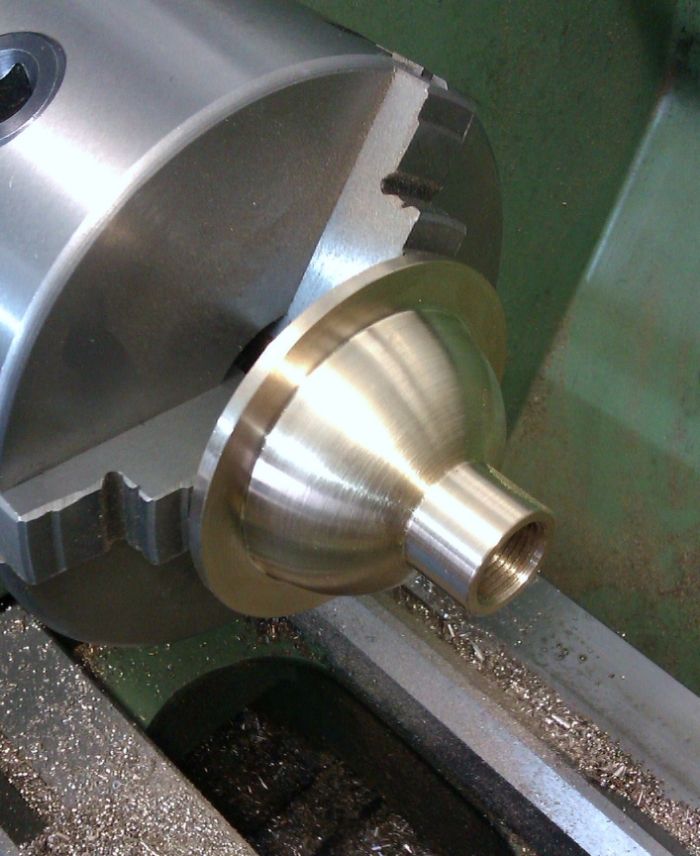
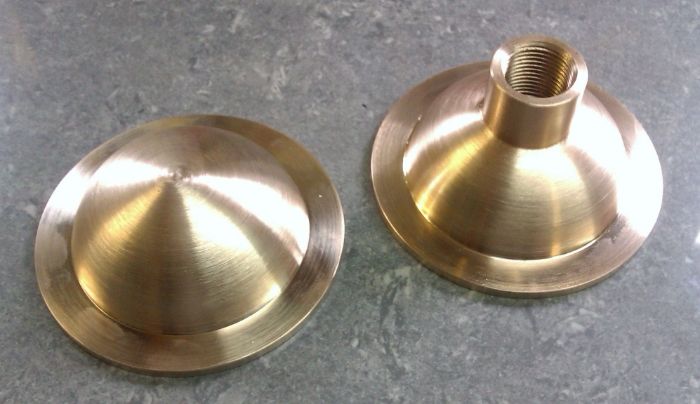
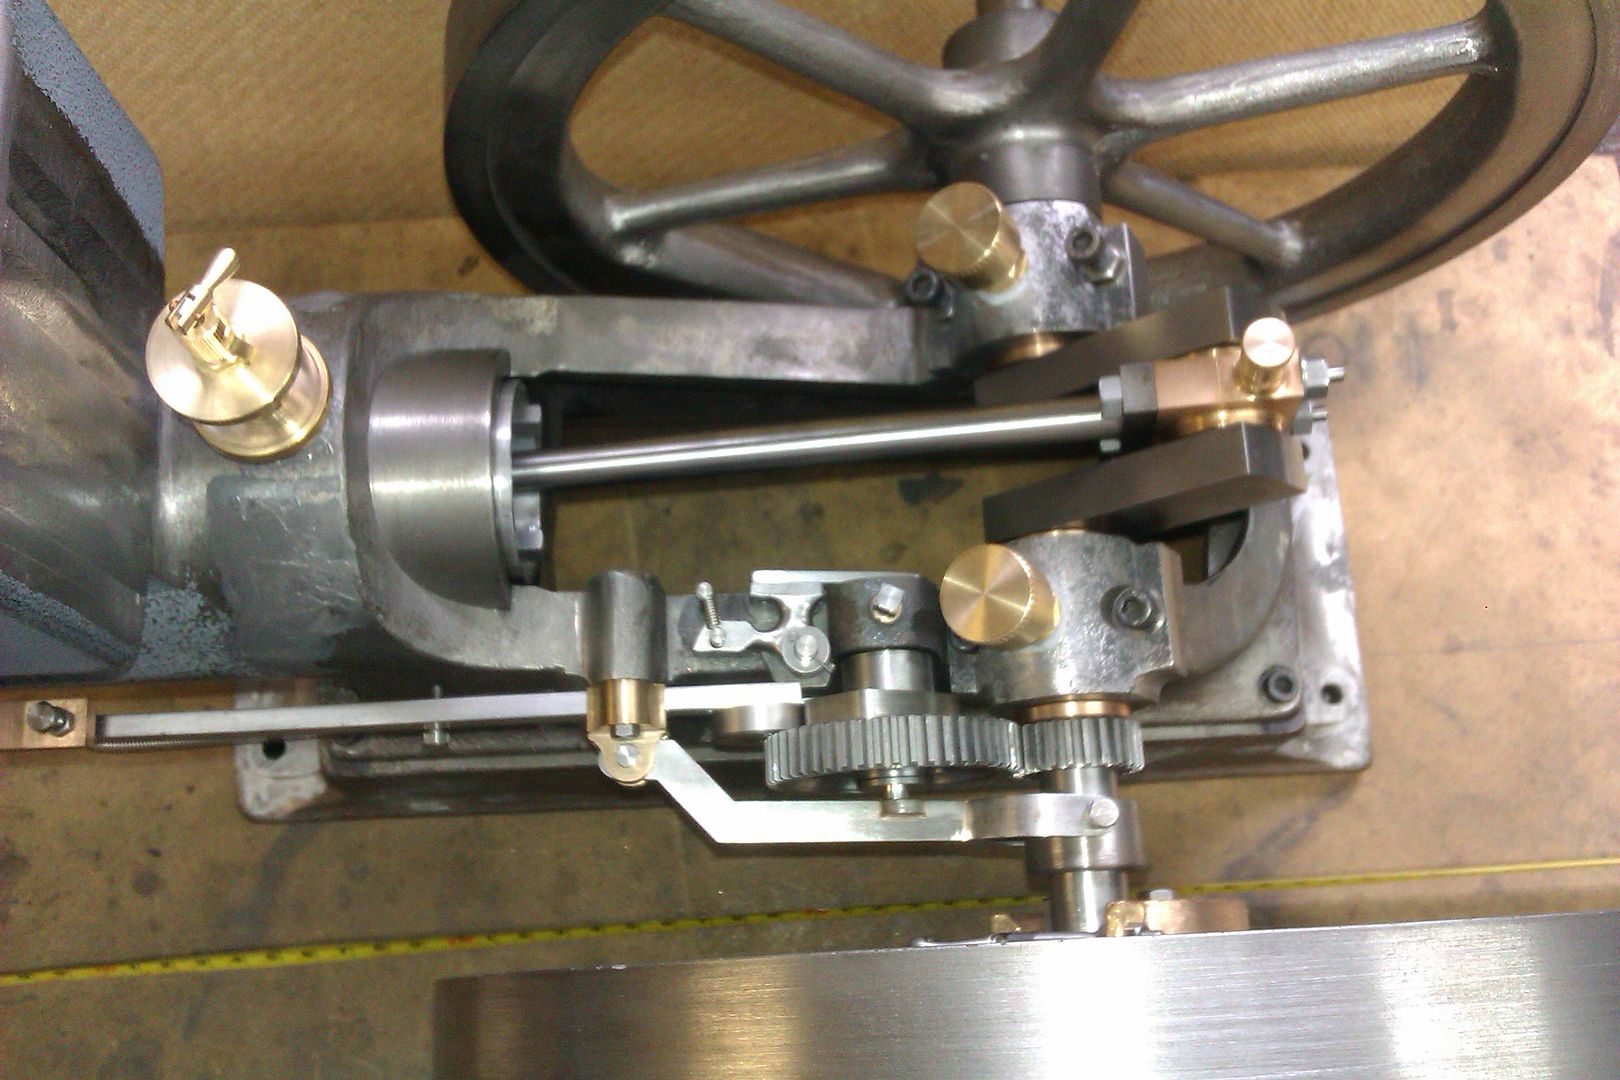
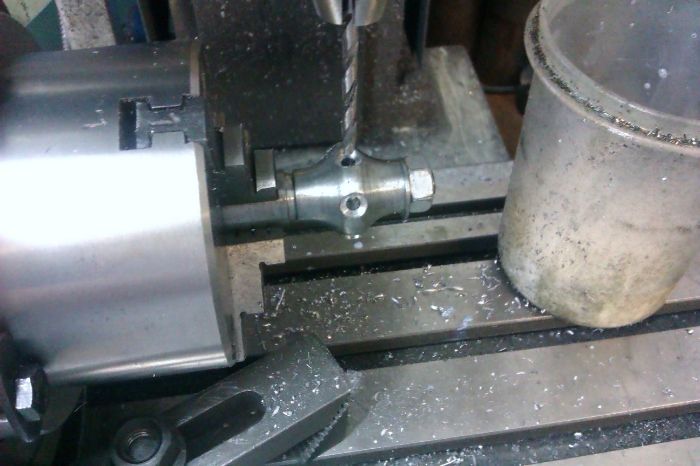
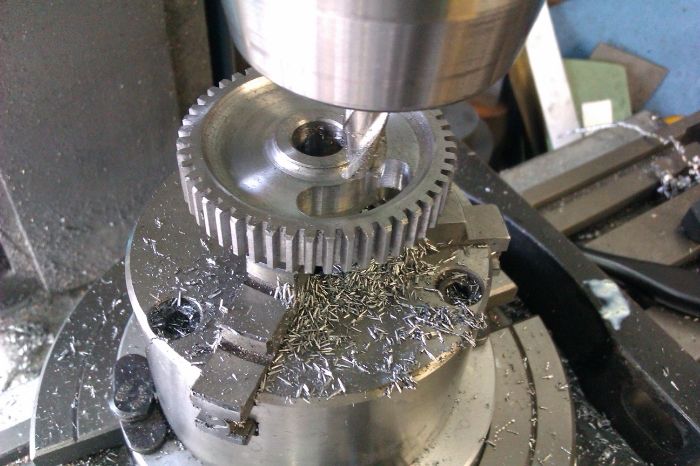
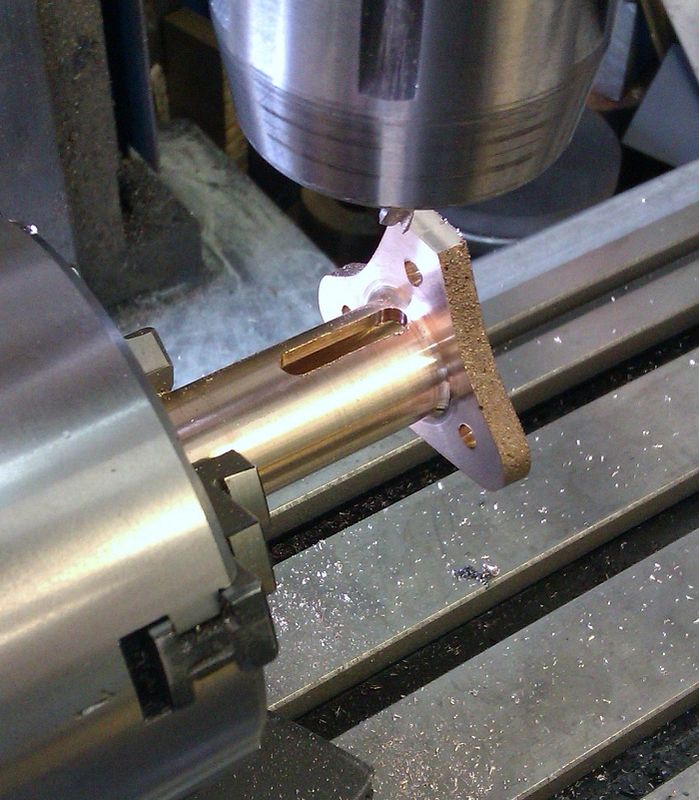
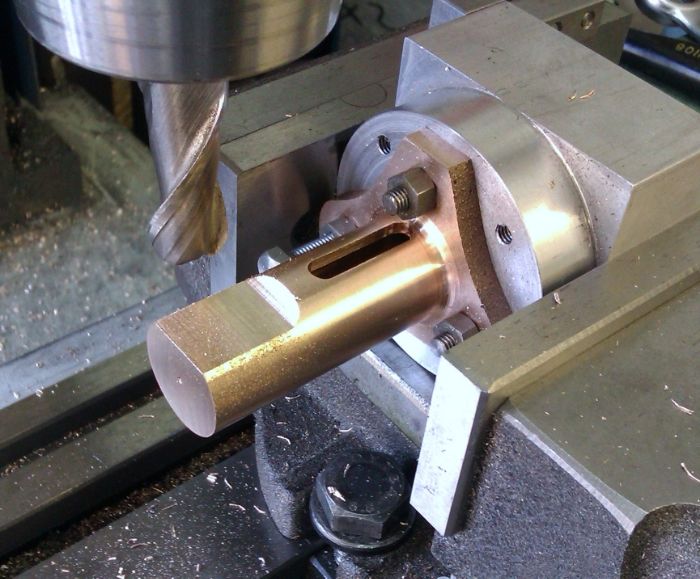
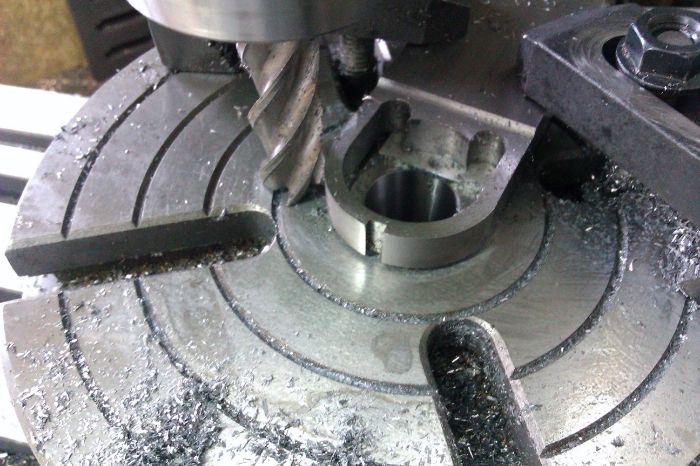
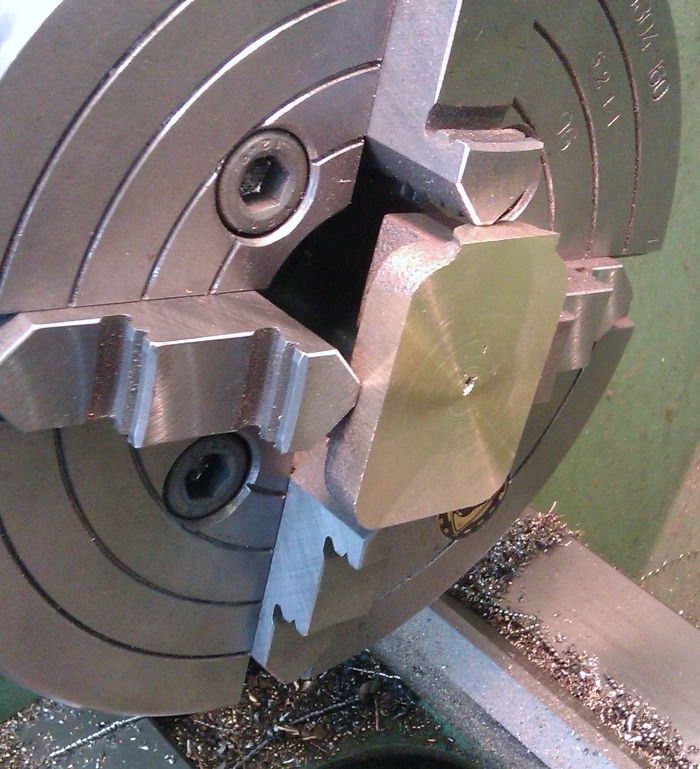
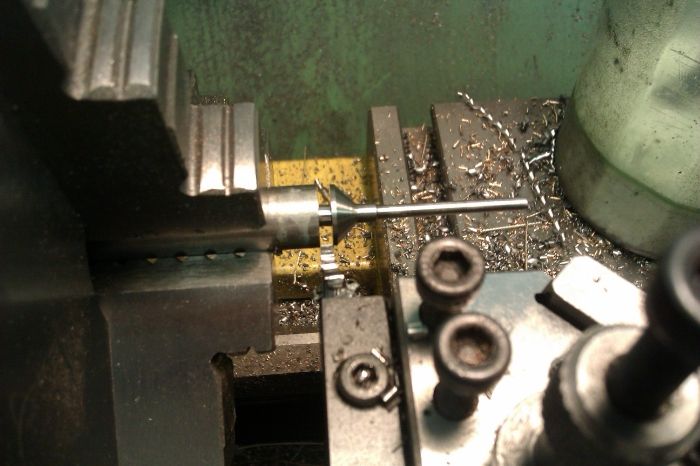
Looking for a quick job one evening I decided to make the supplied timing gear a bit more like the ones on the full size engine as the supplied one is just a plain gear

IMAG1819_zpse5e2fe70.jpg


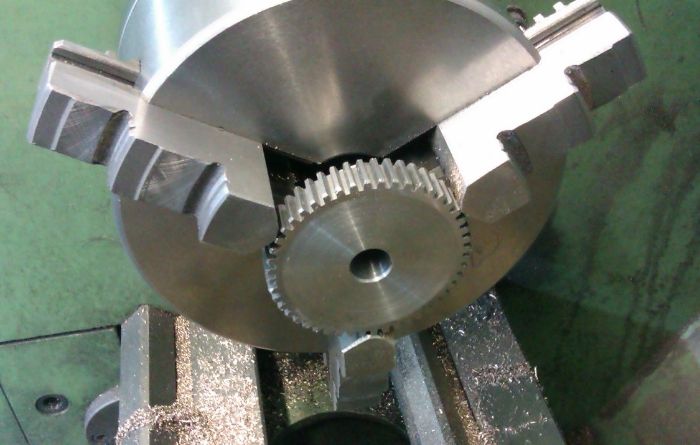
I dished out the face and then used the rotary table to cut the window in the central web

IMAG1820_zps7315e568.jpg


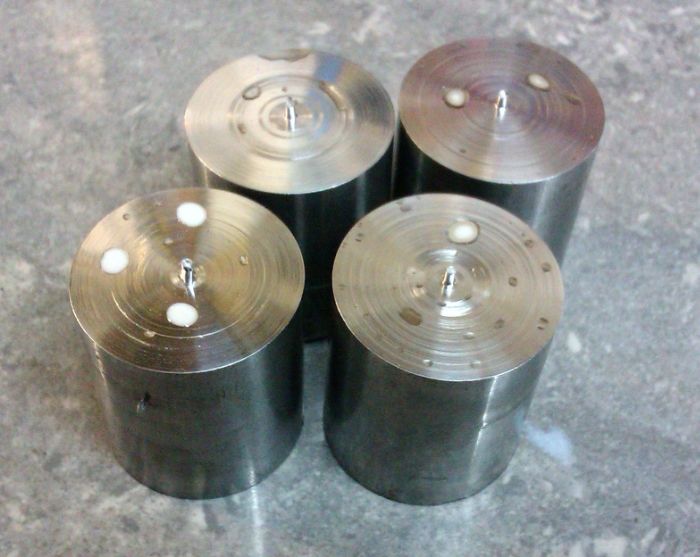
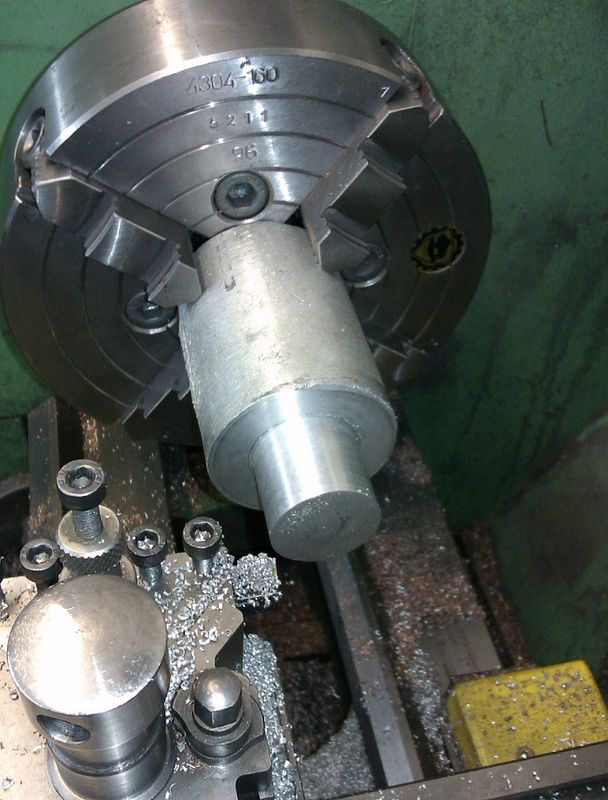
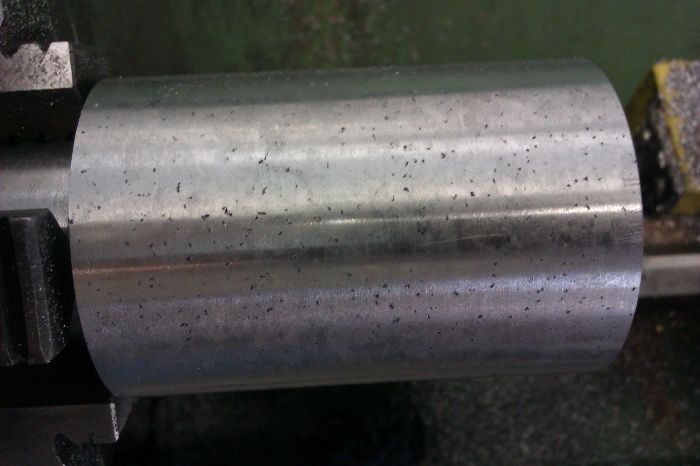
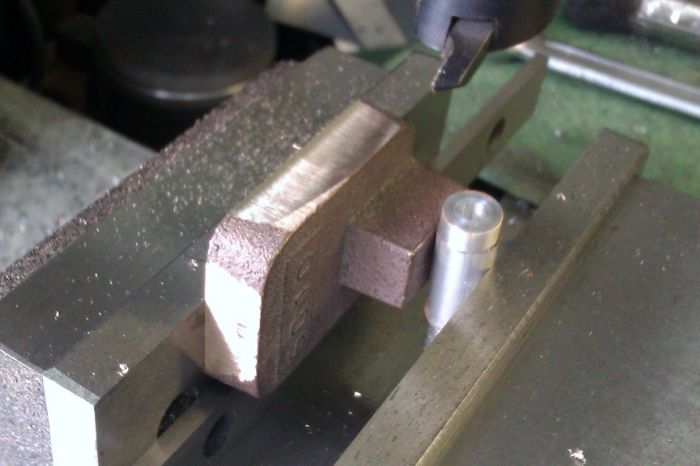
The piston is supplied as an aluminium casting with a large chucking spigot on one end, this was trued up first to get a decent surface to hold onto.

IMAG1827_zpsa2a0b3c5.jpg


I clocked the inner cast surfaces true and then took a cut off the end and took the OD down to 0.050" oversize.

IMAG1828_zpse23f1bd9.jpg


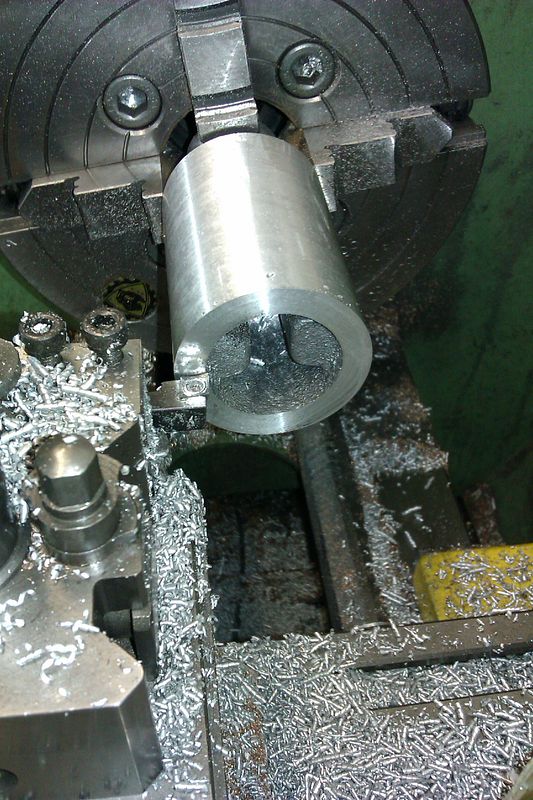
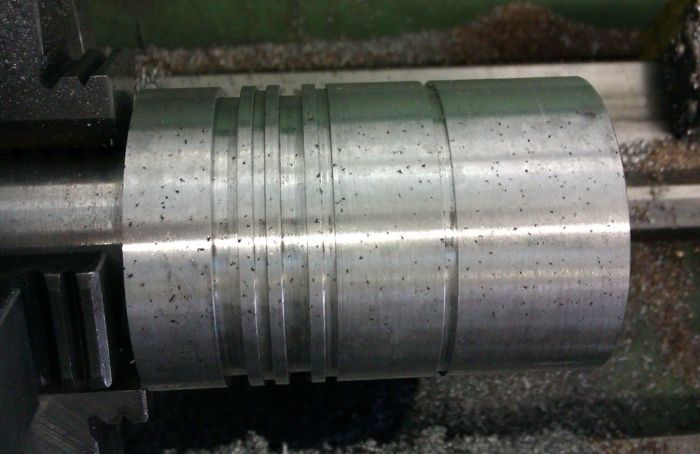
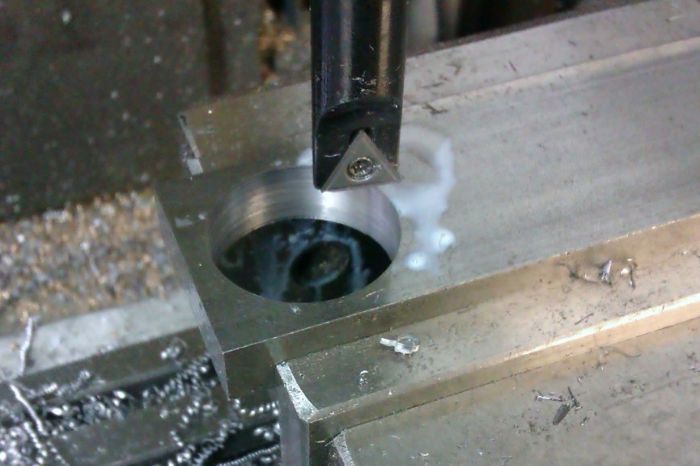
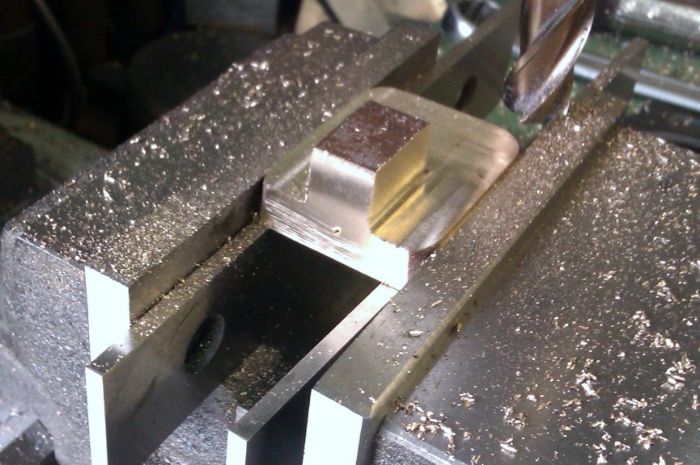
And then used a boring bar to hollow out the skirt to size before leaving the casting to cool.

IMAG1829_zps6d724fdf.jpg


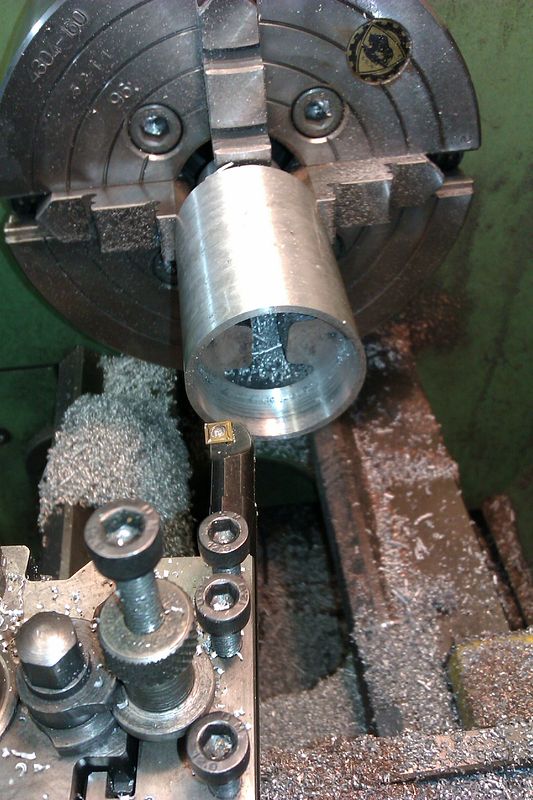
I then went back and machined the OD to size at which point the casting started to look a bit porus but it should be OK in use.

IMAG1831_zps9da58c71.jpg


So I carried on and cut the ring and oil grooves

IMAG1832_zps696820ee.jpg


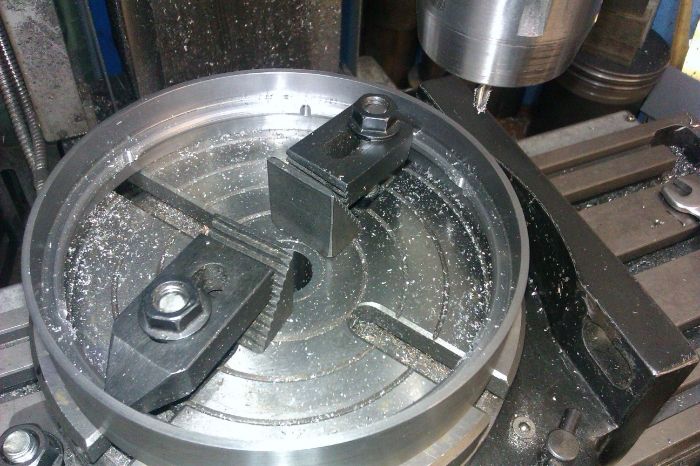
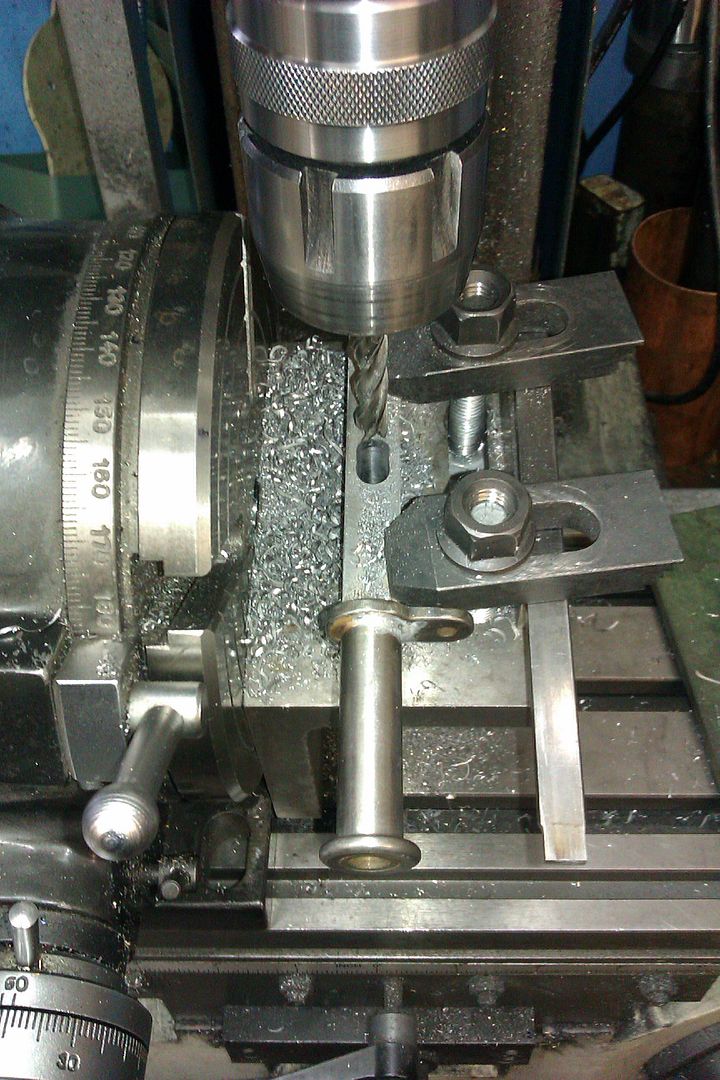
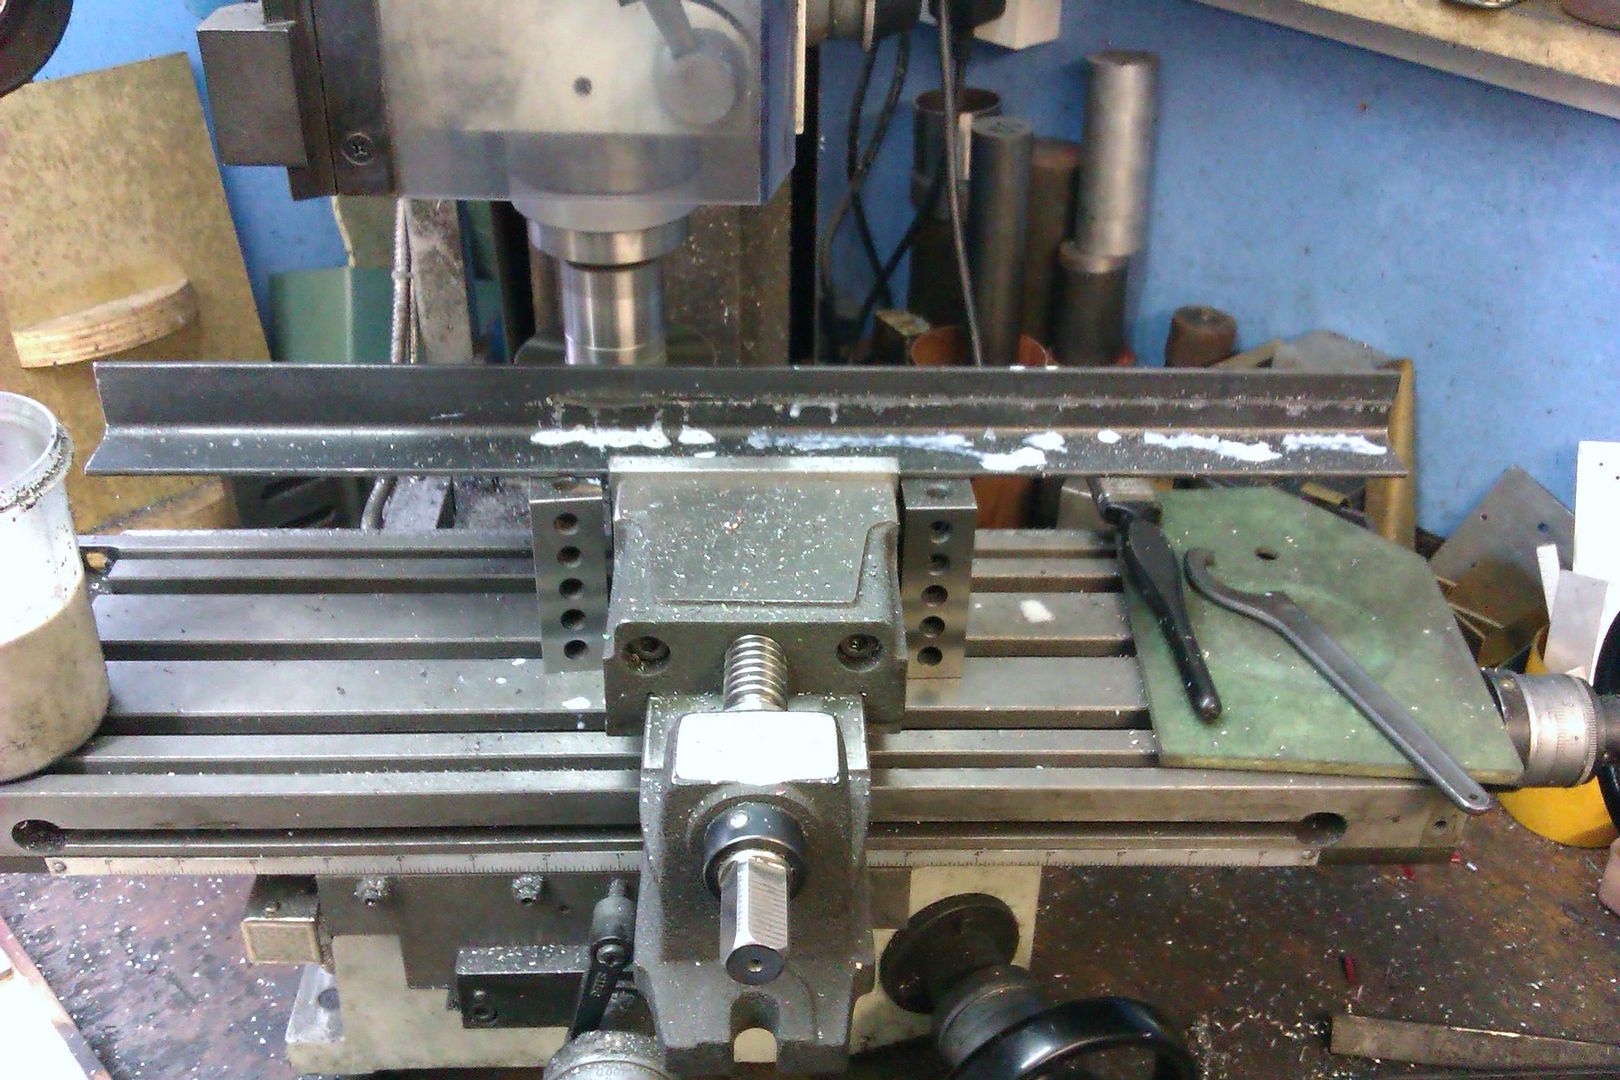
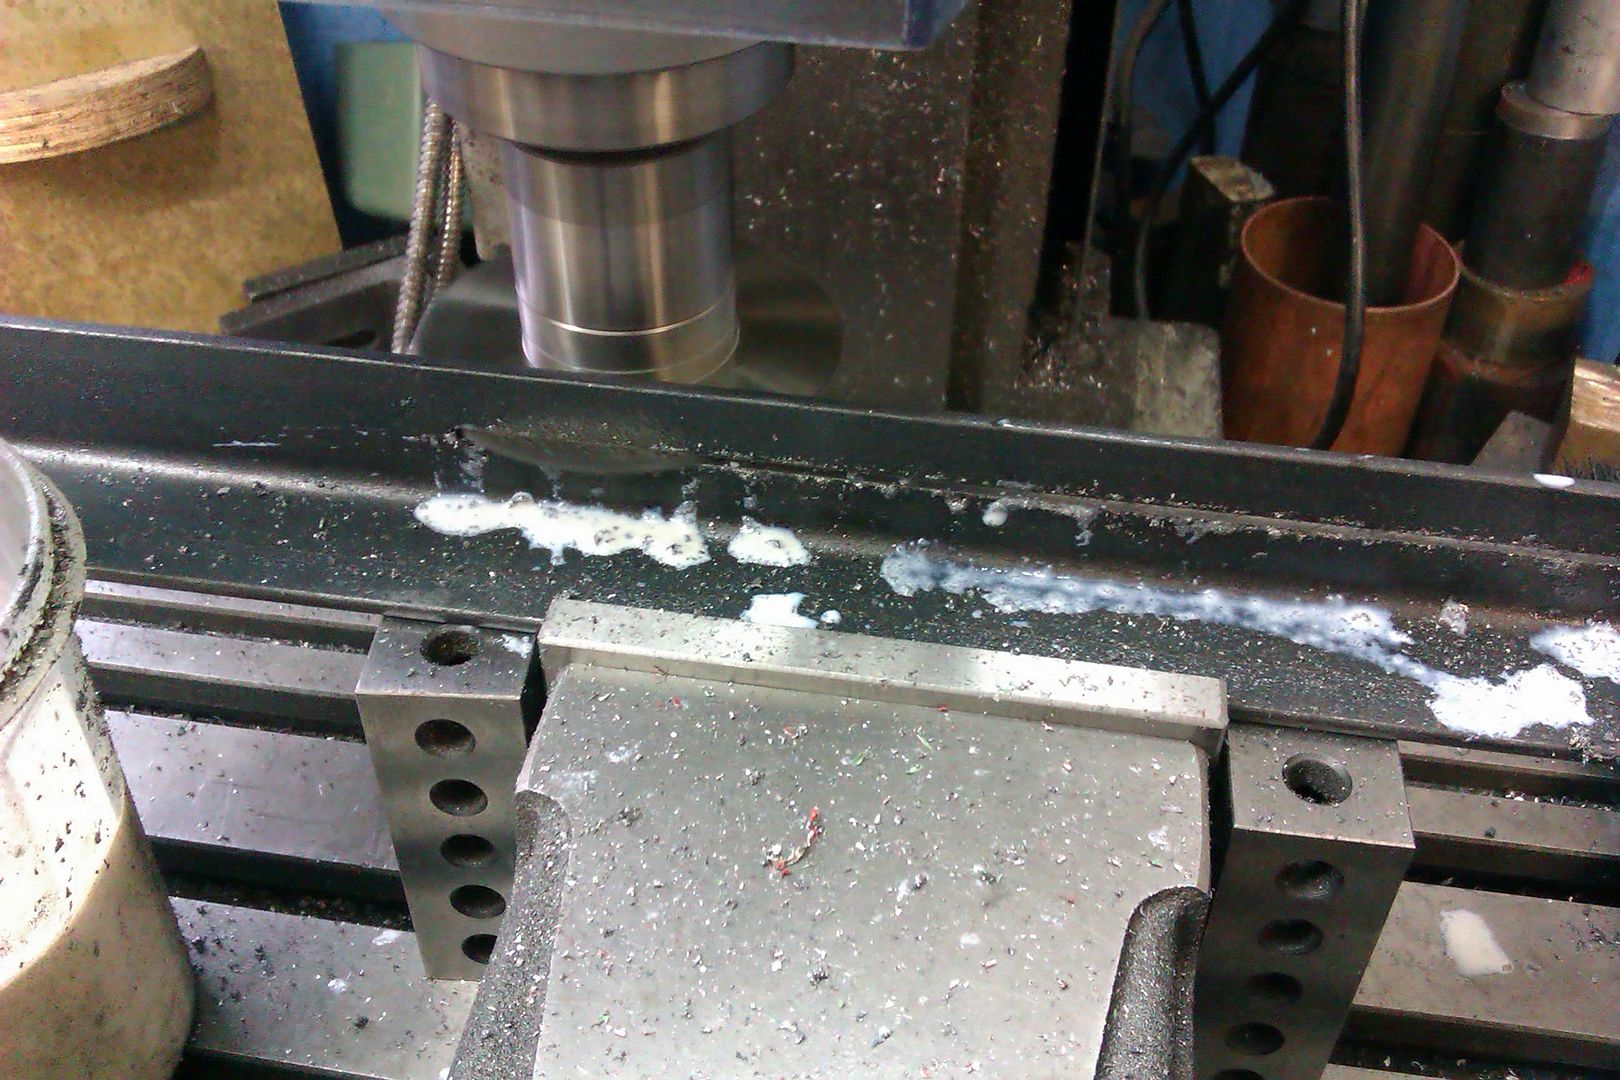
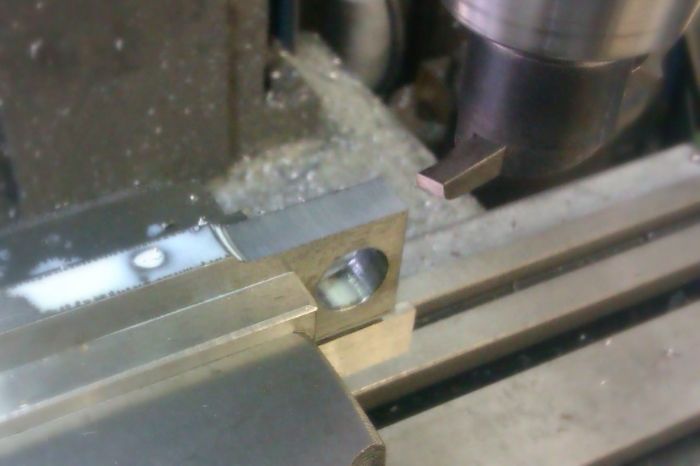
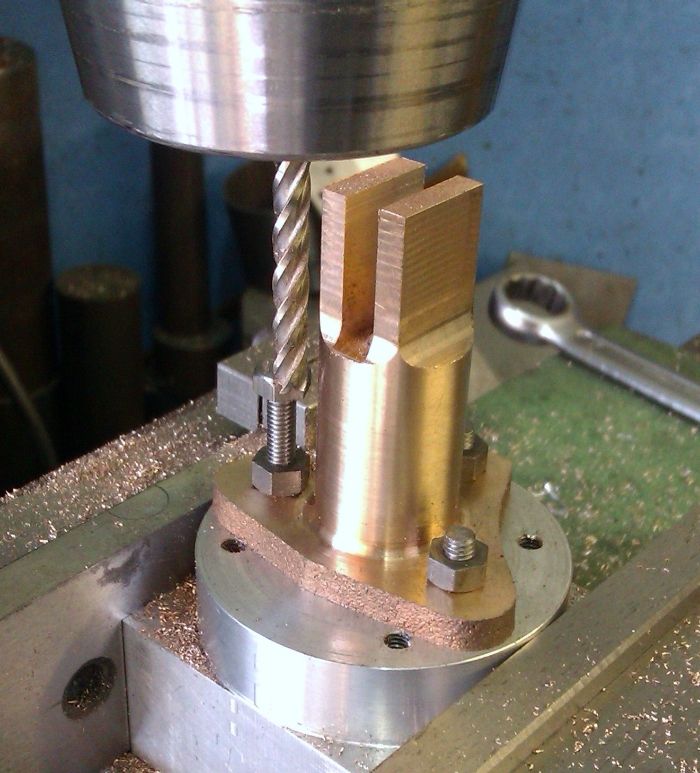
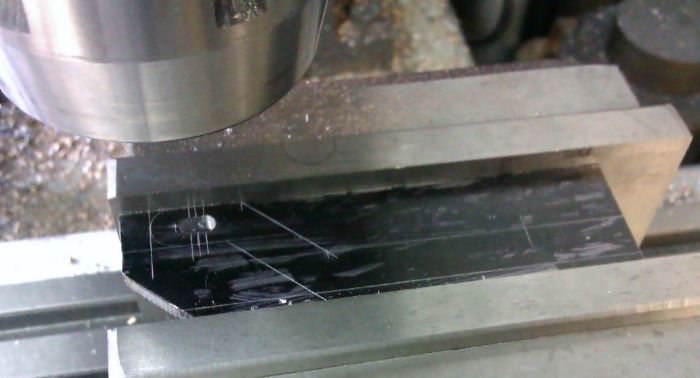
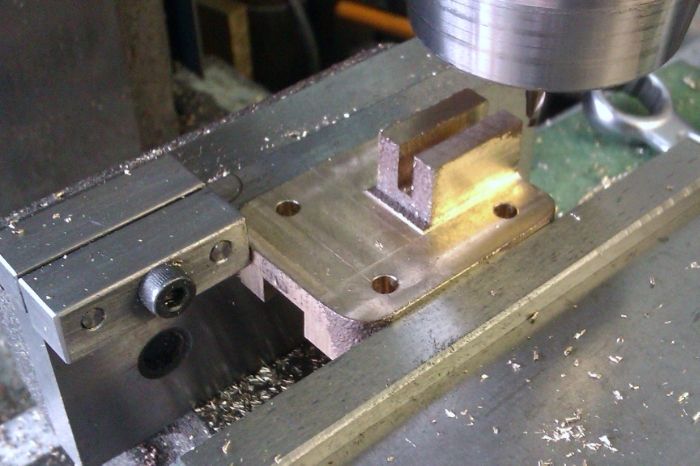
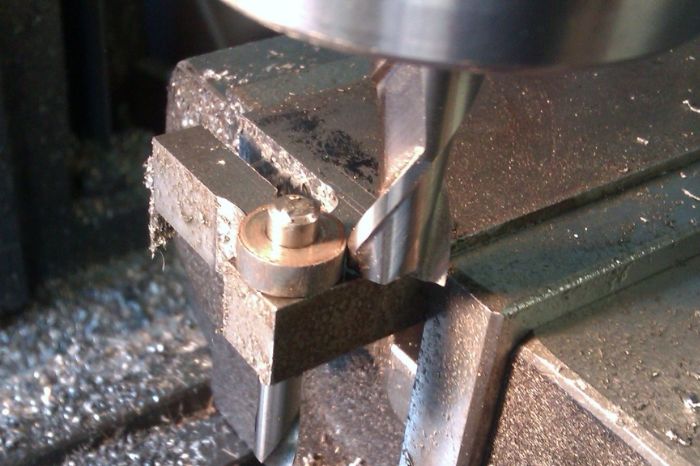
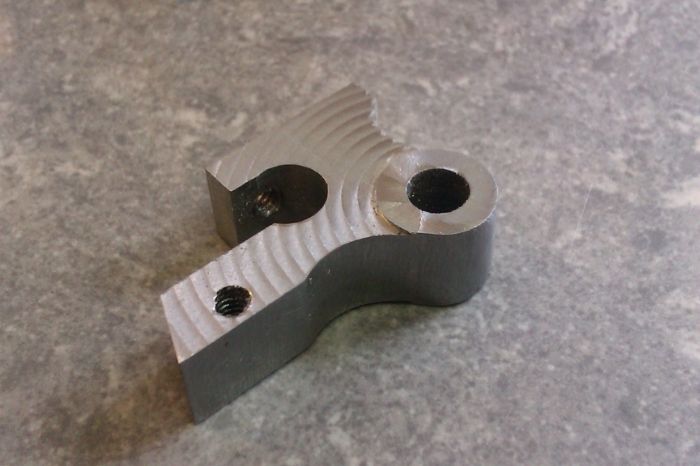
Over to the mill to take the gap for the conrod to width

IMAG1833_zpsc3bdb2b9.jpg


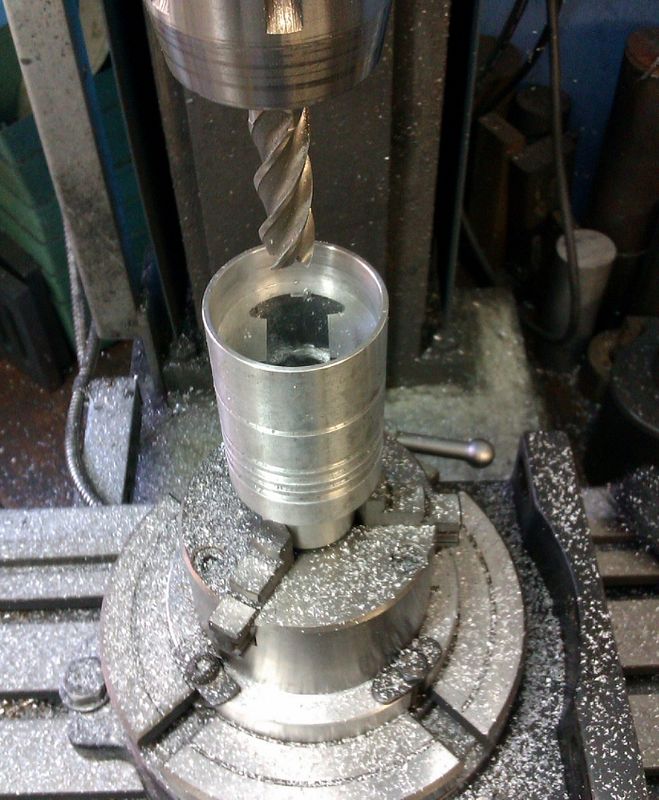
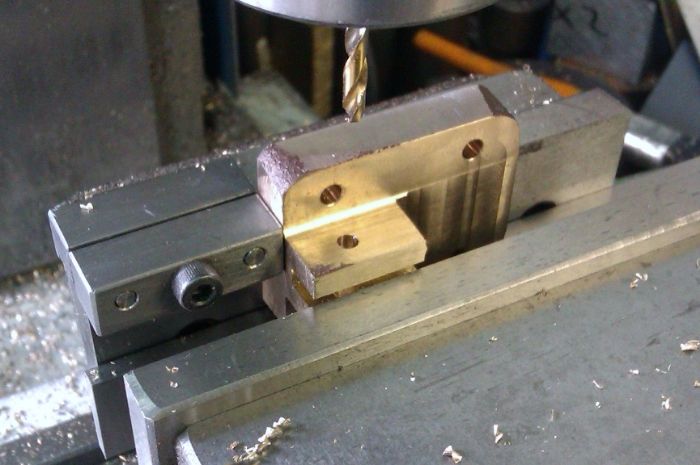
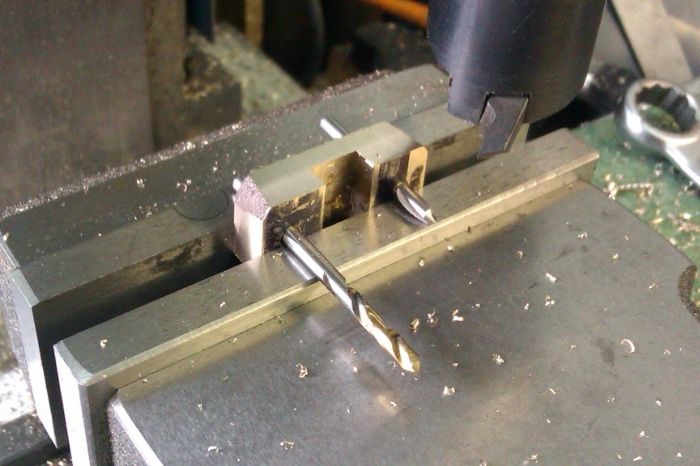
Then without rotating the table mounted it vertically so the pin hole is at right angles to the previously machined faces

IMAG1834_zps334df9f9.jpg


Then drill and thread the holes for the pin retaining screws.

IMAG1835_zps083b8fc5.jpg


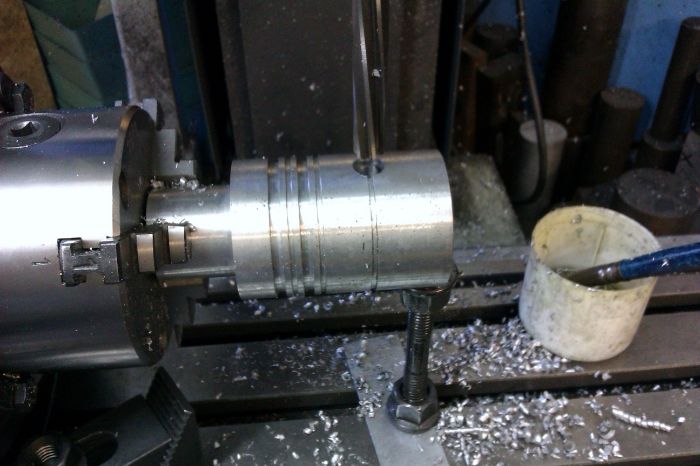
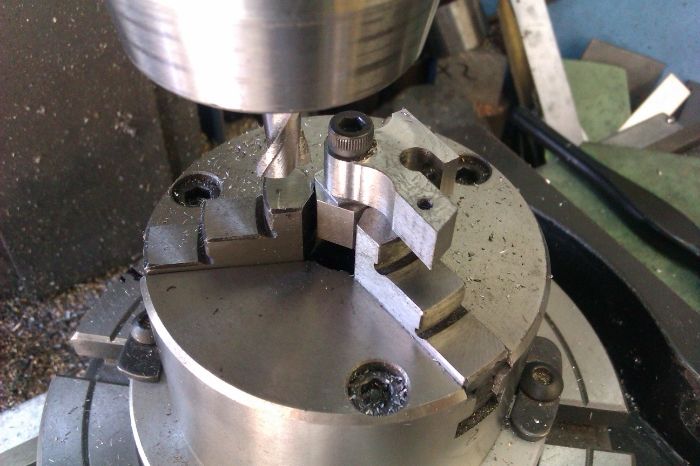
It was then machined to length to complete.

J
 
Jason,

The engine is coming along really nice, good to see your progress,

Cheers,

Colin
 
With the piston and crank made the next logical item was something to join the two together so a bit of 1.5" x 0.375" flat bar was sawn off to form the conrod.

IMAG1837_zps2e183e70.jpg


The ends were squared off and the 12" digital callipers bought out to check length.

IMAG1839_zps161630a9.jpg


The hole for the small end bush was then bored

IMAG1840_zps78fabf44.jpg


The other end was drilled for the big end bolts and a Ctr hole added.

IMAG1841_zps12d9c5b5.jpg


The small end was then reduced to width and a bit more as things looked a bit tight inside the piston if made to drawing.

IMAG1842_zps11df6363.jpg


It was then held by the small end in the 4-jaw and supported with the tailstock at the other and reduced to 3/8" dia which gives this engine its "round rod" nickname.

IMAG1844_zps08fbb095.jpg


While the 4-jaw was on the lathe the block of bronze supplied for the big end bearing was faced and then transfered to the mill to square the edges all oversize

IMAG1849_zps7a54856f.jpg


IMAG1851_zps6abc3576.jpg


I then did some rough marking out and hacksawed the bearing into two

IMAG1853_zps5d348cd2.jpg


The mating faces were then flycut followed by milling the mating slot/spigot and bolt holes drilled

IMAG1856_zps58136f56.jpg


IMAG1857_zps20bdb591.jpg


A couple of dowels were then stuck into the bolt holes to keep things in line while the oil cup spigot and then the sides were turned.

IMAG1859_zpsc648b8ae.jpg


IMAG1864_zps25297589.jpg


The other few bits are just simple turning jobs so I won't detail them but these are the parts that make up the piston/rod assembly

IMAG1865_zpsf69e9d17.jpg


IMAG1866_zps5fb4848a.jpg


And it all put together

IMAG1868_zps9a454f33.jpg


J
 
The rocker arm post fits over the intake valve and is supplied as a bronze casting, first job was to get it running true in the 4-jaw and face the end followed buy boring out the hole for the valve & spring to fit inside.

IMAG1594_zps5b359f44.jpg


A mandrel was knocked up to fit the bore, the end faced and ctr drilled to give additional support while the outside was turned.

IMAG1595_zps8ae6140b.jpg


IMAG1596_zps2bb4319f.jpg


Then over to the mill and into the rotary table to drill the three mounting holes, without turning the table it was reset from vertical to horizontal and the slot to get access to the valve milled.

IMAG1597_zps50697763.jpg


It was then mounted onto a block of aluminium so it could be easily held and indexed while the end was milled to shape.

IMAG1598_zps7e565cad.jpg


I had to use a long reach mill to cut the slot for the rocker arm.

IMAG1599_zpsc50523de.jpg


A rough and ready jack was used to help support the end while the pivot pin hole was drilled & reamed

IMAG1600_zpsb9bbf80e.jpg


The part was finished with some hand filing of the end and around the three bolt holes.

The rocker arm is a fairly straightforards steel fabrication. Start by marking out and drilling/milling the holes in a bit of plate.

IMAG1899_zps2c70f3e5.jpg


Then saw and file to shape, add a bit of rod with a locating slot.

IMAG1900_zps8554cd26.jpg


Silver solder the two together

IMAG1901_zps590b9002.jpg


Machine the pad back to size

IMAG1902_zps6692218c.jpg


And basically done though I have since fettled it a bit to make it look more like a casting.

IMAG1903_zps4521471b.jpg


J
 
The governor arm is a similar steel fabrication but a bit more involved as it has a forked end. Again I started by marking out and then milling the holes in some plate before cutting and finishing to the lines.

IMAG1873_zps729f28f5.jpg


The fork was worked onto the end of some 3/8" flat stock, starting by boring a hole to form the inside curve of the fork.

IMAG1874_zps4dc2f148.jpg


Followed by a bit of milling to form the two fork prongs

IMAG1876_zpsaef21575.jpg


Quick slot to locate it on the end of the other bit.

IMAG1877_zps05b48e9c.jpg


Mount on the rotary table with a bit of packing between and round the outside of the fork

IMAG1878_zps4b231a1f.jpg


Drill and tap for the pins that fit in the governor spool

IMAG1879_zps78264bb1.jpg


Solder together with the addition of another pad set into a hole. By leaving the fork on the parent bar it was easy to make sure the two parts were in line.

IMAG1881_zps6f3e97e5.jpg


Job done

IMAG1894_zps2e7d08ac.jpg


J
 
The push rod slides in a pair of brackets, these are supplied as a single bronze casting which was first held in the 4 jaw to get a flat reference face. Although it looked fine from the outside some holes soon started to appear.

IMAG1614_zps9ee8c33d.jpg


With the now flat face against the vice fixed jaw and a bit of aluminium on the other side to take up any uneveness the 4 sides were squared up but left oversize at this stage.

IMAG1615_zps592de284.jpg


I could then hold it by these faces to bring it down to thickness and shape the governor arm pivot that is part of the bracket nearest the crank

IMAG1616_zps3b00c8a4.jpg


The slot for the pushrod was then milled which revealed how cheesy the casting was, followed by adding the mounting holes

IMAG1617_zps7ae3c0dd.jpg


IMAG1618_zpsef8fe0b8.jpg


The slot for the governor arm was added, then the pivot hole and finally the brackets were taken to size

IMAG1619_zps3f1e6455.jpg


IMAG1620_zps22c03b66.jpg


IMAG1621_zps969581af.jpg


Then onto the rotary table to add a bit of shape

IMAG1622_zps0f7a1f4b.jpg


There is a little block of steel on the end of the pushrod that engages with the governor latch, the "dovetail" shape of this was cut with a flycutter

IMAG1625_zps86b6802c.jpg


And here is the rod assembly complete with cam follower wheel and adjustable fork. Most of the holes are out of sight in teh surfaces that the rod runs against so I don't see it being a problem as there is still enough meat to give a decent bearing area.

IMAG1627_zpseadd6c57.jpg


J
 
The ignitor trip is another bronze casting, this time it seems a bit more solid. I have included a bit of the drawing so you can see what I'm aiming for

IMAG1909_zpsda07ce28.jpg


I started by machining the top and sides to give me some flat surfaces to do some rough marking out on

IMAG1910_zps17745bad.jpg


I then started to machine to size but left the angled faces square for now

IMAG1911_zps301d9e93.jpg


I could then indicate off these faces to locate the pivot hole

IMAG1913_zps5218a71e.jpg


Followed by the slot so it can slip over the push rod. Also drilled and tapped for the stop screw at the same setting.

IMAG1915_zps7da64742.jpg


I then roughed out the top and cut a rebate (rabbet) for the steel tip

IMAG1916_zpsc3d80248.jpg


An oversized piece of steel was silver soldered in place before being machined off flush with the bronze

IMAG1917_zps482f4af7.jpg


IMAG1918_zps63bbfb2a.jpg


And thats another bit done

IMAG1920_zps93e40f24.jpg


The Governor latch that engages in the small block I showed in my previous post is cut from a lump of 3/8" steel which was marked out as a guide though I used the DRO to get the actual positions

IMAG1933_zpsb00ccd3d.jpg


The straight bits were easy enough but to ensure the curves met the round pivot boss correctly I used the spinning button method - when the edge of the tool touches the button it turns and you know you are in the right place

IMAG1934_zps88be23b3.jpg


IMAG1935_zpsc69f594a.jpg


Then onto the rotary table to form the raised boss and round the outside

IMAG1936_zpsa8fea723.jpg


And this is the finished part as the drawings would have it.

IMAG1937_zps07dac9f4.jpg


But as its a casting I spent a while with files taking off the edges to get it more like ones I have seen in photos. Also got the spring post and back lever in this shot

IMAG1950_zpsc9456653.jpg


J
 
The ignitor body is another bronze casting, I started by turning the outside dia to the finished size of 1.187"

IMAG1921_zpsd4ff892a.jpg


Then the oblong boss was tidied up and the holes added. It could have done with a bit more metal to play with but nothing that could not be got around

IMAG1922_zps406d1525.jpg


A small piece of brass was soldered on to form the lug for one of the stop screws

IMAG1924_zps9e73a696.jpg


The inner face was then turned to bring the flange to thickness and the spigot formed

IMAG1926_zpse6abe538.jpg


A couple of holes were tapped on the outside to take the spring pins and stop screw. The trip stop and shaft can also be seen in this shot.

IMAG1968_zps49e9b439.jpg


The trip is a tricky little thing to make, I've included a bit of the drawing so you can see the part. Most was worked on the end of a bar using the rotary table.

IMAG1979_zpse7f4ef4f.jpg


IMAG1980_zpsb42d75d4.jpg


IMAG1974_zpse2f6d718.jpg


IMAG1976_zps29c56f12.jpg


IMAG1977_zpsa65bc4e6.jpg


The ignitor needs a tapered spring winding so I started by making a mandrel

IMAG1988_zps07b9eece.jpg


Then wound the music wire spring onto the mandrel

IMAG1984_zps1078f853.jpg


Then a quick bit of work with some pliers and the spring is done

IMAG1986_zps0a4dccf8.jpg


The other bits are quite straight forward so I won't cover them here, just to say that I use 3/32" TIG electrode for the contacts on the hammer and anvil to reduce the errosion caused by the spark. This is the finished item on the engine.

IMAG1991_zps6b6ce5ef.jpg


J
 
The carb is another tricky part carved out of a bronze casting. I started by holding the main body in the 4-jaw so I could skim the chucking spigot, this was then held in the 3-jaw and work started on the top of the body.

IMAG2005_zpsa96b7133.jpg


The hardest part is turning the tapered seat below the threaded portion as there is not a lot of room for the tool as it gets towards the bottom of the taper.

IMAG2010_zpsc030c93e.jpg


While the topslide was set over I machined the flow valve so the tapers would match

IMAG2034_zps0c942eed.jpg


It was then over to the mill to face back the various bosses before drilling and tapping these. There are also sveral passages that have to be drilled for the fuel, you can see one here that has been counter bored ready to take a soldered plug to cap off the end.

IMAG2018_zpse461d8ec.jpg


The final hole is for the needle valve and the 1/16" hole for the fuel has to come out in the tapered seat so not the easiest to line up.

IMAG2019_zps845b346a.jpg


Fortunately it came out just about right

IMAG2020_zpsaabb02a2.jpg


Two plugs were turned from the chucking spigot material and then silver soldered into position.

IMAG2021_zps682d0735.jpg


The hole for the fuel line did not come out very central on the cast boss so I decided to machine the boss concentric with the tapped hole. To maintain some draft angle I packed the rotary table up at one side. Then used a ball ended cutter to tidy things up.

IMAG2023_zps54756ccf.jpg


IMAG2024_zpsf58470f1.jpg


The top was turned in the lathe before transfering to the mill to form the hexagonal part

IMAG2014_zps982340bb.jpg


Before going back into the lathe to chamfer the edges

IMAG2016_zps6c247e6a.jpg


It was then parted off and the make thread cut before once again returning to the mill to drill the air holes

IMAG2017_zps6c53198d.jpg


And this is a rough assembly of parts so far.

IMAG2026_zpsc47b0c00.jpg


The remaining bits are quite straight forward so not worth describing, this is all the parts that go into the carb.

IMAG2035_zps74dfbb8c.jpg


And the assembled carb, just the spring and washer missing off the bottom. If you compare this shot of the body to the previous you can see where I have used an engraving tool to restore the "cast" texture around the fuel boss and the plugged holes.

IMAG2036_zps2291ab65.jpg


J
 
This post is just a round up of a few odd items that complete the build.
The piston rings were turned from a length of 50mm CI bar and then parted off with a few spares. I knew there was a reason these scribers had a bent end ;)

IMAG2037_zpsd542bd67.jpg


IMAG2038_zpse1871f89.jpg


The oiler was fairly straight forward, once you have made one they are all very similar.

IMAG2055_zps111c65d7.jpg


The grease pots for the crank and big end are just brass turnings, the straight "knurl" was done using two turns of the rotary table handwheel to get 45 divisions and cut with a spotting drill in a similar way to using an engraving cutter.

IMAG2057_zps7bfa44c1.jpg


The silencer (muffler) is supplied as two bronze castings, the inside face is turned while holding by the spigot and at the same time a small recess squared up on the inside

IMAG1513_zps25f5b5ed.jpg


You can then expand the chuck jaws into this to hold it while turning the outside.

IMAG1515_zps999181ac.jpg


And the two halves turned

IMAG1516_zps9924edcd.jpg


This is what it looks like with all the bits put together.

IMAG2074_zps8ea9992c.jpg


IMAG2075_zpsc22e1f1f.jpg


IMAG2076_zps625ed6ee.jpg


At this stage I would normally test run an engine but as there was quite a lot of filler (Bondo) work needed I decided to paint it first and avoid having any oil soak into the iron that may affect the paint. So slap on a load of Upol

IMAG2077_zps3b52e9ee.jpg


Allow to cure and then sand it down

IMAG2078_zps7588eea1.jpg


Then blow on some high build primer, sand refill, sand and touch up primer

IMAG2082_zpsdb1ea1a4.jpg


Fiat "Red Orange" seemed a good match to the Galloway colours.

IMAG2142_zps2e2647c8.jpg


IMAG2150_zpsda3c4d56.jpg


Followed by some yellow lining and clear coat.

Thats it for tonight, don't expect the next post to be the running engine there is still a long way to go as there is plenty to fabricate that did not come in the kit

J
 
Looks as good as the real McCoy.


Sent from my iPad using Model Engines
 
Some of you may recal that back in post #4 I said that I was considering not using the cast sub-base. I did fancy making the "cross cut rig" but after some consideration decided against that as at 1/3rd scale the whole thing would be about 54" long. Therefore I took the option of the "hand portable" cart and a bit of time spent on Google Images resulted in an old e-bay advert for an original Galloway hand cart and some useful dimensions in the description.

cart_zps65232519.jpg


Armed with the sizes and photos I was able to arrive at a suitable design and decided to tackle the wheels first, this is what I was aiming to reproduce.

Cartwheel_zps4e221710.jpg


Luckily the wheels scaled out at 5.5" and I was able to buy some 139.7mm dia x 5mm wall ERW tube. I cut off two pieces long enough to get 2 rims out of each.

IMAG2171_zps960b49cb.jpg


The rings were held in the 4 jaw trying not to distort things too much, that was why I opted to do two from each ring as at the early stages there would be twice the amount of metal so more rigid. The outside was just skimmed and a recess cut on the inside to take the rim down to 2mm thickness.

IMAG2169_zps5932ad54.jpg


IMAG2170_zps45edaba1.jpg


Once one was done it was just a case of doing it another 3 times before sawing down the middle to give the required 4 embrio rims

IMAG2173_zps5a70a4f2.jpg


IMAG2174_zps7417b633.jpg


I also bought four 150mm x 5mm thick lazer cut steel discs from the same e-bay seller as the tube

IMAG2177_zps8e074b02.jpg


And proceeded to trepan out the middle

IMAG2178_zpsc314e844.jpg


Rather than cut all the way through and risk the central disk doing something you don't want I like to cut from both sides until almost meeting. Then support the disk and give the middle a whack and it should open up like a tin can

IMAG2179_zps3cb7a774.jpg


IMAG2182_zps4b1c10b9.jpg


IMAG2183_zps3902bfd8.jpg


I then turned down the outsides so they would fit into the rims and rest in the bottom of the recess

IMAG2200_zpsac18777c.jpg


Followed by a bit of silver solder

IMAG2201_zps85133db6.jpg


It was then back to the lathe to thin the other side down to 2mm, reduce the depth of the central web and then using a form tool to round over the web edge

IMAG2202_zpsa6fa8ad5.jpg


IMAG2204_zps20d3d363.jpg


IMAG2206_zpsdedce23a.jpg


IMAG2210_zps562cc52e.jpg


That was a bit of a long one, next the hubs.

J
 
Hubs now, starting with 4 bits of 1.125" steel parted off from the bar

IMAG2221_zps6bacdea9.jpg


Machine to length, drill under size and turn the short parallel section on each end.

IMAG2222_zpse2337d85.jpg


Make up a mandrel and with the aid of the ball turner cut the concave profile in one end

IMAG2223_zps5a11587f.jpg


Flip it the other way round on the mandrel and do the other end, repeat for the other three hubs.

IMAG2225_zpse3a04c19.jpg


Reset the ball turner to round over the remaining central ridge.

IMAG2226_zpsd1c0b3de.jpg


Quick bit of blending with a file and emery and the basic shape is complete.

IMAG2227_zps56aa3276.jpg


Now transfer the mandrel to the chuck on the rotary table and drill & tap six M4 holes followed by a shallow 1/4" counterbore

IMAG2229_zps829f950c.jpg


I used up all my 5/32" and 4mm steel making the spokes so the last few had to come from some chromed brass that was in the scrap box. Use about 50" of material in total. These were threaded M4 one end and rounded over on the other with a simple form tool.

IMAG2232_zps88bcaca3.jpg


I then cut six half round recesses into the rim web to suit the rounded end of the spokes

IMAG2233_zps8d077c2a.jpg


The hub nipples were faced to length and rounded over, to speed things up I arranged the two tools on the tool post to save having to rechuck 24 times. These were also tapped M4 for part of their length and drilled 4mm for the remainder.

IMAG2239_zps7f046707.jpg


IMAG2240_zps3566fd80.jpg


A quick mock up of the hub, the spokes can be screwed in/out to true the wheel and then the nipples used as locknuts to hold them in place, the counterbore in teh nipple hides any spoke thread.

IMAG2241_zps996e8007.jpg


The rim nipples are a similar job but drilled 4mm right through and notched 5mm to slip over the rim web, this locks teh other spoke end in place.

IMAG2244_zpscc79ed8f.jpg


IMAG2243_zps8e2cea75.jpg


All 4 wheels were then assembled with some soft solder paste where needed before heating to melt the solder. Following that I mounted them on the lateh, clocked the rim true and then bored the hub to finished size so the wheel would spin true on te axle.

IMAG2250_zps09c16f4d.jpg


A quick clean up and thats the wheels done.

IMAG2251_zps84acc38a.jpg


J
 
Hi Jason,
Great fabrication techniques on the wheels. I made a set of drawings for a Russel traction engine years ago and it has a similar construction for the wheels. Thanks for the great documentation.
I noticed on the picture of your pushrod with the igniter trip lever that you have a slot in the pushrod. You must be working from the new drawings. When I built this engine and redrew the drawings I added that feature to make it easier to time the engine.
gbritnell
 
yes they are your drawings George as its one of the Linley produced kits, I did have a 1/6th kit with the old drawings complete with all their errors.

With the wheels out of the way it is time to start work on the actual cart starting with the front bolster. The top corners are rebated so that the angle iron sides will sit flush, the bottom curved to allow the axle to articulate and the pin in the middle allows the axle to pivot, this is the basic sketch.

Gallowaybolster_zps03cf8e3f.jpg


The various bits of steel were cut to size, I used 3mm angle at the ends as I needed the internal radius and the bottom curved part was a section of 100mm x 3mm wall steel tube.

IMAG2252_zps467963dc.jpg


As there were going to be a lot of parts to try and hold together for silver soldering I decided to fabricate the lower parts by welding, I'm not the worlds best but with a bit of fettling it came out OK.

IMAG2253_zps850c7358.jpg


IMAG2256_zpsf0e8f6d6.jpg


After silver soldering a bit of file work had things looking the right sort of shape and I also milled out the slots where the angles bolt to the sides.

IMAG2257_zpsf5ee9178.jpg


IMAG2259_zpsa6e8c149.jpg


The two inner webs were marked out by holding the job ontop of a blued sheet of 2mm steel and just scribing the shape. These were then coated around the joint with soft solder paste and a few spacers parted off from some aluminium rod to stop them dropping through during heating.

IMAG2260_zps16a501f9.jpg


After a bit of a clean up we have the finished bolster, you can see why I wanted the internal radius of the angle iron as it allowed me to round the outer corner and still keep the same wall thickness.

IMAG2262_zpsadb306f0.jpg


J
 
Next up is the front axle casting.

frontaxle_zpsebb28d2f.jpg


The parts that the spindle passes through were straightforward turning jobs and I printed my drawing out as a guide for bending the top flange.

IMAG2263_zps9d095a0e.jpg


The lower flange was bent from some 5/8" x 1/8" flat bar and the two ends welded on. After I made this part PatJ kindly provided copies of an old Galloway spares catalogue that show the lugs for the handle to be in a slightly different place.

IMAG2266_zps26345af4.jpg


IMAG2268_zps210dc895.jpg


The main central web which is thicker in the middle was shaped from some 1/2" square and then the whole lot silver soldered.

IMAG2270_zps8cb10b0a.jpg


IMAG2271_zps58ec4925.jpg


So that the axle can both steer and pivot it required a hole that was 7/16" round at the top but opening out to an oval at the bottom, to do this I mounted the work on the rotary table with the parts top surface dead on centre height and milled it 10degrees either side of vertical.

IMAG2273_zps7412a484.jpg


IMAG2274_zps83127585.jpg


The end webs were added in the same way as the bolster then after a bit of a clean up and some primer it looked like this

IMAG2275_zps5865dd7c.jpg


The rear bolster/axle is just a combination of the two parts described above so I won't go into much detail, just a few pictures should give an idea of what went on.

IMAG2281_zps4c1efab8.jpg


IMAG2284_zpse182bb3b.jpg


IMAG2286_zpsbac1af7e.jpg


IMAG2287_zpse7312481.jpg


The two side rails were cut down from 30x30x3mm steel angle

IMAG2289_zps4c2ab42e.jpg


Don't panic I did it in three stages sliding the angle along and cutting about 7" in each setting.

IMAG2288_zps82bd7b9d.jpg


And a quick test assembly of the main components

IMAG2293_zpsd804f821.jpg


IMAG2295_zps69226f22.jpg


J
 
Well you can't have a "Hand Portable" cart with out a handle so a couple of bits of maple were ripped off a board and run through the planer/thicknesser. Then a Mortice and tennon joint cut where the shaft meets the handle.

IMAG2298_zpsc7078e5e.jpg


The handle was then turned in the lathe to give a couple of handholds. Two strips were cut from sheet and bent to form the brackets.

IMAG2554_zpsc1474e2a.jpg


The fuel tank was soldered up from copper tube and plate with a couple of brass fittings.

IMAG2303_zpsff96d50b.jpg


A wooden box was knocked up from my stash of Parana Pine, this will hold the sealed 6V battery and the Minimag LT coil

IMAG2383_zps8aa80789.jpg


IMAG2384_zps2c2448df.jpg


I had intended to print my own waterslide transfers for the side of the hopper as the supplied vinyl ones were a bit thick and the font was too small but yellow on a dark background is not a good colour for this method when using the clear carrier. One of our other members did offer to use his computer cutter to make some masks but it did not like my intended font. So in the end I resorted to printing out the wording on a self adhesive postal lable and then cutting out the individual letters by hand

IMAG2431_zps493405fd.jpg


IMAG2430_zpsf8f08765.jpg


IMAG2432_zps524eb245.jpg


Not too bad, the G and O could be a bit smoother flowing

IMAG2451_zpse993534f.jpg


I made some gib head keys from 1/4x3/16 keysteel and fitted them nice and snug to the slots. I like to do it with the key still on the end of the bar as it gives you a bit more to get hold of while you are getting the correct fit then cut of and form the head once its right.

IMAG2400_zpsfada20ac.jpg


The last job was to make up some pipe and fittings to get the fuel from the tank to the carb

IMAG2436_zps5aad505b.jpg


J
 
This is really a nice build log. Keep it going on.

Barry
 

Latest posts

Back
Top