Bernd
Well-Known Member
Since I haven't seen anybody mention using a faceplate on a lathe I thought I show how I solved a problem do to lack of tooling and having small machines other than a 10X Logan lathe.
Remember the the thread of the mini-mill crash that took out my hi/lo range gear. Well, the part I was working on is done, but in order to finish it the part needed a 3/4"-14 pipe thread put into one end. This requires a 29/32" drill (0.906"/23mm). Show of hands of how many of us have one? Not me. If I did it won't fit in the machine any way. So, what to do.
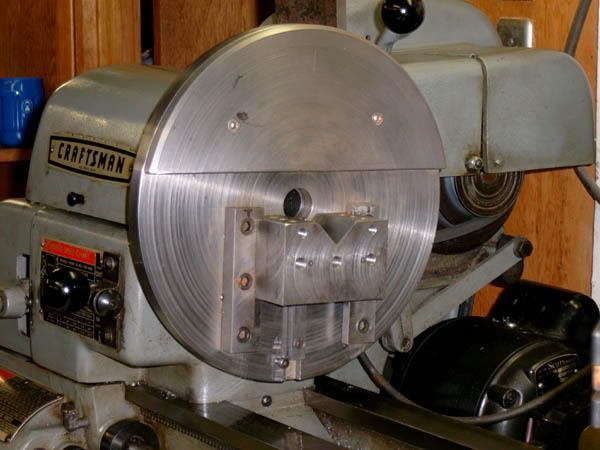
I decided to use the lathe to bore out the hole to proper size and to help start the tap square in the hole. The first pic shows the set up. The tube on the right is what is going to get threaded into the adapter I made. On the left is the 3/4"-14 pipe tap and a penny in the forground to for size comparison. Note that I bored a 1/2" hole after I mill the surface flat in the mini-mill. Also not the piece of brass bolted on the opposite side to counter balance the weight of the angle plate.

Next I used a piece of stock to line up the hole on center somewhat. It doesn't need to be accurate since it will not mate with another part. It needs to run just good enough to get the first cut from the boring bar.

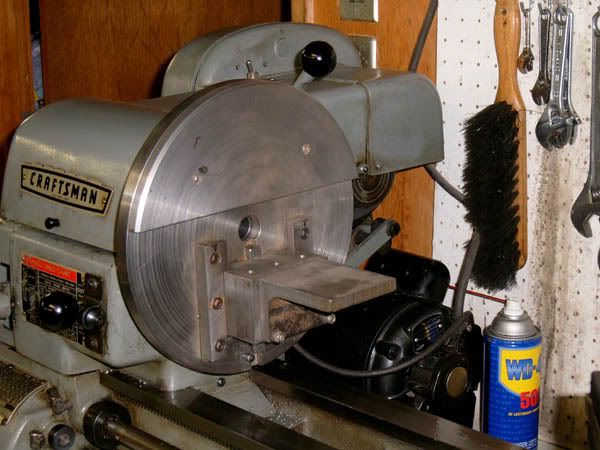
I took this picture while the lathe was running boring out the hole to the 0.906" size. I used a small carbide boring bar and a .05" depth cut. Finish turned out nice.

And here are a couple of pics of the finished product.


And here is were it's permanent home is going to be.

Where the wrench is lying in the forground is the radiator of the car. The adapter makes the connection from the intake manifold to the radiator via a hose.

I hope I've imparted a bit of info that can be used by others. As it's been said before "There's more than one way to skin a cat".
Bernd
Remember the the thread of the mini-mill crash that took out my hi/lo range gear. Well, the part I was working on is done, but in order to finish it the part needed a 3/4"-14 pipe thread put into one end. This requires a 29/32" drill (0.906"/23mm). Show of hands of how many of us have one? Not me. If I did it won't fit in the machine any way. So, what to do.
I decided to use the lathe to bore out the hole to proper size and to help start the tap square in the hole. The first pic shows the set up. The tube on the right is what is going to get threaded into the adapter I made. On the left is the 3/4"-14 pipe tap and a penny in the forground to for size comparison. Note that I bored a 1/2" hole after I mill the surface flat in the mini-mill. Also not the piece of brass bolted on the opposite side to counter balance the weight of the angle plate.
Next I used a piece of stock to line up the hole on center somewhat. It doesn't need to be accurate since it will not mate with another part. It needs to run just good enough to get the first cut from the boring bar.
I took this picture while the lathe was running boring out the hole to the 0.906" size. I used a small carbide boring bar and a .05" depth cut. Finish turned out nice.
And here are a couple of pics of the finished product.
And here is were it's permanent home is going to be.
Where the wrench is lying in the forground is the radiator of the car. The adapter makes the connection from the intake manifold to the radiator via a hose.
I hope I've imparted a bit of info that can be used by others. As it's been said before "There's more than one way to skin a cat".
Bernd