Spindle Threaded ER-40 Collet Chuck for the Atlas

Home Model Engine Machinist Forum

Help Support Home Model Engine Machinist Forum:

This site may earn a commission from merchant affiliate links, including eBay, Amazon, and others.

JAndrew

Well-Known Member
Joined
Aug 9, 2013
Messages
113
Reaction score
21
Hello,

Chuck Fellows recently posted his ER-32 collet chuck for a mini-lathe that was backplate mounted. I appreciate his post a lot as he provided some good advice on getting the 8 degree taper for the collet precise.

I'm going to post progress on my collet chuck but be forewarned: "I have little or no idea what I'm doing really."

It's been over 10 years since I machined anything and even then I was billeted as an "Emergency Machinist" on submarines so my experience is minimal.

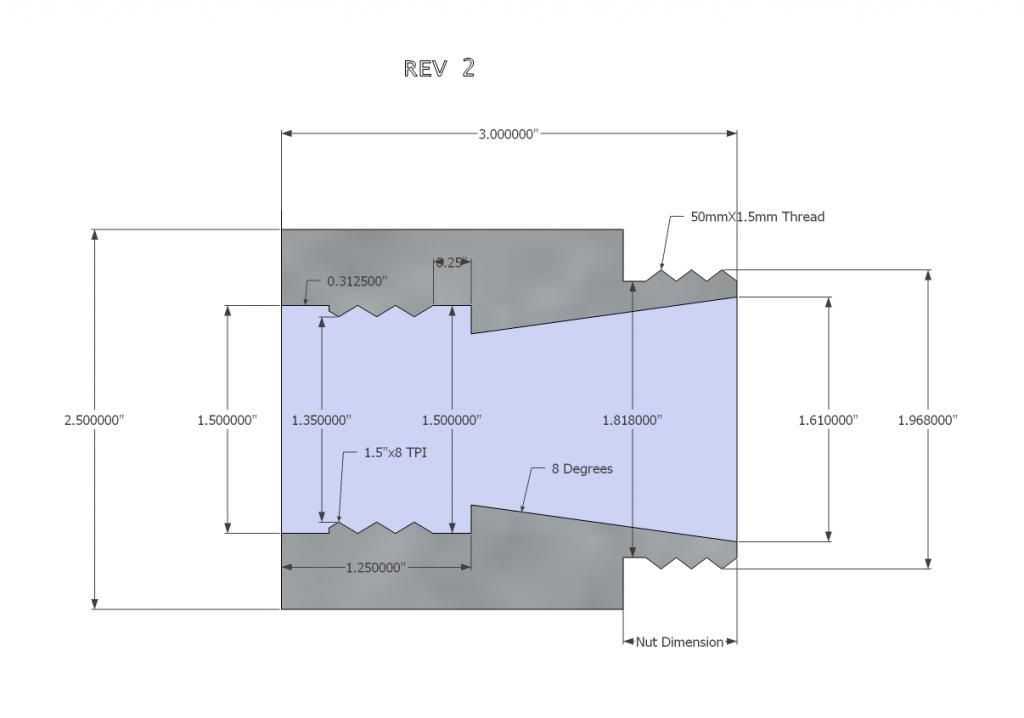
Here's the cross section collet chuck plan that I drew up in google sketchup:
ER-400001_zpsb6d63ba5.jpg

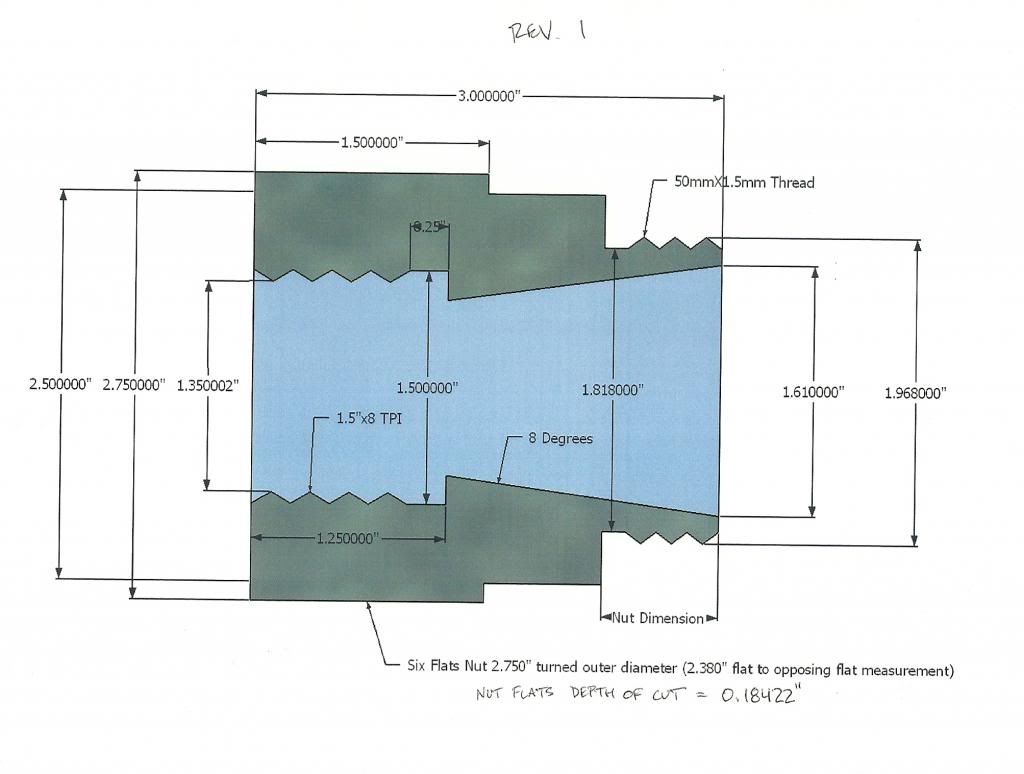
I would strongly advise that anyone reading NOT use these plans. As I said I'm not really sure I know what I'm doing.

So far:
The first mistake I've made so far was ordering a piece of 12L14 that was 2.50" in diameter instead of 2.75". In order to keep the wall thickness "meaty" enough the flats of the nut will be a little further apart and not meet at pointed angles. I guess I should have finished those plans entirely before ordering the stock! :wall:

I am starting with my stock at a length of 3.50" instead of the 3.00" that is shown on my plans just in case I make any kind of mistake on the 8 degree taper.

Here's the progress:
IMG_20131108_061742_631_zps4e5a9e00.jpg

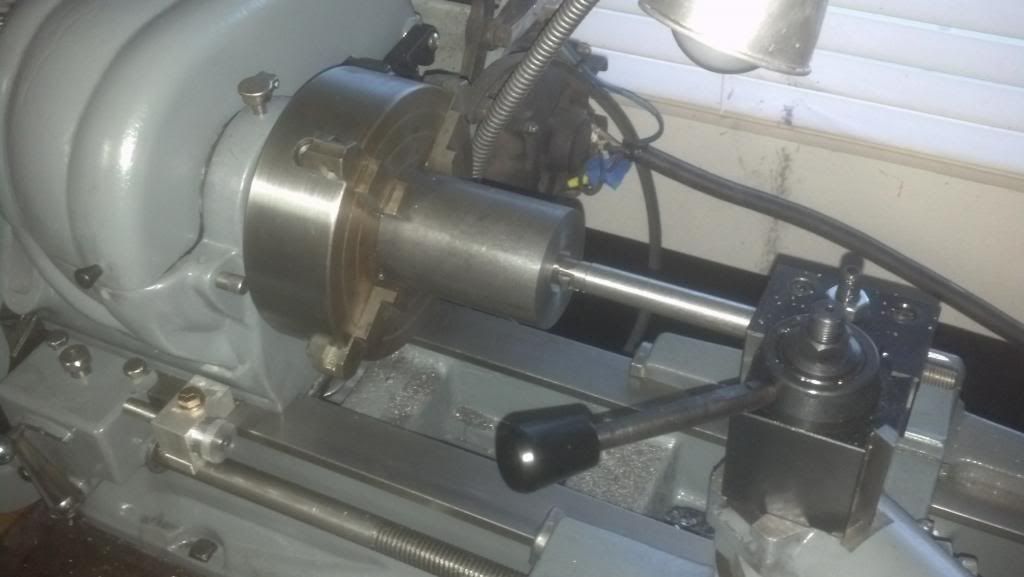
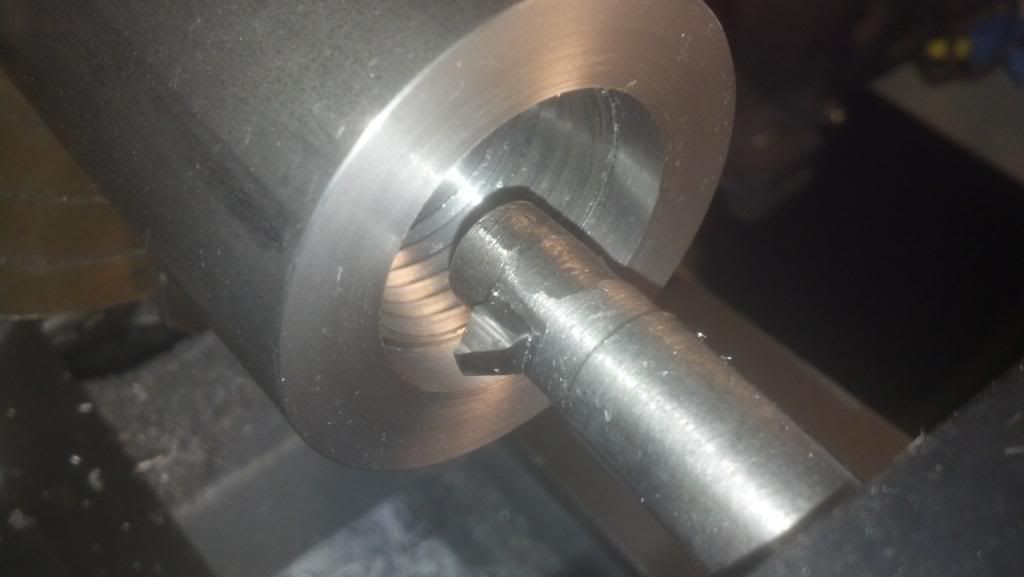
I placed the stock in the four jaw chuck and dialed in the runout to within 0.005". Then faced the end and flipped it around. I dialed in again at 0.002" (due to the un-even rolled external surface).

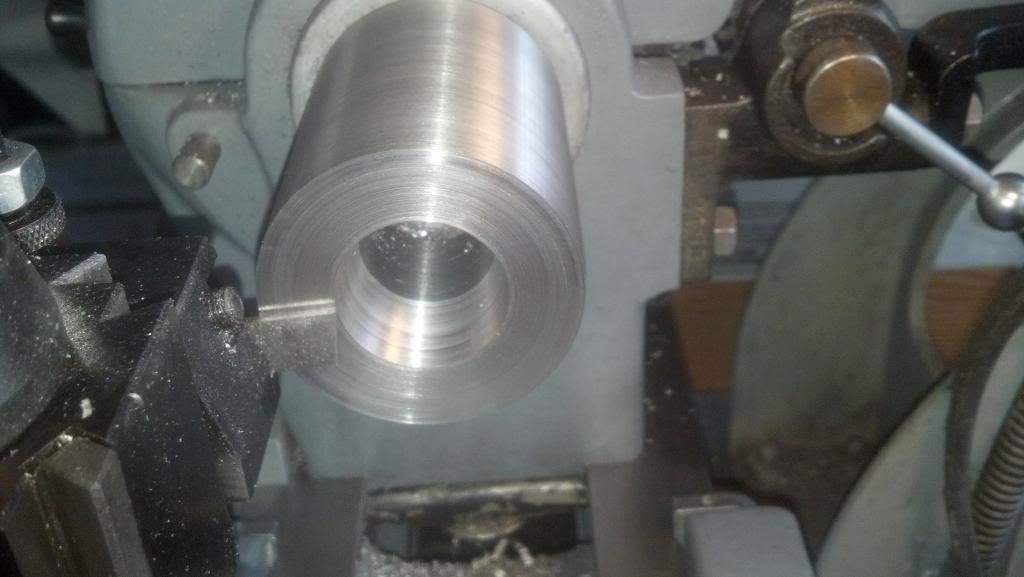
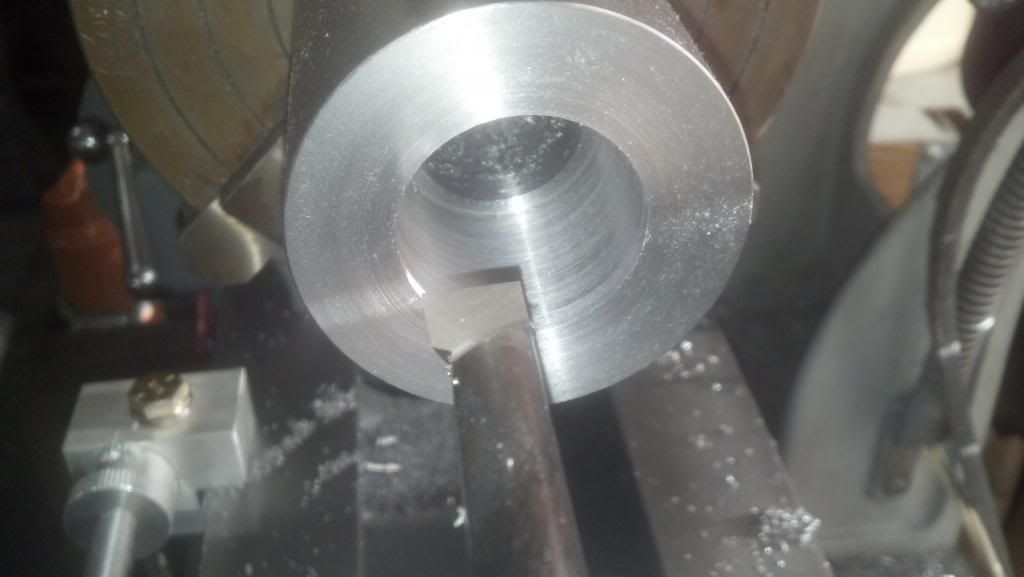
The plan is to bore all the way through to a diameter of 1.125". I faced the 2nd end of the stock and center drilled. Then drilled to 0.375". The stepped it up to 0.500". Then stepped it up to 0.625". And finally drilled to 57/64 or 0.890".

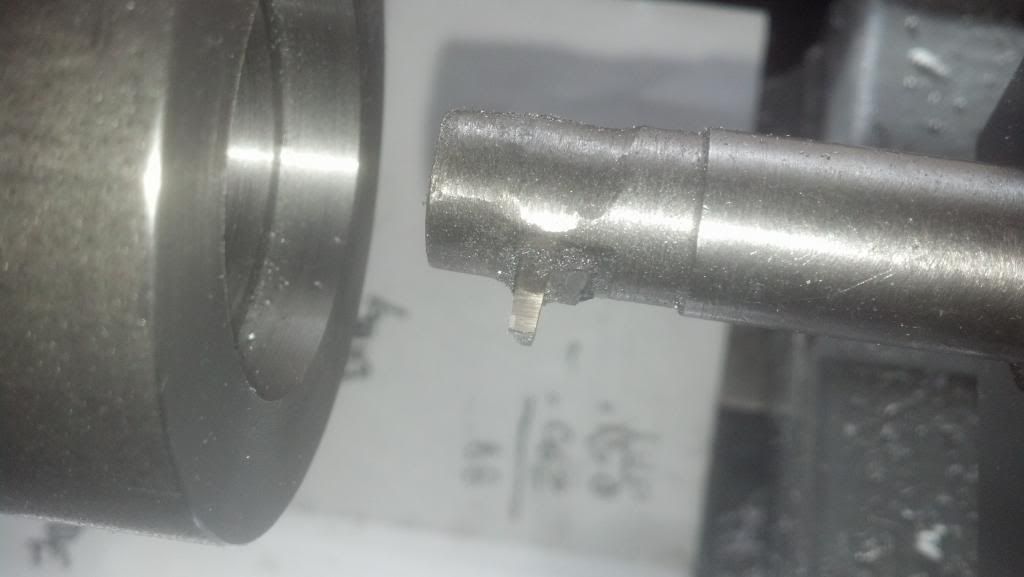
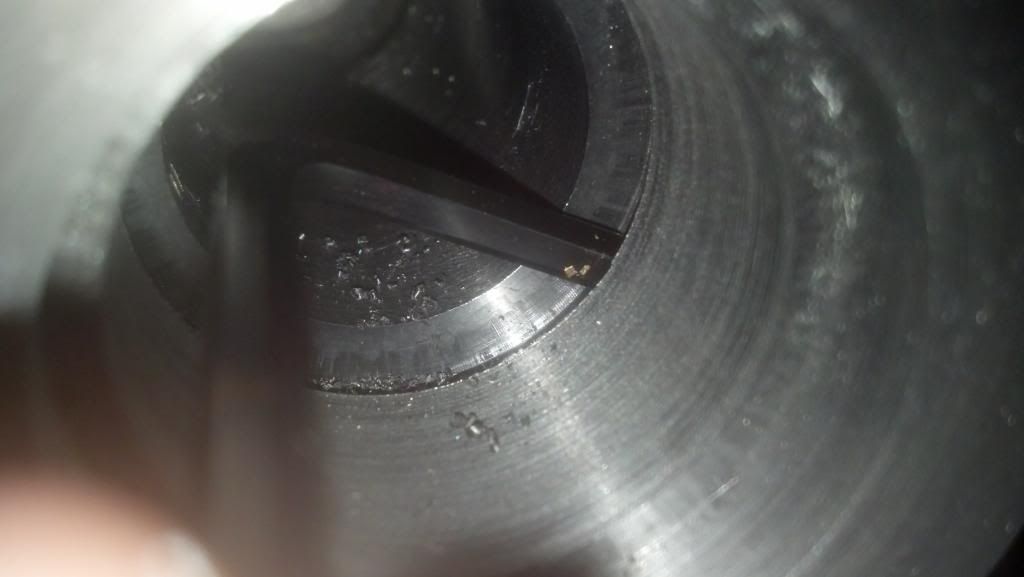
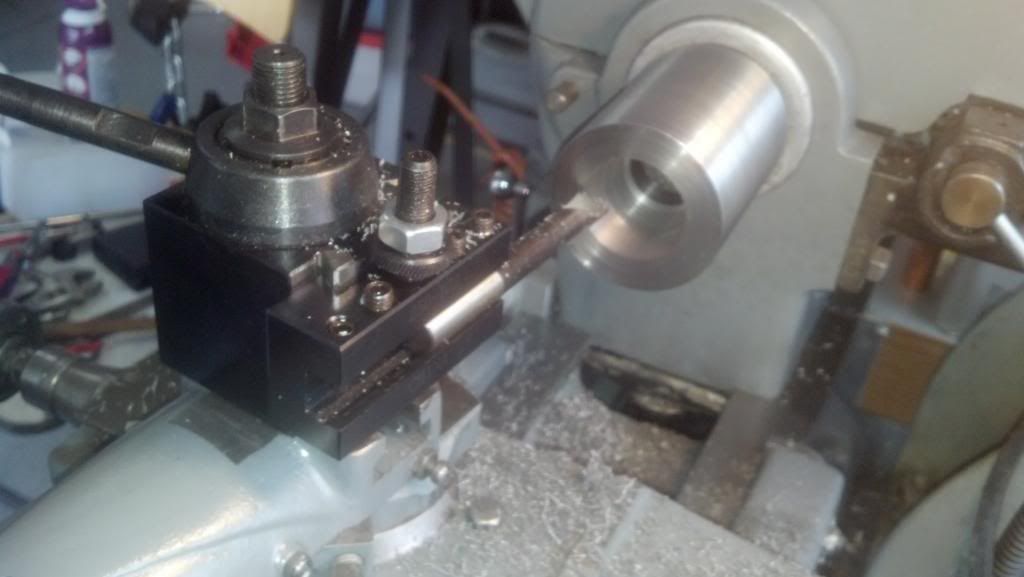
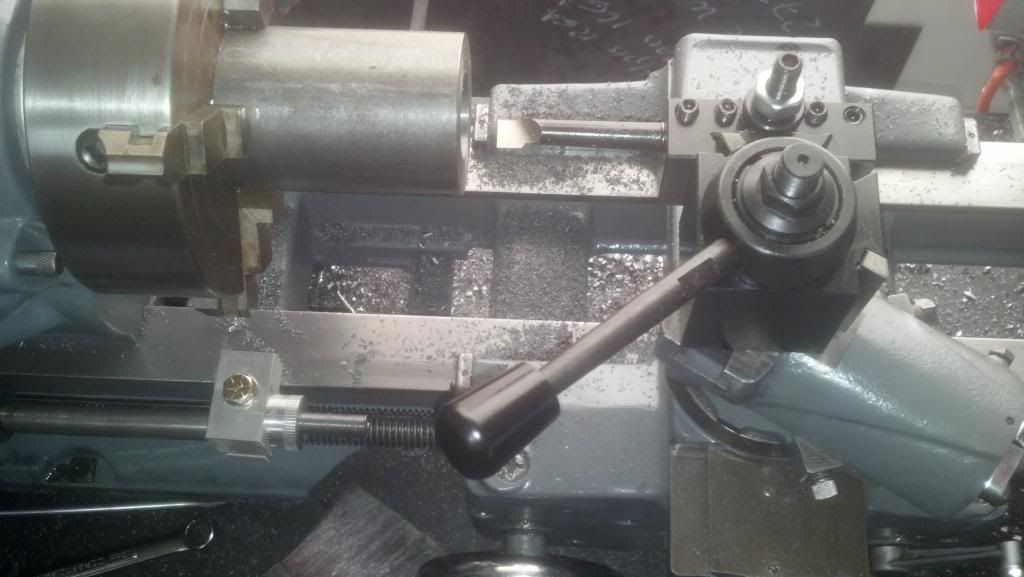
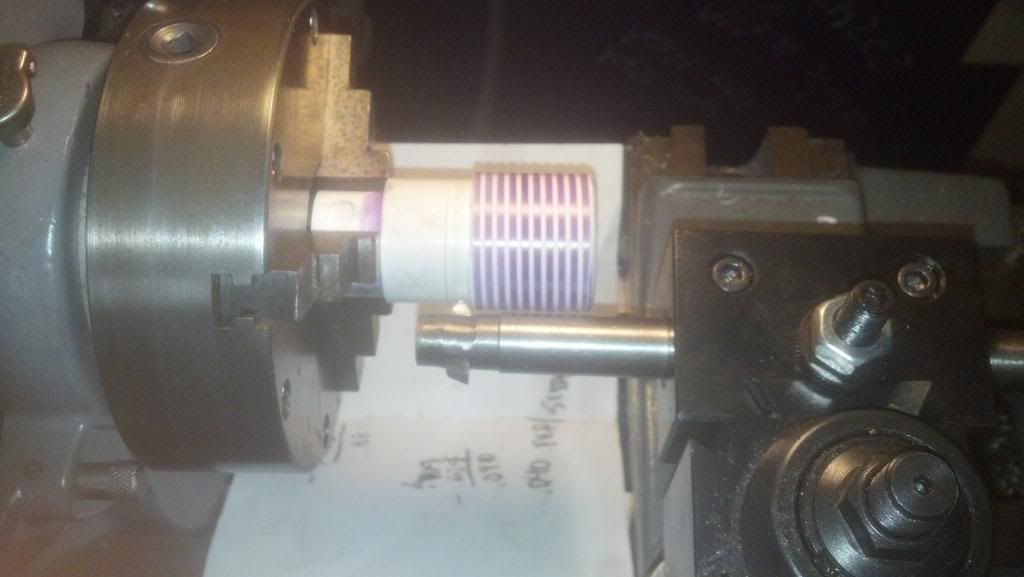
The above picture shows the boring bar set up in the Aloris style tool holder with a 1/4" HSS bit. The boring to 1.125" went well each time advancing the cross feed dial by 0.010". Each time though I did an additional "Spring" cut as I'm in no hurry. It seemed necessary as the boring bar is extended pretty far to bore through the full 3.50" length of the stock.

I had to stop there for the day. (New baby in the house so I only work during Nap-Times or in the early morning).

The plan moving forward is to bore the section for the spindle threads to 1.350" and thread 1.50"x8TPI. I included an extra large thread relief groove as I'm deathly afraid of running into the work.

Any suggestions or feedback is greatly appreciated. Don't know when I'll get back out to the shop.

Thanks,
-J.Andrew
 
To get decent accuracy with the collets, everything needs to be concentric to the spindle. Therefore I'd recommend the following:

1) After the initial non-critical bore and without removing the stock, bore and thread the spindle nose thread (1.5x8 ), and then face.

2) Screw the stock onto the spindle do all the other operations from there.

I suspect a 1.5" tap would require a lot of force, so I assume you'll be single-pointing the threads on the lathe.

KVOM,

That's exactly what my plan is. To cut 1.5x8tpi threads for the spindle I will be using a single point ground HSS bit that fits in the same boring bar above. I will not have the boring bar hanging out so far though for those threads. Once those are cut I'll be putting away the 4-jaw chuck. I ground the bit already.

I'm beginning to regret not making an externally threaded test piece beforehand so I could test my threads. It would have also served the purpose of giving me some well-needed practice at thread cutting. I read another post somewhere saying just to leave the part in the 4-jaw and flip it around to test the threads.

Thanks for the good advice.
-J.Andrew
 
The wife took the baby to the mother-in-laws for a bit today so I was able to perform the next step of boring the threaded portion to the diameter required (1.350").

I swapped from the boring bar to a nice boring bit with a squared off tip so I could straight cut the shoulder. I used my ebay micrometer stop to set the depth at 1.250".

Here's the setup:
IMG_20131108_155543_226_zps800d3000.jpg


And here's the result:
IMG_20131108_155515_670_zpsc693a06e.jpg


I'm pretty impressed with the bore finish that this bit and the old atlas came out with. Not bad for a 70 year old machine! And the bit was a freebie with the lathe.

Next I need to cut the 0.250" wide thread relief groove to an ID of 1.500".

Here's a 0.250" bit I ground relief angles on but I'm wondering if it's a good idea to try to use a bit that wide...?
IMG_20131108_155852_595_zpsf811b169.jpg


I'm kinda wondering if this is going to chatter too much? Should I be using a 0.125" wide bit twice instead?

Thanks in advance for any suggestions or advice!
-J.Andrew
 
Nice job on the chuck. I would grind the end of that 1/4" tool bit down to a width of .090" or less. Doesn't need to be much longer than the depth of your groove.

Chuck

Capture.JPG
 
Nice job on the chuck. I would grind the end of that 1/4" tool bit down to a width of .090" or less. Doesn't need to be much longer than the depth of your groove.

Chuck

Thanks Mr. Fellows! I will do just that. I'll probably cut that groove today and then remove the part and the 4-jaw chuck from the machine. I want to use my 3-jaw to make an externally threaded "test" piece out of PVC. Gives me some threading practice and will be easier to test my internal threads.

Thanks again for the advice and the drawing.
-J.Andrew
 
Hello,

Didn't have much time to mess with the collet chuck on Sunday but I did manage to find the first problem with my plans and correct it. Here's Revision 2 of the plans:
ColletHolderRev2_zpscf7fa6fd.jpg

I found that the spindle threads do not extend all the way to the stop collar. So in order for the back face of the collet chuck to meet the spindle stop collar I needed a thread relief BEFORE the threads as well as after to a depth of 0.3125". Luckily a minor correction. (I also removed the external diameter of 2.750" for hex nut flats as the piece of 12L14 is only 2.500" OD.)

This morning I was able to get the Atlas change gears swapped over to threading at 8TPI. I tested it out on my PVC test piece:
IMG_20131111_042026_492_zpsa7232269.jpg

It was going well until I took to aggressive of a cut (0.010") and the flimsy PVC ripped out of the 3-jaw chuck.:eek: It wrecked it. I'll make a new test piece this week and bulk up the section that I clamp in the chuck.

-J.Andrew
 
Hello,

I was able to finish another thread tester out of PVC today:
IMG_20131115_124911_518_zps09c37ae1.jpg

PVC is a mess to cut! I was really surprised how easily it can be ripped out of a 3-Jaw chuck. I barely finished this one! On the last cut it grabbed again and twisted it out of the chuck again :mad:!!! Luckily enough of it was undamaged that I can still use it to test the threads on the collet chuck.

I set to work next on making the grooving tool that Chuck Fellows was nice enough to draw up for me. Here it is:
IMG_20131115_142906_966_zpsfed120c2.jpg

I'm really glad Mr. Fellows advised me on this. Even at a cutting thickness of 0.090" it chattered like mad on the first cut! I surely would have broke something if I had tried to use the full 0.250" thick bit I had made originally.

To cut the chatter down I only advanced the grooving tool 0.030" each cut using my micrometer stop to reach the full width of 0.250". It work very well with no chatter. At one point though I did lose track of my math for advancing the micrometer stop. After some head scratching I was able to figure out how to measure the groove width using a 3/16" hex key. Here's the groove in progress:
IMG_20131115_143110_317_zps1bde6299.jpg

No more progress today. The wife is making lasagna today so I'm on baby-watch. Hopefully will get to threading tomorrow.

-J.Andrew
 
Hey! Just noticed this thread is displayed on the main HMEM page! I'm honored (even if it is completely random);)

-J.Andrew
 
JAndrew,

I agree PVC is a mess: Some thoughts.

If your supplier has the heavier PVC (Schedule 80??) Try that.

Turn a piece of wood to fit inside the PVC to provide some support. (Yes, you can do it on a metal lathe. It is for support rather than beauty.) Turn a piece of stock longer than you need with a slight taper or a stepped OD. Put the PVC over it, then cut off the excess wood. Of course, you could also make a mandrel from from metal instead of wood.

--ShopShoe
 
ShopShoe,

Thanks for the reply and the ideas. I even considered filling that second piece of PVC with some old epoxy resin I have. I had originally planned on PVC as a "quick and easy" way to make the thread tester. Ha! See how well that worked out for me?! I think I've spent more time on this PVC than on the actual project!

Live and learn. Hopefully I never have to turn PVC again but if I do...I'll use your ideas.

Thanks again,
-J.Andrew
 
If you drill 4 no 1\4" holes in the body 1\4" deep you can use the collet spanner insead of machining a hex works a treat .
 
If you drill 4 no 1\4" holes in the body 1\4" deep you can use the collet spanner insead of machining a hex works a treat .

ChipEnter,

Thanks for the post! I think I will end up doing that. There's just not enough meat there for nut flats. The collet set I bought came with an R8 adapter for my mill and the spanner you are talking about:
IMG_20131116_140755_584_zpsa98d6b20.jpg

I can also finish the collet chuck drawing dimensions now that I have the retaining nut.

I was afraid I had gotten a bad collet chuck nut when I first got it. If you look at the ring the collet snaps into it isn't ground concentric to the nut or the taper. I started stressing out about having to send the thing back and wait for a new one to come but all for not. I read elsewhere online the retaining ring is supposed to be ground off center so you can pop the collets in and out easily!:p

-J.Andrew
 
Hello,

It's internally threaded! I was sweating bullets through the whole process but it worked! The first skim pass I took I did what I feared most; I ran the cutting tool into the back of the thread relief! Grrr!:wall:

Luckily I was able to put a bevel on there and no major damage was done.

Here's the single point tool ground to 60 degrees about 75% done with the threading:
IMG_20131116_123856_968_zps028ace2a.jpg

It went very well after that first mistake and despite my nervousness. I was really hoping there would be a scraping noise I could use to tell when the cutting tool entered the relief groove but the whole process was very quiet. I used the back gears (~28RPM) and each pass advanced the compound rest 0.005". No chatter, no surprises. It came out very well. I took "spring" cuts without advancing the compound rest on the last 3-4 passes.

I used the PVC thread tester to see when it was getting close and then unscrewed the 4-jaw and flipped it around on the last 2 passes to check the final fit:
IMG_20131116_123726_295_zps65df0688.jpg

It fits! And it seats against the spindle's stop collar just as it's supposed to! I couldn't think of anymore reasons to keep it in the 4-jaw after that.

After changing back to "feed" gears from "threading" gears I faced the end I haven't seen in the last 2 weeks and turned the final OD. I had to remove one way wiper from the carriage and angle the tool bit to be able to reach the spindle end of the collet chuck.

Buying the wrong size piece of 12L14 bit me again as there wasn't enough material there to maintain the OD at 2.500". It measures out at 2.490". That's the nice thing about machining at home...no one will ever come after me and check my measurements!:hDe:
Here's the last shot before I bore the taper tomorrow and externally thread:
IMG_20131116_133823_071_zps62cda544.jpg

The finish on the OD is inconsistent at best :(. That's the rigidity issue I suppose everyone is talking about with Atlas lathes...? Like the Ride Maintenance Mechanics at LegoLand used to say, "It ain't goin' to the &%$@in Moon."

-J.Andrew
 
No more progress today. The wife is making lasagna today so I'm on baby-watch. Hopefully will get to threading tomorrow. -J.Andrew

Homemade Lasagna is a valid reason to mis a day in the workshop. For me though the carbs would mean missing another day due to high sugar levels. I do mis Lasagna and a bunch of other high carb foods!
 
Homemade Lasagna is a valid reason to mis a day in the workshop. For me though the carbs would mean missing another day due to high sugar levels. I do mis Lasagna and a bunch of other high carb foods!

Wizard69,

The lasagna was great. There were no leftovers:wall:

-J.Andrew
 
Hello,

I finally got some shop time in. Quite a productive day.

I was having a good deal of trouble with chatter while trying to bore the internal taper for the collet :(. I found out a good deal about proper spindle speeds. Turns out I was running the spindle speed at about half what is should have been. Also found that the gib screws for the compound rest and cross-slide needed to be tightened down to the point of being difficult to turn by hand in order to get the rigidity I needed. Luckily I had plenty of passes to test all these variables out before the finish cut. Also swapping to the boring bit I used before instead of the boring bar setup seemed to help a good deal. Here's the setup:
IMG_20131120_124916_062_zpsc41b3133.jpg

At this point the part was still closer to 3.5" in total length to allow me a good deal of test cuts while boring. Everything I've read about these collet chucks has said to keep them as short as possible for rigidity. Since this is a project to help me re-learn lathe skills I decided to use a parting tool to shorten it closer to the 3.0" length rather than a bunch of facing.

The parting operation went extremely well! No chatter or squealing. But man alive does it make a mess! Here's the parting tool afterward:
IMG_20131120_121443_864_zps8f12a871.jpg

The surface was so smooth I didn't even face it when completed.

Back to boring. Over and over! Hand cranking the compound rest with the gib screws very tight! Ugh! Lubricated with WD-40 and the finish cut came out awesome! It fits!!!:
IMG_20131120_131814_957_zps28527ee2.jpg

The bore seemed a little off angle at first but after deburring the outer lip the collet fit so well I didn't even bother doing a blue check. I did smooth the bore with 120 grit sand paper and then again with 400 grit for a smooth polished surface that the collet can slide well on.

Next I turned down the area for the external 50x1.5mm threads to a diameter of 1.968":
IMG_20131120_143135_925_zpsa300d4f2.jpg

I finally figured out how to grind a HSS bit and angle it in the AXA holder so I could turn down the diameter and face the edge with just that tool! Grinding bits is a long process for me. Most of the time is head scratching but it also goes slower because I'm using a belt sander instead of a grinding wheel.

Finally I added the relief groove using the parting tool to a width of 0.125" as such:
IMG_20131120_144757_628_zps8ab5e725.jpg


Hopefully I'll do the external threading tomorrow. Metric threading...I've verified I have the change gears needed and from what the Atlas manual says, I'm in for a long day of hand cranking the spindle in reverse. The manual says I'm not to disengage the carriage from the leadscrew until the threads are done. No reversing motor :(.

I'm considering using the Armstrong style threading tool to do this threading instead of grinding another bit for the AXA. I'm wondering if there's any reason I shouldn't try using this tool...?

Thanks for reading and thanks in advance for any advice you can offer.

-J.Andrew
 
I did a lot of metric threads on my old Atlas-Craftsman. It's not a big deal cranking that spindle back. If you intend to do it often, make one of the spindle crank handles that goes in the back of the headstock. http://www.homemodelenginemachinist.com/f28/spindle-crank-threading-7047/

DieselPilot,

Thanks for the link. That guy does some really cool projects on his website Dean's Photographica. When I bought the lathe I was disappointed it didn't have a quick change gearbox but justified it by saying, "I don't plan on doing much threading anyway...":wall:

Here I am threading right off the bat! I will add this to my long list of projects.

Thank again,
-J.Andrew
 

Latest posts

Back
Top