


Cheshire Steve
Well-Known Member
- Joined
- Mar 28, 2009
- Messages
- 69
- Reaction score
- 1
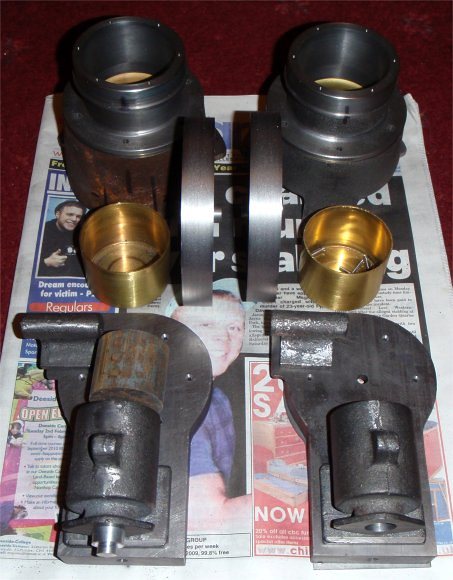
Have done a quick search here and have not found any reference to making models of the Robinson Hot-Air engine (Polly models do castings). I have only built an ST oscillating V-twin, and I am in the middle of building a Stothert & Pitt beam engine - so I am a newbie compared to some of the awesome work displayed here, but my father who is mid-80s has discovered a liking for hot-air engines, so I decided to build a pair of these - one for him and one for me - and have put the beam engine to one side for now.
Its been a couple of months in the making so far and I have had big challenges due to chilled castings, and disappointment due to both the flywheels having either side of the casting out of register by 1/8" - though this is all part of modelling I suppose. While I can handle some chill using carbide tools, I don't have the same for my milling machine and have blunted some cutters. In future I will heat treat all castings, as I have found you can get chill out by cooking up to about 900C.
Anyway - now for the tricky bit - and I am open for advice. I have a good machined finish on the cylinders, and have ordered some 1 1/2" ally to make laps to get them true and clean. The pistons are cast iron too, and are getting close to size. However I am a little unsure about getting them to exactly the right size without taking too much off - and how to construct an external lap to finish them to size. So I thought I would pitch up here for advice - as I know it is all too easy to take a fraction too much off and scrap the item - and I don't have any spare CI bar in 35mm - so would rather get it right first time (and second time - as I am building two).
I would be very happy to hear from anyone who has built one of these, as I am building one close to spec, but the other I am going to experiment with a little - maybe be fitting an electric heating element to run it by plugging in. I also think both could do with a slightly larger main shaft.
Steve