poppin crankshaft revisted

Home Model Engine Machinist Forum

Help Support Home Model Engine Machinist Forum:

This site may earn a commission from merchant affiliate links, including eBay, Amazon, and others.

BMyers

Well-Known Member
Joined
Jul 9, 2007
Messages
302
Reaction score
4
I am back on the poppin engine from Hell. I am building crankshaft #4. The build instructions call for lock-tite to hold the crankshaft pieces together. I am not sold on lock-tite (nor do I have any) what about using soft soldier ? any opinions ?
 
BMyers said:
I am back on the poppin engine from Hell. I am building crankshaft #4. The build instructions call for lock-tite to hold the crankshaft pieces together. I am not sold on lock-tite (nor do I have any) what about using soft soldier ? any opinions ?
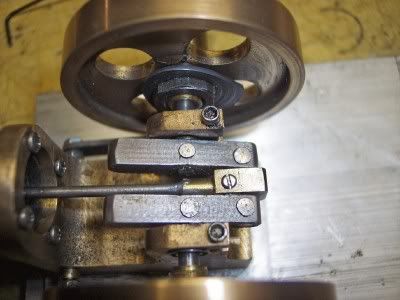
A while back I built a 2 cyl vertical using my own ideas.

The crank was made of 16 pcs including sacrificial graphite spacers.

Crank #1- Brass was used with stainless shafting and soldering didn't work.

Crank #2- Brass and drill rod, the soldering seemed to work until 2 joints failed, seems the solder flowed in but only bonded with the brass.

Crank #3- (At this point I'm ready for medication and a strait jacket!) Brass and drill rod Silver BRAZED RED HOT (not silver solder) worked, However, their was a slight warp even though I used a good holding fixture.The engine runs well with a slight wobble at the flywheel, a bit of a failure but obviously I,m done with it!"
I named the engine "Double Trouble".

If you were to see my latest builds you might notice a purely coincidental pattern of avoiding this type of type of crank. ;D

I will make future attempts machining from solid or built up (the latter my preference at this point) using Locktite, its really good stuff. Not convinced? Ream a 1/4 hole in a 1/4 thick brass disc and Locktite a slip fit 1/4 stainless rod in. Wait the proper amount of time and have a go at taking it apart! (no cheating using hammers, torches, or other means that your crank will never encounter.

Please post your findings. MB
 
Hi

For what it's worth, the crankshaft in the vertical single in my avatar (two of them) started out drilled, pinned, and soft soldered... and after all the faffing around in assembly and testing I ended up dis-assembling them, cleaning the mating surfaces and silver soldering. This has held up so far. The soft solder had let go in three of the four joints. Of course, this could just be that I can't solder worth a damn... as to the locktite, I've never tried it yet for a crankshaft, but the few places I have used it, it's still holding.

Cheers, Joe
 
MB,
What locktite did u use ? I dont have silver soldier and dont want to set up for that now.
 
What sort of Loctite does it suggest ? Just the generic red or blue for threads or the sleeve retainer type ?

I'm not familiar with the build details but would like to avoid the problem if this comes up in a future project.
 
Loctite green, which is tougher than red, is used to lock shafts to collars, bearings, etc. It's also pretty thin so it will wick itstelf into tight places. When I made my Poppin, I used Loctite green and 1/16" roll pins. It has held up very well.

Chuck
 
The variety of Loctite products always amazes me. A quick Google finds :

Green #290 - Wicking
Green #609 - Retaining
Green #620 - Retaining - High Temp

On one site I noted that the 290 description says to apply after assembly - hence the need for the wicking feature.
 
I soft soldered the crankshaft when I built the Poppin.
If memory serves me correctly that was my 3ed attempt at it.
The first one was was assembled with #609 Locktite. It didn't hold.
The second one was made with a .002 press fit at the joints.
The throw pieces split when the pins were pressed in.
For the 3ed on I soft soldered the joints and it held OK until I knocked
the model off the table. The solder joints didn't pass that stress test.
When I make the 4th crank I pinned the joints.
PoppinCrankshaftPins01.jpg

That time it worked very well.
My Poppin has a lot of hours on it and it shows!
Maybe time to build a new one?

Rick
 
i think i may try Loctite and roll pins on this attempt.
I want to move on past the crank, I am tired of making them
 
I made my first and only crank using lock tite. What i did was make the drill rod slp fit to the mating pieces and everywhere thay mated i turned 3 little grooves for the lock tite to seep in to and it hasn't failed yet.
 
what about jb weld could one use that & has anybody used it for this.
 
When using locktite I have always been told to have a "slight" clearance. If used on a press fit you scrap off the locktite when you assemble it. Should be able to google locktite and get answers to how to correctly use it. By the way I have not used it very often but plan to on a couple upcoming projects. I do know the the live steam railroading gang uses locktite on the wheel to axle fittings a lot. So I would think it could be used on a crank.
 
I ended up using #290 so it would wick into the joint after fitting. I let it dry, then I roll pinned each joint. So far so good !
 
My avitar's crank was built up of brass and all soft soldered. I probably have close to 200 plus hours on it now. It's usually running when ever I am in the shop and is running right now. I haven't had any problems with it yet but I haven't dropped it.

The next one I am going to try to machine in all one piece and see how that goes. Building one up wasn't hard at all really.
 

Latest posts

Back
Top