PM Research Inc. 5BI

Home Model Engine Machinist Forum

Help Support Home Model Engine Machinist Forum:

This site may earn a commission from merchant affiliate links, including eBay, Amazon, and others.
Threading 3/32 rods for 3-48.
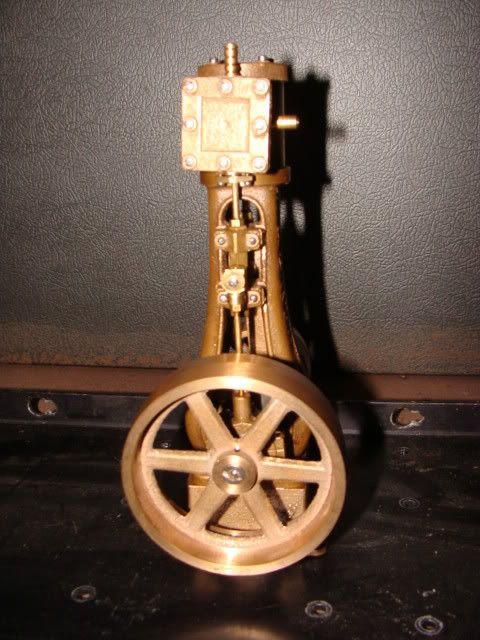
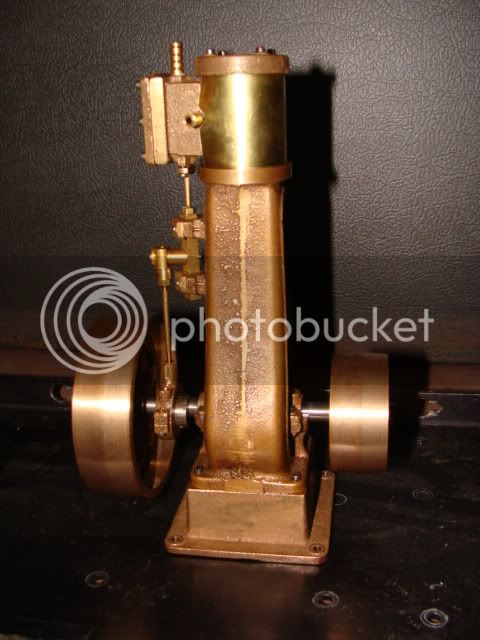
My chuck is too large to properly hold such a small rod. I had no problem turning and threading the 1/8" piston/slide rod (except for my lathe seizing up but that's another story). I got around this 'small problem' by making a soft jaw from aluminium hex rod. I chucked up a small peace of the alum rod facing, centre drilling, and drilling through with a 3/32 drill. After marking the side so I could return it to the same position I removed it and using a worn hacksaw blade I cut a slit right to the 3/32 hole. I then aligned the the soft jaw in the chuck, inserting the 3/32 rod, and firmly tightened the chuck down on the soft jaw. It firmly held the 3/32 rod so I proceeded to thread it. The result is shown below.

Lathe seizure story here: http://www.homemodelenginemachinist.com/index.php?topic=14426.0

DSC00346.JPG
 
I also got a 5BI kit a few weeks ago. Very interesting to see and read how others work on it. I now have an idea where to start, but how, I'm not sure, because my lathe has a 5 inch chuck. Also finding out what I need for tooling and accessories, now for sure I'll have to order a four jaw chuck, plus many other items.
 
If your inventive you can do everything you need to do with just a 3 jaw chuck. I've used shims between one or two jaws to get square or odd shaped parts properly aligned in a 3 jaw chuck. It's time consuming and really slows things down but it can be done. I survived without a 4 jaw chuck in my youth when I was just starting out with a worn out South Bend Lathe and a (slightly damaged) Bridgeport vertical mill. A fork lift had ran into the left hand side of the table and broken the handle and the brass lead screw nut within. I made a new lead screw nut and did without the left side handle. Both of them were headed to the scrap yard so I purchased them for scrap metal prices. I vividly remember when I got a contract that would pay me enough to buy a new Taiwan Lathe with all the goodies including a 4 jaw chuck and a face plate. I was able to purchase a new vertical mill as well with a discount. I still have them. When I retired I took them with me. That's been over 30 years ago. Anyway, just take your time and and figure things out as you go.
Having a 4 jaw chuck is a worthwhile investment if you plan on doing more projects in the future.

 
I've been volunteering here in Alabama with Tornado damage mitigation. It's been a while sense I've had time to work on the 5BI due to this. Today I got to open the box on my new vice and use it. It's a 2 piece 6" model H2992 from Grizzly. This vice is going to make my mill setup and operation so much easier! No more time consuming setup time with a dial indicator. Just use a machinist square ageist the table and vice face and clamp it down. I checked it with an indicator the first time and I was within .0005 across the 6 inch face. It'll be easy to setup angel cuts as well. This is without installing keys in the slots provided. I simply do not need them. You must make your own keys for this vice if you want them. The specs said the vice jaws measured 2 1/4 X 6 inches but when I opened the box I found the jaws were 3 X 6 inches. Sweet! This is a really heavy duty vice too. Much better than the 4" vice I've been using for 30+ years. I paid over $300 for it way back then. Anyway; I completed the Eccentric and started working on the frame too. I cut the crank shaft bearing faces smooth and parallel and then flipped the frame upside down vertical to mill the bosses for crankshaft.

DSC00348.JPG


DSC00349.JPG
 
I started working on the rod today. They did not leave much meat to work with. The crankshaft end should be .250 thick. They just gave me .032 over that. The other end is already at .240 which is what is called for on the drawing. I ended up using a file and fitting it by hand.

I'm still loving my new vice. I had a walk-in job which required my precision vice. I put my precision vice in my new vice and did the job in less time than would have required taking my old vice off the mill and clamping the precision vice on the mill and indicating it in before starting that job.

DSC00350.JPG


DSC00352.JPG


DSC00351.JPG
 
I cut the valve slide bosses so I could drill and tap the frame for the crankshaft bearing caps. Drilling the holes with a #50 aircraft drill was easy but tapping them was tough. I had to make a tiny wrench to turn the tap. This was a slow and tedious operation. I was so worried about breaking the tap but I got away with it. I used a 1/8 Woodruff key cutter to cut the recess for the drill. This worked out perfectly.

DSC00354.JPG


DSC00355.JPG
 
I drilled and reamed the frame and pillow blocks for the crank shaft. I then turned both ends of the crank shaft between centres. I chucked a 3/8" shaft cut a 60 degree point for use as the dead centre. I used my live centre for the other end of the shaft, of course. I used the dog engaged with a chuck jaw I made for this job. Turning the ends was no big deal. I turned both ends to .313 then used some fine sandpaper and polished them to .312. I ran into a setup problem when turning the crankshaft throw. My 8 inch 4 jaw chuck was too big for this tiny crankshaft. What I did to fix this problem was chuck the dog I made to turn the pulley and crankshaft and use it to hold the crankshaft. This worked out perfectly. If you do not have a 4 jaw chuck you could clamp a similar dog to a face plate and then turn the crankshaft throw. The first thing I did was centre the 5/16 hole in the dog using an indicator. After getting it within .0005 I put a 1" dial indicator against the jaw that would be moved .437 for the proper offset throw. I then moved it .437 and tightened the apposing jaw. I then double checked the offset using a dial calliper measuring between the point of the live centre and end of the crankshaft. I was dead on. I then proceeded to turn the crankshaft throw. I worked slow taking no more than .010 cuts. I fiddled around with it for at least a hour being very careful. Some would say I was being overly careful but the last thing I wanted to do was break it and have half a crankshaft lodged in my head. Everything worked out so I proceeded to put the crankshaft in the frame. It was a little tight but after spinning the crankshaft in a drill press chuck while holding the frame after less than a minute of break in turning it freed up nicely.

DSC00358.JPG


DSC00360.JPG


DSC00361.JPG
 
I worked on machining the small parts and finished them. Now I'm using my rotary table to drill 4 #50 holes in a 1" BC for mounting the cylinder to the frame. For whatever reason I'm getting an error when attempting to post pictures. Oh well! Sorry but it's not my fault.......
 
I have completed this engine kit. It runs smooth as any double acting steam engine should. This kit is not for the inexperienced machinist/engine builder! I attempted to post pictures of the completed engine but unfortunately this forum still has an upload problem. This problem has not been corrected for over a week so I guess someone has lost interest in maintaining this forum.
 
I uploaded the pictures of the completed engine to my photo-bucket account so you can view them.

DSC00379.jpg


DSC00380.jpg
 
n4zou said:
I attempted to post pictures of the completed engine but unfortunately this forum still has an upload problem. This problem has not been corrected for over a week so I guess someone has lost interest in maintaining this forum.

No interest has been lost on maintaining the forum. The technical administration has been working on it but has not found the source of the problem yet.

As you have found photos stored in an external storage such as Photobucket, Google etc are unaffected so that is a workaround for the moment.

Nice looking engine. Thanks for the posting.

Gail in NM
 
Engines looks good!

I have a question on finishing the castings though.
Is there a way to get rid of the rough surface?
Is filing it and shaping it the only way to get a smooth surface?
Or is it supposed to be left rough?

Andrew
 
That's up to you! Originally the manufacturer would have painted the rough castings of they are cast iron. If cast of brass like mine that is never going to rust it would have been left alone. Remember that the manufacturer is not going to do any work that is not required to the engines operation. This is the reason I will not paint or polish my engine castings. If you wanted to smooth the castings by hand and paint it you could very well do that. The new 5BI kit has a cast iron frame along with a few other cast iron parts and those should be painted. Personally I would just leave them rough and paint it as this is what the manufacturer would have done. In the end it's a personal choice. If you want to clean up the castings you could start by using a Dremal with sanding disks and work down to hand sanding and polishing them.
 
Thanks for the info!!!!
Mine are cast bronze, so i may just bead blast it to get a bit of a shine!

Andrew
 
Back
Top