Newbie's first engine.

Home Model Engine Machinist Forum

Help Support Home Model Engine Machinist Forum:

This site may earn a commission from merchant affiliate links, including eBay, Amazon, and others.

eleqim

Member
Joined
Jan 15, 2008
Messages
5
Reaction score
0
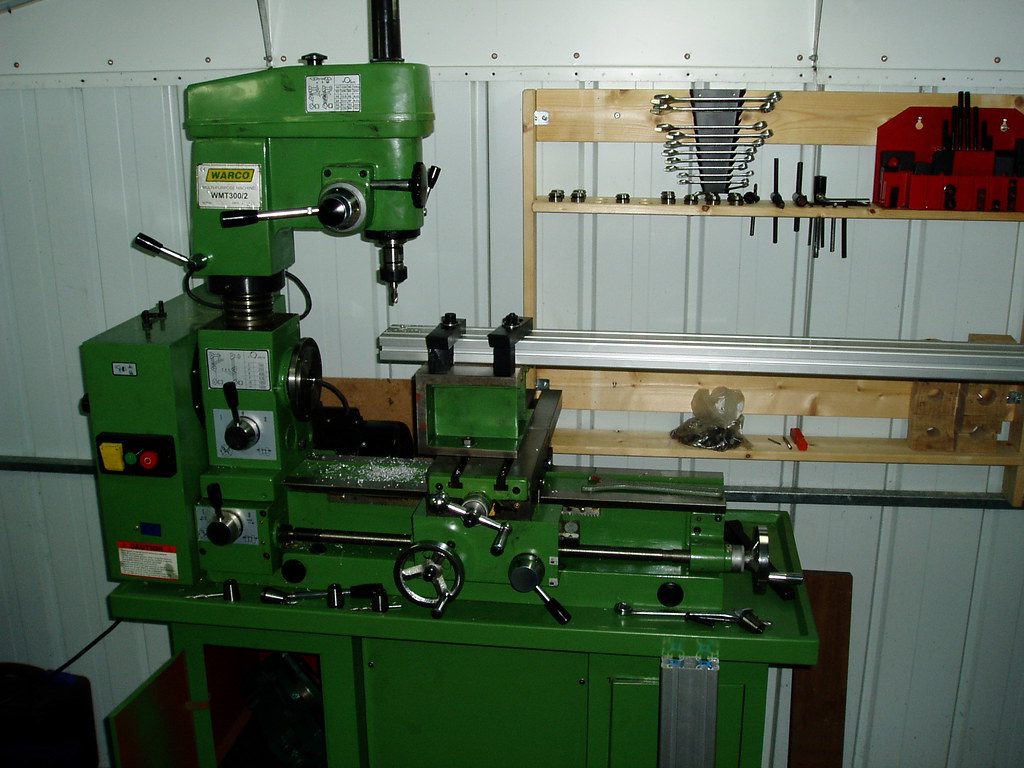
Well my first bit of proper metal bashing from my mid life crisis purchase of a lathe. And it actually runs! Which is a relief!
It's yet another Jan ridders flame licker :)

2706918095_da57919a65_b.jpg


2706919151_160e4ed4a2_b.jpg


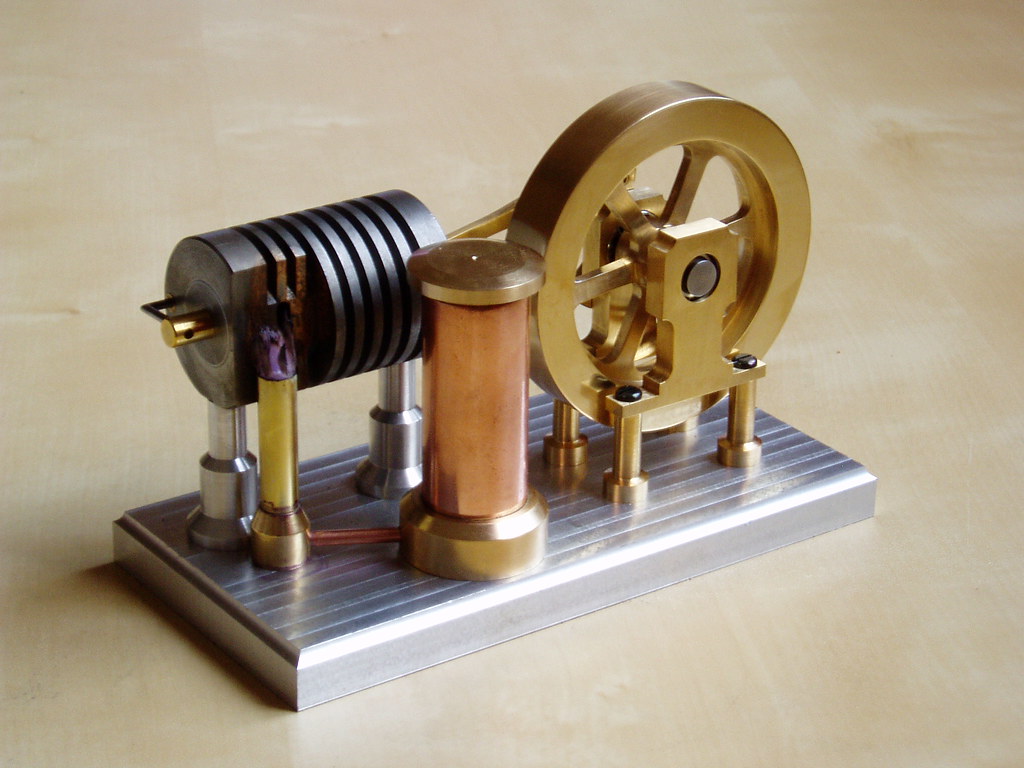
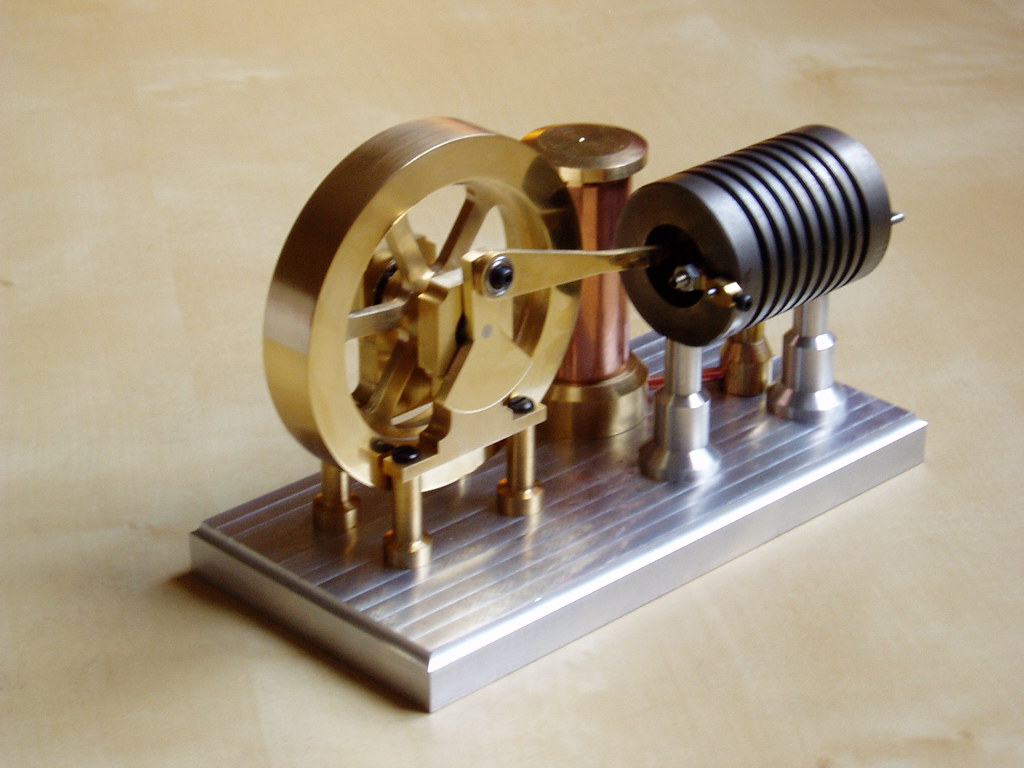
I built a different burner after reading bogstandard's comments on here - and I'm still grateful for him pointing me in the direction of this site in the first place. Now I know how I should have built it :)
I don't think there's a single component on it which doesn't have some fault. I still don't know the correct way to do things, but I've learnt loads of ways how not to:)
The engine's currently very fussy about the flame position, and when I finally got the thing to run, it only ran at about 180rpm.
I think there might be a couple of reasons for this. Firstly when watching the flame get sucked in, the bottom 1-2mm of the port looks flame free, so I'm going to try reducing the height of the burner pipe. Secondly the internal finish of the cylinder certainly isn't the glass like finish that others have described. I just made the cylinder a tight fit on the pistons then covered them in coarse metal polish and twisted them back and forth until they slipped through the cylinder under their own weight. But there's still plenty of visible machining marks on both the pistons and cylinders, so I might make a for the cylinder and then some new pistons.
Other outstanding jobs are making a base and finishing the surfaces on some of the components and maybe adding some grip indents on the fuel tank lid. But at the moment I'm just pleased that it finally spluttered into life.

[ame]http://www.youtube.com/watch?v=Jn3fmsywduA[/ame]
 
Ian,

A lovely bit of work there.

If it runs, you have succeeded. Fine tuning comes later. You might find that when you lower the flame, you will get a faster run speed.

I will be experimenting with gas burners for this type of engine when machine time allows. I will keep everyone posted.

I'm glad my ramblings helped you out. The height for the burner is critical. In fact Jan is designing and making a new twin cylinder version of this engine, using a common block, and he is using the vertical burner as I described instead of the angled one, and he has it running. That will be a real nice engine to make when he releases the plans.

Again very well done making one of the most difficult of engines. You have achieved what others can only wish for.

John
 
Nice work Ian. You should be proud, that is a tricky engine to build.

Cheers,
Phil
 
If that's your first engine you have built I'll look forward to seeing your second and third engine as that is a great result for a first engine. Well done
 
Great looking engine, Ian! Very nice work. I've built 2 or 3 flame lickers and I've yet to get one working for more than about 30 seconds!

Chuck
 
Wow!! What a lovely piece of work! I have heard that these engines are really difficult to get right, a very brave move to make it your first engine, well played that man!

Did you do all the milling work on the lathe with a vertical slide or do you have a mill too?
 
Very nice workmanship Ian, and welcome aboard ;)

CC
 
The physics behind a flame licker is fairly complex. Ideally, the retreating piston creates a partial vacuum which sucks in hot gas through the open valve. Once the valve closes this gas loses heat very rapidly to the walls of the cylinder thus creating a partial vacuum in the sealed cylinder. Atmospheric pressure then pushes the piston into the cylinder creating the power stroke.

Aside: This is how Newcomen's original engine worked, although he used steam and condensed it by cooling the cylinder with water. Such engines are called atmospheric engines because they are limited to operating at atmospheric pressure, 14.7 psi.

If the cylinder is too cold the hot gas will "quench" too rapidly and the vacuum will be lost before the valve can fully close. (This explains why I can get my flame lickers started more quickly by preheating the cylinder.)

The base of the flame is not as hot as the top of the flame because the gas there hasn't fully oxidized yet. Sucking from the bottom of the flame should produce less vacuum once the valve closes. (Just intuition - I can't prove this.) With less vacuum, the (atmospheric) force on the piston decreases and the engine runs more slowly.

Even with the flame top well below the cylinder port, I can control the speed of my engines (minutely) by moving the flame toward or away from the port. Again, I can't prove it but I believe this is due to the variation in the temperature of the gas reaching the interior of the cylinder.

Regardless, flame sucker operation is critically dependent on the flame placement in all three dimensions. Considerable experimentation is needed to get the engine running satisfactorily.

 
Great little engine Ian! Wow your first and it's running success! I think your well on the road to many hours of enjoyable engine building. I hope to build one of the flame licker engines someday but have held off until I get a little more experience. And here you go and do it on your first one. Nice work and a thanks for sharing it with us.
Mel
 
Typical! Now i've fiddled with it I can't get it to run any more.
In the back of my mind I know I really should improving the lapping, but i'm hoping i can get away without that. At the moment it sucks in from the bottom of the flame, so following on from what Marv's said, i'm going to try substatially shortening the burner tube and trying to get a hotter part of the flame.
As for the milling, I bought a warco wmt300 which is one of those combined lathe/milling machines. A bit of a compromise, but space was limited.
2534204743_10ab3ef795_b.jpg

Thanks for all the positive comments, if I knew flame lickers were so tricky to get running I would have chosen something else :)
 
Ian Munro said:
a warco wmt300 which is one of those combined lathe/milling machines. A bit of a compromise, but space was limited.

very capable machine non the less Ian, I was going to buy the Chester equivalent but happened on a second hand 9 x 20 lathe just before I ordered it, so I then got an X2 mill to keep the lathe company :D ............. it's a slippery downhill slope though now, .......... there's always more tooling / improvements to buy and do and then things to build with the new tools ............ ;D

CC
 
Aye, there's not enough hours in the day to do all the things I want to, but I guess i've got to wait another 25 years before I can give up the day job :)

Anyway I have success again! Turns out the piston is triangular, or at least the piston and cylinder certainly aren't circular. If I rotate the piston through 180 degrees it works, rotate it back and it doesn't. I knew the finish was a bit dodgy :)
Now i'll just have to remember to mark the correct way round, and check if there's a similar issue with the valve.
 
Very Well Done Ian!

I have built that engine, TWICE!
No runner yet.

Rick
 
As for the milling, I bought a warco wmt300 which is one of those combined lathe/milling machines. A bit of a compromise, but space was limited.

Well it certailnly turns out some nice work :bow:
 
Hey Ian!

Thats a nice looking engine. 1st eh? very well done.

Eric
 
Hello,

That is fantastic for a 1st engine. I have a flame licker based on Jan's design next on my list, however, I've just finished my first stirling engine and that only runs with ice cubes on the cold end and meths burner, it might work if I finish the water jacket off and use cold water completely submersing the displacer cylinder.

Anyway, my point is that to get a flame licker to run on your first attempt is top notch. They are notoriously difficult, I don't really fancy my chances considering my experience with thr stirling! At least with Jan's I know a few people have had success with it though.

As John said, his twin cylinder one looks good and think he has sorted the valve tumbler mechanism now, just waiting for the plans as he reckons he will tweak it such that it should be virtually guaranteed to run so long as it's machined to a good standard with the correct fits etc.

 
way to go Ian, looks good. Always a great accomplishment to see them run - whats next?
 
What next? Well probably another Ridders. The problem with going to his site is you think 'Oh! that looks nice to build!', then you look at the next and think 'Oh! that looks nice to build!' and a few minutes later you've got a very long list :)
Next will probably be one of those lamina flow engines or a LTD stirling because it's not obvious from just looking how they work, but I'll be cheating on these as i've got a couple of those carbon piston glass cylinder air pot thingies. The lamina flow one is looking more tempting at the moment as I haven't worked out a good way to machine true the perspex ring yet.
I quite fancy one on those test-tube marble things, but haven't found a source for ceramic balls yet.
One of Jans IC engine would be nice too :)
Oh and a conventional stirling and also a poppin flame licker as they make a nice sound.
That should be enough for a while :)
 
Thanks for that link John!
I've Just ordered some.
As i've already got some 16mm pyrex test tubes, it looks like the next project's been decided :)
 

Latest posts

Back
Top