Mini Bike

Home Model Engine Machinist Forum

Help Support Home Model Engine Machinist Forum:

This site may earn a commission from merchant affiliate links, including eBay, Amazon, and others.

stevehuckss396

Model Engineer
Project of the Month Winner
HMEM Supporting Member
Joined
Nov 19, 2008
Messages
4,935
Reaction score
1,680
Location
Sterling Heights, MI
I have had this project in the back of my head for a long time now. Work has been extremely busy
so every once in a while I get out to the garage and make a piece or two. I'm going to build a
1970 Ruttman Wild Goose mini bike.

Ruttman_mini_bikes_003.jpg


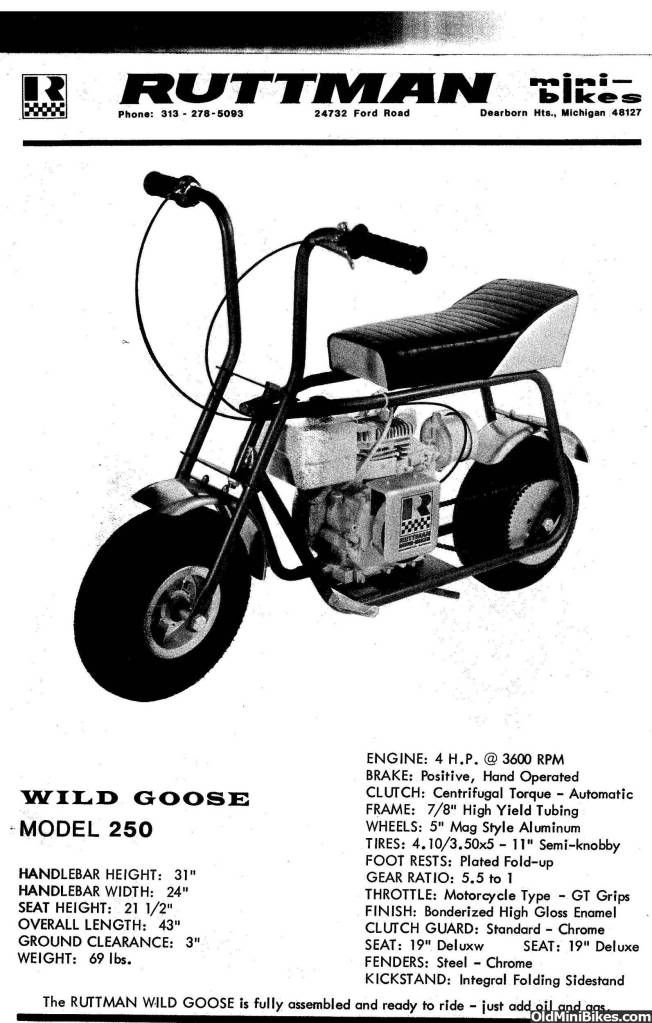
When I was a kid we used to ride bikes just like this one. That is what got me going on this thing.
It will be in it's original chrysler code FC7 Plum Crazy purple color. I'm still in the stages of gathering
information to get as original as possible.


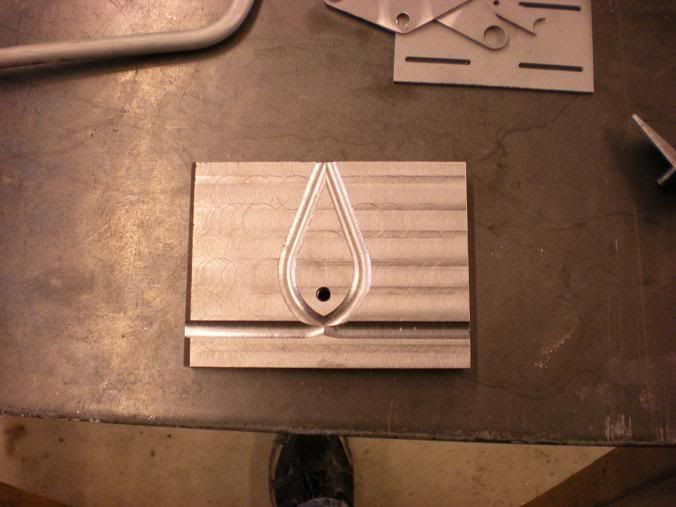
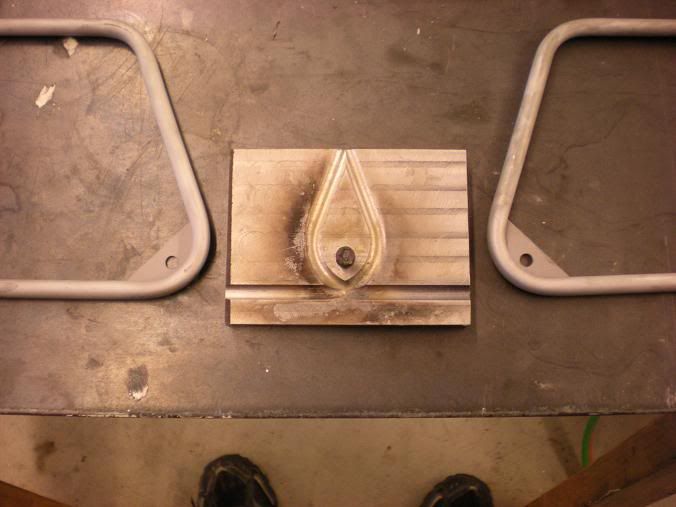
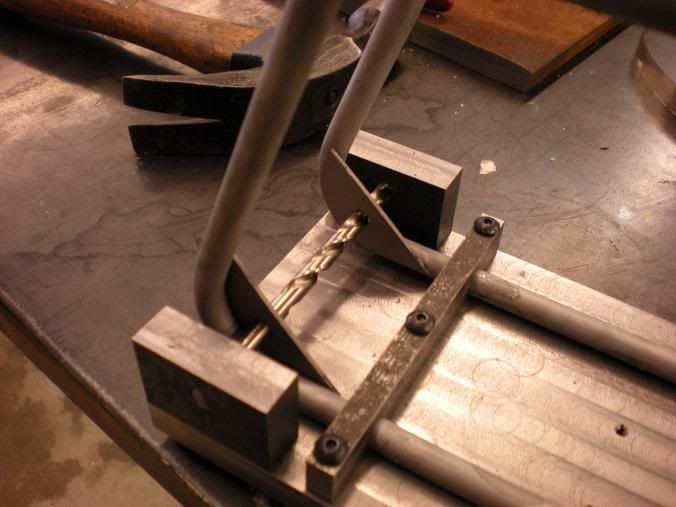
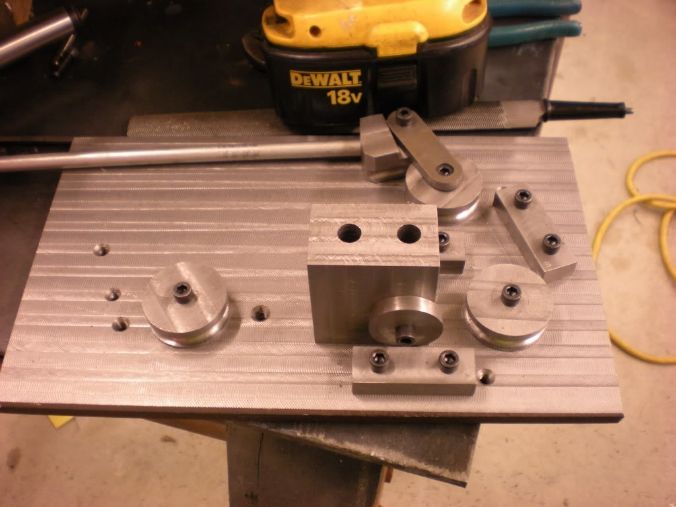
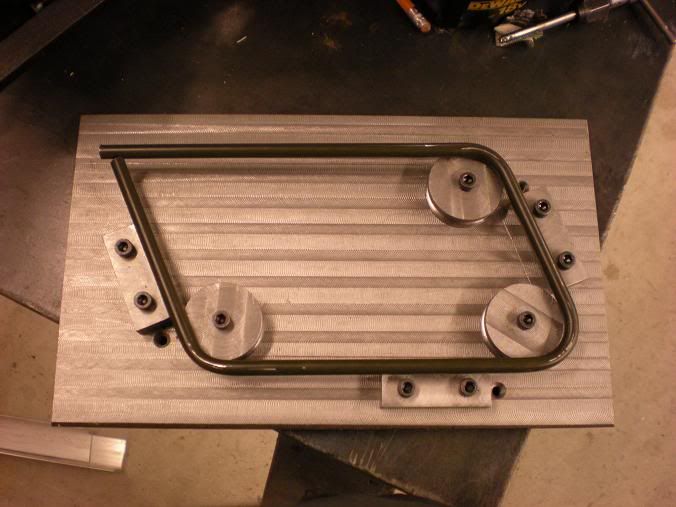
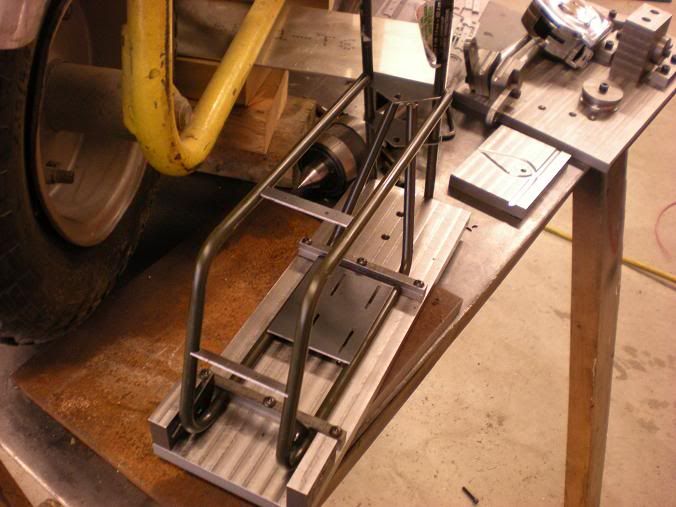
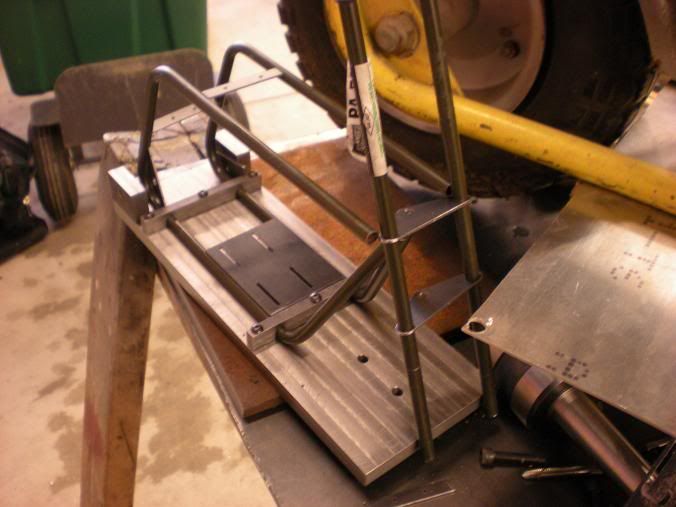
I have enough information to start on the frame. To build the frame I will need 4 fixtures. One fixture will be
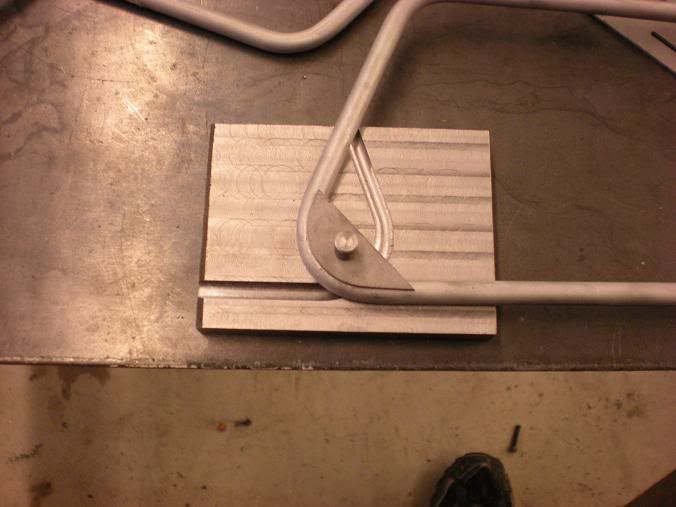
a bending jig to bend up the frame and handle bars. The second will be a simple thing to help get the rear
axle bracket in the correct place. The third will be used to hold the frame together for assembly. The last
one will hold the triple tree together for assembly.

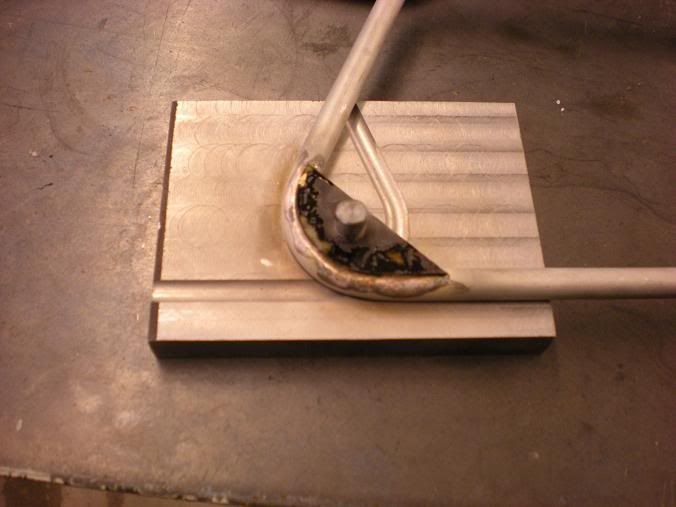
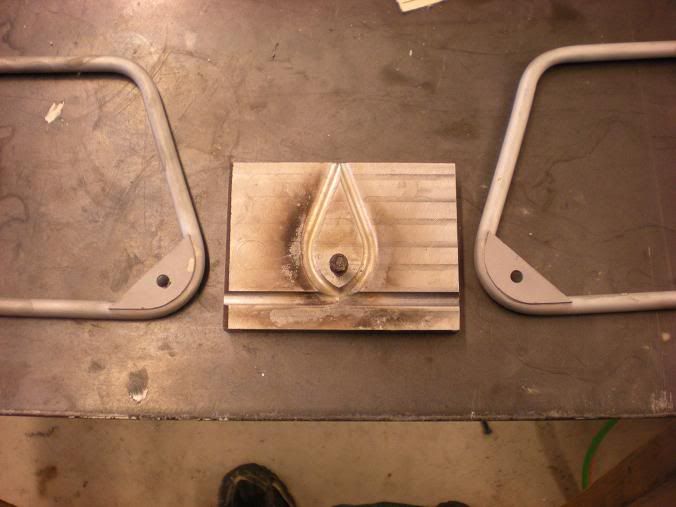
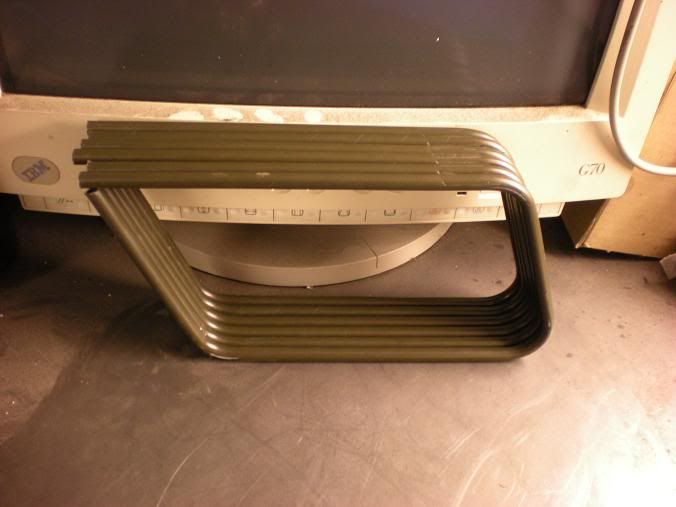
The bending fixture has taken over 2 months just on it's own. It has 4 setups. 2 to bend the frame and 2
to bend the handel bars and forks.

DSCN2770.jpg


DSCN2757s.jpg


DSCN2759s.jpg
 
Steve

This going to interesting. I will be following you in your new project.

Vince
 
Thanks Vince

I spent a couple hours making some of the parts for the frame.
Somehow I screwed up the front fender mount bracket but all the other pieces look good.

DSCN2833s.jpg


DSCN2835s.jpg


Here are some of the pieces on the half finished frame fixture.

DSCN2838s.jpg


DSCN2836s.jpg
 
Should be a fun project, this one. From the looks of it, your model will only be slightly smaller than the real thing. :)
 
Hi Steve,

An Interesting project and very cool!
The style reminds me of the old Raleigh Chopper bikes from the 70's!! (But without the engine)!
A very neat jig/fixture there and nicely made.
Have you made 6 off frames for trial and error or just for the fun/satisfaction of doing so?
What size will this beasty finally be?
Are you planning on building your own engine for it?

I will be following along.

Kind regards,

Ron.
 
stevehuckss396 said:
Thanks Vince

I spent a couple hours making some of the parts for the frame.
Somehow I screwed up the front fender mount bracket but all the other pieces look good.

DSCN2833s.jpg


DSCN2835s.jpg


Hi again Steve,

How did you do these shapes? CNC or water cutting?
Obviously a nice bit of manual filling once parted.

Kind regards,

Ron.


Here are some of the pieces on the half finished frame fixture.

DSCN2838s.jpg


DSCN2836s.jpg
 
Hi Steve.
I see, this will be a real minibike-project ;). So you are going to build three mini-Briggs as well. ;)
Will be following you in the progress.

CS.
 
ronkh said:
A very neat jig/fixture there and nicely made.
Have you made 6 off frames for trial and error or just for the fun/satisfaction of doing so?
What size will this beasty finally be?
Are you planning on building your own engine for it?

Hello Ron!

I made 6 rails for 3 frames. I also made 3 sets of the frame parts. I have no idea how this is going to go so I made extras while I was setup. I'm hoping for 2 good frames when done.

The beast will be 1/3rd scale

Yes i'm going to scale down a 4HP Tecumseh. It wont be an exact model like Mr. B.Lindsey but it should be close enough to look like it belongs there.
 
What a great project Steve. With all your talent I know it will be a fun biuld to watch and a unique and beautiful model. So who's the lucky 1/3 scale rider going to be?

Bill
 
This is going to be good. We had these in Australia too, the main one you find these days is a Deltek. We ended up with one at a lawnmower shop I used to work at, of course we had to modify it some, Victa 160cc 2 stroke, modded clutch, lots of porting, expansion chamber, SU carb off a motorbike. Got it to go about 85kmh (53mph) but it was a bit hairy small wheels, high centre of gravity etc but good fun. I have gathering dust in the shed at home a 1969 Tas Keystone minibike which was missing an engine when I got it but have retro fit an 80cc motorised push bike motor. Good fun. Will be watching along Steve.

Brock
 
Oh Man! I had one like that...burned it up, rebuilt it, ran it into the ground...don't know what happened to it WAY too much fun!

:bow:

Dave
 
steamer said:
Oh Man! I had one like that...burned it up, rebuilt it, ran it into the ground...don't know what happened to it WAY too much fun!


Really! My wife would kill me if I did that to our dog. You ought to get a mini bike instead!!! Haahahah!!! I crack me up!

Seriously, I have to do something. I have very little time for this stuff. Not enough time to finish the V8 so i figured I would pick away at this thing.
 
Cool project Steve,

It will be fun to follow along with your build. My older brother had a mini bike similar to this as a kid; he called it the black jack ass. After all it was all black.

Dave
 
Yeah but the monkey might like it so much you may never see it again :big:

Bill
 
I'm sure Molly is just wondering where to get a helmet for that cute little head ;D
 

This is the fixture for getting the rear axle gusset aligned correctly. It seems like alot to go thru
to get the gusset installed. I feel it was worth the extra trouble because the hole in the gusset
will be used to line up the frame and if they are not correctly installed the frame could end up
skewed out of wack.

DSCN2840s.jpg


The fixture has a #12-28 thread that is used to hold the bracket down. The frame seats in the
groove and held at the correct angle.

DSCN2842s.jpg


The gusset plate is silver soldered to the frame rail. The original plate is a straight strip of steel. I
made mine follow the contour of the frame rail to add a little strength. At the model engine shows
people like to pick things up and look at stuff. I want to be able to let them without worrying about
something getting bent up.

DSCN2843s.jpg


DSCN2846s.jpg


DSCN2848s.jpg


When the frame fixture is complete I will silver solder everything together. You can see in this shot
why it is so important to have these brackets properly located.

DSCN2850s.jpg


That's it for a while. I'm going to keep plugging away at the frame fixture and when its done I'll
get back to give you an update.
 
Hi Steve,
Quite an interesting project you have there. I think a lot of us had one of these as kids, either buying them used or fabricating them from a pile of parts. At one time when they were very popular you could get a 'kit' which consisted of most of the basic parts and then you had to assemble it. Rupp in Mansfield made many of them.
gbritnell
 

Latest posts

Back
Top