Metal Spinning Trial

Home Model Engine Machinist Forum

Help Support Home Model Engine Machinist Forum:

This site may earn a commission from merchant affiliate links, including eBay, Amazon, and others.

RManley

Well-Known Member
Joined
Jan 6, 2011
Messages
113
Reaction score
38
Hey all, I thought i'd post some photographs of a tool I'm constructing at the moment. I have no idea if it will work and the design has been stolen from youtube clips of people who make it look easy. The steel square is 20mm in section (0.8") to give it some perspective. I have some off-cuts of steel destined for a car body repair shop so I think I have some usable material to play with.

I need to make a few 'spun' parts for my bike project including a dynamo cover which looks like the top off a thermus flask and a headlamp bowl (gulp). Im going to start easy and small. Next job is making a former then the fun can begin.

20120622_214215.jpg


20120622_214224.jpg


20120622_214244.jpg


20120622_214301.jpg


So, have you guys done any spinning? Post pictures, examples and tips, its an open thread.

Rob.
 
I'm definitely interested Rob.

I make my own rechargeable gas tanks out of brass, and have always hand beaten the end cap flanges.

I am getting to the stage where I need to make eight pairs to begin with, a major project for myself, and if spinning could be brought into the equation, it would make everything a lot easier and quicker.

So, please do carry on, and if it works, then even a rough sketch up of the tool you have made would be greatly appreciated.


John


I've only done it once and was quite happy with teh results, I didn't use the wheel method just a hard rounded tool to push the steel over teh hardwood former. Anneal it a couple of times.

This is the cylinder end cover, about 1.73" dia 20g steel

Cylinder3.jpg


If you can use a soft brass like CZ106 it will be a lot easier than steel.

J
 
The trick is to use annealed stainless steel or better yet dead soft copper.
You can also acquire dead soft aluminum and have it heat treated.
Be sure to machine your spinning form out of steel if you are going to make multiple pieces.
It really pays for itself.
 
Hi, its a handy thing to learn as I use it a lot to make reproduction toy steam burners and small boiler end caps its a very quick method especially for multiplies.I did a little write in the tips and tricks section under the title simple spinning project a bowman burner it may or may not be of any use
best wishes Frazer
 
Right, I took the plunge today and had a go. I needed to create a cup shape approx 7/8" deep and 2-3/8" dia.

I made a former and backing plate that plugs onto my live centre - don't use your best one as some pressure is required. The former is two times the thickness of the sheet smaller in diameter plus 5thou. I thought that I would be thinning the steel so I had to start somewhere and I could always skim it smaller if required. The rad on the former is 5/16".

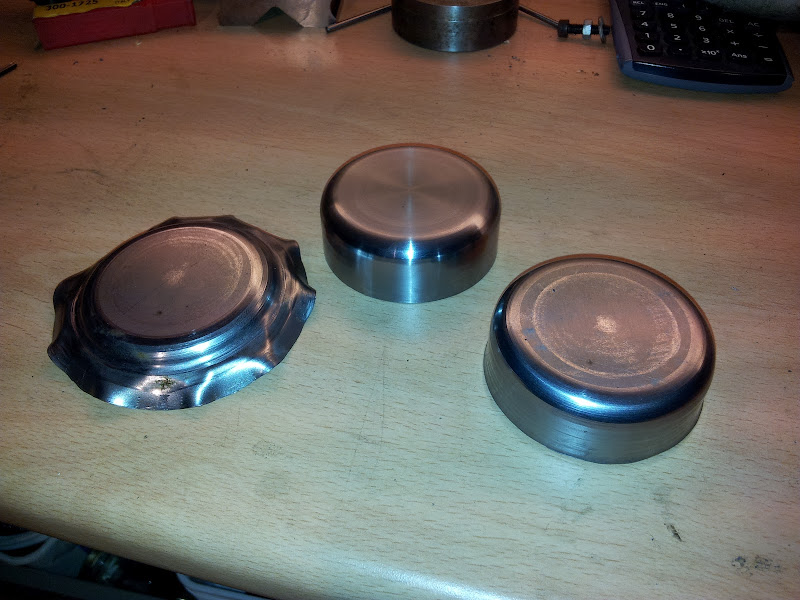
I used the formula D=(0.8*(l+r)) to get the diameter of the disk I needed in my 22gauge steel. This steel is intended for car body shops so at the time I thought it would be ok to use for this. You should be able to tell the first go I had in the photograph below, if you cant its the one on the left ;) .

Major fail. It was a mix of user error and tool failure. I had pressed a shaped steel ring onto my bearing and this had come loose and become wedged in the slot, on top of that I had not fanned out the material enough whilst working it around the bend and so it just warbled - almost impossible to come back from. I then stood back, loctited the shaped ring on the bearing and had a cup of tea.

Take 2 (on the right of the photo). I was happier with this try as it looked roughly like what I wanted to achieve. I was grooving the parallel part of the job too much but was happy with how the round was looking. I needed a differently shaped wheel for the finishing stages, more round almost semi-circular and less pointy. But that will be an improvement later on as I currently don't have a spare bearing. I think im lucky getting this steel as it is working really nice.

Take 3 (middle). I took more care to use the less pointy sides of the wheel after getting the shape. This worked much better and I was getting the hang of 'flowing' the steel round. I think longer handles would be better but shorter ones let yo know how much abuse your spindle bearings are getting. I wouldn't want to do this all the time on my myford although I can't imagine its much worse that drilling large holes. I used a scotchbrite pad to polish up the surface but no other work was required.

20120624_163800.jpg


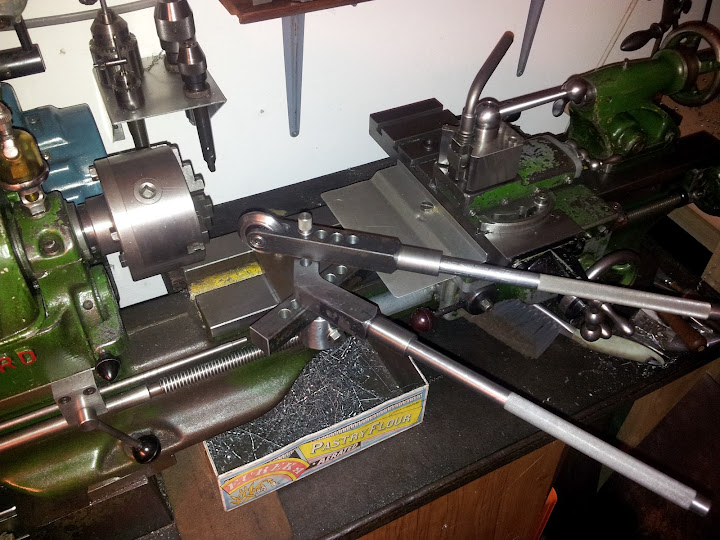
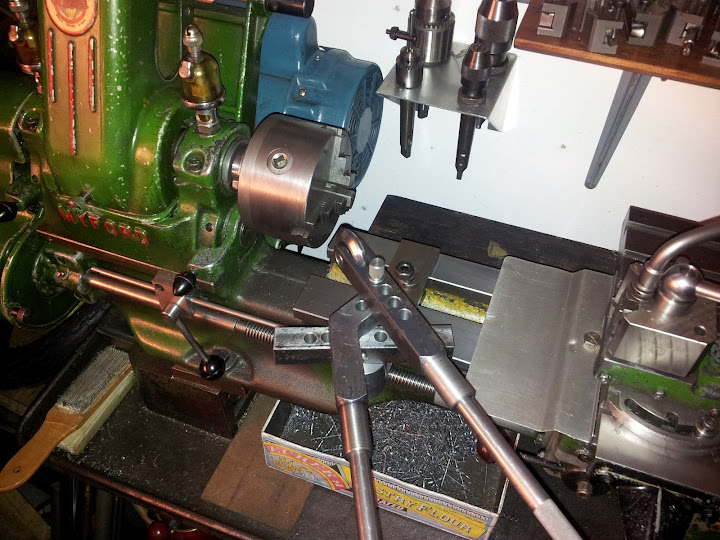
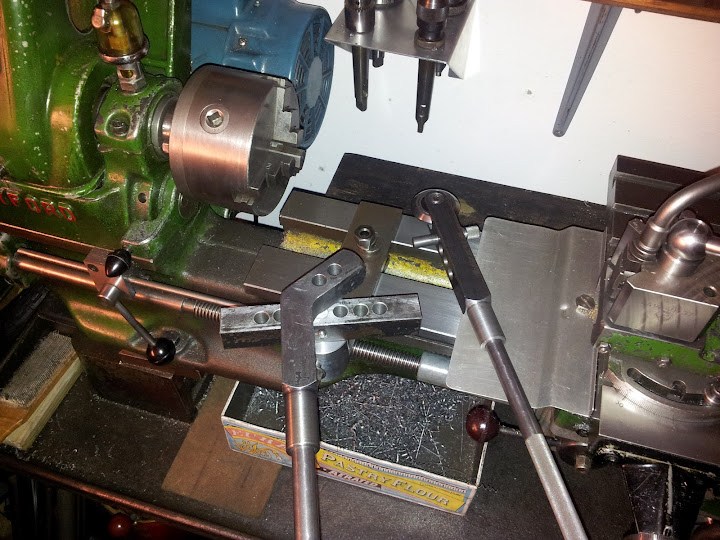
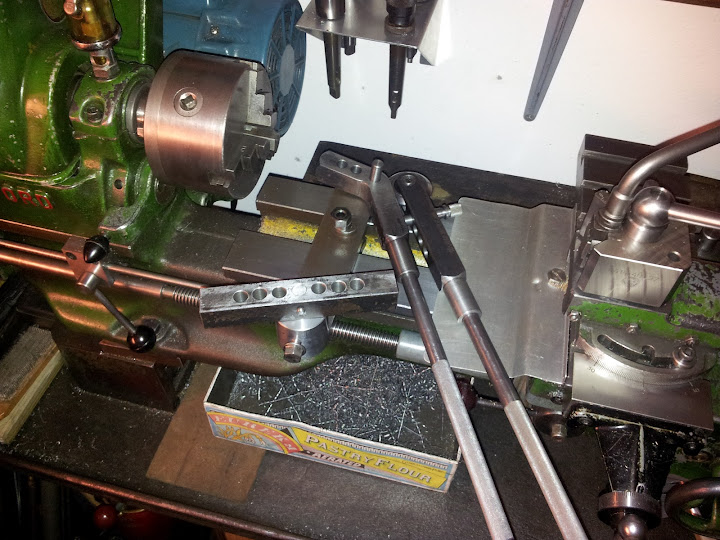
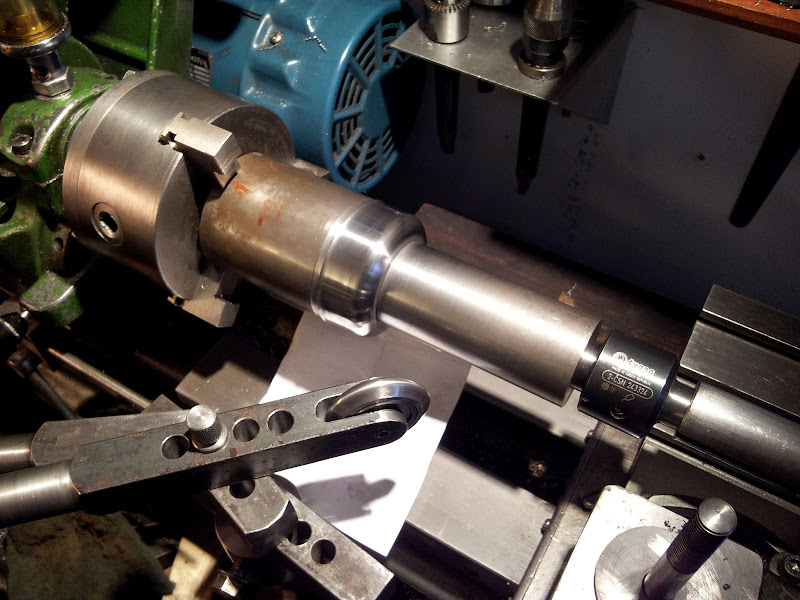
Here is my set up, the final part is finished and still in the mandrel. I needed the long pressure pad as I dont want to take off my saddle:
20120624_162325.jpg

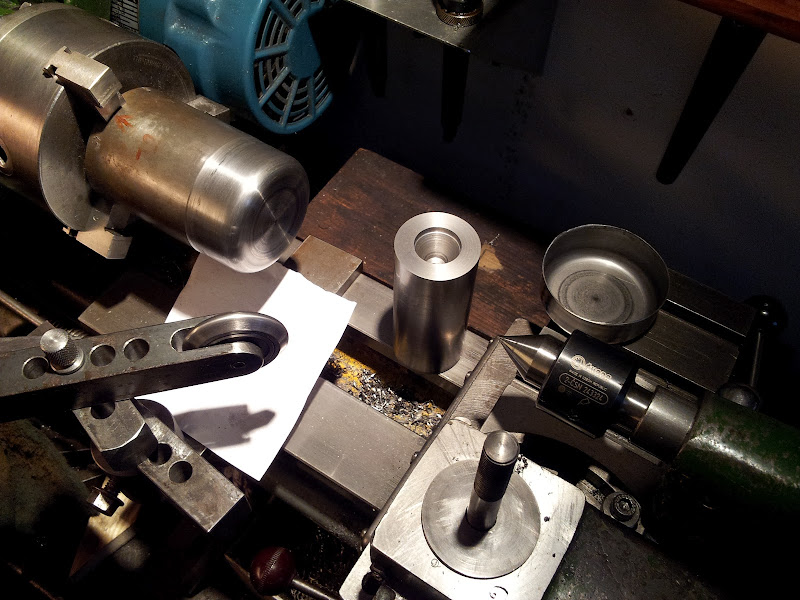
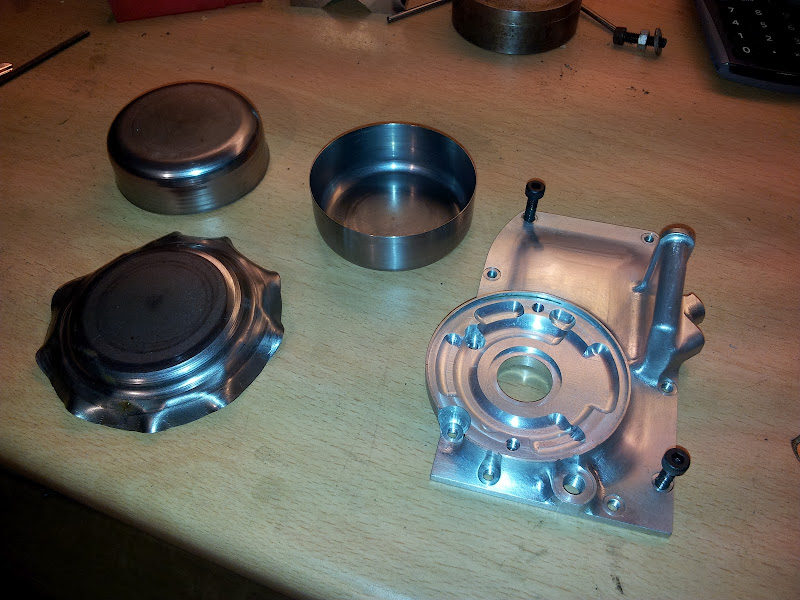
The parts unassembled:
20120624_162404.jpg

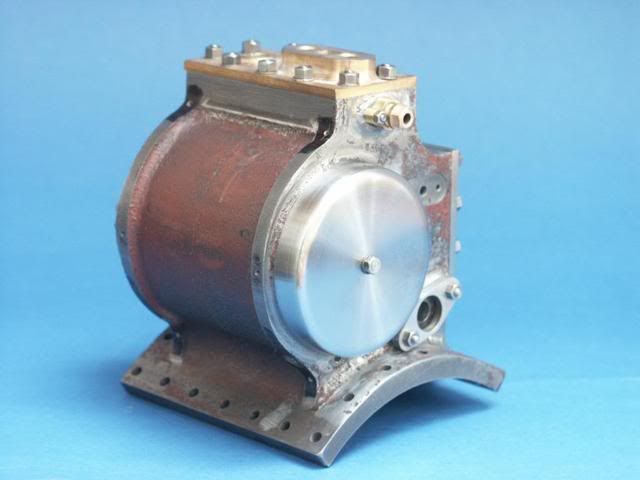
What the part is for:
20120624_163828.jpg


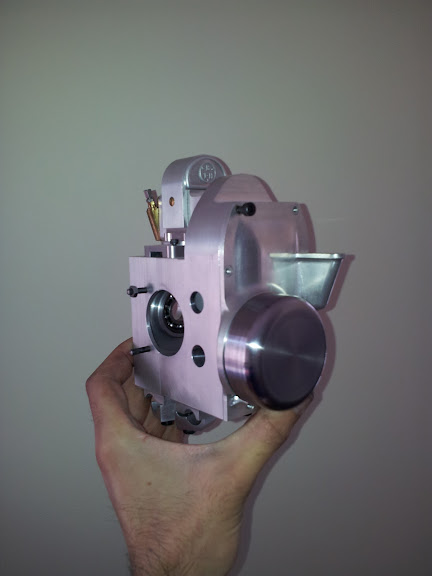
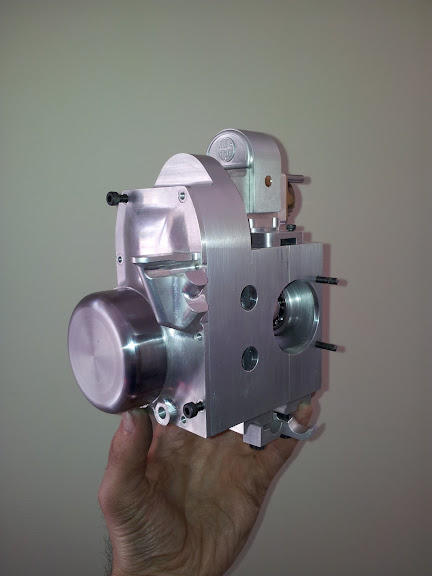
This is how it looks in its final position, I still have a BTH logo to emboss in the centre but thats another trial.
20120624_164306.jpg

20120624_164344.jpg


Im happy and in the third try im done! Im sure I could bash it around a former and make it look presentable but after the tools are made, this is much quicker. I believe it took me around 7-8 hours to make the tooling including the formers and maybe 2-3 to produce 2 scrap and 1 final part. And now that I know how to do it im sure I could make another one in 30 minutes with all the faffing I do!

So, I will try and get some quick drawings done as this set-up seems to work ok.

My next challenge is a headlamp bowl approx 4" in diameter....but that wont happen for a while due to holidays etc.
I want to put this:
http://www.ebay.co.uk/itm/REPLACEMENT-LENS-FOR-DOMINATOR-HEADLIGHT-ASSEMBLY-ALL-GLASS-LENS-/310308575918?pt=UK_Motorcycle_Parts&hash=item483fd51aae#ht_2245wt_1062
in it which would give me a dipped, road legal good looking headlamp pretty much half scale to go with my road legal tyres.

I worked out that a half size adult equates to a 3 year old :-[
Im not sure I'll be able to ride it after all.

So, over to you guys.

Rob.
 
That really is a nice achievement for your second and third pushes. :bow: :bow:

This is one thing I must pursue as I will only be moving fairly soft brass.

What I like is that there should be no cleaning up afterwards once you get the former to the correct size. By hand beating, I usually have to skim up the flanges on the lathe.


John
 
I have done some simple spinning on aluminium & steel.

I like your hand forming lever set and the very nice outcome.

I've only ever done it using a ballbearing mounted in the toolpost - using only the radiused edge of the ballbearing for forming.

Typically only strightforward cup shapes as per Jasonb's photo.

I normally caclulate my blank diameter by volume plus a small amount for clean up. Too much excess makes the "warbling" more likely.

As in most press forming / drawing / spinning / swaging operations the wall thickness seldom thins out but it does "grow" in length - the volume obviously remains the same.
So the trick is guestimating how much its going to thin or thicken - as a starting point I assume (not always correctly) that it stays the same.

As an aside - when I worked for a shockabsorber firm I set up an NC lathe to produce gas spring tubes with a spun closed end - the original intention was a projection welded stud would weld closed the anticipated pinhole in the end of the spin forming - in practice it spins shut (cold) and withstands 2000 psi without leaking - If you had asked me beforehand if that was possible, I'd have said no.

Ken
 
That's neat Rob Thm:

Are we going to see an avatar upgrade soon? :hDe:

Just thinking out loud ;D

Bez
 
That is just so cool :bow:
love it!
Pete
 

Latest posts

Back
Top