Horizontal Mill Engine From Kit

Home Model Engine Machinist Forum

Help Support Home Model Engine Machinist Forum:

This site may earn a commission from merchant affiliate links, including eBay, Amazon, and others.
The M&M connoisseur is back! Woot!!

Glad you're home and safe among the machines, Zee.
 
Same here Zee,,almost lost your thread to second page.

Welcome back.

JimN
 
Wow! Thanks all. You have no idea what that means to me. (Well yes you do...so you know it means a lot.)

I was out for quite a bit the last two weeks. This past week was about catching up.
Wife just left on another trip (Yay! Bummer!) so I'm hoping to get this engine done soon.

Thanks again!
 
kvom said:
It's about time!

And on that note...

I'm struggling with the flywheel...so I set it aside (i.e. walked over to the mill) and finished the porting and steam chest cover. The steam chest cover just needed polishing. (It still does...I didn't do a great job.)

Pic of setup. I used the dials to move the table. The blue marking is there so I can see whether I made a major screw-up.

IMG_4500.jpg


First slot made...

IMG_4501.jpg


Finished...

IMG_4502.jpg


So the steam chest cover is used when running on steam (I doubt that will happen) and the clear cover is used when running on air. I doubt I'll finish up the edges on the plastic cover.

Some observations...

The bottom side of the porting cover came out pretty decent. That's what you see in the pics. The top side though isn't as nice. One corner is off and there seems to be a bit of chatter along two edges. I think it's due to flex of the cutter and I should have take more than two passes. However, the most likely error was not moving the table a few thou for cleanup.

A big big thank you to Vernon for sending me a 1/32 end-mill.


That leaves 3 parts just needing a hole each and the flywheel. Then I'll find out what parts I have to do over. :big:

Cool! I see the 'preview' works again.
Fooey. You can see the ding I made against the end of the stop block.

[EDIT: End-mill is sticking out kind of far. I thought about it when I put it in but left it out so I could see what I was doing...but that might have contributed to the problem.]
 
Still looking good Zee. At the stage I am I'm making enough parts over that I could build a second of whatever object I'm working on...
 
Thanks Twmaster.

I was just looking at JMI thread on the same engine. (A worthwhile thread to watch.) His thread helped me catch a boo-boo in my build.

I missed the dimension showing .05 wide slot. Could just as well have been 1/16. So the slots are a bit narrow. I did wonder how I was going to get a file in there.

I think I'll leave it alone for now.
 
Heck, they look really nice, Zee.

I can't see the finish in the slots, so am not sure of the finish issue you mention. A couple of things that may, (or may not) be related;

The end mill seems to be hanging out in the breeze quite a ways. Choke up on it in the spindle as far as is practical and still get the job done. Tiny end mills fairly whip around.

Don't know how fast you ran the spindle, so a suggestion for future; With a tiny end mill like this, let 'er rip. You could run this 1/32 size at 10,000 rpm and it would be happy -in brass.

Both of these things can help with the finish the tool produces.

Glad to see you back in the shop!

Dean
 
Thanks very much Dean.

I ran the spindle as fast as it would go and, yes, the end mill is too far out.
The finish inside the slots wasn't too bad but could have been better had I move the table left and right a thou or two. 'Finish' probably wasn't the right word. On the other side you could see one corner wasn't very tangent and the exhaust slot didn't look as square as the (non) square slot you can see.

It's great to be back in the shop ;D
 
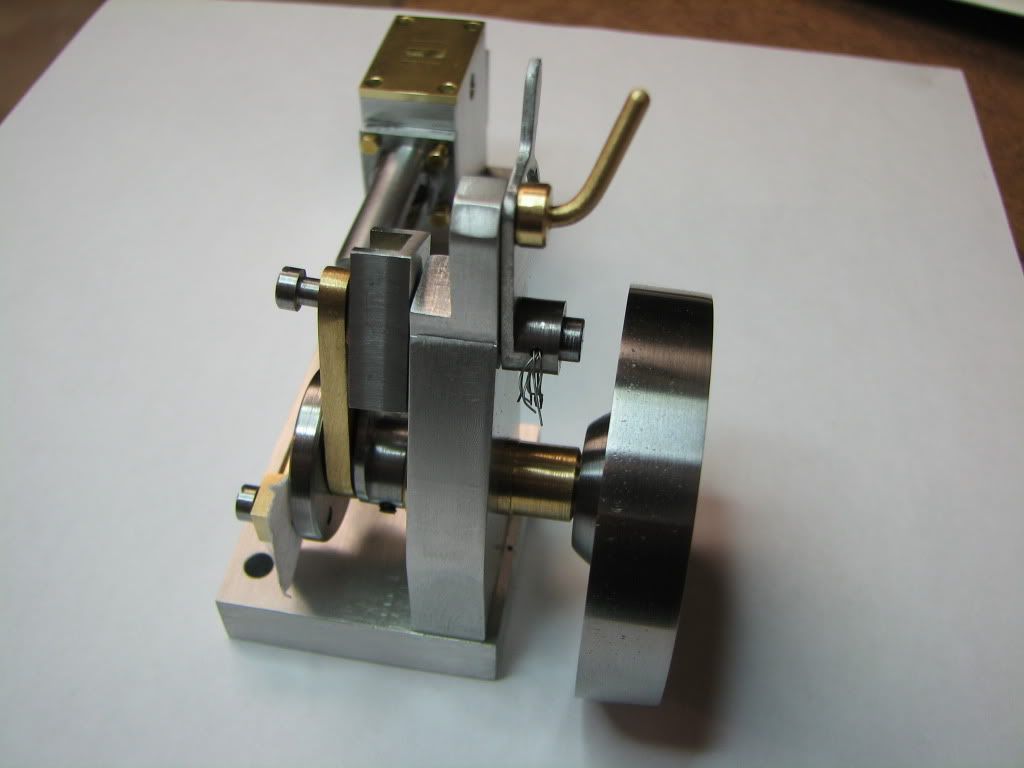
Well it's time to start fitting and sweating...

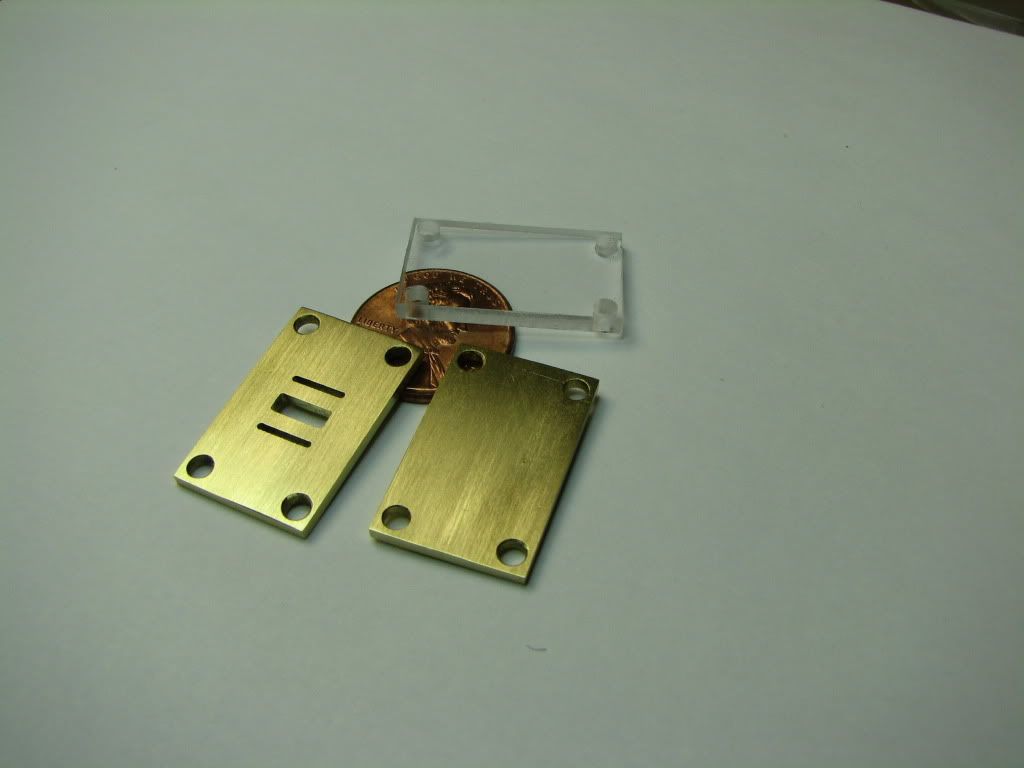
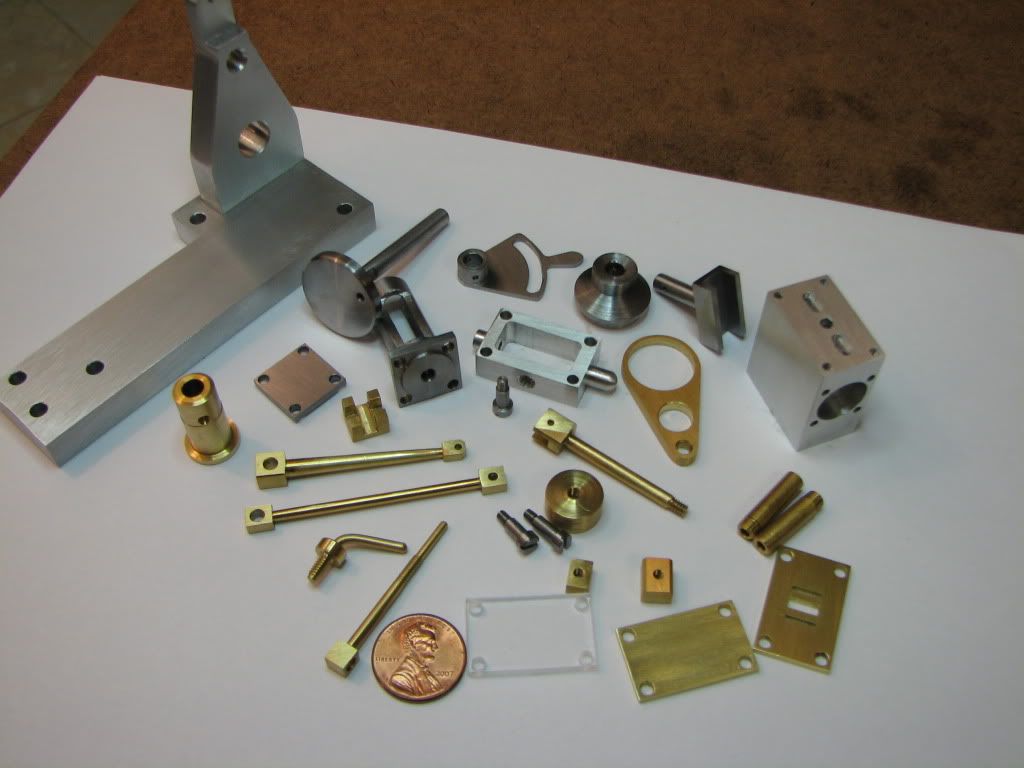
Here's a pic of all the parts I've made...okay okay...'good' parts...
I didn't show the screws and pins that came with the kit.

IMG_4503.jpg


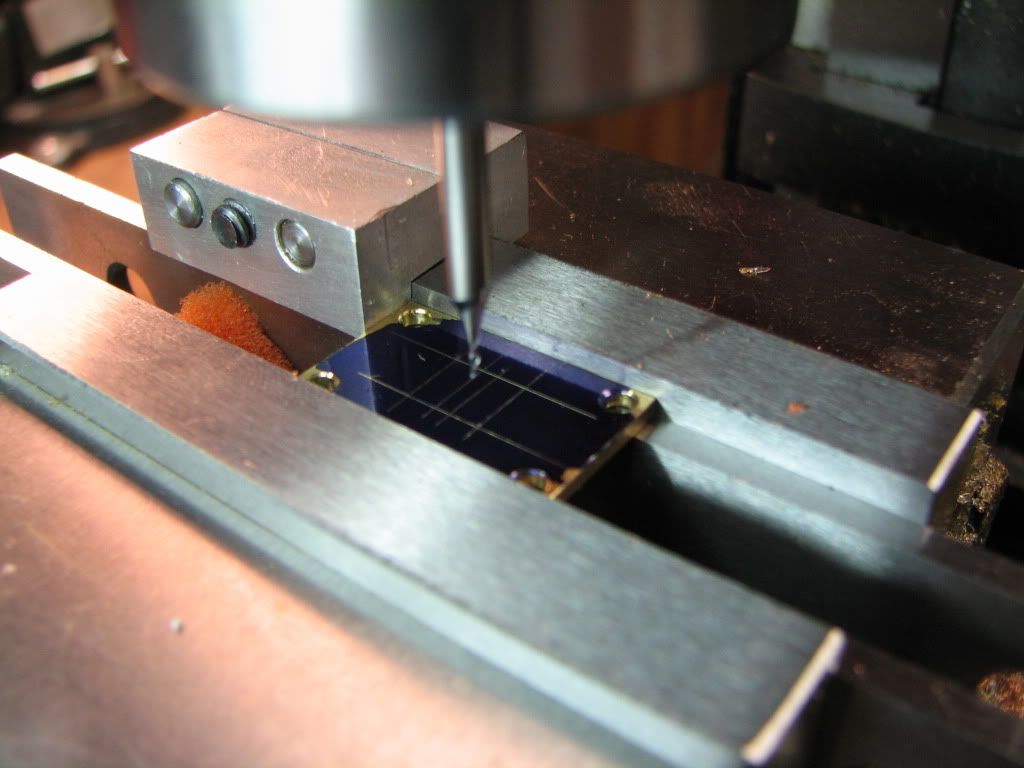
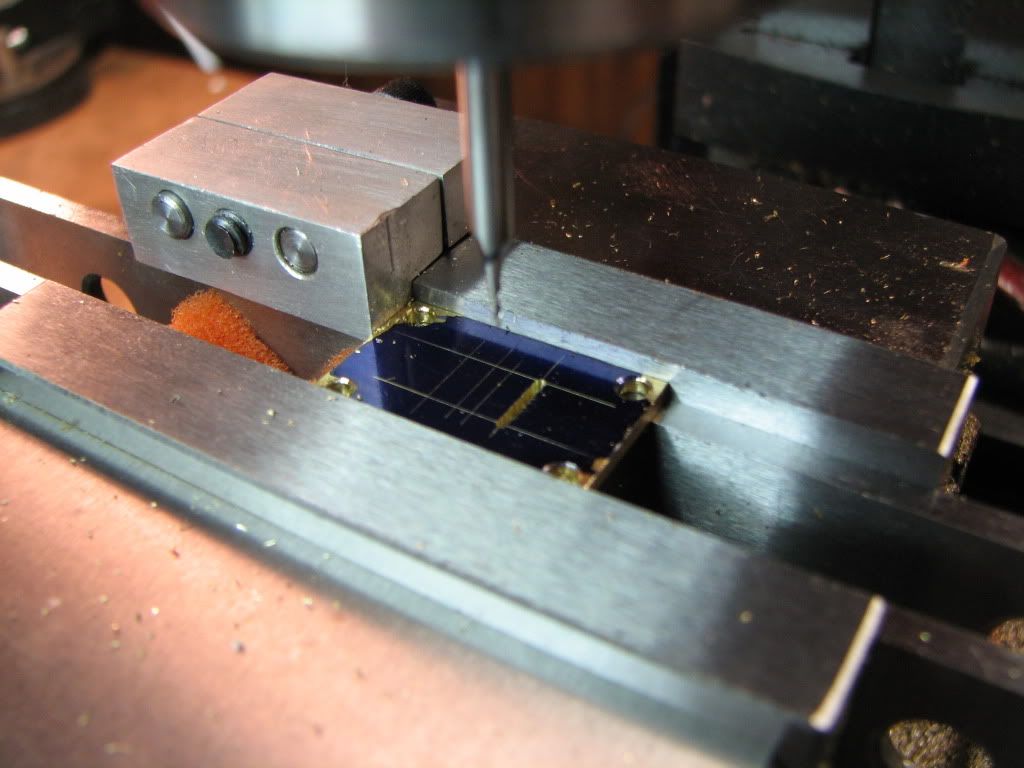
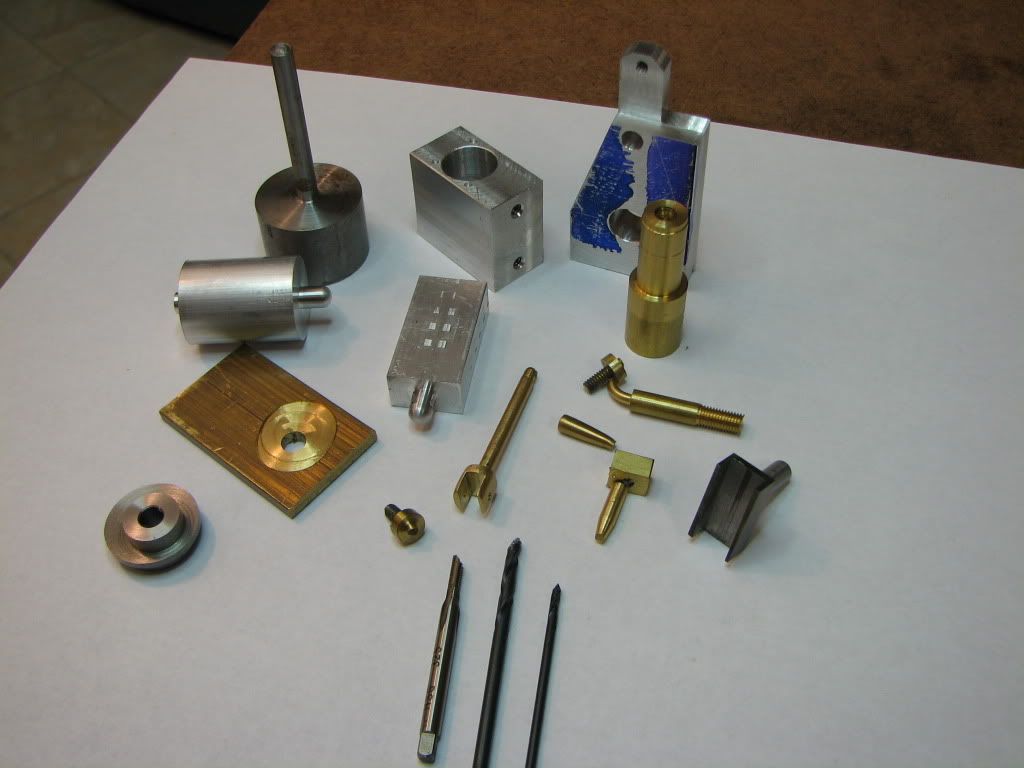
Here's a pic showing some of my travels...

IMG_4506.jpg


Not all the parts are there...I managed to re-use some of them.

Two drill bits and a tap sacrificed themselves...okay okay...were killed by me.
There's at least 3 evil handles in there too.

And before you all go posting on me...that's right...the flywheel is missing.

For whatever reason, I've been struggling with that. I had much less trouble on the flywheel for the launch engine. I don't know what's going on. Certainly some of it was not having the cutter in the right place. Some of it was not having it ground properly. (Insufficient clearance so there was some rubbing going on.) I've tried a carbide, a carbide insert, and several HSS (one of which I ground). The thing that really gets me is that the HSS tool looks like it's being ground by the flywheel. It's not rubbing as far as I can tell. But it's getting gouged.

In any case, my time is limited...I'm on vacation with many plans for the shop that I dearly want to get done. ;D

So I may just use the flywheel as is until I have time to make another.


Kind of puts in perspective the number of parts needed for these little engines. I wouldn't have pictured that many in my head. Of course, my projects always turn out way more complicated that I first imagined. Guess that comes from being an eternal optimist! Anyway, nice work, Zee! You have definitely achieved a professional look on the parts.

Chuck
 
Zee, that's a GREAT looking set of parts for your engine Thm: - I can't wait to see it assembled!
What's going wrong when you are machining the flywheel; any photos of that ? - somebody may be able to help.

As to the practice parts - keep them handy; you'll find a use for them one day ;)

Kind regards, Arnold
 
Zee,

That looks like a very nice engine to me. Interesting to see all the parts at once. I've considered doing that for my interminable steam tractor project as a way to convince myself that I actually am making progress. I'm curious if that was your reaction when you got everything visible?

Dennis

P.S. Not implying your project is interminable ;D
 
Thanks very much Chuck. I seem to be making good progress on 'the look'. It helps that I haven't tried to get better pictures yet. ;D Fit and function is another matter.

Thanks Arnold. No photos on the flywheel. I may just need to step back and think a little more about it.

Thanks Dennis. It has seemed interminable to me! ;D But yes...seeing all the parts was pretty neat. I'm in the middle of first assembly and I've been pretty happy for the most part. A little filing to get it to fit better. It also reminded me of my first erector set...lots of parts...put them together to make something.

First assembly going better than I'd hoped. I stole the flywheel off my launch engine. The bore is a little bigger but it works well enough to turn by hand and see that things actually move and/or where the binding is.

The porting cover needs to be modified. They should have stuck with the 1/16 wide slots I think. I made them .031...they should've been .05 according to the drawing...but even that I think is a tad small. I can barely see the ports underneath. Of course I may have made the ports wrong. ;D

The hole they specified for the pin in the reversing lever is way too small. I may have to redrill that after I measure the pin. Right now I just have a bit of wire stuck through to keep it together.

Here's a cheesy pic...
The paper is there to minimize scratches for now.

IMG_4507.jpg
 
Fabulous, Zee. It also looks like you have enough parts to build a second engine..

You're so close to having a runner!

Dean
 
Deanofid said:
It also looks like you have enough parts to build a second engine.

Almost ;D About 20% of the parts were made once, 60% twice, and 20% thrice. There may be a part I did 4 times. Sigh.
 
It's together. Need to run it in some.
Instructions suggested making a wheel, mounting it on the mill, putting a rubber band around it...well...here's what I did.

I used the arbor from the slitting saw and wrapped a few rubber bands around it.
The flywheel is from the Launch Engine. Its bore is a bit large so it's not concentric. 3 rubber bands were each wrapped around 3 times.

It's wobbly but it's running the engine. Works either direction.


I did try some air...no way. In fact...I'm less than optimistic that it will work. But let's break it in first and see what happens.
 
Zee,

Neat run in setup. Don't despair probably some minor adjustment on the valve setting and it will run just fine.

Best Regards
Bob
 

Latest posts

Back
Top