Hit me - Miss me?

Home Model Engine Machinist Forum

Help Support Home Model Engine Machinist Forum:

This site may earn a commission from merchant affiliate links, including eBay, Amazon, and others.
Hi Bob

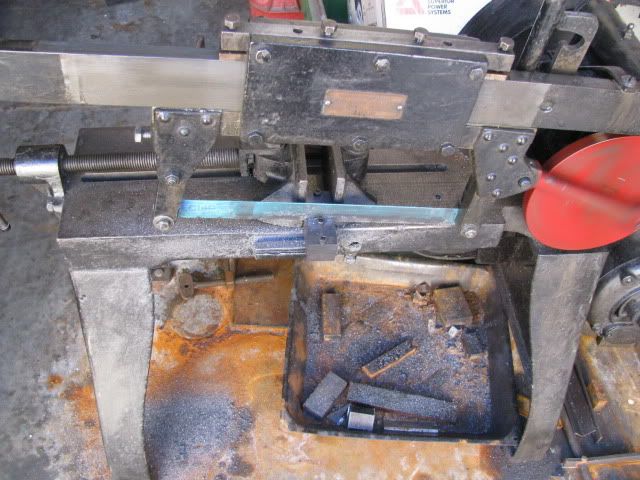
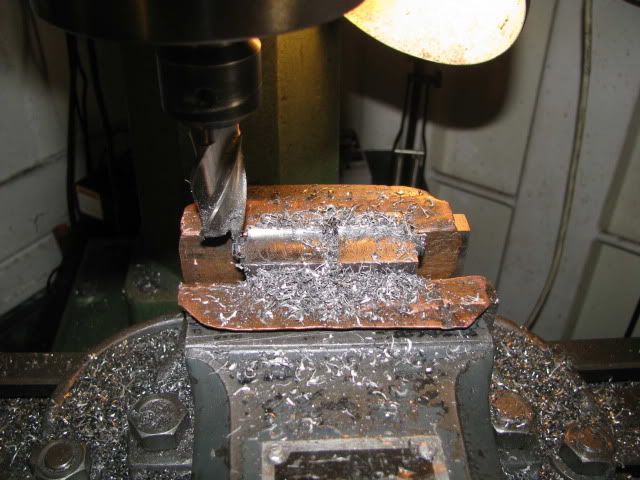
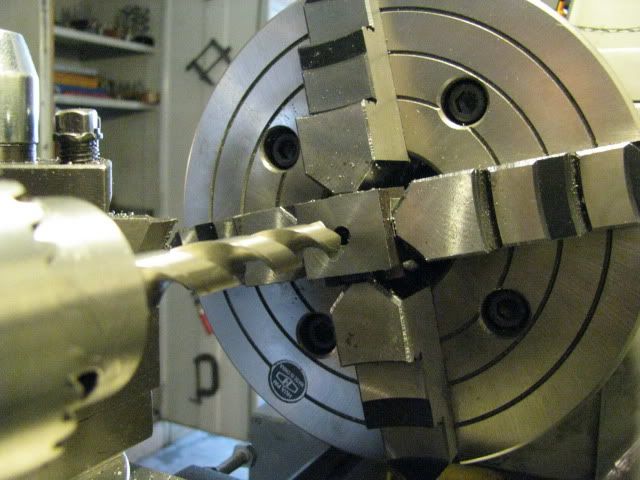
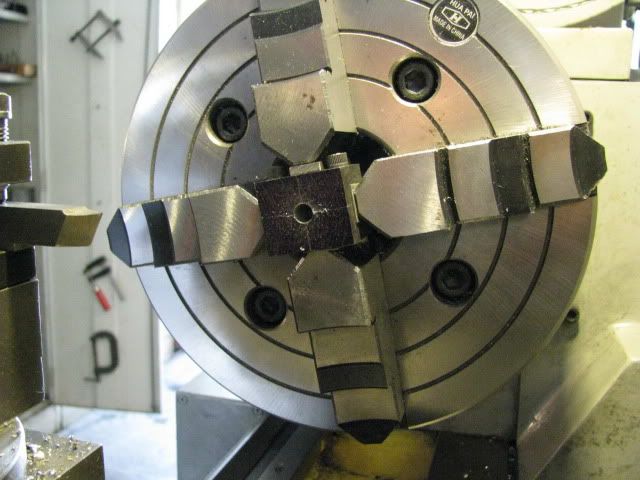
Did you heat the bottom half and cool it slowly to let down the hardness of the broken tap so you could drill it out,

If so I guess it work.

Nice work watching progress with great interest.

Have fun

Stew
 
Hi Stew,

In a word "Yes."

The tap was 3/16" HSS - old and probably blunt. When I was a lad breaking smaller taps was one of lifes hazards and it necessitated a trip to the blacksmiths shop to put the part in the forge and then in the lime bucket to give a very slow cooling period and anneal the HSS. If it was late in the day the part was placed in the forge and the forge was shut down and the whole thing allowed to cool overnight, even better and sometimes the only way, especially if the tap broke off in a large part.

After annealing I used as big as would fit centre drill to restart the hole in way of the broken tap. This was followed by a drill one size under the tapping drill size. Next a HSS punch was used to free some of the daggy bits of tap remaining. The tap was then restarted using a plug/bottom tap to pick up the original threads. After ensuring that things were as before, the hole was tapped in the normal manner, (taper, intermediate then plug tap).

Things were pretty straight forward this time as it was a through hole being tapped. It can be much more exciting when the tap breaks off in a blind hole. ::) ::) Ask me how I know. ???

Best Regards
Bob
 
Hi Bob

Thanks for the explanation, pleased you got the tap out OK. I suppose it would work just as well using dry sand if no lime was available.

Have fun

Stew
 
I've been watching and enjoying this thread closely and have been enjoying it.
Hopefully I will not drag this too far off topic but can you explain why lime is used to cool the item slowly?
How do this help compared to just using sand?
 
Without getting too technical:-

When you heat carbon steel up the carbon combines with the iron to form something called martensite, when you quench the steel you freeze it in this state which is very hard.

Heating it up and letting it cool down slowly the carbon migrates out of the iron and the steel returns to its soft state.

The ? with sand is a good enough insulator to slow the cooling down enough. Its something you could try.

Hope this helps

Stew
 
Stew and tmuir,

Thanks guys for your support and interest. :bow: :bow:

tmuir,

Stew has explained it pretty well. Lime was what was used successfully in my formative years so where possible, I have followed this method. I have tried dry sand but it leaves the HSS harder than does the lime. As a result, when you start the drilling process there is more chance of the drill wandering, especially on smaller holes as it encounters the harder bits of tap v the softer bits of your original material.

Best Regards
Bob
 
Not much but at least it was all forwards. :eek:

Splitting into 2 housings.

IMG_0775.jpg


Sizing for width.

IMG_0776.jpg


Ready for marking out and boring/shaping.

IMG_0777.jpg


Best Regards
Bob
 
Maryak said:
Stew and tmuir,

Thanks guys for your support and interest. :bow: :bow:

tmuir,

I have tried dry sand but it leaves the HSS harder than does the lime. As a result, when you start the drilling process there is more chance of the drill wandering, especially on smaller holes as it encounters the harder bits of tap v the softer bits of your original material.

Best Regards
Bob

Thanks Bob I'll have to get myselfe some lime

Stew
 
you're doing a great work Maryak, and your threads are always instructive

I'm happy to see that I'm not the only one that breaks taps :)
so, lime is better than sand...
is lime what we call 'calce' in Italy? a substance used, with cement, to bild walls?

I ask because the 'calce' is of a light grey color, while your lime seems to be of a light yellow color...

 
Another idea!! Never tough that lime, as "calce" a white fine powder made by cooking the limestone at high temperature, used by home builder had that capacity..!!
Best regards
Paolo
 
Paolo and Ariz,

Thanks for your continued support and interest. :bow: :bow:

Yes Lime is Calce.

There are different types of Lime, I just bought what I could from a garden shop. Where it was in contact with the hot part it has turned dark gray which indicates to me the carbon migrating from the steel.

Best Regards
Bob
 
Diymania, "Every great journey begins with but a single step" I don't know who I'm quoting but it works!
Didn't mean to step on your thread Bob :bow:
Tony
 
Diymania said:
This is just amazing :bow: I wouldent be able to do this even if i had 2 or your shops @ my disposal.

Diymania and Tony,

Thanks for your interest. :bow: :bow:

As Tony says one step at a time and soon you have a ladder. We all started from knowing nothing about machining or engines, some like me, were lucky enough to be paid and taught how to do this others have learned and persevered on their own. The journey is as much fun as the destination.

Crawl before you walk before you run. There are many very good examples here of how to get started and all of us will help where we can.

Tony, helping a newcomer is what makes this site so good. It's not stepping on my thread it's part of what we are about.

Best Regards
Bob
[/quote]


What Bob said...in spades! ;D DIymainia......it all starts with a decision....there's plenty of help here....I don't think anybody would have it any other way......


...Gotta get me a lime bucket! ;D Looking great Bob!


OK.......Keep us in suspense with the setup to bore those bearings and I'll see if I can guess...... ;D

Dave
 
Dave,

Thanks for your continued help and support. :bow:

Just so you don't have a FFFFretful weekend. Below is a boring post.

The first housing being aligned in the 4 jaw for boring and facing.

IMG_0778.jpg


Drilling the bearing hole.

IMG_0779.jpg


Boring the bearing hole.

IMG_0780.jpg


The 1st housing half complete.

IMG_0781.jpg


Trial placement in the bed.

IMG_0782.jpg


2nd verse - same as the 1st.

IMG_0783.jpg


IMG_0784.jpg


The idea is to turn them around mounted on a slighty tapered mandrel and finish the other sides.

Were you guessing the same thing Dave. ??? ???

Best Regards
Bob
 
Nice progress Bob - looks good Thm:

Regards, Arnold
 
Arnold,

Thanks for your continued support. :bow:

Best Regards
Bob
 

"Were you guessing the same thing Dave. "


Nope....but if you didn't move two of those 4 jaws in between parts, you got the same results...... ;D

Dave
 
steamer said:
"Were you guessing the same thing Dave. "


Nope....but if you didn't move two of those 4 jaws in between parts, you got the same results...... ;D

Dave

You got it buddy, I should have taken a picture of the 2 big chalk "X's" on the jaws I undid.

Best Regards
Bob
 
OK I love this forum....

In my little bird brain, my knee jerk reaction would have been a faceplate and a knee, perhaps just a squared up block of stock. I would get the first part mounted on the knee, and bolted down with the cap bolts. Then the next one would be mounted up without disturbing the knee. Might have put a slot for the bearings to sit in to register them.

But you got it with a simplier setup.....so Good ONYA! ;D


Dave

ps fixed that ....I think.
 

Latest posts

Back
Top