Hand Stamped Labels

Home Model Engine Machinist Forum

Help Support Home Model Engine Machinist Forum:

This site may earn a commission from merchant affiliate links, including eBay, Amazon, and others.

jslocomb

New Member
Joined
Nov 10, 2011
Messages
4
Reaction score
0
Hi all,
I'm new to the site and entranced by the knowledge here. I'm a long term machinist - welder that is new to modelling. I have this project I've been working on that I wish to make a small name-board (aka label) out of brass plate for.

There has to be a slick way to line up hand stamp letters and numbers (app. 1/4" in height) and make a nice looking label .... I just haven't figured it out. In my tugboat engineer days I saw many examples of very nice hand lettering on valve labels so I know it can be done.

Does anybody here know the secret?

Thanks
Jim Slocomb
Friday Harbor, WA
 
I think Lautard suggests a strip of masking tape on the job to align stamps as well.
 
I always heard you used a strait edge like a metal ruler or such as a guide. Even better might be to use the ruler and a square to control both vertical and horizontal movement. You're on your own for angular displacements (ie rounds)

FB
 
I made a small cube of aluminum that has a 1/4" slot in it into which the (1/4") stamps fit. This cube has another slot which fits over one arm of a 1/8" steel angle iron. Said slot is fitted with a thumbscrew so the block can be locked into position.

In use, the angle iron is clamped down on the work with its arm vertical. The cube is slid along the vertical arm in increments and locked in place. Put the stamp in the slot and whack with hammer.

(I know a picture would be helpful here, but I gave the rig away a long time ago.)

You'll quickly learn two things...

For professional appearance, you can't simply space adjacent letters by the width of the punch. You need to experiment to develop what amounts to a proportional font spacing for your particular stamps.

Different letters need different amounts of hammer force. You need to whack an "M" or a "W" a lot harder than an "I" or a "T". The advantage of the sliding cube approach is that it's easy to whack, inspect, and then, if necessary, replace the stamp and whack again without getting a double impression.
 
I gave up on getting good looking results with stamps some time ago. Not cheap, but I invested in a New Hermes manual engraver. Works a charm in metal or plastic.
 
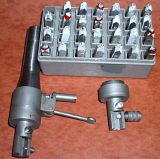
There was plans published in an old Home Shop Machinist magazine for a spring loaded stamper for use in the mill by Glenn Wilson. It works fairly good but requires adjusting of the stamps so all the bottom of the letters fall on the same line by removing metal on side of some of the stamps or by soldering or gluing shim to side.

A trick that works for me on the spacing of the letters is too first put some marking medium such as grease or lip stick on the work and touch the stamp to the metal to see if the spacing looks OK before stamping.

 
Definitely, some kind of guide block is the way to go.

One thing you may run into is letters not being centered exactly the same on all the stamps, so if you try to align them against a fence they won't align properly. This is, frankly, a pain in the butt. I have one set of stamps like that. My other set lines up nicely.
 

Latest posts

Back
Top