Governor Links for the Beam Engine Mary

Home Model Engine Machinist Forum

Help Support Home Model Engine Machinist Forum:

This site may earn a commission from merchant affiliate links, including eBay, Amazon, and others.

Dr Jo

Well-Known Member
Joined
Nov 1, 2011
Messages
166
Reaction score
13
One of the things that I always seem to put off making is those fiddly small strangely shaped links which seem to be forever associated with governors!

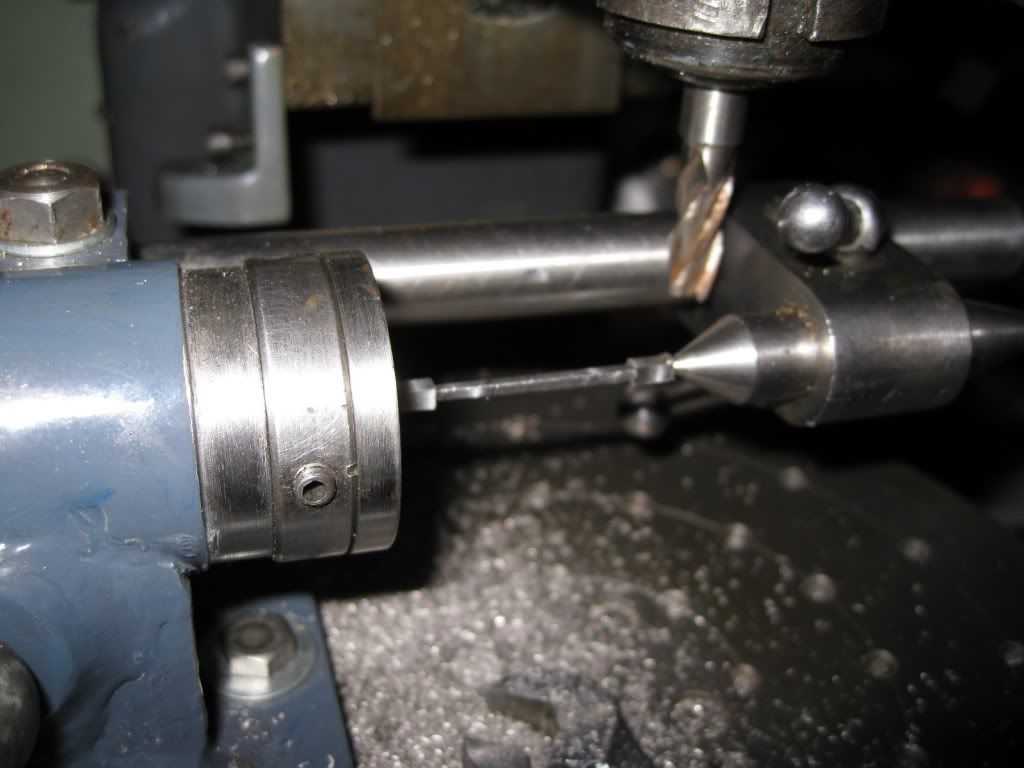
On Mary is there is a short 1.6mm square rod which has 2.8mm heads on either end. On Lady S I had made this using separate pieces but this time as the 2.8 sq is not available I decided to try mill them out of a piece of rod and cut the squares using the dividing head:

IMG_1278.jpg


Over the years I have given up trying to mill the curved ends on rods this sort of size and am a great believer in filing buttons turned to size and fixed in place using super glue during the filing exercise.

IMG_1298.jpg


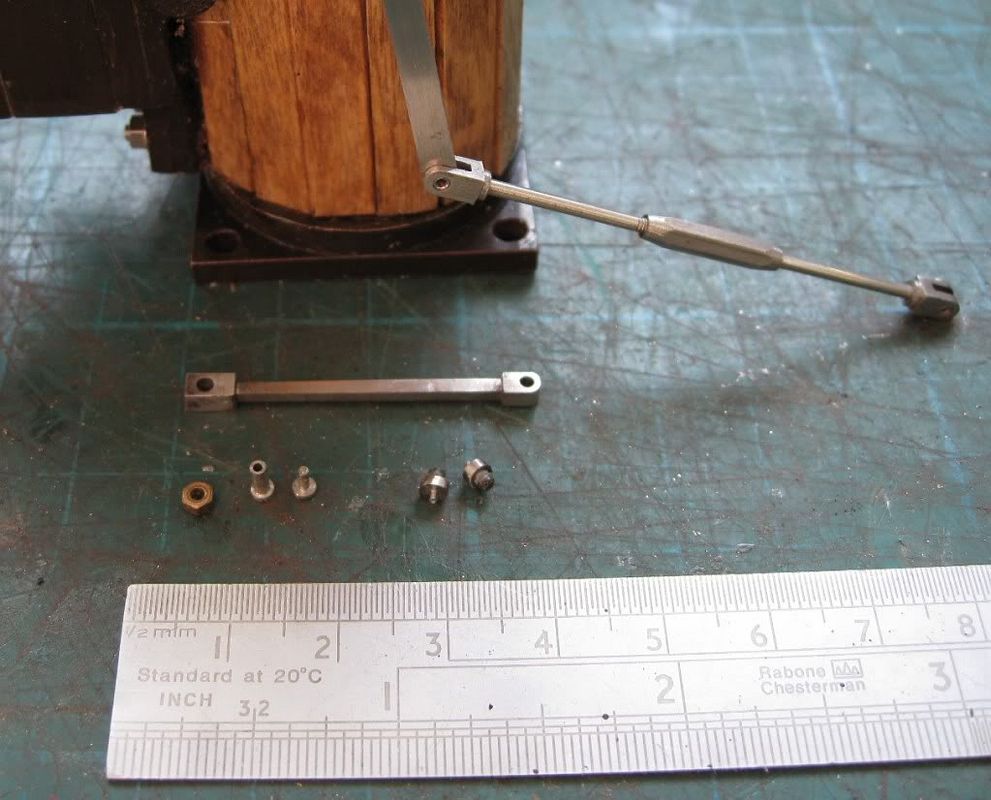
On final assembly the rods are connected together using the male and female pins you can see to the left, after the 10BA nut, above the ruler. These have 2.4mm heads, 0.8mm thick, the working part for a female pin is 1.6mm thick which has been drilled with a 1mm hole for the male pin, the male pin has a 1mm diameter. The length of the female pin is adjusted for the application, the males are normally left at 3.2mm (or shorter if needed).

Jo
 
Over the years I have given up trying to mill the curved ends on rods this sort of size and am a great believer in filing buttons turned to size and fixed in place using super glue during the filing exercise.

Yep that's what I do you can't beet a good old filing button and a dollop of glue.

Good to see you're following Tubals plans, I've seen lots of Mary engines where the builder has fudged the smaller fiddly parts.

Her's my engine its a crap paint job but all the bits and bobs are more or less as Tubal intened.


IMG_0163.jpg


Stew
 
Hi Stew,

Lovely to see your engine. I have painted mine chocolate and cream to represent Great Western Railway colours. (For information: The GWR took over responsibility for many of the UK canals and with them became responsible for the water pumping stations and subsequently painted many of their stationary engines with the same paint used on their carriages).

I note that you, like many builders, have chosen not put cladding on the cylinder, I have made the cladding but with the make up of the valve chest arrangement it is difficult to decide where to secure the straps.

You should just about be able to see my Mary in my shop photos in another thread.

Jo
 
Very Nicely done Jo! I too am a proponent of filing buttons.

Dave
 
I too am a fan of filing buttons, but usually use small screws to hold them in place. never gave superglue a thought. Thanks for the tip.
peter
 
Thanks Jo

I note that you, like many builders, have chosen not put cladding on the cylinder, I have made the cladding but with the make up of the valve chest arrangement it is difficult to decide where to secure the straps.

I couldn't work out how to do the cladding, so passed the chalenge over, I'd be interested to see how you take it on if thats the way you go.

You should just about be able to see my Mary in my shop photos in another thread.

Yes spotted her, nice colour scheme.

I'm a LNWR blackberry black fan.

Stew
 
The cladding itself is easy: The wooden spills used in coffee shops are really nice, they are all the same width, have a nice fine grain and normally given freely if you explain what you want them for. Using wood glue stick the appropriately shortened spills to a piece of cotton. Once dry "crack" each of the joints between the spills to allow them to curve around the cylinder. Stain the spills only once the jacket has been fitted to the cylinder otherwise you may not get an even staining in the joints.

For the straps on Lady S I cut 2 mm wide rings from a brass tube and silver soldered on the ears for the 12BA mounting screws. But on Mary there is no where to secure the ends so my current thoughts are leaning towards Stainless straps as I might be able to get them springy enough not to have to fix them to the cylinder and tucking the ends under the valve chest.

If any one has a better ideas then I am all ears.

Jo
 
Hi Jo,
Nice work on your engine. When I built mine I didn't do the cladding around the cylinder as I never intended for it to run on steam. I did however paint the central part of the cylinder casting to match the rest of the engine.
gbritnell

mary beam 6.jpg
 

Latest posts

Back
Top