


DICKEYBIRD
Well-Known Member
- Joined
- Sep 27, 2007
- Messages
- 653
- Reaction score
- 46
I've been fighting plumbing problems and other issues for quite a while but decided today was a shop day.")
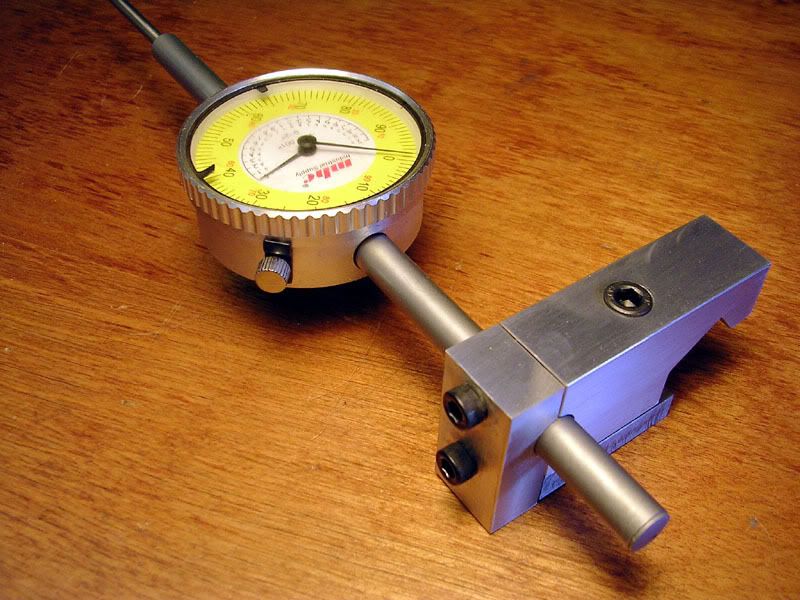
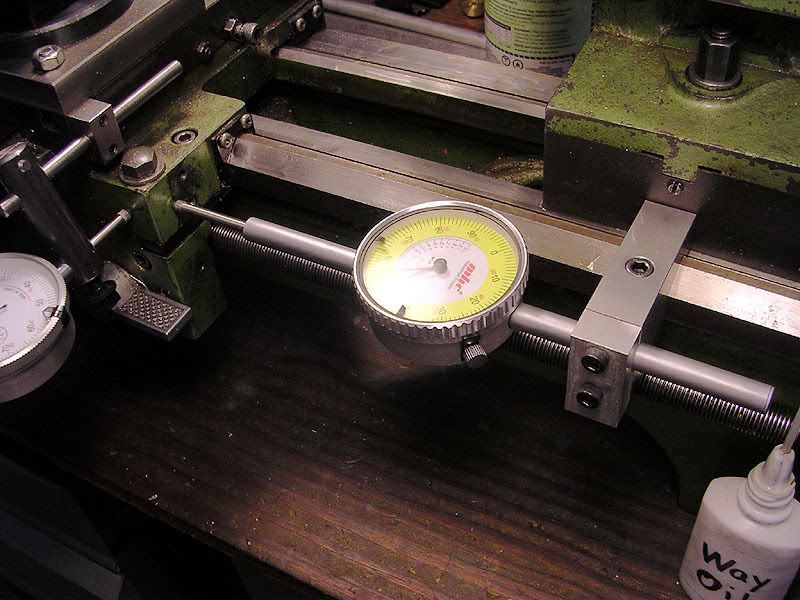
1st, I finished up the 2" D.I. mount/carriage stop that I started over a month ago. It came out great so now I don't have any excuse to keep me from starting a flame licker cylinder with accurately spaced cooling fins.
I like to draw out all projects in CAD before I start making chips but this thing defied all attempts to do so. I finally just chucked up a block of aluminum and whittled away, trying different angles until it fit the ways very close. It clears the tailstock and slides on from the end without any problems.
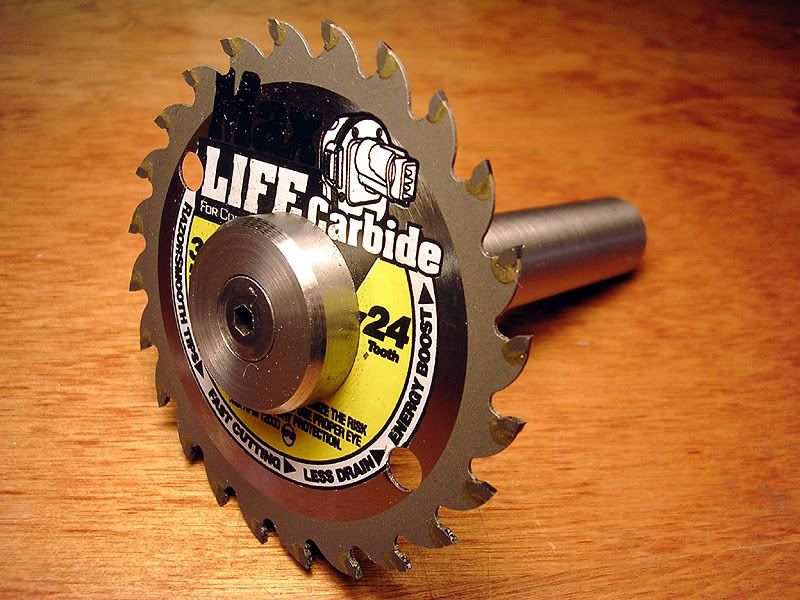
Since it came out so nice, I decided to make an arbor for the little saw blade I bought on impulse from Home Depot a while back. It's a 3 3/8" x 24 tooth carbide tipped blade that's only .055" thick. I made the arbor from a Jaguar suspension bolt I picked up at work. I turned the hex end down to 1.14" dia. and the shaft down to 3/4" to fit my biggest R-8 collet. It has a stub that's 15mm to fit the hole in the blade and a countersunk allen screw to hold the cap on.
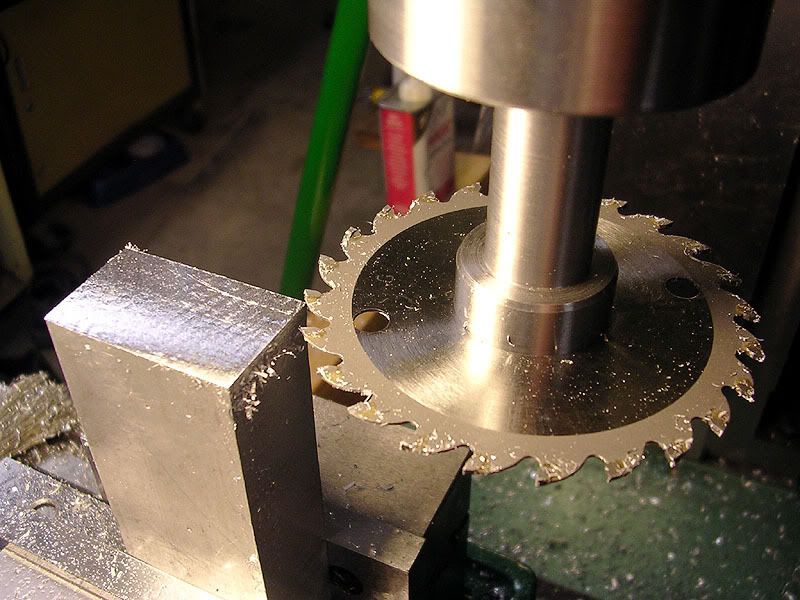
While making it, I came up with a trick that I'm sure you fellers already knew about but was a "Eureka" moment for me. I turned the shaft and the hub using one setup and a live center but when I parted it off and had to re-chuck the shaft, it ran out .003" in my 3 jaw chuck. I could have installed the 4-jaw and dialed it in...or accepted the runout since all slitting saws seem to runout anyway but I said to myself: " Self, why not see where the high spot is and shim it the opposite direction." I did exactly that using a strip of thin paper between 1 jaw and the shaft and VOILA! It then ran almost dead true!
I just had to try it so i chucked up a chunk of 1" thick aluminum in the mill and made 1 pass at about .060" deep, then all the way to .5" deep and finally the full 1". Amazingly, it never grabbed, chattered, howled or protested in any way. Me likee this puppy!
1st, I finished up the 2" D.I. mount/carriage stop that I started over a month ago. It came out great so now I don't have any excuse to keep me from starting a flame licker cylinder with accurately spaced cooling fins.
I like to draw out all projects in CAD before I start making chips but this thing defied all attempts to do so. I finally just chucked up a block of aluminum and whittled away, trying different angles until it fit the ways very close. It clears the tailstock and slides on from the end without any problems.
Since it came out so nice, I decided to make an arbor for the little saw blade I bought on impulse from Home Depot a while back. It's a 3 3/8" x 24 tooth carbide tipped blade that's only .055" thick. I made the arbor from a Jaguar suspension bolt I picked up at work. I turned the hex end down to 1.14" dia. and the shaft down to 3/4" to fit my biggest R-8 collet. It has a stub that's 15mm to fit the hole in the blade and a countersunk allen screw to hold the cap on.
While making it, I came up with a trick that I'm sure you fellers already knew about but was a "Eureka" moment for me. I turned the shaft and the hub using one setup and a live center but when I parted it off and had to re-chuck the shaft, it ran out .003" in my 3 jaw chuck. I could have installed the 4-jaw and dialed it in...or accepted the runout since all slitting saws seem to runout anyway but I said to myself: " Self, why not see where the high spot is and shim it the opposite direction." I did exactly that using a strip of thin paper between 1 jaw and the shaft and VOILA! It then ran almost dead true!
I just had to try it so i chucked up a chunk of 1" thick aluminum in the mill and made 1 pass at about .060" deep, then all the way to .5" deep and finally the full 1". Amazingly, it never grabbed, chattered, howled or protested in any way. Me likee this puppy!