Finger Engine

Home Model Engine Machinist Forum

Help Support Home Model Engine Machinist Forum:

This site may earn a commission from merchant affiliate links, including eBay, Amazon, and others.

winklmj

Well-Known Member
Joined
Nov 23, 2009
Messages
171
Reaction score
2
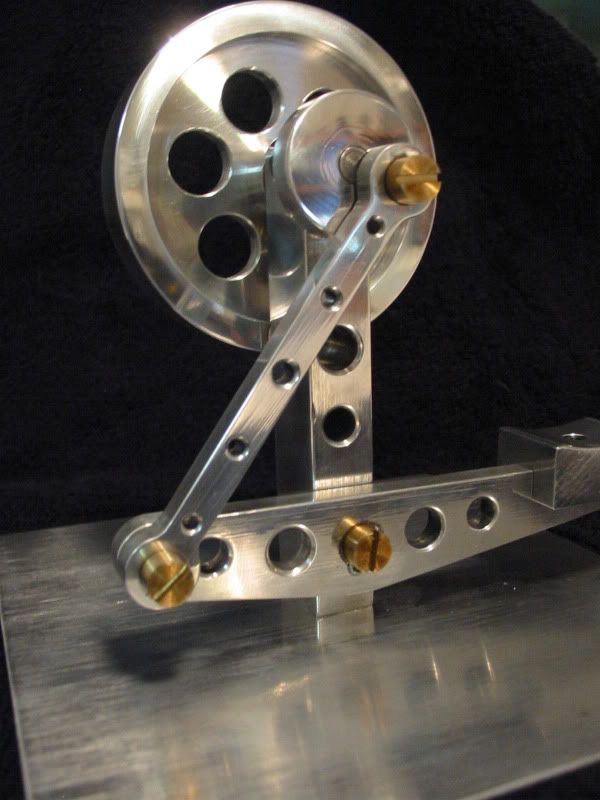
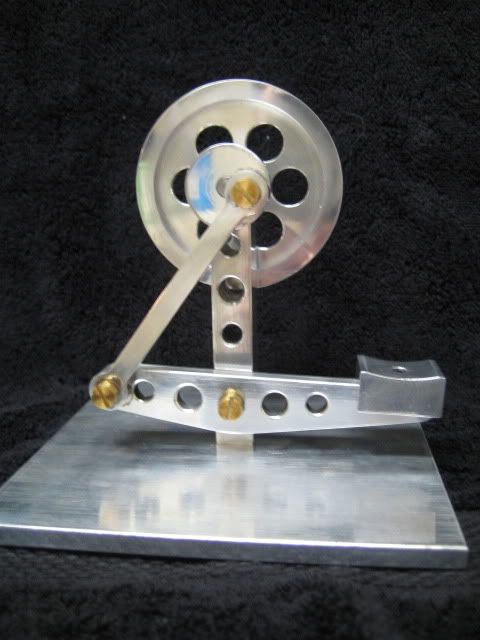
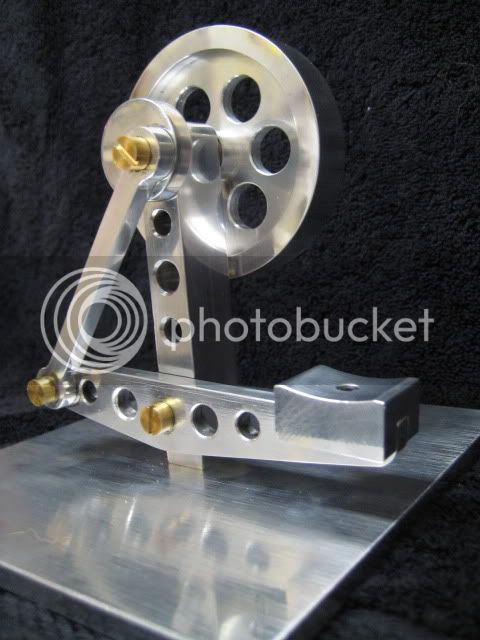
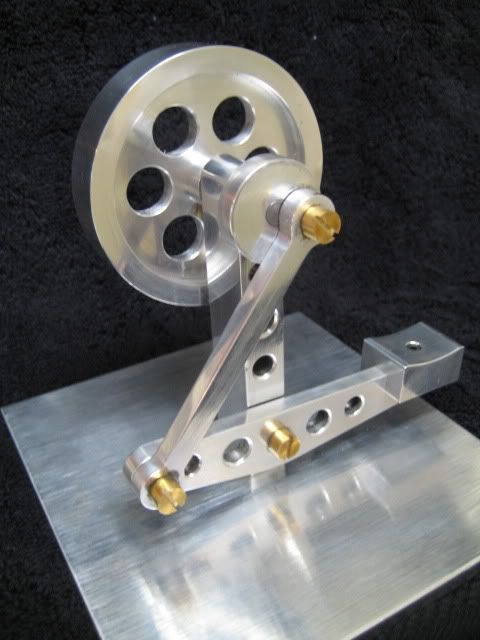
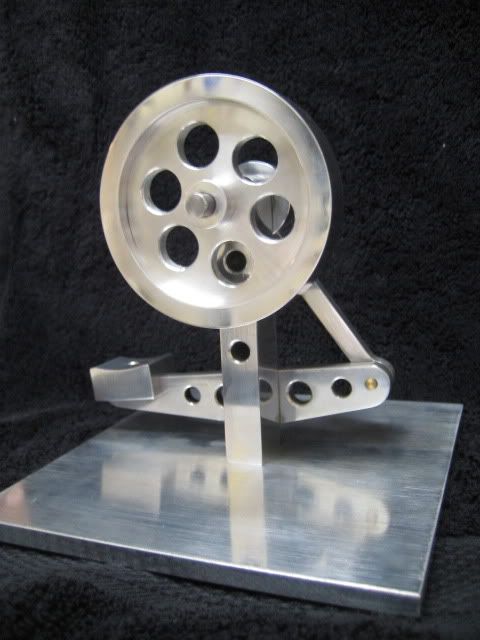
Something to keep me busy the past couple of weeks. Sorry for no build photos. It's based on the NAMES plans that are easily found on the net. It was gonna be a quick-n-dirty project then I got carried away a bit.

It's not entirely finished--it needs a bigger or heavier flywheel to make it "run" better. I'm gonna try and rework the one on it now--maybe add some brass to weigh it down some. And, yes, I'll get a video later (know how everyone loves the videos). :)


IMG_2964-1.jpg


IMG_2965-1.jpg


IMG_2966-1.jpg


IMG_2967-1.jpg
 
Nice machining on those parts.
and a nice looking build.
 
Hey Mike,

Brass on the OD of that would do wonders for added inertia...you could make a ring and press/bond it on....just my two bits....worth what you paid for it. :)

I need to make one of those ....and put it on my desk in my office.....that should be hysterical...I wonder how many times in one day it will be fondled... :big:

Dave
 

Really well made.

I like the brass shoulder screws and as an ex-aircraft guy, I also love the lightening holes.

You've got me wanting one for my desk too!

 
A very good looking finger engine!

I have some plans for those lying around that i wanted to machine.
Summer came around and i got sidetracked by the Honey-Do list, which never seems to get any shorter! ;D

A video would be great!!


Andrew

PS- as an aside... I was wondering if there would be a way to include a sort of clutch mechanism into the design??
So that when you spin it up to speed it disengages from the treadle and spins on it's own.
Any ideas on how to do this???
 
Well done.
Always a nice project.
I'd be interested in the clutch idea too. It's amazing the power these things have and you can really hurt a finger if you get it under the treadle.
 
Reichert's clutch engine is a neat display but it relies on a purchased 1-way bearing or overrunning clutch. With all the design power on this forum, a simple design that does not rely on purchased components should be possible.

I'm feeling challenged. I don't think I'll make one right now but it would make for a fun design project. I'm going to give it a try. Anyone else?

Jerry
 
I bought Bill Reichart's plans for the clutch bearing version, it also requires a couple of gears as well, 64 & 24, but they could be replaced with others you may have lying around to give about the same ratio with just a little change to plan spacing dimensions. It is a very compact unit with very little friction involved in the design.

One of the major problems with using other methods is friction. I looked at ratchet wheels and all sorts of free wheeling methods, and it all boiled down to really, the cheapo one way clutch bearing was the way to do it if you want to reach those higher flywheel speeds.
In fact, when I looked at it, if you were willing to sit there pumping it a couple of times every so often, and fitted a higher density flywheel, it could be made to do a little work driving something.

I stated many moons ago that a finger engine would be the very best first project for a beginner, no compressors or boilers needed, just a bit of finger power to make the contraption work. In fact, very few raw materials are needed, just bits out of the scrap box.

If you don't believe me, I would suggest you have a look at this very old post, there are still a few pics and vids in it that can be seen, including the eventual winner with a tin can finger engine.

http://www.homemodelenginemachinist.com/index.php?topic=2063.0

It proves that things don't need to be complicated to have a wow factor. In fact, mine takes pride of place on my engine shelf, and it still works just like it did when first built, and always raises a smile when I show it to anyone who thinks engineering has to be a critical exercise to work properly.

John
 
Everyone, thanks for the comments.

Bogstandard said:
Slugs of brass around the periphery worked an absolute treat...

I just couldn't justify carving up a big hunk of expensive brass for a press on ring. I contemplated filling the existing holes with brass instead. But last night I decided to drill and plug new holes in the outermost part of the wheel. Six 3/8" slugs have helped greatly. I'll try it like this for a while--there's room for 6 more if needed. I've discovered a slight "rubbing" issue that needs some tweaking tonight.
 
A couple of mods. Wife has the good camera so it's back to the old standby. The last pic is a tad blurry but you can just make out the brass slugs that were added.

IMG_3982.jpg


IMG_3985.jpg


IMG_3983.jpg


IMG_3984.jpg


And the video:
[ame]http://www.youtube.com/watch?v=eIJwsnaNCRk[/ame]
 
Looks great!!!
Nice and shiny, i like!!!! ;D

Sounds like you have the worlds first finger powered helicopter engine!!!!
I can hear the money rolling in from here... :big:

Andrew
 

Latest posts

Back
Top