ER Collet Chuck for mini lathe

Home Model Engine Machinist Forum

Help Support Home Model Engine Machinist Forum:

This site may earn a commission from merchant affiliate links, including eBay, Amazon, and others.

cfellows

Well-Known Member
Project of the Month Winner
Joined
Aug 25, 2007
Messages
3,890
Reaction score
715
Yet another improvement for my mini lathe. I have a number of ER20 collets and decided a collet chuck for my mini lathe would be nice. I would have preferred an ER32, but ER20 was what I had.

I started with a 3" diameter piece of 12L14.

IMG_3075_zps879681ef.jpg


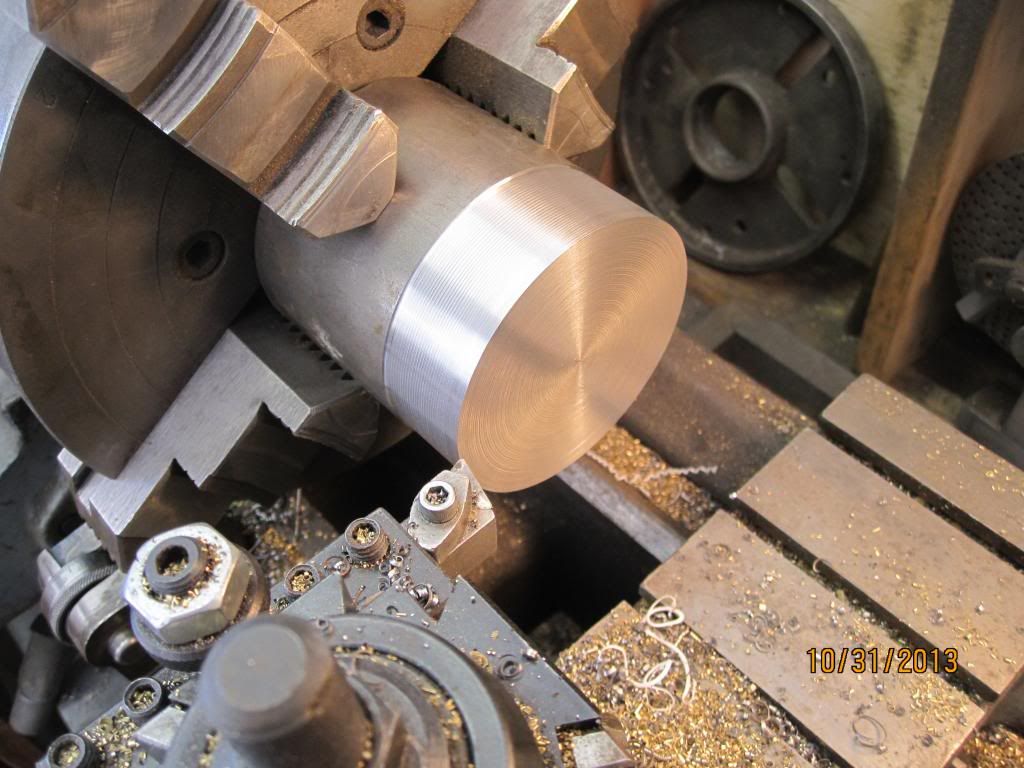
I used my Logan 12" lathe so I could remove the metal faster. I left the nose about .050" oversize so I could finish it in place on my minilathe.

IMG_3076_zps194f6574.jpg


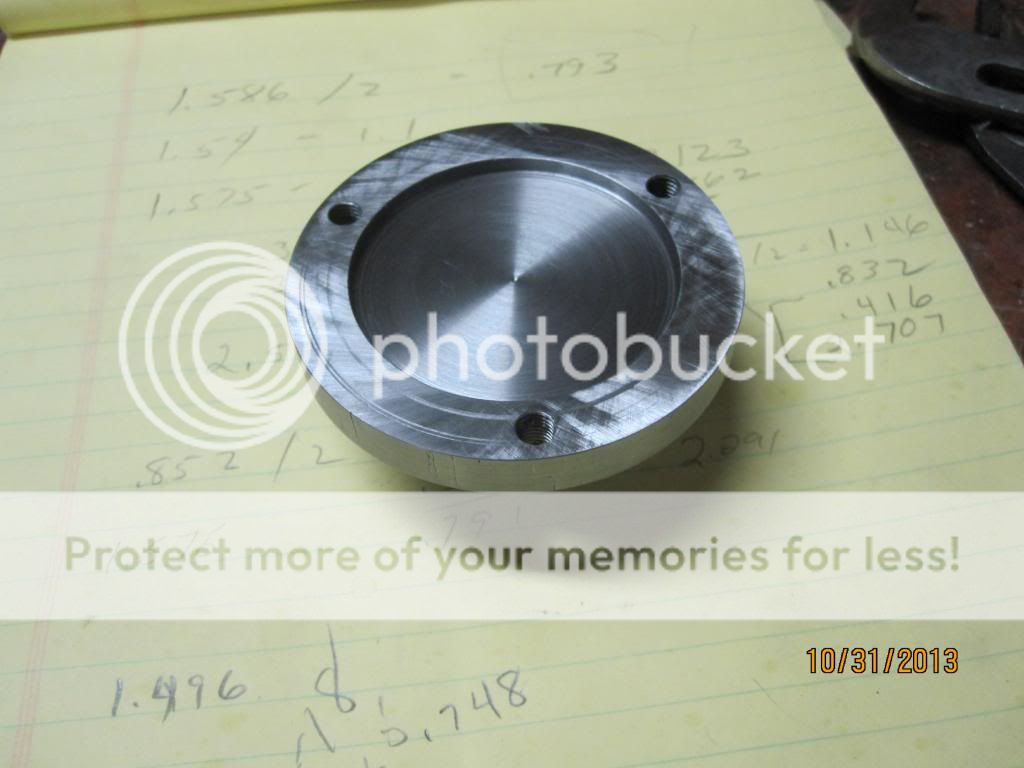
Next I parted off the piece turned it around and chucked it by the nose so I could cut the recess in the back. Then I drilled and tapped the mounting holes 1/4-28. I used my rotary table to locate and drill the holes.

IMG_3078_zps1e267fad.jpg


IMG_3077_zps545e16e6.jpg


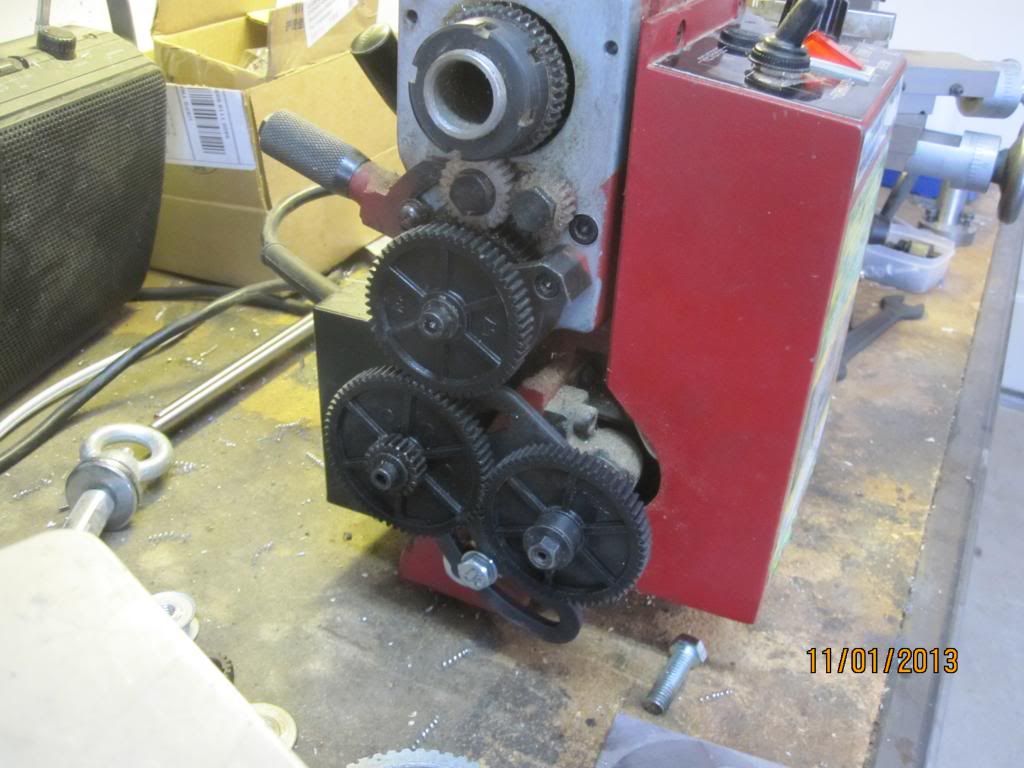
Next I mounted the blank on the mini lathe so I could cut the threads. I had never used the min lathe to cut threads, so had to go through some setup and make some bushings to hold the banjo. Here is the change gear set up. I was able to approximate the 1.5mm thread pitch by using a 60 tooth gear on the lead screw and a 57 tooth as the driving gear. These two gears just happened to be in the gears included with the lathe and gave me a ratio of .945 : 1 with a 16 tooth per inch lead screw.

IMG_3079_zpsea9ac0f4.jpg


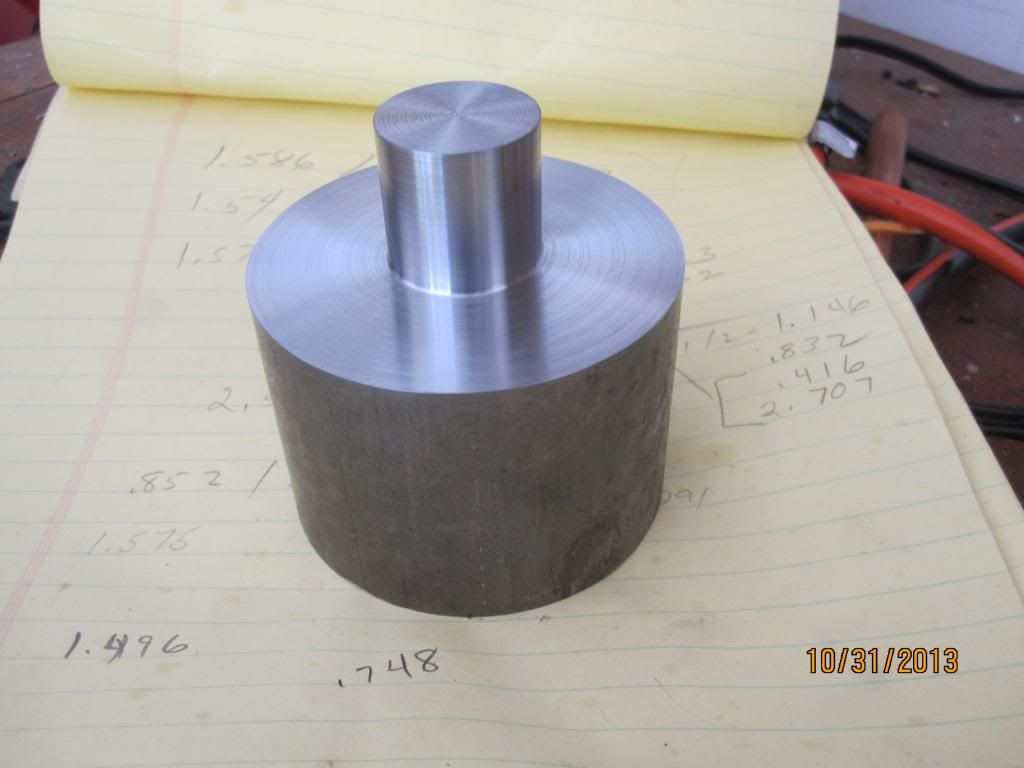
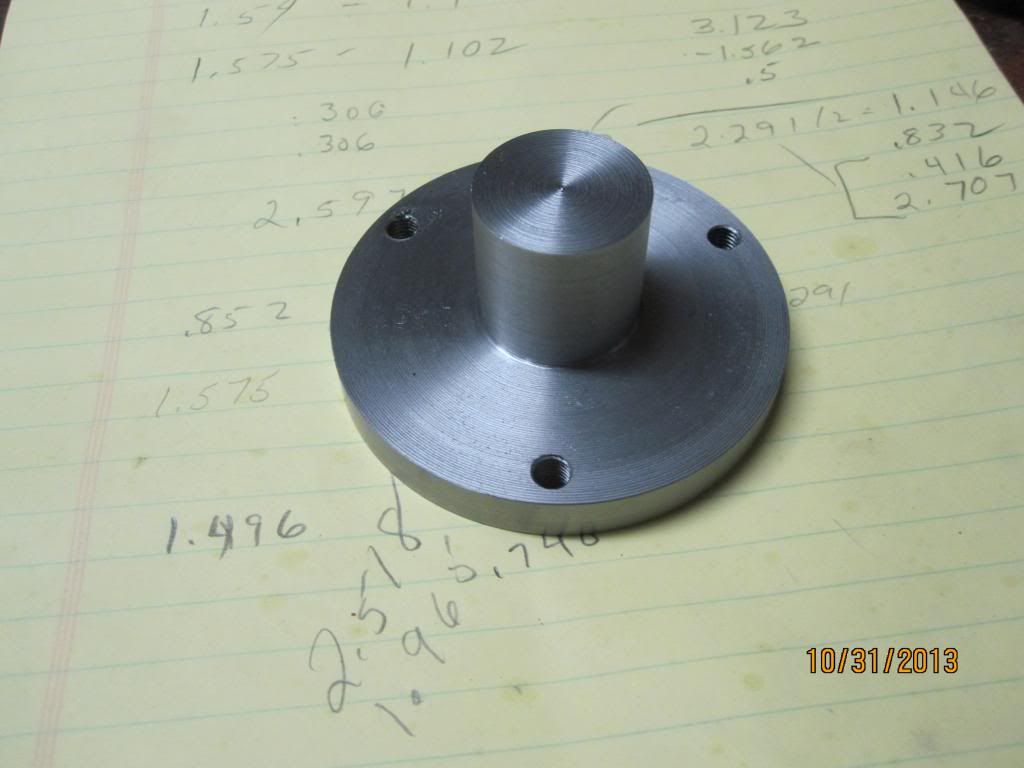
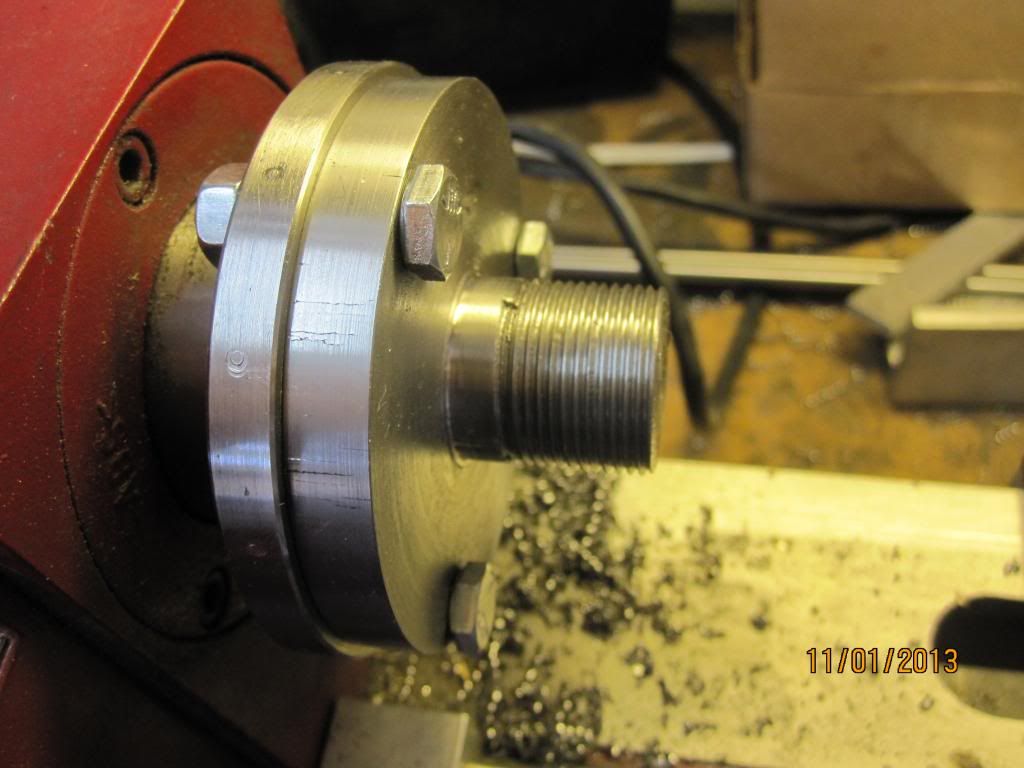
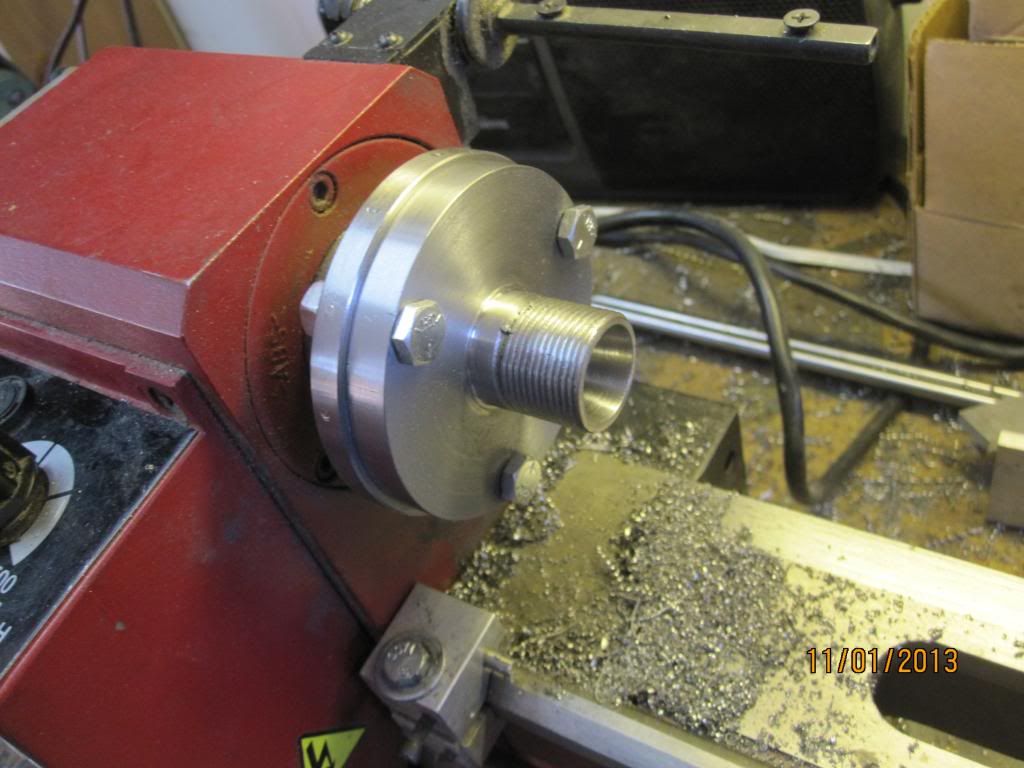
Here's the threaded nose piece.

IMG_3081_zps535874a5.jpg


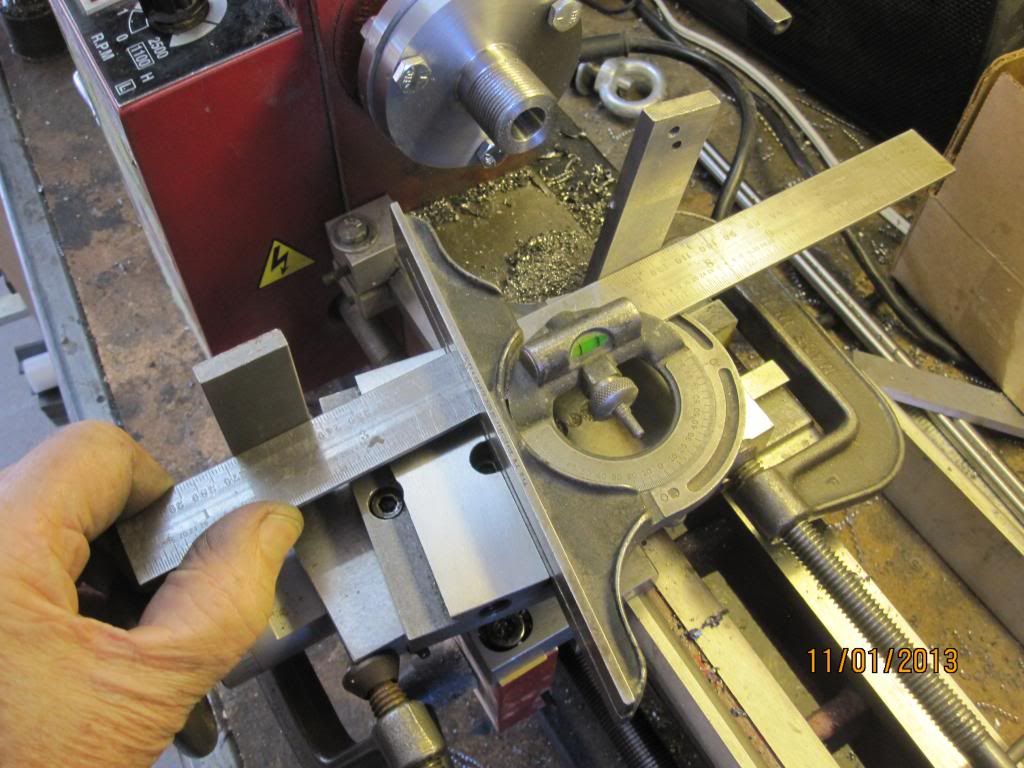
I bored a half inch hole through the center of the chuck, then set up the compound to cut an 8 degree tape in the nose piece. Here is the lash up I used to set the angle...

IMG_3084_zps2ffcc471.jpg


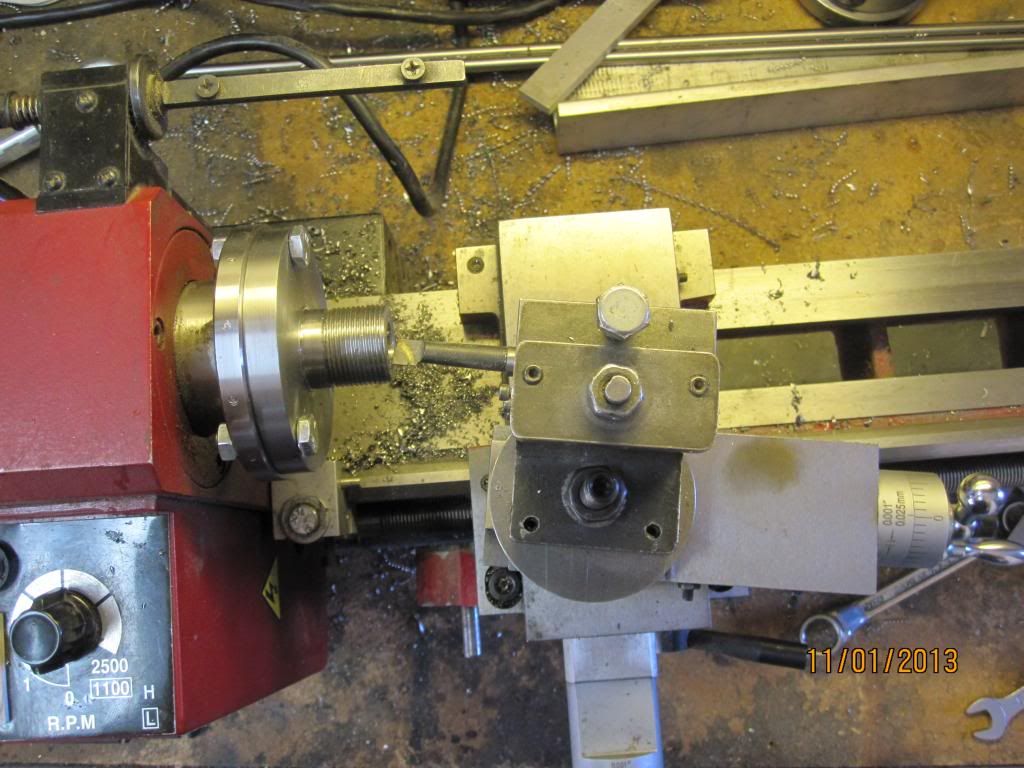
And here I'm ready to start boring...

IMG_3086_zps00ad933b.jpg


Here's the finished taper bored...

IMG_3091_zpsb93f27d1.jpg


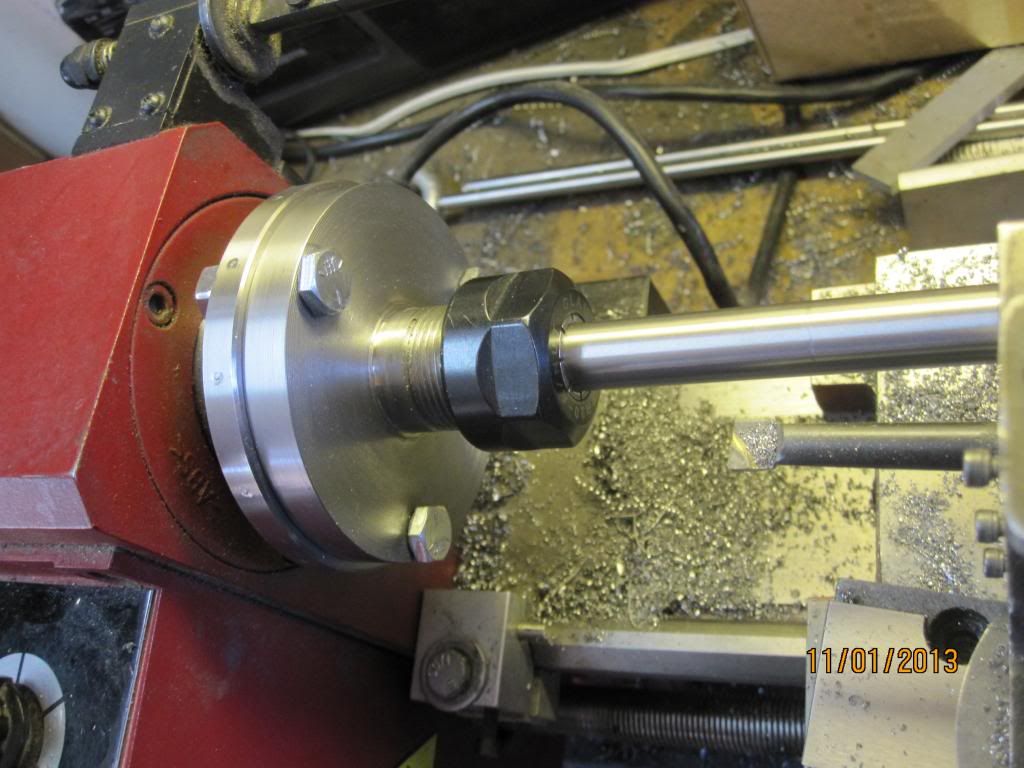
And here's the finished chuck with a 1/2" rod chucked in it.

IMG_3088_zps70871815.jpg


I made the nose a little longer than need be, but it turns out I can't get the carriage any closer to the head stock so it turned out good. I also want to replace the hex head bolts with button head socket head screws... should be a little less dangerous.

Chuck
 
Mr. Fellows,

Funny coincidence...I just recieved a 3" piece of 12L14 in the mail today for this same project! I'll be making an ER40 holder for my Atlas lathe soon. Only difference is I'll be internally threading it to 1.5x8tpi to screw directly onto the spindle threads.

That's an interesting way of setting the compound rest angle for boring the taper. I saw another method that I was going to try somewhere online. The guy chucked up a section of drill rod, then put one of the collets on the drill rod and set the compound angle against the taper of the collet.

I have verified that I do have the change gears needed to run a 1.5mm thread for the nut.

Gives me some inspiration to get started. I haven't machined anything in 10+ years and just finished restoring the Atlas. Any other tips/tricks/guidance would be appreciated.

Thanks for the post.
-J.Andrew
 
Fantastic job Chuck. I'm curious if you measured TIR on that 1/2" rod. I am just now really appreciating the value of a spindle mounted collet for doing fine work.

Cheers,
Phil
 
Mr. Fellows,

Funny coincidence...I just recieved a 3" piece of 12L14 in the mail today for this same project! I'll be making an ER40 holder for my Atlas lathe soon. Only difference is I'll be internally threading it to 1.5x8tpi to screw directly onto the spindle threads.

That's an interesting way of setting the compound rest angle for boring the taper. I saw another method that I was going to try somewhere online. The guy chucked up a section of drill rod, then put one of the collets on the drill rod and set the compound angle against the taper of the collet.

I have verified that I do have the change gears needed to run a 1.5mm thread for the nut.

Gives me some inspiration to get started. I haven't machined anything in 10+ years and just finished restoring the Atlas. Any other tips/tricks/guidance would be appreciated.

Thanks for the post.
-J.Andrew

Thanks, J. After setting the angle initially, I partially turned the inside taper until a 1/2" collet would go in about half way. Then, with a 1/2" rod in the collet, I pushed it into the taper as tight as I could by hand and tested for any lateral wiggle. If I could feel wiggle, I could look with a magnifying visor and tell if the slop was on the outboard end (angle too steep) or the back (angle too shallow). On the first check, I did find some slop on the outboard end, so I light tapped the compound with a hammer to make the angle shallower and took another light cut. I had to repeat the process one more time and then I could no longer detect any wiggle. Then I finished boring the taper to the proper width. You do want to start correcting the taper while you still have plenty of meat left on the part and it doesn't hurt to keep checking after each pass until you reach final width. That'll get you a taper that's a dead nuts fit!

Funny you mention the ER40 collet chuck. I had originally bought the 3" piece to make an ER40 chuck for my 12" Logan. It would have required an inside 2.25 x 8 spindle thread. I'm probably not going to make any more attachments for my Logan since I can forsee the day when I'll need to downsize my shop to just the mini lathe and maybe a smaller mill / drill like the Little Machine Shop high torque mini mill.


Chuck
 
Last edited:
Fantastic job Chuck. I'm curious if you measured TIR on that 1/2" rod. I am just now really appreciating the value of a spindle mounted collet for doing fine work.

Cheers,
Phil

Haven't measured the run-out yet. If there is any, it has to be in the collet, because I haven't removed the chuck since I turned the taper in place on the lathe spindle.
 
Chuck,

Thank you for posting this. I am also contemplating the same project. I chose ER25 over ER32 because of the collets available at the smaller end of the range. If I plan to use collets for smaller things and chucks for larger, then having more range at the smaller end seems to make sense.

Thank you again,

--ShopShoe

Youre welcome! I removed the chuck and milled a flat on either side for a wrench. I also cut the heads off the mounting bolts and loctited them in place. I remounted the chuck, chucked up a half inch ground rod and checked the runout. It was still under a thou so I'm happy.

IMG_3093_zps1fc46b51.jpg


Chuck
 
Back
Top