


I have one of these Craftsman 109 lathes that I've been fixing up. One of the most recent things done for it was to make a new tail stock ram. The taper in the original one is pretty gouged up, and I also don't have an adapter to use a drill chuck in the ram. They are tiny #0 MT jobs, and I'd rather just have a solid ram that is tapered and threaded on the end for chucks and turning between centers.
This tail stock ram is similar to the one Taig uses on their lathes, and one I'm used to since I have one of their machines too.
I took some pictures of the job while I was working on it and thought I would share. All the steps are simple turning jobs.
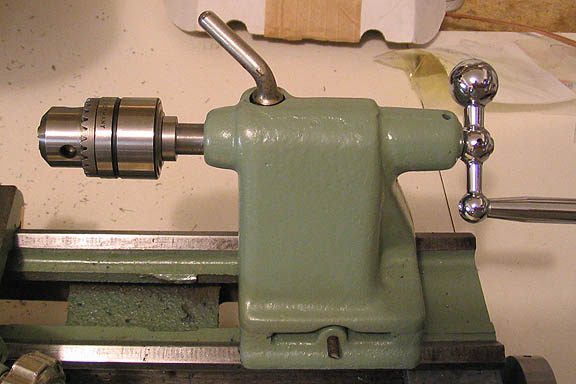
First step is to drill center holes in the ends of a piece of stock so a center can be used for accurate turning of a long work piece. I started out with a 7" long piece of 3/4" dia 12L14. I did this step in the Taig lathe, since I have no way of mounting a drill chuck in the Craftsman (yet).
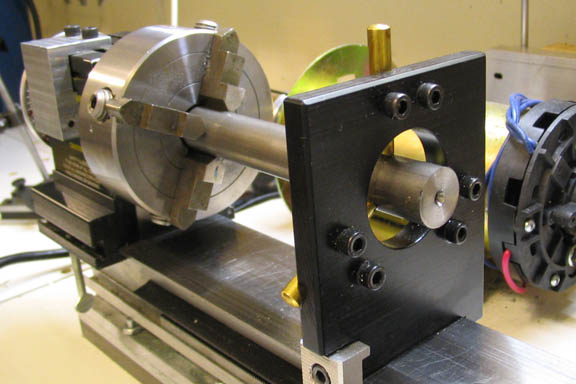
Then the piece is moved to the 109 and the long end of the ram is roughed out. There will be a chuck register on the ram, and the end behind the register is 3 1/2" long, finished length.
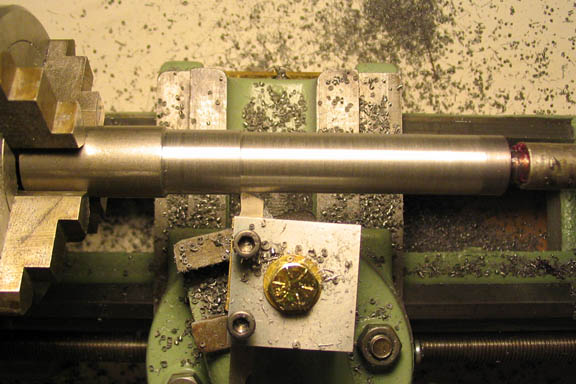
Once the long end is finished, the piece is flipped end for end and dialed in. Then the short end can be turned down. I left the register ring at .2" thick, and the portion to be threaded at 1 1/2" long at this point. It will be shortened later when the taper is cut.
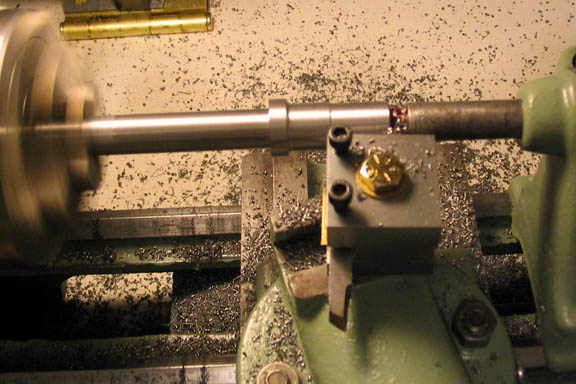
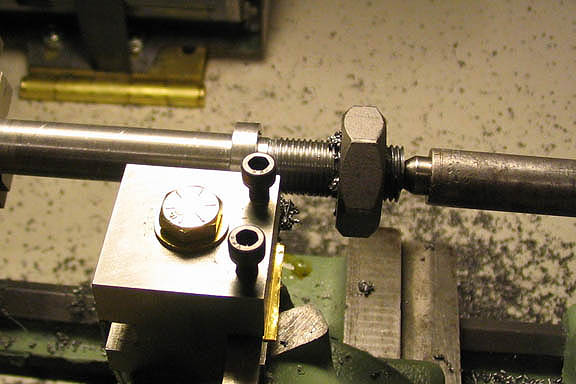
Once the diameter of the short end is finished, it's threaded for 1/2-20, (or for what ever thread you would like, depending on the drill chuck you use).
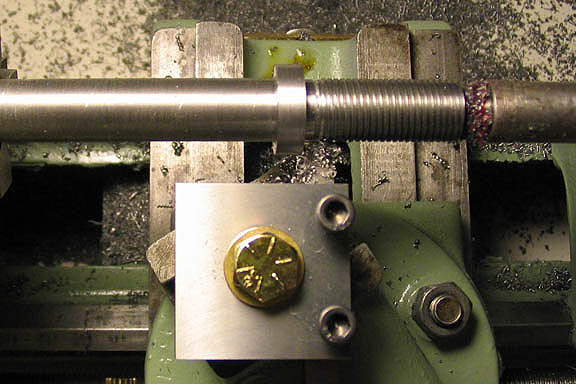
After threading to nearly the complete depth, a die is run over the threads to finish them off. They could be threaded just using the lead screw to cut them, but running the die over them just before final cut depth is reached makes a nice finish on the threads.
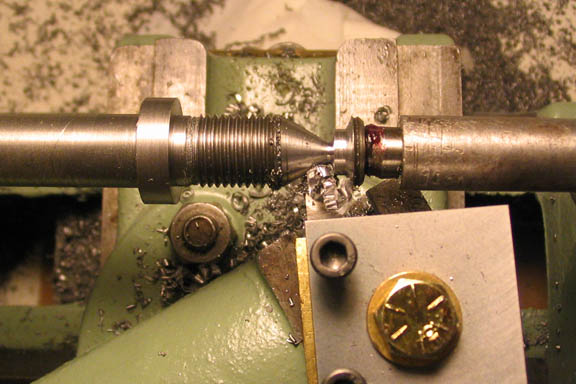
The next step for this piece is to cut the taper and cut off the waste at the end of the shaft. I started the big end of the taper at 3/4" from the register face and took many passes to get down to what is seen in this picture. The last bit is cut off with a hack saw. You probably don't want to cut it to the completed length while it's got pressure from the tail stock center against it. If you do, when you get to the last few thous that are holding the piece together, it will probably separate and the part will ride up over the cutting edge of the tool, spoiling the job.
The taper was finished after backing off the tail stock and took many light cuts to get it down to finished length. It's hanging out of the head stock chuck nearly four inches, so a light touch is needed prevent chatter. Lock any gibs not in use.
The correct overall length was determined by threading the drill chuck onto the tapered end. When the drill chuck seated down nicely on the register, it was done.
The drill chuck I'm going to use has a small hole completely through its' body, and that allows the tapered end a place to protrude into it a bit while still leaving plenty of threads to attach the chuck.
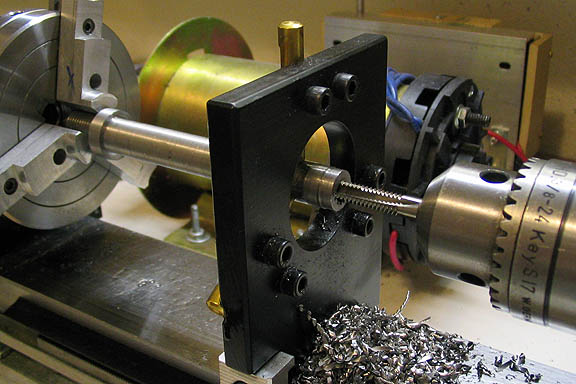
The last bit of lathe work on this piece is to drill and tap the long end for a left hand thread. I chose 1/4-20 LH since that's what I had handy. The thread of the original piece was 5/16-24, which is not very good for calculating ram travel if you're trying to do it in your head. At some point I'll add a mic dial to the end of the ram screw, and it will be easy to determine drilling depths, since the 20 pitch of the new screw gives .050" per turn.
The end of the ram screw is made of a built up piece, one end of which will thread into the ram, and the other end will take the hand crank on the end of the tail stock. The original piece is shown here next to the new piece being held in the chuck. A small stub is turned to a similar shape and length of the original, then flipped in the chuck and drilled and tapped for 1/4-20 LH. (I have dimensions if someone needs them.)
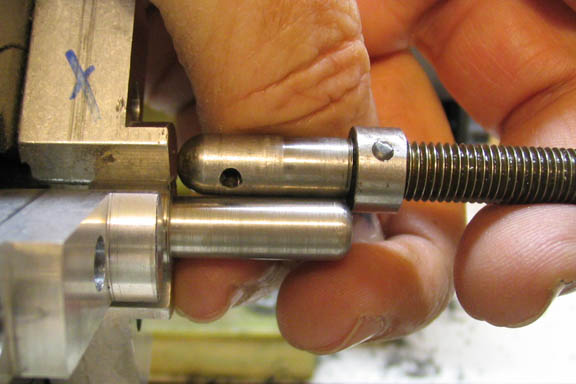
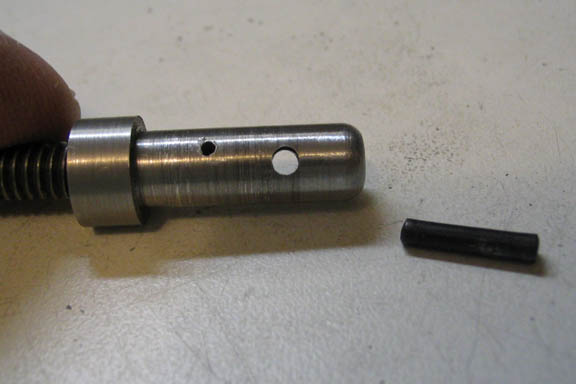
This is the finished stub, and a piece of 1/4-20 LH threaded rod has been screwed in and pinned. The pin goes in the small hole. The larger hole is for the pin that holds the crank to the ram screw. The ram, screw, and the little stub must be assembled and inserted into the tail stock to find the location of the larger hole. Once it's in the tail stock, the handle is slipped over the end and a transfer punch used to mark the hole.
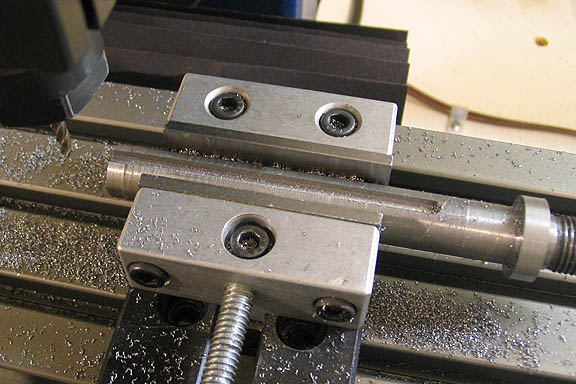
The last step is to mill the slot in the ram. For this lathe, it's a handy 1/8" wide and .062 deep. Clean it up and it's ready to go.
Finished. I just happened to have a brand new Rohm chuck in 1/2-20 mount that was needing to be used. Until I got the 109 lathe, I had nothing to use it with. Now it has a home.
Dean
This tail stock ram is similar to the one Taig uses on their lathes, and one I'm used to since I have one of their machines too.
I took some pictures of the job while I was working on it and thought I would share. All the steps are simple turning jobs.
First step is to drill center holes in the ends of a piece of stock so a center can be used for accurate turning of a long work piece. I started out with a 7" long piece of 3/4" dia 12L14. I did this step in the Taig lathe, since I have no way of mounting a drill chuck in the Craftsman (yet).
Then the piece is moved to the 109 and the long end of the ram is roughed out. There will be a chuck register on the ram, and the end behind the register is 3 1/2" long, finished length.
Once the long end is finished, the piece is flipped end for end and dialed in. Then the short end can be turned down. I left the register ring at .2" thick, and the portion to be threaded at 1 1/2" long at this point. It will be shortened later when the taper is cut.
Once the diameter of the short end is finished, it's threaded for 1/2-20, (or for what ever thread you would like, depending on the drill chuck you use).
After threading to nearly the complete depth, a die is run over the threads to finish them off. They could be threaded just using the lead screw to cut them, but running the die over them just before final cut depth is reached makes a nice finish on the threads.
The next step for this piece is to cut the taper and cut off the waste at the end of the shaft. I started the big end of the taper at 3/4" from the register face and took many passes to get down to what is seen in this picture. The last bit is cut off with a hack saw. You probably don't want to cut it to the completed length while it's got pressure from the tail stock center against it. If you do, when you get to the last few thous that are holding the piece together, it will probably separate and the part will ride up over the cutting edge of the tool, spoiling the job.
The taper was finished after backing off the tail stock and took many light cuts to get it down to finished length. It's hanging out of the head stock chuck nearly four inches, so a light touch is needed prevent chatter. Lock any gibs not in use.
The correct overall length was determined by threading the drill chuck onto the tapered end. When the drill chuck seated down nicely on the register, it was done.
The drill chuck I'm going to use has a small hole completely through its' body, and that allows the tapered end a place to protrude into it a bit while still leaving plenty of threads to attach the chuck.
The last bit of lathe work on this piece is to drill and tap the long end for a left hand thread. I chose 1/4-20 LH since that's what I had handy. The thread of the original piece was 5/16-24, which is not very good for calculating ram travel if you're trying to do it in your head. At some point I'll add a mic dial to the end of the ram screw, and it will be easy to determine drilling depths, since the 20 pitch of the new screw gives .050" per turn.
The end of the ram screw is made of a built up piece, one end of which will thread into the ram, and the other end will take the hand crank on the end of the tail stock. The original piece is shown here next to the new piece being held in the chuck. A small stub is turned to a similar shape and length of the original, then flipped in the chuck and drilled and tapped for 1/4-20 LH. (I have dimensions if someone needs them.)
This is the finished stub, and a piece of 1/4-20 LH threaded rod has been screwed in and pinned. The pin goes in the small hole. The larger hole is for the pin that holds the crank to the ram screw. The ram, screw, and the little stub must be assembled and inserted into the tail stock to find the location of the larger hole. Once it's in the tail stock, the handle is slipped over the end and a transfer punch used to mark the hole.
The last step is to mill the slot in the ram. For this lathe, it's a handy 1/8" wide and .062 deep. Clean it up and it's ready to go.
Finished. I just happened to have a brand new Rohm chuck in 1/2-20 mount that was needing to be used. Until I got the 109 lathe, I had nothing to use it with. Now it has a home.
Dean