


- Joined
- Oct 29, 2011
- Messages
- 287
- Reaction score
- 2
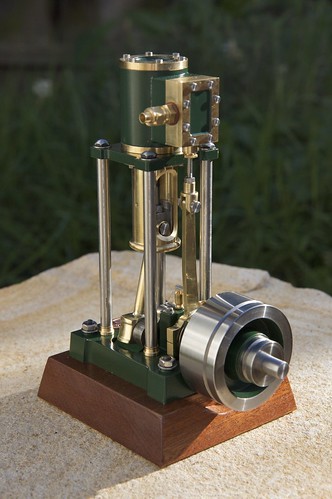
I put together a Cotswold Heritage "Isis" from a machined kit a while back (http://www.modelsteamenginesuk.com/acatalog/Isis_Machined_Kit_Model_Steam_Engine.html), which looks like this:
But I was never really happy with the way it ran; the connecting rod was loose on the crank pin, so it knocked. The connecting rod also came as a casting, and was originally powder-coated or painted to make it look like steel, which is a bit tacky.
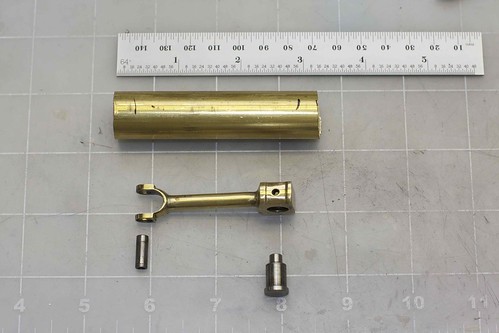
So as a quick "between projects" project I decided to make a new conrod from brass. Here we are with a hunk of brass rod:
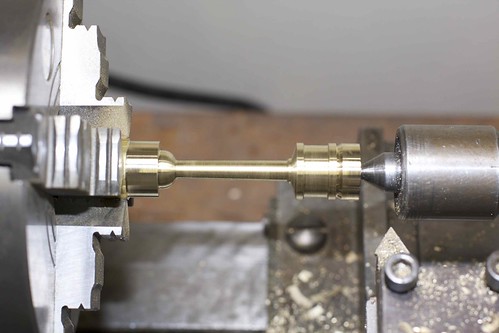
and after some turning we have the basic profile of the conrod mapped out:
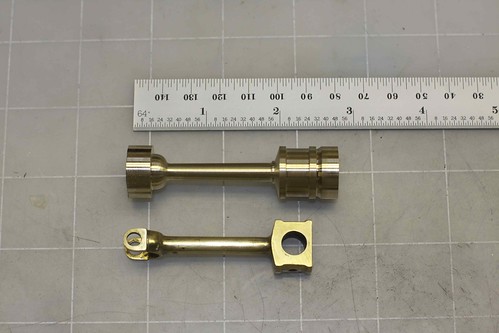
I gave the body a slight taper, which I think looks better than the original. The profile on the left side was done freehand, and tidied up with the file.
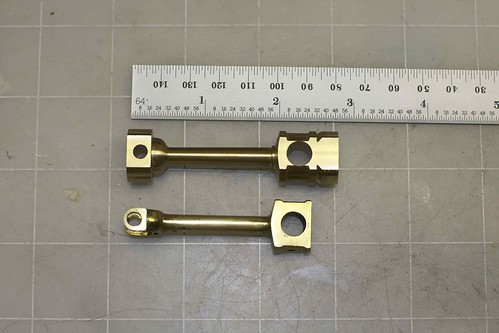
I left both ends the same diameter at this point to make it easier to drill the holes straight:
I milled a flat on one side, flipped it over and milled the other side, taking care that the final thickness was a tad over the outside width of the small end. With the flats done, the holes could be drilled and reamed:
This engine is an odd mixture of Imperial and metric. The small end holes are 3/16", and the big end is 8mm. Not having an 8mm reamer, I had to improvise. I reamed 5/16" (7.94mm), then put a toothpick in one of the flutes and reamed again. That made a bit of a mess at the start of the hole, leaving it bell-mouthed, but luckily most of that material was to get cut away later. The final fit in the rest of the hole ended up being pretty good.
Next the little end was formed:
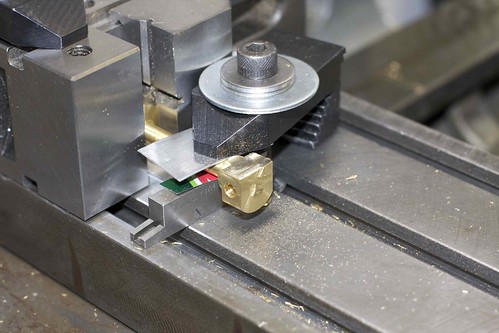
It was a bit tricky to hold at this point (especially with the taper), but an adjusting parallel came in handy here. Another Imperial dimension; the gap here is 3/8":
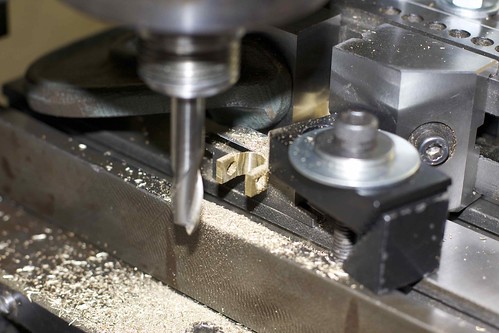
I did most of the removal with a 5/16" endmill, then went in with the 3/8" at the end.
Almost there:
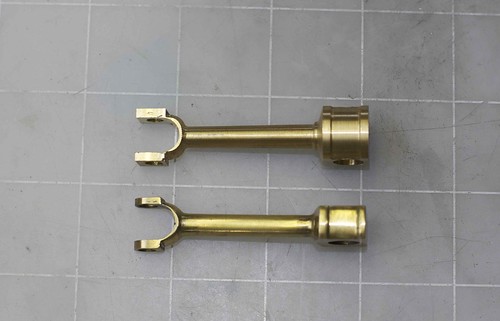
The small end needs some rounding on the rounding table, and the big end needs reducing to thickness.
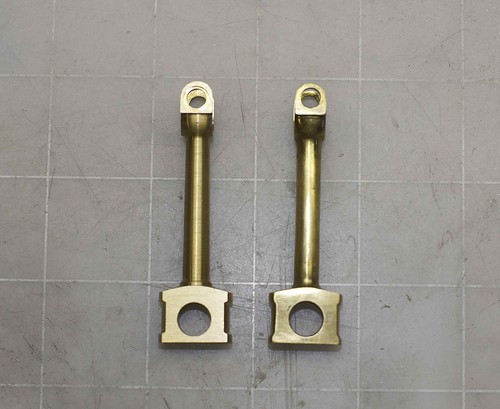
And done (new one on the left):
After putting the engine back together, it's definitely better. Here's a before and after video (watch on YouTube for the high-def version):
[ame]http://www.youtube.com/watch?v=aktCg40WxzY[/ame]
Simon
But I was never really happy with the way it ran; the connecting rod was loose on the crank pin, so it knocked. The connecting rod also came as a casting, and was originally powder-coated or painted to make it look like steel, which is a bit tacky.
So as a quick "between projects" project I decided to make a new conrod from brass. Here we are with a hunk of brass rod:
and after some turning we have the basic profile of the conrod mapped out:
I gave the body a slight taper, which I think looks better than the original. The profile on the left side was done freehand, and tidied up with the file.
I left both ends the same diameter at this point to make it easier to drill the holes straight:
I milled a flat on one side, flipped it over and milled the other side, taking care that the final thickness was a tad over the outside width of the small end. With the flats done, the holes could be drilled and reamed:
This engine is an odd mixture of Imperial and metric. The small end holes are 3/16", and the big end is 8mm. Not having an 8mm reamer, I had to improvise. I reamed 5/16" (7.94mm), then put a toothpick in one of the flutes and reamed again. That made a bit of a mess at the start of the hole, leaving it bell-mouthed, but luckily most of that material was to get cut away later. The final fit in the rest of the hole ended up being pretty good.
Next the little end was formed:
It was a bit tricky to hold at this point (especially with the taper), but an adjusting parallel came in handy here. Another Imperial dimension; the gap here is 3/8":
I did most of the removal with a 5/16" endmill, then went in with the 3/8" at the end.
Almost there:
The small end needs some rounding on the rounding table, and the big end needs reducing to thickness.
And done (new one on the left):
After putting the engine back together, it's definitely better. Here's a before and after video (watch on YouTube for the high-def version):
[ame]http://www.youtube.com/watch?v=aktCg40WxzY[/ame]
Simon