Complex casting

Home Model Engine Machinist Forum

Help Support Home Model Engine Machinist Forum:

This site may earn a commission from merchant affiliate links, including eBay, Amazon, and others.
90LX_Notch said:
It's been a long time since I worked there; so I might not have it all correct.

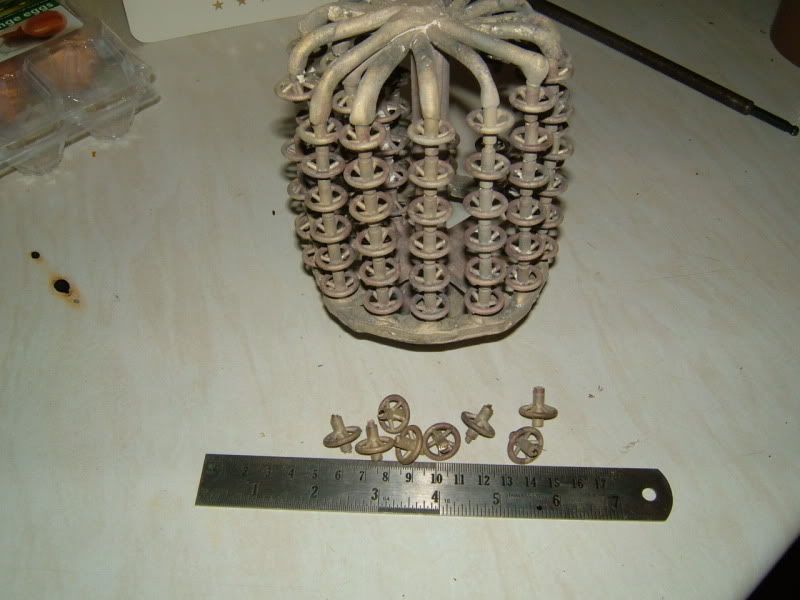
Thanks for the comments, and im not doubting you in any way, Im just experimenting, this may work (40%) and maybe a total disaster (60%) but if problems arise, which they always seem to do, there maybe a way around them, changing the method/ materials used etc...

Im going to try different temperatures and different sand mixtures im even thinking of using a fire clay based mixture that slightly hardens when heat to melt the wax. I don't know at the moment, just gone do an extra safe test. I'll also video the test for you all to look at.

Cheers matt+
 
Lost wax casting at home is possible but requires a fairly large investment - excuse the pun - in equipment even if like mine most of it is home made .
I started about 25 years ago and have made thousands of castings for all sorts of applications.
There are many mis-understandings and mis-conceptions amongst these posts but the basic idea for producing a pattern is sound , although having it rapid prototyped would not be too expensive and the finish would be far superior.

DSCF4502.jpg


A typical mould such as this can contain a hundred or more separate castings which are accurate to a couple of thou and require very little in the way of fettling.
I won't bore you with the subject but if anyone wants more information with regard to lost wax casting you can visit http://www.unionsteammodels.co.uk
Matt if you can make a suitable silicone rubber mould I will send you some wax and see if you get a decent pattern.
Dan.

 
That is an incredible offer, thanks very much. What would you like in terms of monetary compensation? (that was a mouth full!) Do you use a special type of wax or is it just basic paraffin wax? And what do you use to coat the wax with? If these are your own 'trade secrets' then I fully understand. And what is the process you use for removing the wax, i.e. what melting times/equipment do you use? I have a muffler furnace and a small firing kiln if that helps in any way? Thanks again

matt+
 
Had a look at the site, simply brilliant and I advice all to take a peek. The machine wax casting dies are brilliant. Switching green sand for foundry cement is and excellent idea and most probably the one to try first. One question if you don't mind, apart from the main spru is there any other integrated vents? Also the foundry cement (fire clay) has to be broken off? Is this damaging if using aluminium? I.e how much of a beating do the shell need to free the casting? I have a sand blaster already in the workshop (brilliant for cleaning up tired looking cylinder heads) for the remaining fragments. I understand that the fire clay is a one time deal but if i produce 20 heads then the return is worth it.

many thanks abby

matt+
 
Just thought I'd upload some more pics of some of the cardboard test pieces I did

35n7ewk.jpg

This is the first one i did, just to see how it panned out. I cut out the wrist pin hole and you can see slight grooves for the piston rings, like I said only a try out.

e1b0io.jpg

This is my v8 crank assembly, the clearances were bang on. The rods were 2 piece but I glued them together just to see how well they fit.

6qcnkz.jpg

You can see how the layers build up.

2uetqmp.jpg

A rocker cover, although weighty I know (if cast) This was to demonstrate/investigate how well the card + glue could coupe with larger surface areas. The card didnt warp as I thought it might.

106eniu.jpg

And finally a close up.

Hope im not boring anyone, took me bloody hours mind.

matt+
 
It's an interesting looking technique, keep going :)

Jan
 
Nice. Keep us informed.
I have done some aluminium casting using Wickes one coat patching plaster, that might be a viable way to lost wax cast.

Dave
 
Matt,

If all else fails. You could make a cool static model just from the cardboard. Some filler, sanding and paint and it would yield a nice model. It is a very neat technique that you are developing.

Bob
 
small.planes said:
Nice. Keep us informed.
I have done some aluminium casting using Wickes one coat patching plaster, that might be a viable way to lost wax cast.

Dave

What method did you use and how big was the casting?

Matt+
 
It was a couple of wheels for a freestyle traction engine.
I made the pattern from plastic, about 2" diameter and around 1/2" thick roughly.
I then 'invested' it in a ramakin made of Pyrex ( dont tell swmbo where that dissappeared to)
IIRC, and its about 7 or 8 years ago, I did up to a parting line, then used clingfilm to give a split line.
Melted some vauxhall F10(?) Gearbox casing on the BBQ and poured it in.
The mould had been set for a day or so, and i warmed it up alongside the melt.
The pour was uneventful. Once cooled the part came out clean with very little plaster stuck to it.
The plaster had changed from a white colour to an ashen grey for about 1 mm depth, and lost its solidity.

I'm not certain of the exact plaster composition, but it was white, and very fine, but didn't set as 'china like' as plaster of paris. I mixed it quite stiff IIRC.

Presented as a how I did it, try carefully at your own risk ;)

Dave ;)
 
That's pretty cool, what you are coming up with Matt.

Here is a little lost wax casting video;

[ame]http://www.youtube.com/watch?v=wItj5V9a6yY[/ame]
 
Cool How thing are made has some interesting stuff. I do find details are often lost or wrong terms used. but when tying to explain an entire process in a few minutes you can only hit the basics they do do a good job of that.

look up the episode of how golf clubs are made another shell casting video but they also include some design stuff.
Tin
 
*bump* time.
Here's some photos of one of the heads, the file was kindly provided to me by matt-jaysey. (send me your address, I'll post this to you)
And just out of interest, a compressor wheel. For some reason I just can't get a good photo of the objects I print, in person they look a heck of a lot better than they do in the photos.

IMG_5723_1.jpg


IMG_5751_1.jpg


IMG_5752_1.jpg


IMG_5753_1.jpg
 
I like making patterns and making castings - more so than whittling parts out of billet material. For complex patterns (that is- ones which push my woodworking capability to the limit) I have contemplated doing what you suggest. ie- Build a CAD model, slice it into thin layers and cut them out of sheet material on a laser cutter. Glue the layers together and your done- almost. Patterns need to be smooth to come out of the sand cleanly and the little steps between the layers would need to be filled in and smoothed or they would tear at the sand. That's quite a bit of hand finishing- and I hate tedious things like that, so I haven't pursued it further. Still - by all means give it a shot. My suggestion would be to start with something small (like a thermostat cover) to validate the concept before you try to bite off a whole engine block.

>But I only want to cast a block and then drill and ream some holes.

An modern engine block is pretty much the pinnacle of the pattern makers art. It's possible to climb a mountain, but jumping straight to the top is unlikely.

Have fun -jasonh

PS - Having read the other posts it's now clear that your trying some sort of investment casting, rather than sand casting- so you don't have the remove from sand issues. It sounds like plastic 3d printing would be the way to go, but I have no direct experience of such a process.
 
Thanks for the massive interest guys. Haven't been on here in ages, major problems at home. Anyways everything's good now and I'm gonna get back onto the project asap. After doing alot of reading, watching of videos and talking to some casting people things have changed slightly and most of you will be pleased to know that you were right and I'm gonna follow your advice.

I've been directed by 'myfordboy' from Youtube to a sight here in the uk called http://artisanfoundry.co.uk/ this place is great and well priced. I'm going to buy some investment from them and do it the ceramic/sand coating way. Been talking to a guy called sam who works there and he said that wax in a mold will burn and probably mess up your casting but WONT explode. The rapid evapouration of water i.e expansion is what explodes which most of us I gather knew. Anyway, The method of card sticking is going to be modified slightly. I changed were I work and no longer have use of their laser but never mind I'm buying my own shortly. Anyway Happy New Year to all, thanks for reading and I'll post as soon as I have something to tell all. cheers

matt+
 
Right been along time, no excuses. Made some progress and loads of set back, hindsight has 20 - 20 vision.

The problems and some sucesses - and yes I have to bow down to others lol what can I say I'm young and dumb lol

#1 - the card makes life hell. I've now switched to Styrene, cuts perfectly on the laser. 0.5mm is great 1mm ok and anything bigger is shabby. The quicker the cut speed the better, until you hit the wall and it won't go all the way through. I've found that multiple passes are crap so stopped doing that instantly.

#2 - Don't glue the entire pattern at once, can't get into the deep recesses. So will have to build lower section then smooth out with filler and continue. Worked really well the second time.

#3 I found using PVA/wood glue added thickness over 100 layers by 0.8mm which throws everything slightly out. I've switched to humbrol airfix glue, tiny drops with the nozzle type applicator. Melt the styrene together, works a perfectly.

#4 - bought the investment stuff from artisanfoundry, great stuff, been casting toy solders just to get used to how it works. The temperature is a massive concern with investment and i mix it all together in a sacrificial blender i bought from tescos to mix it properly, very important.

#5 - Used one of the piston from the previous cardboard version - which i need to clarify was a proof of concept model not the actual product. Played with the RTV silicone molding stuff - need to build a vacuum pot - got myself a vacuum pump and going to purchase an old pressure cooker pot and some perspex. Anyways poured some melted wax inside and turned out ok apart from the bubbles - again need a hot wax injector, got my eye on one so waiting for funds to build up lol aren't we all.

#6 - As for the piston test run the shrinkage was around 8% until I bought some machining wax from artisan, fantastic can't get a repeatable shrinkage reading over 15mm so all good and it smells like old machinery! which is an added bonus. Been playing will melting zinc, although its really hard to find in large quantities even the alloys. Boat anodes cost a fortune, wheel weight you can't be sure what the alloy is, problem is in the states 17lbs for $15 off amazon, i hate this country. United stated please take me away.

Anyroad, i'll take some pictures and track my progress a little closer from now on.

Matt
 
Thanks for the update, and watch out for those zinc fumes. Water heater anodes would probably be cheaper, boats = $$$.
 
Thanks for the update, and watch out for those zinc fumes. Water heater anodes would probably be cheaper, boats = $$$.

Yeah thats what I thought anything to do with the boat scene they automatically add 200% lol And thank for the warning, I had the extractor and my 3M chemical respirator on at the time, I make a point of looking up what anything does when you heat/weld or melt it. Similar to Lead, i read that melting it can produce lead monoxide which can be fatal if inhaled.

Thanks again
 
Matt, any electroplating business should be able to supply you with zinc billets at a reasonable price, specifically those that sell DIY plating kits.
 
I wish I had your skills and availability to equipment and the knowledge to operate them. See my attempt at a model engine on bigscale. Rob
 
Back
Top