Chuck Fellows Carburetor - V4.0

Home Model Engine Machinist Forum

Help Support Home Model Engine Machinist Forum:

This site may earn a commission from merchant affiliate links, including eBay, Amazon, and others.

cfellows

Well-Known Member
Project of the Month Winner
Joined
Aug 25, 2007
Messages
3,890
Reaction score
715
While I really liked the design of my previous carburetor, it has a few things I think can be improved upon.

First, while the screw-in throttle was simple and elegant, it just doesn't fit well enough to consistently control the air and fuel. I soon discovered that even with the throttle screwed all the way in, the engine tended to keep running which means some air (and fuel) was getting by.

Second, the separate needle valve assembly was more complex than it needs to be. And, the sewing needle used for the mixer doesn't have the ideal shape... it should be conical, not elliptical.

Third, most model airplane carburetors I've seen have the needle valve coming in from the bottom of the carb, not the top. Maybe their design is just simpler or cheaper, or maybe they know something I don't.
So, here we go with a new design that more closely approximates those of commercially available RC carburetors. I started with a piece of 3/8" square brass bar chucked in the lathe and cut a round boss on the end.
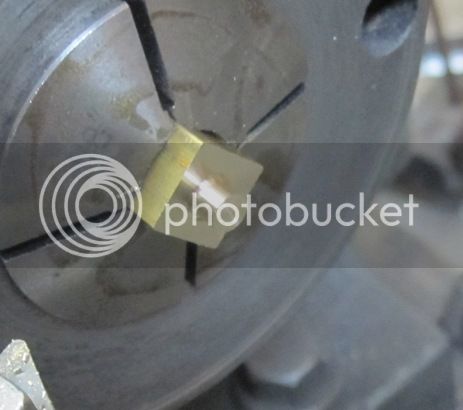
IMG_3357_zpsbf7a326a.jpg


Next, I drilled a 1/16" hole about 1/2" deep through the center.
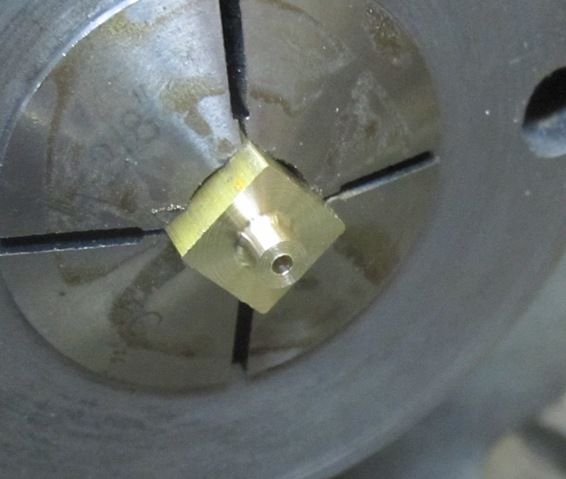
IMG_3358_zpsd29af3e0.jpg


Then I tapered all 4 sides of what is to become the bottom of the carburetor. This is done partially for appearances and partially to make it easier to affix the fuel supply nipple.
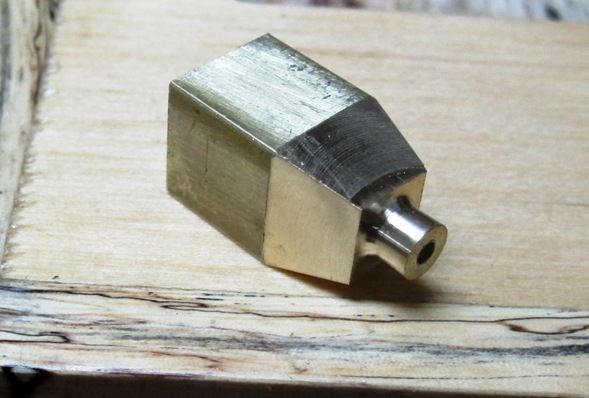
IMG_3359_zps84cff75b.jpg


Next I drilled and tapped a 6-32 hole in one side. The fuel supply nipple will screw into this hole, which connects with the center hole drilled earlier.
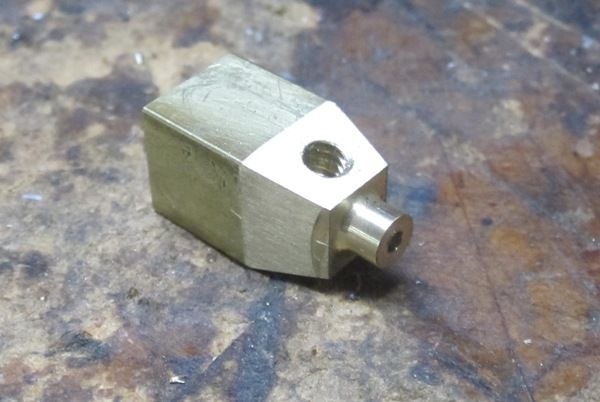
IMG_3360_zps62addf37.jpg


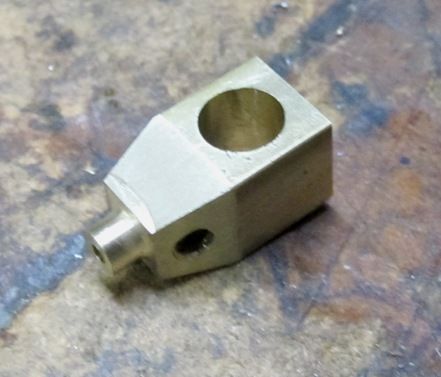
Then I cross drilled a 1/4" hole which will receive the venturi tube...
IMG_3361_zpsd18cb6d6.jpg


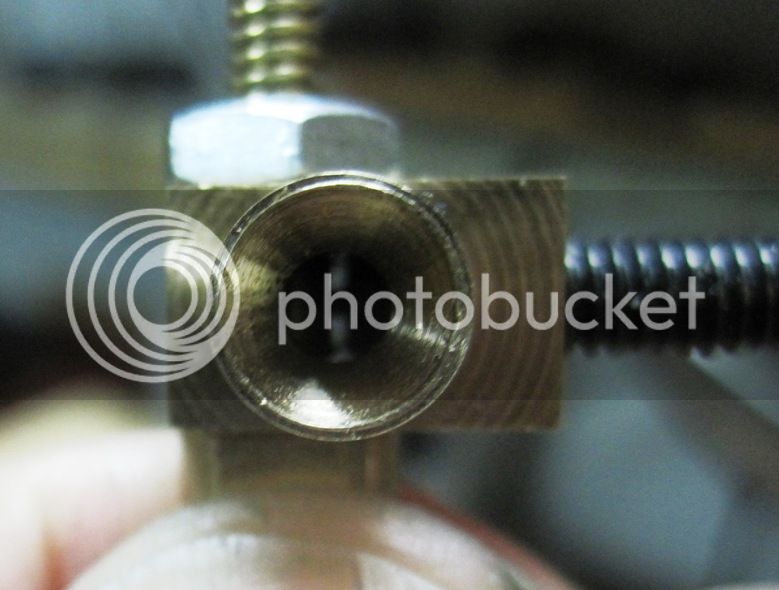
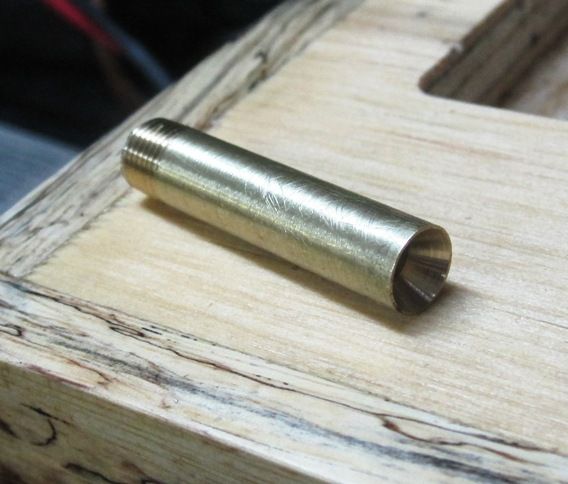
Here is the venturi tube. I started with 1/4" brass rod, drilled a 1/8" hole through the center, threaded one end with 1/4" model pipe taper threads, and used a countersink drill to open a taper for the air intake on the other end.
IMG_3362_zpsec1a9b2c.jpg


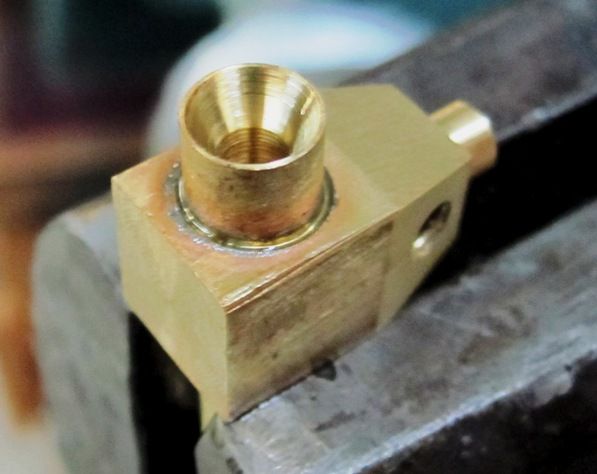
Then I soft soldered the venturi tube into the body. I cleaned both parts with denatured alcohol, slathered on some plumber's flux, fixed it in the vise, placed a ring of solder around the joint, then heated it from below with my Mapp Gas torch until the solder melted and flowed into the joint.
IMG_3363_zps5266c7d8.jpg


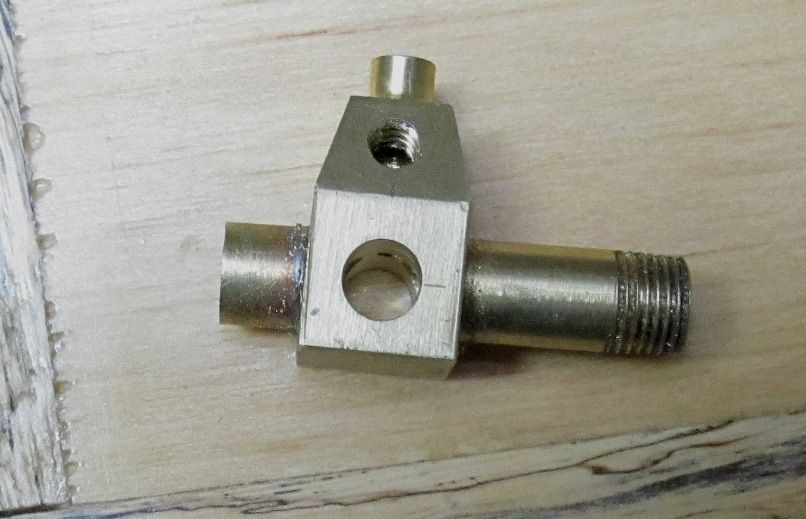
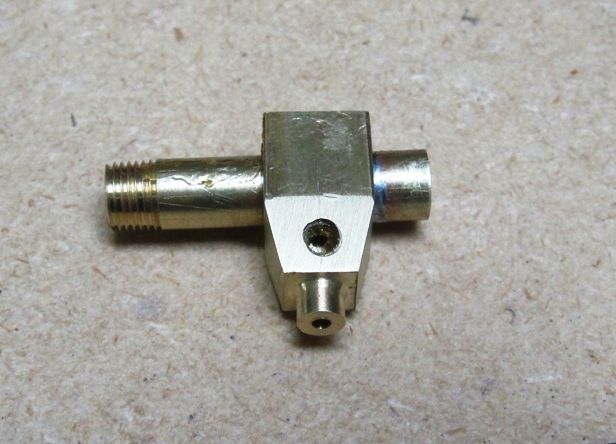
And, here is the built up carburetor body so far...
IMG_3364_zpsff4931e1.jpg


Chuck
 
Chuck--Hurray for you!!! You are tackling one of the few remaining mysteries of small internal combustion engines. I commend you, and will keep watching, hoping to learn something new.---Brian
 
Chuck: Pulled up my chair. Waiting to see the carb completed. Thanks for taking the time to post your build log. Roger
 
I like this thread today.


Sent from my iPad using Model Engines
 
Chuck--If you go to the Traxxas website and plug in the part numbers I gave you, I think they give an exploded view of the carb I am using right now. It is an excellent carb, with only two adjustable controls on it. One is the main mixture needle, while the other is simply a screw that stops the throttle from being completely closed off, thus giving an idle speed adjustment. Might be worth having a look at.---Brian--and it was a Pro-15 not a Pro-16--writing was too small for old eyes.
http://www.amainhobbies.com/product...products_id/17687/n/Traxxas-Pro-15-Carburetor
 
Last edited:
Chuck,

My chair is also pulled and ready to watch. :):)
Lots to earn about carburetors and maybe I will be able to use it on my engine (or should I say Brian's HM :rolleyes:) that I'm building.

Pat H.
 
Pat--be advised--Hit and miss engines do not use a carb with a throttle. The speed is controlled by the governor. You MIGHT be able to use a throttled carb if you lock the butterfly valve wide open. If you run it without governors, as a throttled engine, then yes, you could get away with it. Just be careful---The "Rupnow Engine" is a very unbalanced engine. It works great as a low speed hit and miss engine, but if you run it as a throttled engine and rev it very high, it may explode.---Brian
 
Thanks for the link, Brian.

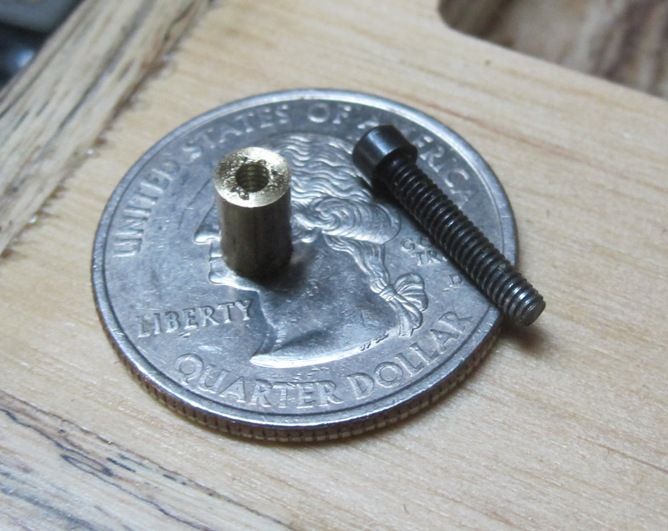
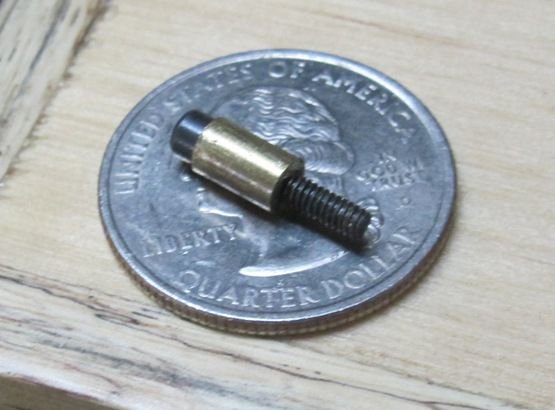
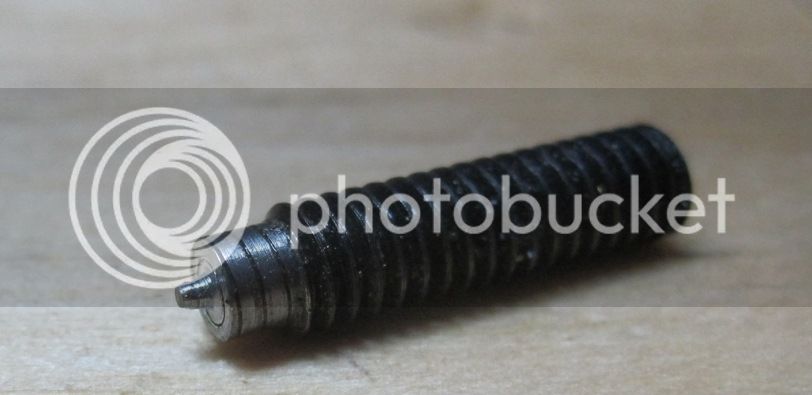
Got the needle valve finished today. I started with a 2-56 socket head cap screw. I needed a way to chuck it in the lathe so I could turn the taper on the end. So, I made a threaded sleeve from a small piece of brass rod.

IMG_3365_zpsfd222e78.jpg


IMG_3366_zps7070dab7.jpg


Then I chucked the brass sleeve in the 3 jaw chuck, set the compound to 4 degrees off the screw axis and turned the taper. The tip is about .025" in diameter. I finished the taper surface with 1200 grit wet or dry sandpaper.

IMG_3367_zpsda480a8d.jpg


IMG_3368_zps6fcc9498.jpg


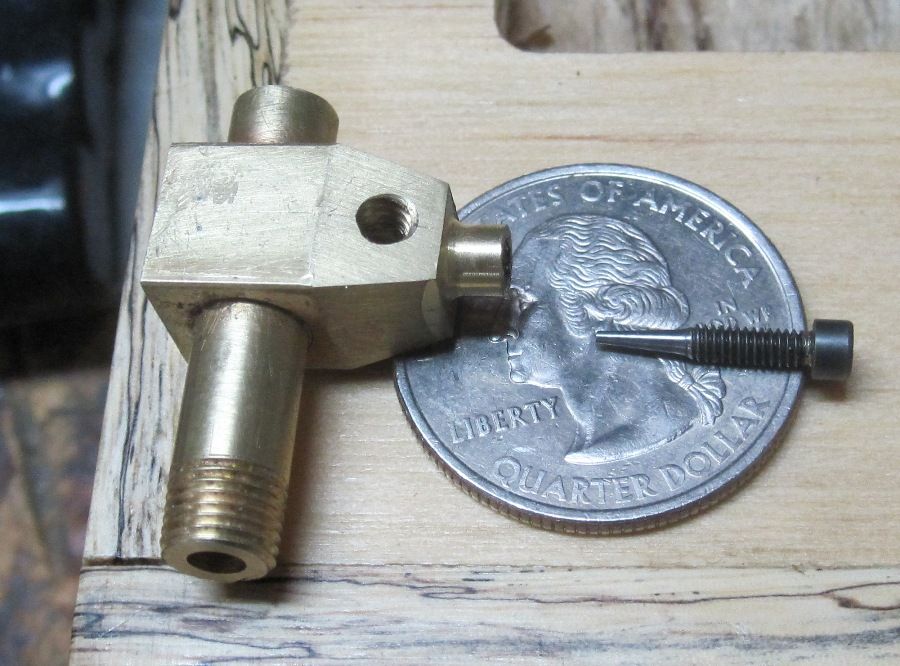
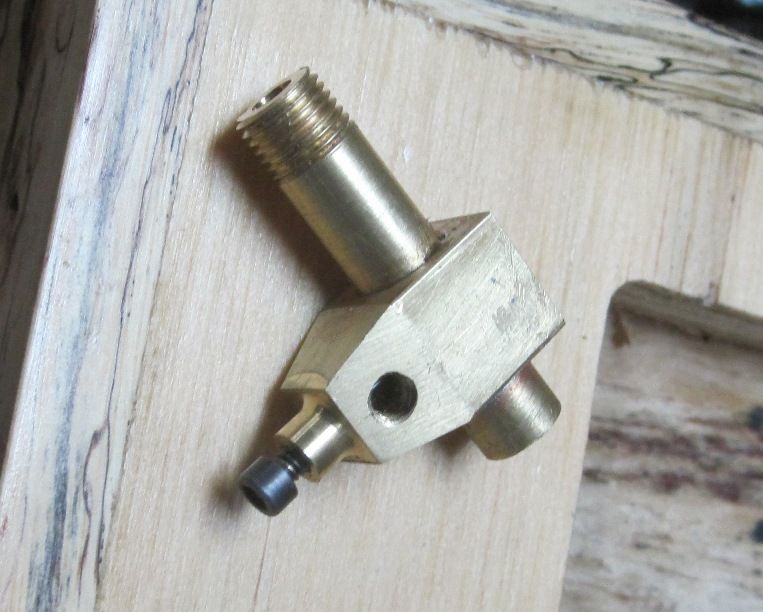
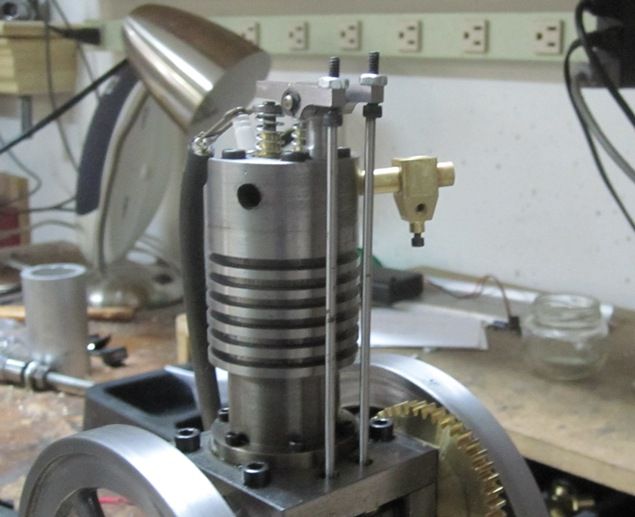
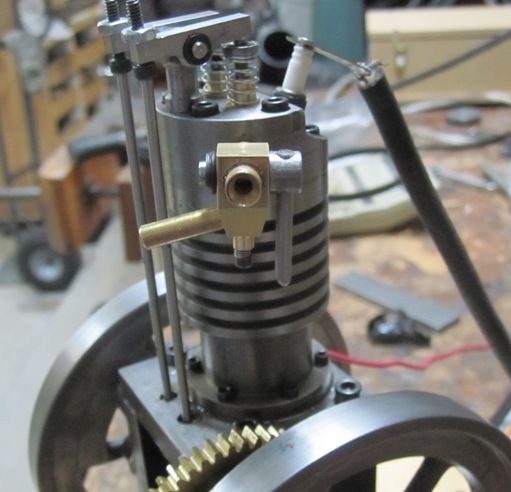
And here's what it looks like on the engine...

IMG_3369_zpsc02514e3.jpg


I used the following procedure to make the needle valve seat.

- When I originally made the body, but before I soldered in the venturi tube, I drilled a 1/16" hole from bottom thru into the opening that later received the venturi tube.

- After I soldered the venturi tube in place. I used a .040" drill to go in through the 1/16" hole and drill through the wall of venturi tube. I first used a 1/16" bit to dimple the side of the venturi tube to help center the .040" bit.

- Then I pressed a 1/8" length of 1/16" brass tubing into the 1/16" hole, seating it against the outside edge of the venturi tube. The ID of the 1/16" tubing is about .032" and will serve as the seat for the needle valve. If the seat ever gets worn, I can just drill out the old length of tube and insert another one.

Next I'll add the throttle assembly, which will be a modified butterfly type. I got the throttle idea from the carburetor on Randall Cox's open column, 6 cylinder engine featured in Model Engine Builder, Vol 1 & 2, I think.

Chuck

Chuck
 
Last edited:
Brian,

Of course :wall: thanks.


Pat H
 
Looks good!! I looked all over that link I posted, and couldn't find the exploded view this time. Either they have taken the exploded view off the website, or else I am going mad. Either is possible. Tomorrow I will phone the hobby shop where I bought my carburetor and see if they can find me the exploded view.
 
Yeah, Brian, I couldn't find it either...

One more set of pictures for the day. Here you can see the 3/16" cross hole drilled that will hold the throttle barrel.

IMG_3371_zpsc7af38eb.jpg


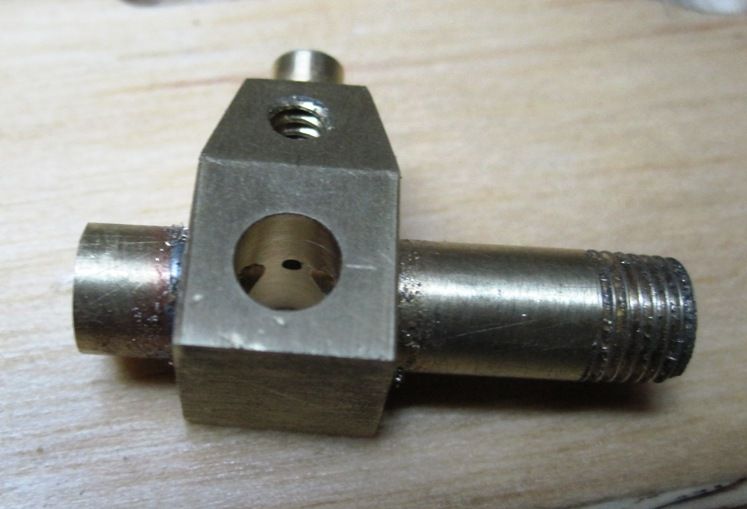
In this closeup, you can see the fuel inlet from the needle valve.

IMG_3370_zps1b3ddafe.jpg


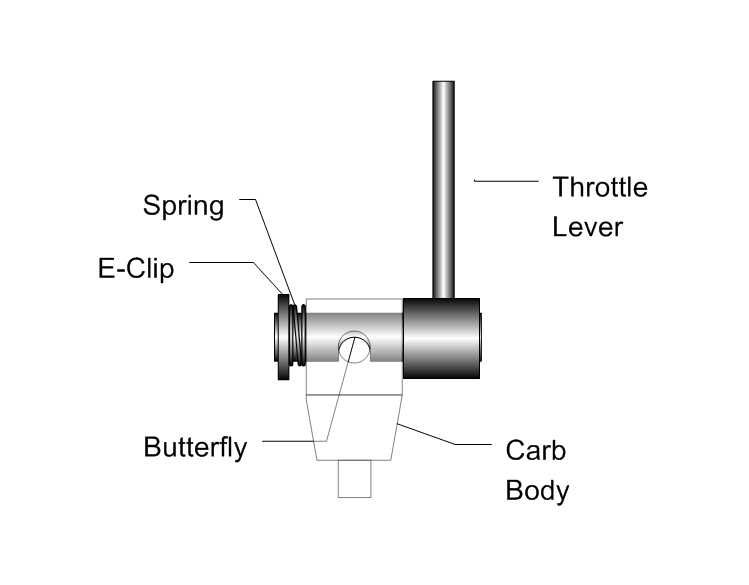
Next I'll make the throttle assembly. Here is a drawing of what it will look like...

CarbButterfly_zps482bcfea.jpg


Chuck
 
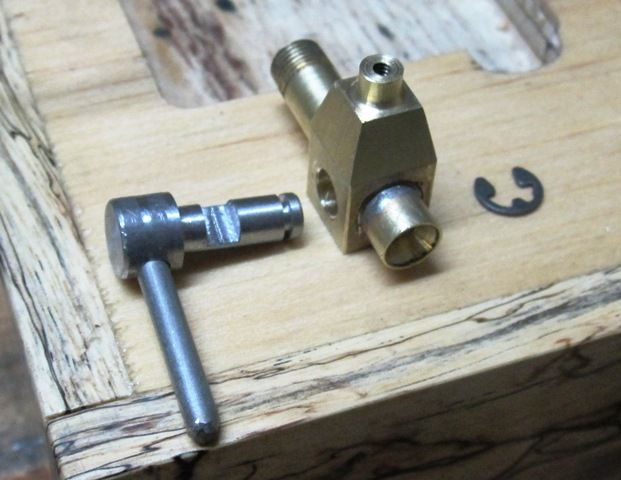
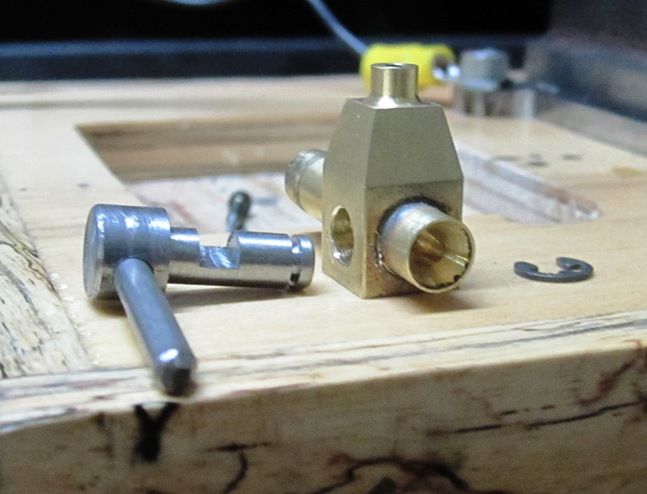
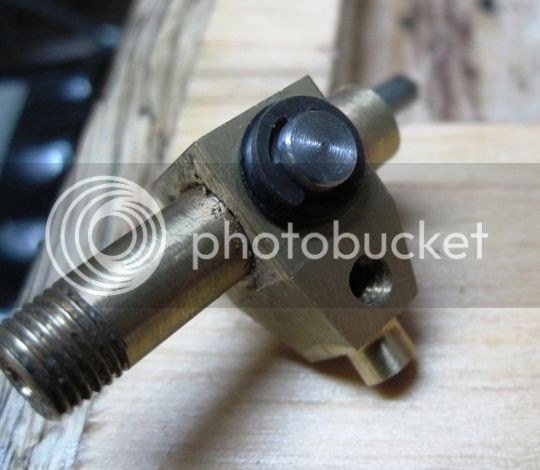
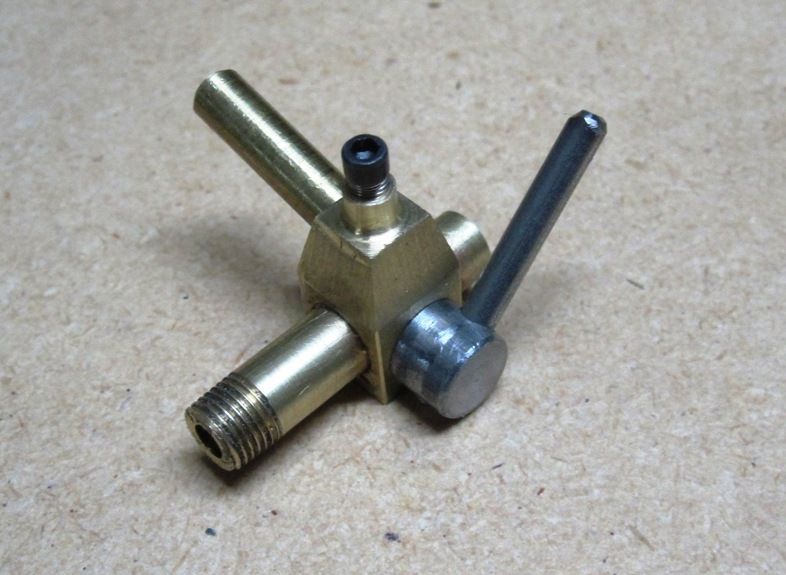
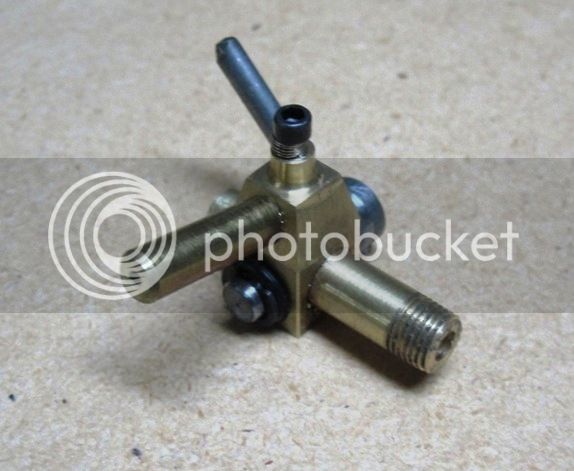
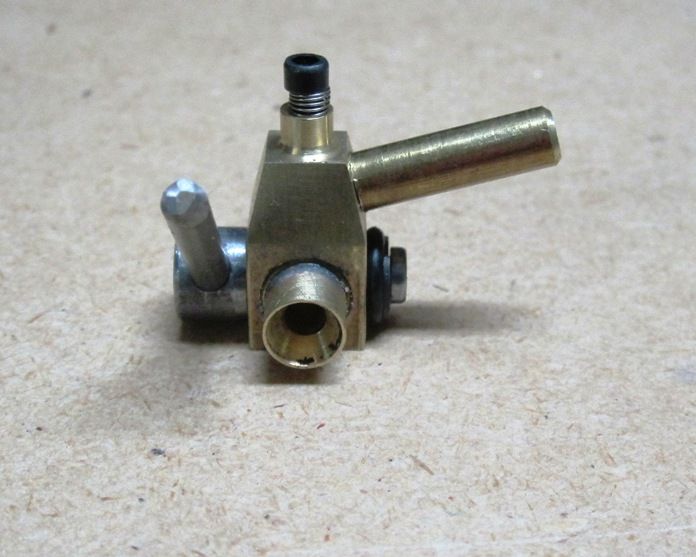
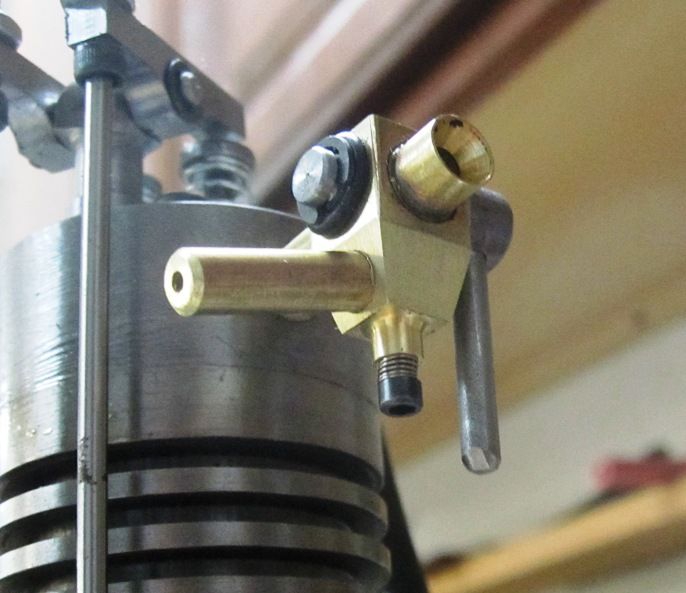
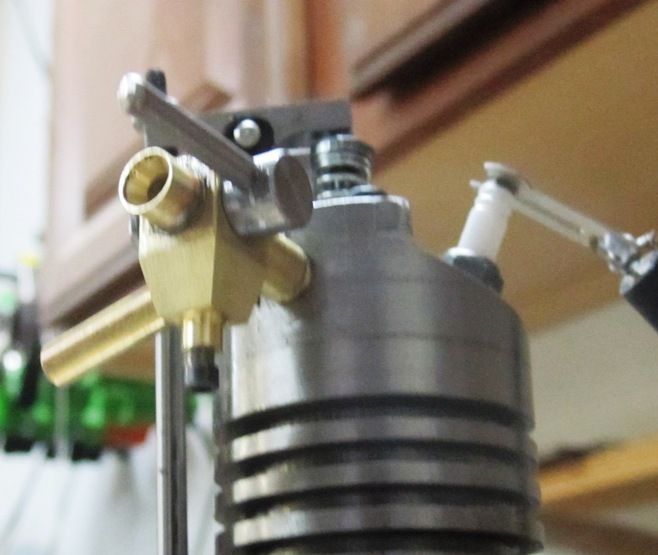
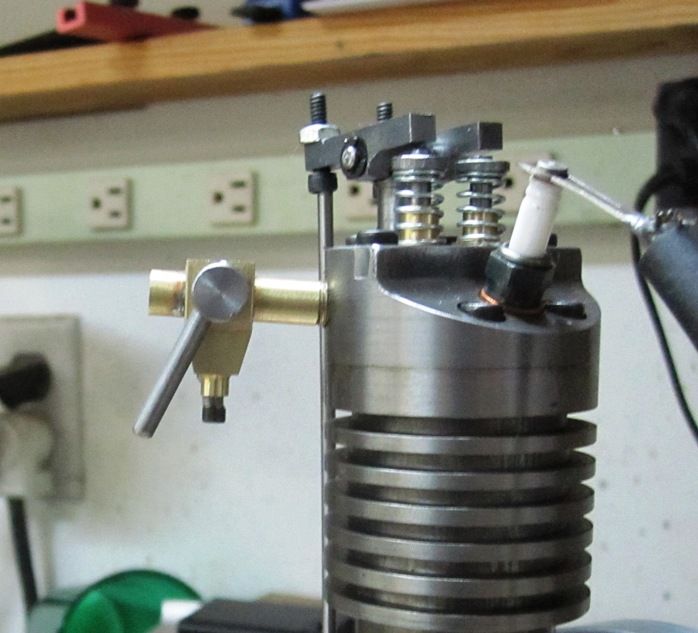
The carburetor is finished. Here are a series of pictures.

IMG_3372_zps5ae26361.jpg


IMG_3373_zpsdcc732db.jpg


I used a rubber o-ring and e-clip to hold the throttle in place and provide some stiffness so the throttle setting will stay put.

IMG_3374_zps34009883.jpg


IMG_3376_zps28d80cb4.jpg


IMG_3377_zps7c599b29.jpg


IMG_3378_zpsd9328ff7.jpg


IMG_3379_zps09b74568.jpg


IMG_3380_zpsc7fb1cbd.jpg


IMG_3381_zps20d344b2.jpg


IMG_3382_zps554137b2.jpg


Tomorrow I hope to hook up the fuel line and try it out.
Chuck
 
Hi Chuck,
Your carb will work but you'll run into a problem metering the fuel from idle to whatever rpm you want the engine to rev to. Let's say the throttle is wide open. With the needle valve adjusted to provide the correct air/fuel mixture the engine will run at an rpm controlled by the size of the venturi. Large venturi, more fuel, more rpm. (to a point)
Now when you shut the throttle down to the idle position the narrow venturi area will create a much stronger vacuum signal and therefore more fuel will be pulled through the needle valve. To compensate for this increase in fuel you can readjust the needle at which point when you try to throttle the engine it will either backfire or stall because of the lean condition.
That's why they make the air bleed port.
Now I'm not saying yours won't work because I have heard of fellow using this type of carb without an air bleed and they work fine, well let's say satisfactorily.
I'm following along to see how you make out because there's always something to learn.
gbritnell
 
Would a small hole to let air in, that is opened when throttle is nearly closed help prevent it from running rich? Or, like on a Chainsaw carburetor, they have a high jet and low jet. Two needle valves that work at different throttle positions?


Sent from my iPad using Model Engines
 
Thanks for the comments, Rick, George. I know that building a simple carburetor that works well across all speed ranges can be a daunting task. My goal is to come up with a design that will let me achieve a slow steady idle that rarely misfires. I would like a little bit of throttle but am not interested in running the engine over 1000 - 1500 RPM, and would mostly like to keep it at 500 - 600 RPM or less.

Chuck
 
OK, I'm abandoning V4.0. The throttle is too sensitive and there is no easy way to compensate for too rich a mixture at idle.

So, I'm back to version 3.0 with the simple threaded screw throttle. However, I've made a couple of changes.

IMG_3383_zpsa04979dd.jpg


I've turned a smooth end that fits closely into the bore of the venturi. The threaded portion ends short of the venturi opening. I've also included a small nipple on the end of the throttle screw which will enter and close off the fuel aperture as the throttle reaches the idle point.

Here you can see the nipple through the venturi opening, although it's not in focus and kind of blurry.

IMG_3385_zps07303939.jpg


I may have to fine tune this part, so the nipple is actually a 2-56 allen screw which is threaded into the end of the throttle screw. I can remove and replace or resize the nipple as required.

I'm also going to make a new needle valve for it, one that has a straight, conical point instead of the elliptical shaped needle.

Chuck
 
I got the engine running with this latest carb version, but I'm still not happy with it. I've decided I need to go back and work on the valve timing on the engine before I do any further carb experimenting. I won't be posting to this thread anymore, I'll just pick it up o my vertical single engine thread.

Chuck
 
Chuck,

I guess carburetors can be a real pain :wall:.
But anyway thanks for the ride it was very useful to watch your progress.:)
Will be following your next build. ;)

Pat H
 
Last edited:
Back
Top