Building an ER collet chuck from scratch for a Myford ML7

Home Model Engine Machinist Forum

Help Support Home Model Engine Machinist Forum:

This site may earn a commission from merchant affiliate links, including eBay, Amazon, and others.
Thanks Dave, I'll pop Rudy a mail :) - Must be the air here, or some psychological remnants from previous years where we were all very limited to imports into these part of Southern Africa :big: (and that's enough said ;) )

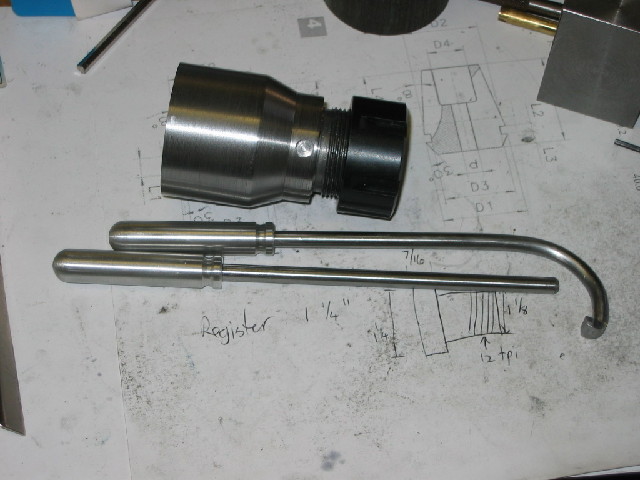
Well, new start today...
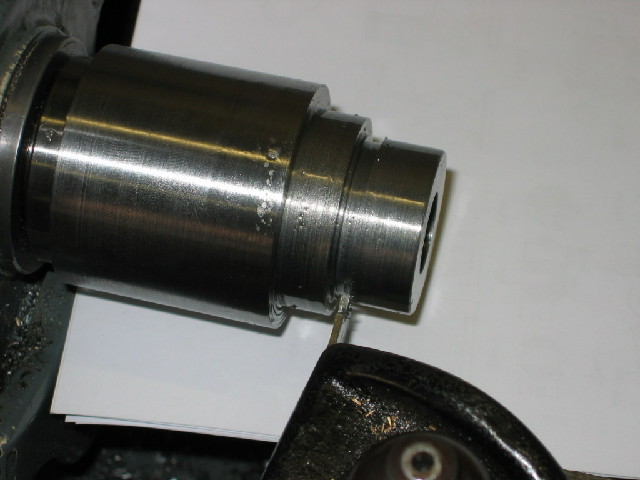
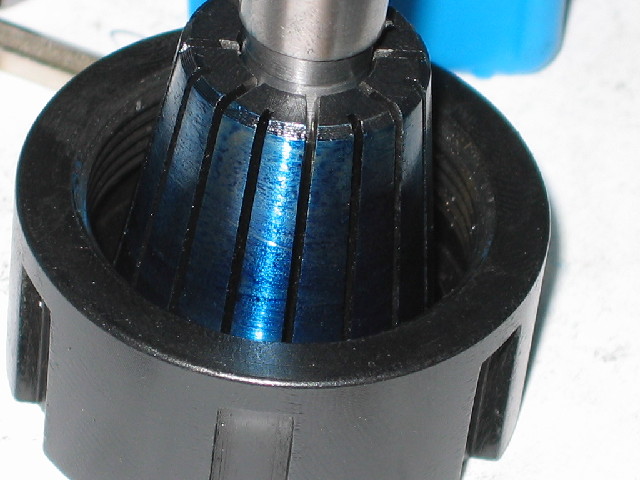
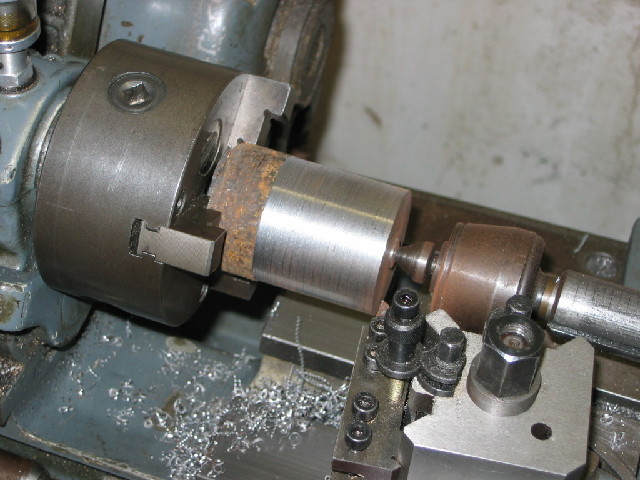
Cleaned up the new chuck body:
smaller-IMG_1296.JPG


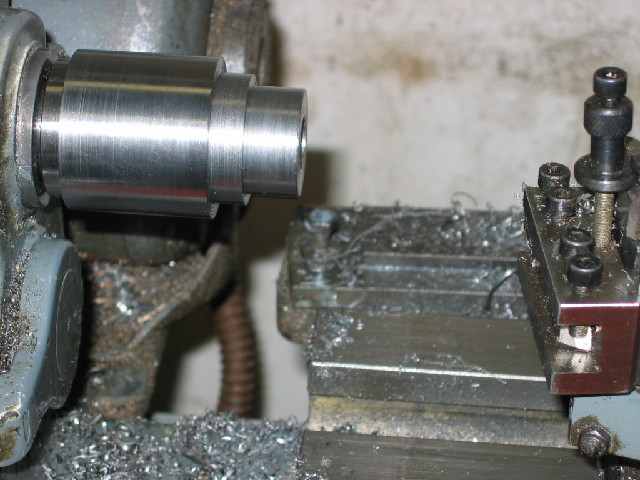
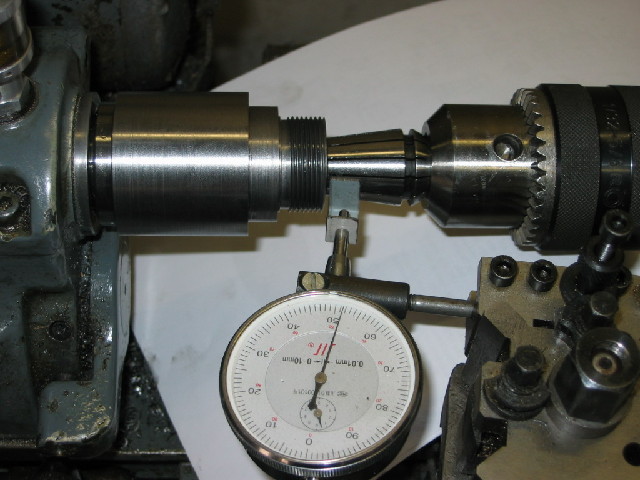
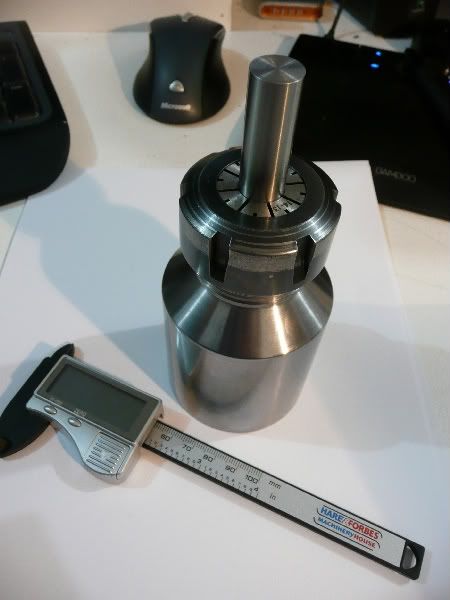
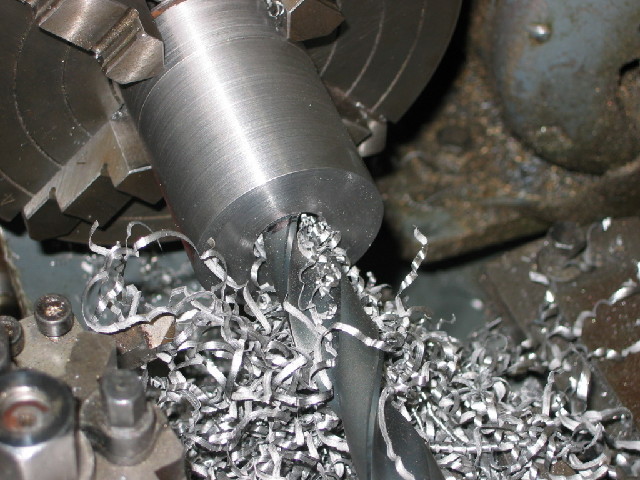
Then switched to the 4-jaw and drilled consecutive through-holes to 16mm, and tried my hand at an action shot while drilling on fast back-gear to 19mm (my biggest drill) to spindle-depth:
smaller-IMG_1298.JPG


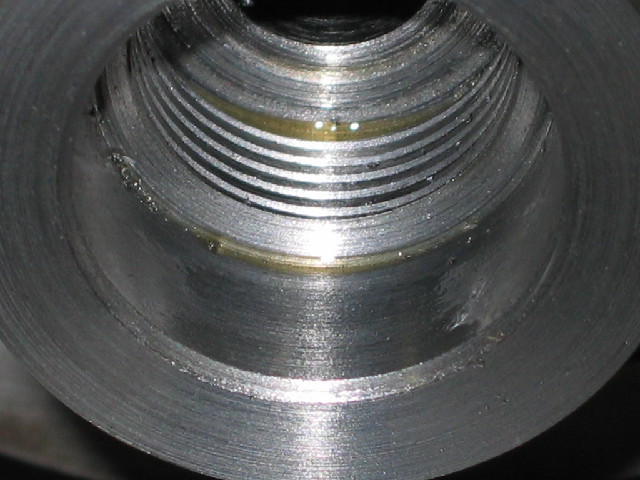
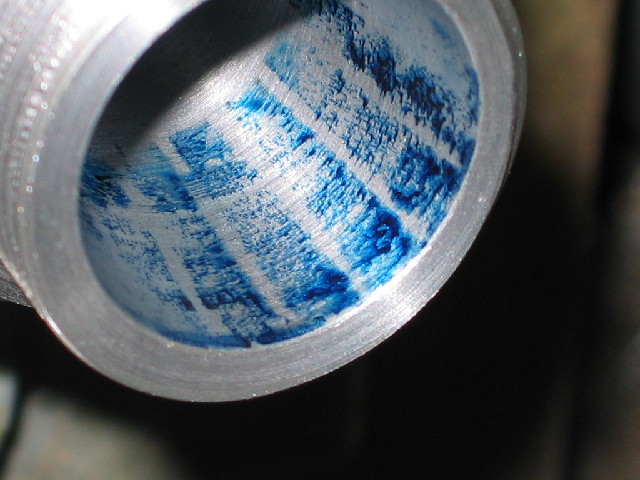
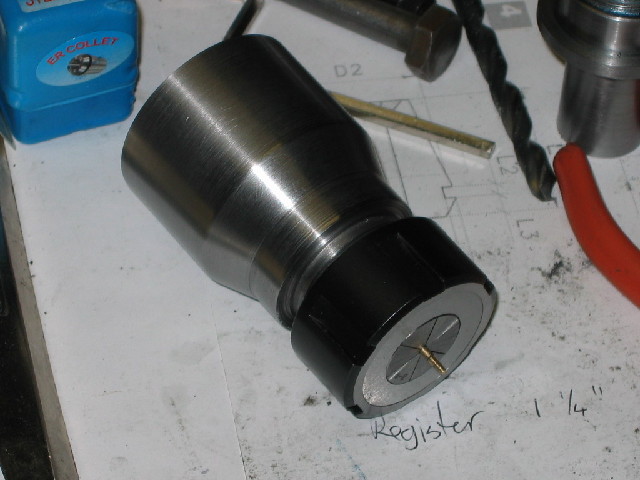
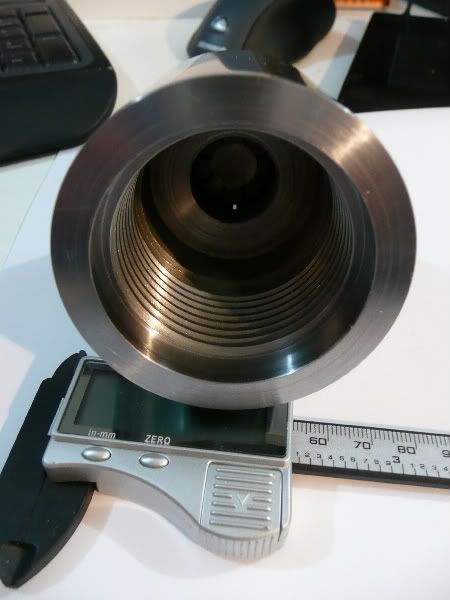
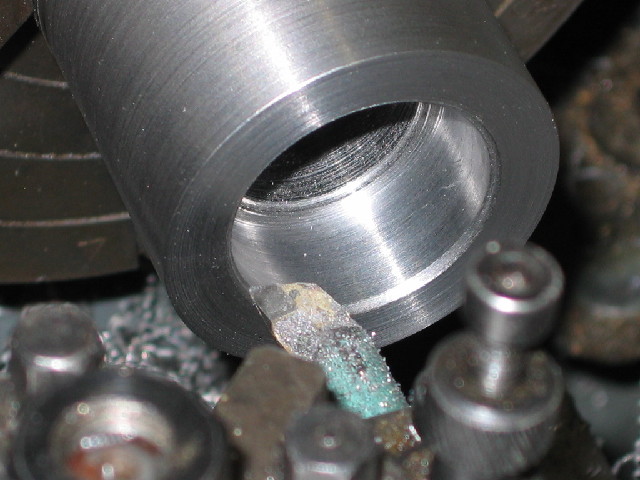
And bored the register to size using a carbide tipped bit that I honed on a bit of emery:
smaller-IMG_1299.JPG


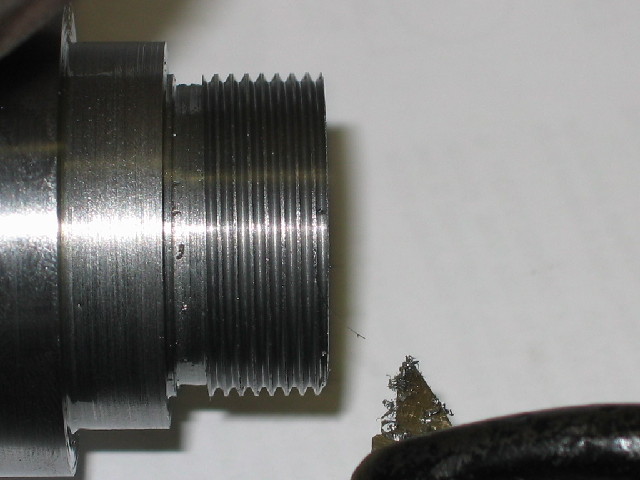
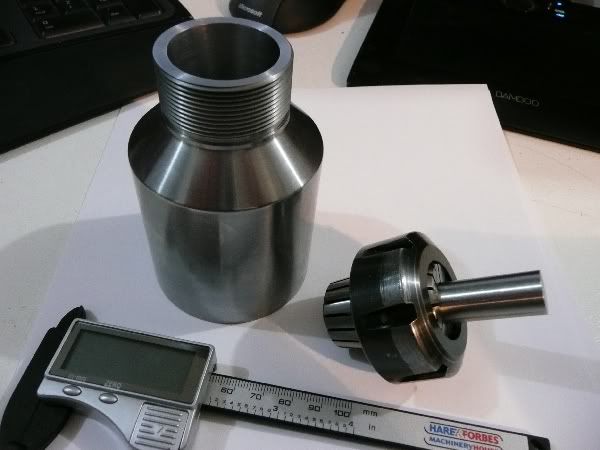
After this I bored out for thread run-out in the back; slowest back-gear speed & PLENTY of lube with frequent stops to clean out the swarf ribbon. Thought it might be more difficult, but came out well. Then I set up the change wheels for the internal thread, and set up for the single-pointing. Decided to stop there, and do the thread tomorrow when I'm fresh.

Regards, Arnold

 
Nice work Arnold,
Thanks for throwing out your first chuck so I could catch up. :big:
I'll try not to return the favor with my chuck body when I get to it this week.

Cheers
Phil
 
excellent work arnold, and a very wise decision to postpone the difficult part on the next day, when you're fresh

I made so many errors in the late evenings, wanting to complete a job, instead ruining a long work!

 
I should have mentioned this a little earlier Arnold.

When cutting an internal fitting, you should really cut the thread first. Then once the thread fits perfectly, by boring to almost thread OD, you can start to check for register fitting.

It is the opposite when making a spindle nose. Turn the register to perfect fit first, but overall length of the nose. Then cut your thread on the end.

It makes everything so much easier to do and check.

Blogs
 
Phil, Ariz, Blogs - thanks for the responses :)

Phil, please do catch up & pass me, then you can post a how-to, so I can stop bumbling along setting a bad example :big:

Ariz - yes, sometimes it is better to wait. I've botched a good few things by rushing :big: ; One of the most valuable things model engineering has taught me is patience ;).

Blogs, you're right - but the register I turned is ever so little under-size still - will need to bring it to size with emery later on. I Went this way around this time, as the steel I'm using here insists on coming off in ribbons - which would have made the tread run-out undercut very difficult, and the long threading a real hassle with swarf getting caught up on the bit while threading...

Fortunately, I am on leave for a change, so hope to have this finished by tomorrow evening; have some other to-dos as well :p

Regards, Arnold
 
Well, a good result for a change :)

This afternoon I started by turning the spindle thread in the chuck body. A close-up down the register and thread - the pool of cutting fluid in the back is collected in the thread run-out:
smaller-IMG_1305.JPG


Once I was happy the thread was well-done, I unscrewed the 4 jaw with the chuck body still in it and tried to screw the whole assembly onto the spindle from the collet chuck body. The register was a touch too tight, so I turned it around again, and used some emery & oil to open up the register a bit more. With the next test it fit very acceptably.

Removed the collet chuck body from the 4-jaw, and screwed it straight to the spindle. Then turned down the nose end to size for the collet closer nut:
smaller-IMG_1307.JPG


Once again the undercut using a parting tool - slowest back gear speed, as this steel is fairly tough:
smaller-IMG_1309.JPG


Threading nearly done:
smaller-IMG_1311.JPG


I tested the final thread size by trying to screw on the closer nut after cleaning the threads thoroughly on each attempt. Once it screwed on full way, but slightly stiffly, I used a fine triangular needle file just to give the threads a final cleaning - after this the closer nut spun on easily, but not loosely.

Now came time for the internal taper for the collet. I first tried the following to set the topslide to taper:
smaller-IMG_1312.JPG


Something "felt" wrong at this point, so I tested a couple of different collets and got readings all over the show... Ahh... They are all already slit and spring loaded, so there would be differences. I settled on trusting mr. Myford, and just set the top slide to 8 degrees, making sure the boring tool was set dead on center. I know there are other ways to set an accurate angle on the top slide - but was not about to go down that route. A blue test while the hole was still slightly undersized would suffice, and that's what I did, using the 10mm collet and a known-good piece of 10mm silver steel, long enough to be clamped on it's entire length. First off, blued the collet and inserted in closer, then inserted test bar:
smaller-IMG_1314.JPG


Then screwed the collet up tight into the chuck,carefully keeping the collet from touching the chuck initially and keeping it from rotating as I did this. Reversed out the collet, once again preventing rotation and trying not to let it "drag" in the chuck - got the following blue marks in the chuck proving that the entire lenght of the collet was clamped adequately and evenly:
smaller-IMG_1315.JPG


After this I turned the taper to just under full-size and carefully smoothed it off using some emery superglued to a wooden dowel & oil. Then I played around with removing the chuck, installing it, chucking up different workpieces repeatedly in different rotations and a whole combination of the previous. Biggest run-out I measured was less than 0.005 mm (less than half a division on my 0.01mm guage) - that's about 0.2 thou - I think that's acceptable.

Some cosmetic work externally (well, it's not a beauty :p) and here is where I left off for tonight:
smaller-IMG_1316.JPG


Tomorrow I'll cross-drill a couple of holes to take a tommy bar in the chuck body, as it is too smooth. At a later stage, I'll knurl a ring grip on the body as well; first need to get some knurling wheels and build a tool ;)

So, that's my version of a collet chuck; pretty it's not, but I really think I'll enjoy this addition to my workshop in upcoming projects.

Kind Regards, Arnold


PS: I'm having a double whammy on the VSOB bottle tonight. Firstly, Congratulations Mate ! - up to you if you want to tell everyone or keep mum ;) ; the other reason is pretty obvoious from the above ;D
 
Congratulations on a job well done and a very informative write up. I did the same thing for my (non-Myford) lathe when I was starting out so I can really appreciate how chuffed you must feel about pulling this off so successfully. Picture me lifting my glass to you later tonight.
 
Very well done, Arnold. You will really enjoy using it.

I know that you have followed some of my threads, so you know that I use collets for most of my lathe work. Mine are 5c that fit the lathe spindle, but I also have a ER32 adapter for odd size work. You have the extra pleasure of knowing that you made yours. I made one years ago for another lathe, but it was not the quality yours is.

:bow: :bow:
Gail in NM
 
Very nice work Arnold :bow: :bow: :bow: :bow: looks like it will be a well used tool in your shop Thm:
looks like i will have to get my finger out and make one ;D


Thanks Rob ;D
 
Marv, Gail - I feel a bit overwhelmed!

Thank you both VERY much - I've learned a massive amount from both of you, and consider you as premium mentors. To receive such positive feedback from yourselves is very special, and I will be lifting yet another glass tonight.

Sincerely, Arnold
 
Thanks Rob ;D

You know it will be well used :big:
Now beware what happens when you use too much violence when your finger is in the wrong place Rof}

And of course you need to make one! :big:

Regards, Arnold
 
Positively magnificent Arnold, Thm: th_wav

pretty it's not,
Mate I think it's a work of art, the beauty is in the accuracy not just the looks.
You have taught me heaps in this thread about procedure and test fits. :bow: :bow:

Thanks to all the other guys for their input as well, Arnold is not the only one you've helped on this tool making adventure.

Hope mine comes out half as good as your's Arnold.
Cheers
Phil

p.s. Mate I'm still excited, that chuck is just excellent! :bow:
 
Thanks for that thread Arnold.
I think it will help a lot of people (me!) believe they can make tools like that too.
 
Phil, Zee - Thank you :)

Phil, I'm sure you can also pull it off successfully :)

Zee, of course you can make tools like this - the biggest hurdle to overcome is self-doubt. And while it is "just" a tool, like Marv said - I feel chuffed; building it was fun has given me a great feeling of accomplishment.

I didn't do much in the shop today, but managed to squeeze in time to drill the chuck for the tommy bar, and also made up a matching tommy bar and c-spanner from some 6mm silver steel. For the c-spanner, I turned the tip of the length of silver steel down to 4mm. After this, I bent the curve in around a piece of 30mm rod - when I released the tension after bending, it sprung back to a nice fitting curve for the collet nose. Bending the silver steel was pretty tough going, and it got pretty warm from internal friction!
Then I picked up a scrap piece of flat iron under the bandsaw and drilled a 4mm hole in it at a slight angle, and silver soldered it to the bent drill-rod to make a nice hook. Used the bench grinder to grind the lot to a reasonable shape, and finished off with a file and then sandpaper.

I also turned 2 pieces of 10mm aluminium rod into a matching pair of handles, and loctited those to the c-spanner and tommy bar:
smaller-IMG_1321.JPG


Now all that is left, is to make a nice wooden storage case for the chuck, accessories and collets - this I'll do in the next week or two when I plan to do some work on my kitchen cabinets - I can do OK woodwork, but don't like the mess, so I'll lump all the woodwork together in a single go.

Regards, Arnold
 
Hi Arnold,
Finally finished my ER32 collet chuck woohoo1 woohoo1

Mate, thanks heaps for your thread. :bow: :bow: couldn't have done it without your instruction and examples.

I finished mine a couple of nights ago but couldn't get if off the lathe spindle :wall: Dam it had worked itself on tight, and bling boy here had made the finish too smooth for anything I had to get a grip. Needed to wait and get a strap type pipe wrench from work to get it off.
The last thing to do is put the C spanner slots in it. Run-out is 1/10 of a thou near the collet but a bit worse further out.

small002.jpg

small003.jpg

small0001.jpg


Great to see you have used yours in the build of your tiny.

Thanks again Arnold.
Cheers,
Phil

 
My compliments..Really well done! Well proportioned...nice to have...
Best regards
Paolo
 
Hi Phil - Great work Thm: - very well done

Hope you get as much fun out of yours as I've had so far :)

Better get some holes cross-drilled for easier removal ;)

And thank you very much for the "thank you" ;)

Kind regards, Arnold
 
Very nice Phil.
And another Thm: to Arnold for his.

Gail in NM
 
I know this is an old thread, but it was very helpful to me when I turned my ER32 collet chuck for my Atlas 618 lathe.

I had the armstrong spanner, so I turned the OD to fit. It turned out to be 2" diameter and just over 3" tall.

The resemblance to the chuck by majorstrain is intensional, when I searched the internet for how to make the chuck, his was the one I liked the most.

Thanks again for all the help this thread gave me

IMG_20171001_233555.jpg


IMG_20171001_233115.jpg


IMG_20171001_233407.jpg
 

Latest posts

Back
Top