A stone steam engine

Home Model Engine Machinist Forum

Help Support Home Model Engine Machinist Forum:

This site may earn a commission from merchant affiliate links, including eBay, Amazon, and others.
There's any amount of talc lying about here - used to be a talc mine in our front paddock.
 
Noitoen said:
Now a bit "of topic", here in Portugal, land of fine "Italian" marble (they extract it from our quarries, ship to Italy and sell the finished product as Italian.....but never mind), many stone shops have a huge box like mould and deposit cleaned "left overs" from stone and when the mould is full, they mix some drums of epoxy or polyester resin and fill the mould. The result is a big block of stone that is cut in slices and after some polish come out with spectacular effects.

NO worries Helder, We could talk about stone aeroplanes in this thread and we'd still be smack on topic.
That epoxy method might come in handy for making a display base for the engine. I't will depend how sick of stone I am when I finish :big:
A bit of marble in the build would be a nice touch as well. I have an old contact that works for a head stone company here in Perth, I'll have to drop in and see if I can get some bits for the engine.

There must be some gag about not being caught dead in her shop, but I'll leave that for when I'm more awake. Rof}

steamer said:
There are some quiet vacuums out there......but pricey! th_confused0052
http://www.jamestowndistributors.co...milyName=Fein+Turbo+III+Variable+Speed+Vacuum
Dave

Dam Dave, and that's US prices. I'd hate to see what it costs here in Oz.
I pressed the old wood (wash my mouth out *club*) extraction system into service. It's a 2hp twin bag system that is plumbed around the shed in 100mm storm water pipe.
The system works on low pressure, high volume suction as opposed to the shop vac which is high pressure, low volume.
For metal it's no good, but for dust she works a treat.
It's not much noisier than the mill and less so than when I am using the cut off blade shown in the pic. I'm glad I saved some granite dust, because there in none any to be found now.
Thm: Thanks again Kermit for the reminder.

rocker006.jpg


tel said:
There's any amount of talc lying about here - used to be a talc mine in our front paddock.

I'd be interested to see a bit in it's natural habitat Tel, could I trouble you for a pic sometime?

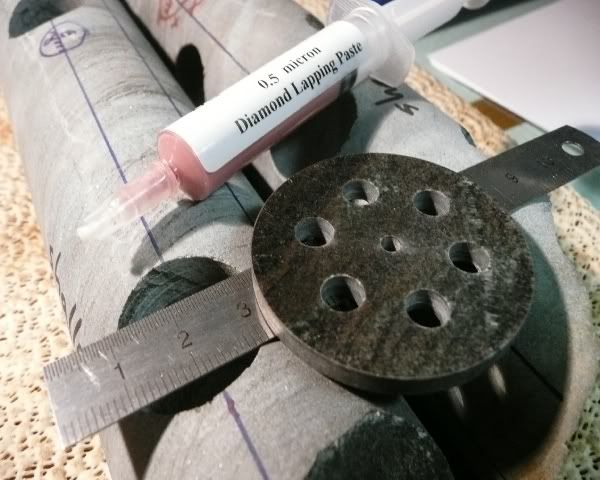
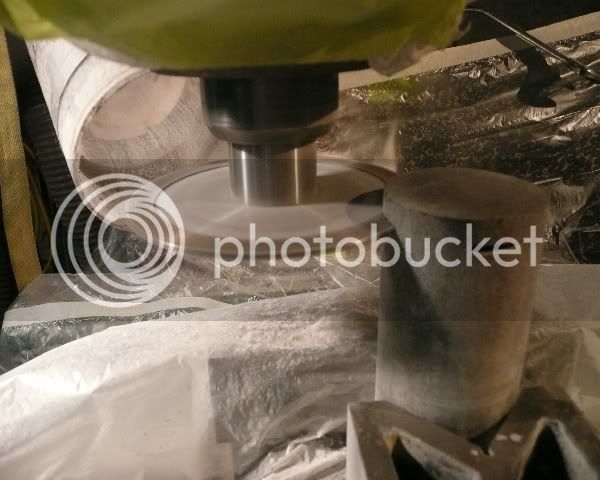
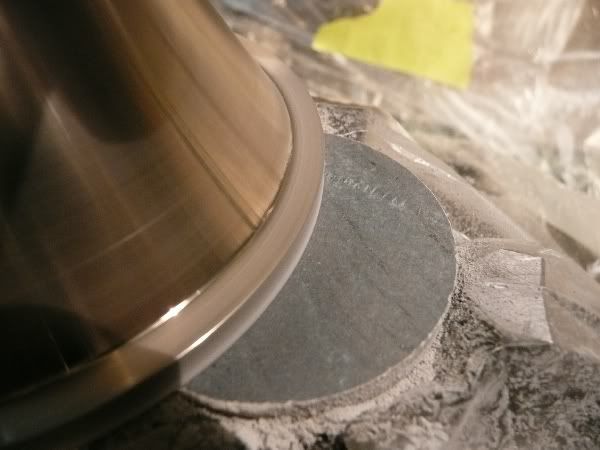
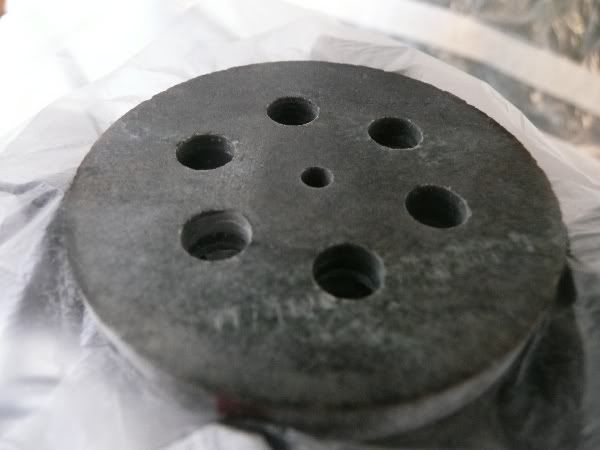
Well this is how much I got done tonight.

I parted off the fly wheel with the diamond slitting saw. It's 50mm across and 7mm thick.

rocker007.jpg


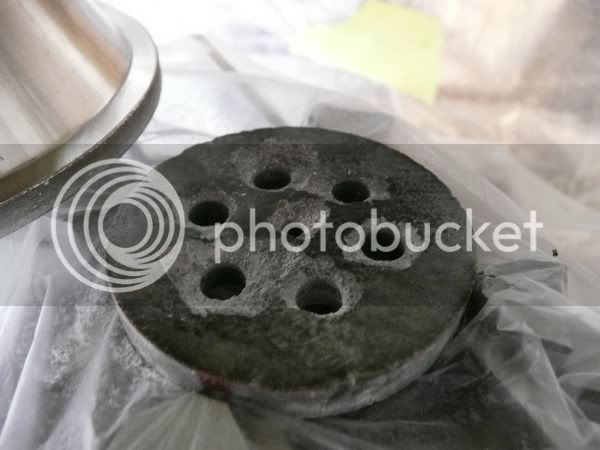
I gave it a bit of a hit with 1200 wet and dry and then the buffing disk to see how it would come out.

rocker005.jpg


You can see two dull patches on the right and left sides, The disk is not flat and it dips down on the edges. It's caused by flex in my home made cutter setup, that cuts more at the start and finish of the cut.
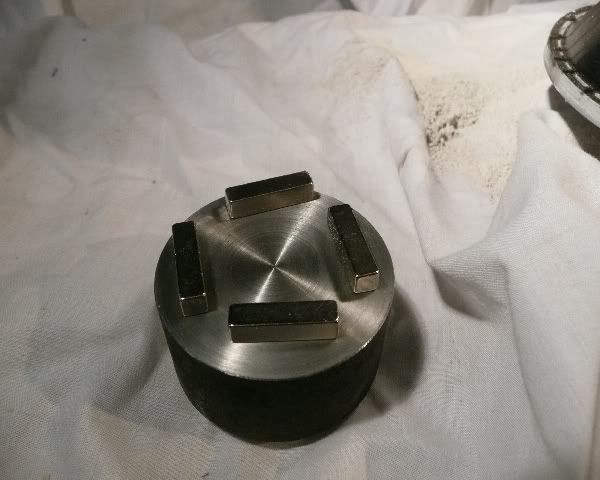
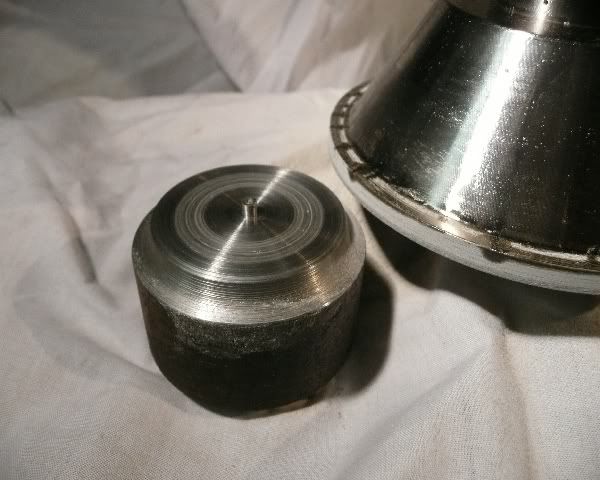
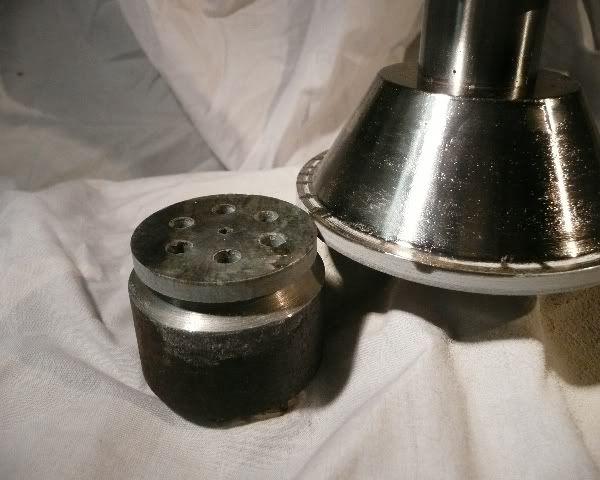
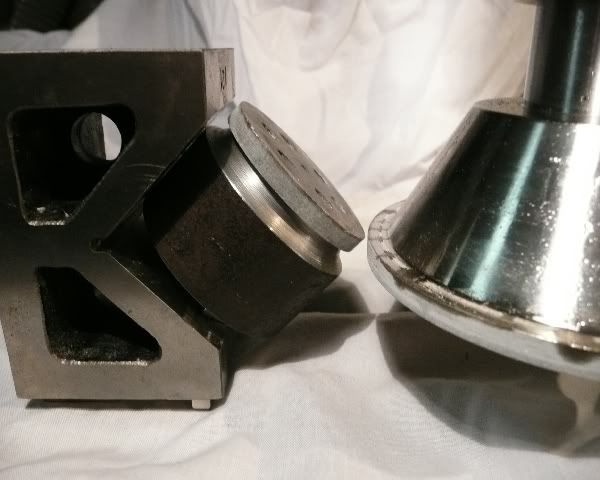
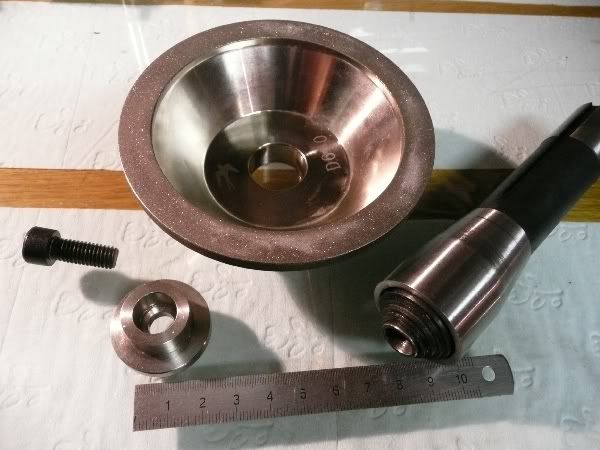
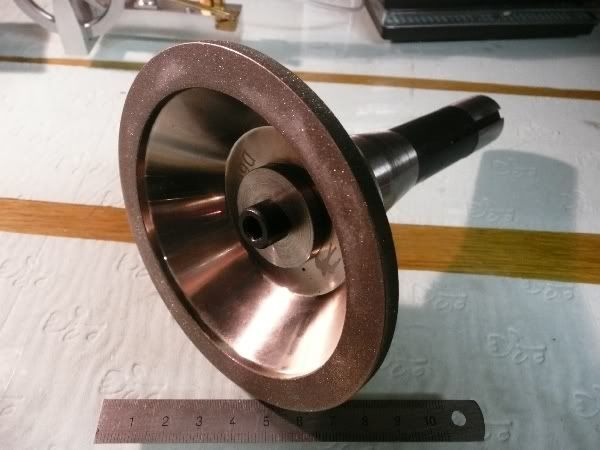
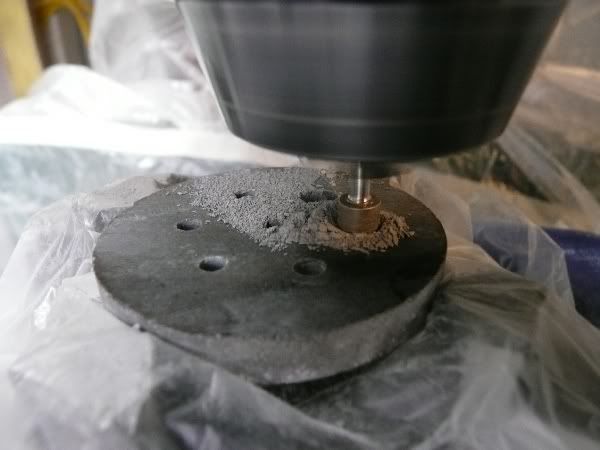
I started work on an adapter for the diamond cup grinding wheel to make it fit the slitting saw arbor.

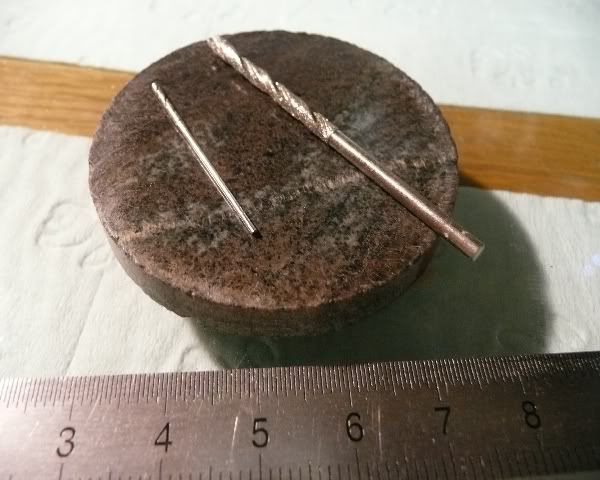
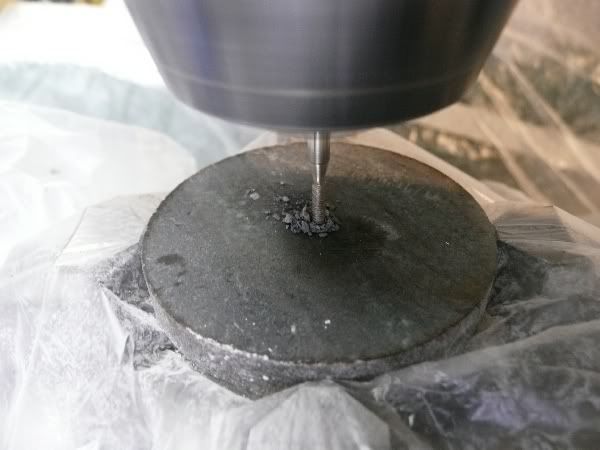
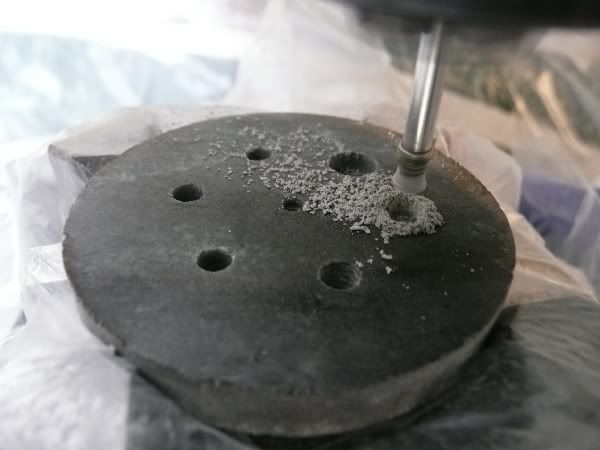
The drill bits are diamond coated twist drills and the small one is 1.1mm, the other is 2.5mm

I hope you all have a comfortable seat and a good book, It's going to be a slow build.
Cheers
Phil

I'm going to have to change my avitar to the Flintstones soon. Rof}

 
This is absolutely crazy but how can anyone not watch it! :bow:
 
Not much to show for the last few days,
Work is interrupting things even though I'm on holidays and the wifes kitchen is not finishing it's self. :hDe: Time to hide :toilet:

Oh well, the only progress I made was to turn a bush for the diamond cup wheel to fit the R8 slitting saw arbor.

small1002.jpg


small1003.jpg


Maybe I'll steal some time on the weekend.

Cheers
Phil
 
Think of the bright side here Major, when you are all finished with this, you will have become an expert in the field of kitchen countertops. :big: :big: :big:

You're an animal man, but I gotta say, this is going to very interesting to watch as the project unfolds. :bow:

regards

BC1
Jim
 
bearcar1 said:
Think of the bright side here Major, when you are all finished with this, you will have become an expert in the field of kitchen countertops. :big: :big: :big:

I hope not, I can think of better ways to drive myself mad. Rof}
Thanks for your support Jim.

Well I put the cup disc to work and the result was better than expected.
The disc is 600 grit and although fine, it removes material beautifully leaving a ready to polish surface. There is also no flex so the resultant surface is true and flat.
I am very happy. ;D

small1005.jpg


Drilling holes how ever is a diferent story entirly. :wall:
The problem can be equated to trying to drill a hole with an end mill rather than a slot drill. :wall: Unless there is a diamond right in the center and then good coverage all the way out to the edge, the bit will not penetrate at all.
I went through 10 different drills and burs with partial success before I found one that would do the job reliably, but the diameter of this bur is 4.5mm. That will be too big for some of the holes coming up in the cylinder. *bang* Thankfully I did get the center hole drilled with a 2.5mm burr before the :fan:.

small1007.jpg

small1008.jpg


Enlarging the pilot holes to 7mm with a drum shaped burr.

small1009.jpg


The top only needs a very light skim to sharpen up the hole edges,

small1010.jpg


The underside is a different story, even with very light pressure at break through depth the underside blowout is huge.
This material is not very forgiving at all.

small1011.jpg


No great problem on the flywheel as I had 3mm of extra meat. It has cleaned up nicely and is spot on the 4.77 mm thickness required.
Next time I'll use some packing to minimize blowout.

I'm now just making a fixture to hold the flywheel while I bring the circumference down to size.
More later.

Cheers
Phil
 
You can use regular concrete drills for the job. All you have to do is to grind a clean scraping/cutting edge on the "diamond" tip. With slow speed and oil you can drill into a regular ball bearing with one of those. ;)
 
Phil,

I have tried all ways to use those diamond coated things to get a good hole, and as you have found out, they are non too successful. They are really designed for cutting thru glass or tiles. These people also do all the diamond polishing pads as well, at very reaonable prices. So you should be able to get good finshes to the project in hand.

http://richontools.com/index.php?main_page=index&cPath=1

But you might have better luck with these types. The spear drill bits, if you catch them just as they break thru, you could turn the job up the other way and open out the hole from the breakthru side.

http://richontools.com/index.php?main_page=index&cPath=2_34

As already mentioned, you can grind up normal masonry bits to a standard drill bit profile, and they work rather well. I had better breakthru results when I put a flat on the leading edge, as you do for drilling brass.

These types of drills are readily available under the name of hard plate drills, and are very reasonable for cost. This is in the UK, but you might find them listed somewhere local to you.

http://www.leofixings.com/fixings-products_Drill+Bits_Hardplate+TCT+Tipped+Drill+Bits-10-132.html

Just a few things to have in your arsenal that might solve a few of your amazing problems to come.

I can thoroughly recommend Richon tools BTW, some of their other items such as diamond 6" laps and ali backing plates, and the flexible shaft drilling end piece have allowed me to design new machines for my shop that just wouldn't have been cost effective before. I'm just in the process of making them.

http://richontools.com/index.php?main_page=product_info&cPath=1_9&products_id=215
http://richontools.com/index.php?main_page=product_info&cPath=45&products_id=797
http://richontools.com/index.php?main_page=product_info&cPath=44&products_id=735


Blogs

 
Wow, Thanks Blogs :bow:
Richontools has great prices and they do metric ball nose mills for the cheapest price I have seen. Thm: Thanks again for the link.
Getting tools from the UK is no hassle, I prefer it to the US these days.

No progress on the steam engine today, but plenty on the laminating together a jarrah bench top for the kitchen.
The timber was cut and planed 6 years ago, and has been "seasoning" since if you know what I mean ::), It was second hand and 20 years old when I got.
SHMBO has the thumb screws on now, as she is tired or the "tempoary" MDF bench tops. (already replaced them once) :hDe:

Cheers,
Phil


Why not put a sacrificial piece of granite under neath it like wood workers do with wood when drilling to reduce the break out/ tear out?

Ron
 
Glad to have been of help Phil.

Their other cutters, the two and four flute ones, are perfectly acceptable as well, not to the very highest standards, but the cost of them, including the tungsten ones, put them into the realms of true disposable cutters. I have a complete set of their round nosed cutters, and they are certainly well worth the money and cut very well indeed.

I was tipped off about the Richon site by another modeller when I was searching for small imperial cutters, and ever since, I have placed an order each month, as I find more items I can use in the shop.


Blogs
 
Blogwitch said:
Glad to have been of help Phil.

Their other cutters, the two and four flute ones, are perfectly acceptable as well, not to the very highest standards, but the cost of them, including the tungsten ones, put them into the realms of true disposable cutters. I have a complete set of their round nosed cutters, and they are certainly well worth the money and cut very well indeed.

I was tipped off about the Richon site by another modeller when I was searching for small imperial cutters, and ever since, I have placed an order each month, as I find more items I can use in the shop.


Blogs
Thanks for the review Blogs... Those prices makes a set of metric cutters a lot less painful and they've got lots of decent-looking diamond tools for stone/glass work.
 
Got a little bit of time tonight between completing the Jarrah kitchen bench top and starting the over head cupboards.

I had stripped all the gear off the mill to do some more core samples for work, and didn't feel like putting it all back again just to clean up the edge of the flywheel. Yep I'm a lazy bugger. ::)
I slung an old fitted double bed sheet over the table and the column to keep everything covered.

I was going to hold the fixture I had made for spinning the flywheel on the mill table with a clamp or such, but then I remembered I had some 5x5x20mm rare earth magnets.
rocker011.jpg


They worked really well for holding the fixture in place while I turned the flywheel against the cup disc by hand.

rocker010.jpg


Fear not, the sheet was further away than it looks in the picture and the disc is a smooth 600 grit. :hDe:

rocker009.jpg


I used a few more magnets to hold the V block in place while I put a 45° chamfer on the edges.

rocker012.jpg


After that I used some 40um and then some 0.5um diamond lapping compound to finish the sides of the flywheel. After a quick buff it looks alright.

rocker008.jpg


There will be a bit more of a break before the next installment. Probably the cylinder block.

Cheers,
Phil
 
One you can use to get those holes "polished" is to use some clear varnish. If you sand one of those plastic watch faces to remove the scratches with some fine sandpaper, the varnish will make it nice an transparent again so maybe it will also work on stone.
 
I've done the same with a wipe of thin epoxy. Worked great for places that weren't getting a close inspection.

Thayer
 
Noitoen said:
One you can use to get those holes "polished" is to use some clear varnish. If you sand one of those plastic watch faces to remove the scratches with some fine sandpaper, the varnish will make it nice an transparent again so maybe it will also work on stone.

thayer said:
I've done the same with a wipe of thin epoxy. Worked great for places that weren't getting a close inspection.

Thanks Noitoen and Thayer, That's just the information I needed. :bow: :bow:
I had noticed how the finish looked perfect when it was wet, but I didn't put two and two together.

Cheers
Phil
 
Just remembered another detail I've seen at our local stone works. When they are polishing the also use a small torch to heat the stone a little to rub some wax on it. You should try these techniques on some scrap pieces to see the result. ;)
 
Back
Top