A small boiler

Home Model Engine Machinist Forum

Help Support Home Model Engine Machinist Forum:

This site may earn a commission from merchant affiliate links, including eBay, Amazon, and others.
That's a great looking boiler, I have only built steel ones with copper flues expanded in.

Not too be a nit picker but one should be cautious about putting linear scratches (scribed lines) in any pressure vessel, especially thin walled ones such as this. I would use a really light touch and try and polish them out later.

This being said with a lot of experience in designing high pressure cylinders and doing a fair amount of hoop stress and fatigue analysis calculations, its amazing what a notch factor like a sharp line does to the strength.

Brian
 
:) ;D

Hi again,

FB.....Citric acid pickle should really be made up by disolving as much as possible into a given volume of water, i.e. saturated solution, this helps a great deal in minimising/eliminating bacterial growth...the normal cause of slimey growth.
I use it myself for most small jobs (I use sulphuric for larger boilers) and find it lasts for months without any degredation from such growths.

You can add a very small capful of domestic bleach, when you make up a new brew...and contrary to the opinion that adding an alkaline substance to an acid (the argument states it ruins the pickle) I have found it does prevent any bacterial growth..... and the very small amount of bleach does not make very much difference to the overall acidity.

Copper and bronze will generally remain in an annealed state (they do gradually return to half hard but over a very long time), the down side is...they are very much more prone to surface damage whilst in this state....I would normally just anneal when required.

Another good hearth material, and very cheap to buy, is thermalit building blocks (obtainable from any good builders merchants) they measure approx 18" x 9" x 4" and are quite soft and easily cut with an old panel saw and half a dozen can form a very good hearth.
My own hearth is made/lined with these and I also have a few broken up ones to pack around items to retain the heat. The last ones I puchased, about a year ago, were less than £1.00 each...very much cheaper than refractory blocks.

Brian, welcome to the mad house.....

Yes you are quite correct and I would not anticipate, or encourage this practice on a high pressure boiler.

The marks applied in this case can, and will, be polished out during the cleaning process prior to silver soldering.

The hoop stress calculations for this boiler shell returned a max safe working pressure of around 96psig allowing a safety factor of 8 and as it will only be used at around one third of this (35psig) there is an added safety factor within the design.

Having said this, deep score marks can, and do, create serious problems so thanks for bringing the point up, as it can very easily be overlooked.

Keep happy guy's.

Best regards,

SandyC ;) ;) ;D ;D
 
Oh buns FB, this shows how out of date in todays world of central heating I am. In the good old days of gasfires, Cannon made a model called the Gasmiser. It was an "Open flame" type heater, ie. no glass front and had three "White" fireclay radiants to radiate the heat. On dissassembly these bits slid out, and being a tigh-- FRUGAL Yorkshireman, not only could bits of Brass from the gas fittings be salvaged, but the radiants could be carefully broken and used as a base and be packed round "constructions" to be silver soldered.
As Sandy says, Thermalite blocks are easily obtainable but under NO circumstances use normal house bricks, They E X P L O D E when attacked with heat.
Regards Ian.

BTW a couple of points you may remember from the "Other" forum, "Sno-paque" or Typewriter (do they still have them??) correction fluid is an effective "Stopper" when Silver Soldering, and don't try to silver solder a joint that's already been soft soldered.
 
Hi

Thanks Sandy, Eric, Ian

Tonight I carried out the little mod on the bush jig suggested By Sandy. Popped them back in the lathe, drilled and tapped 4 BA and a couple of little brass screws.

DSC06915.jpg


DSC06916.jpg


I decided to fit the bush for a water injector, not because I intend to fit one on this boiler but at some time I will have to look at making a water pump and this little boiler would be the ideal test rig to try it out.

DSC06921.jpg


Dug out the old bar-b-q from the bowels of the garden shed and set it up. The base and the 2 sides are cast iron, the back is stainless steel. I threw a 12" rule in to give an idea of size. I think this would make a good brazing hearth. It needs better legs to bring it up to working height. I'm sure I've seen some fire bricks in our local Wilkinsons store. What do you think.

DSC06917.jpg


I'll be back in a while with todays questions.

cheers

 
Hi

I Have been thinking about the number and layout of the conduction studs. The studs will be made from 3/16" dia phospher bronze. 4 rows of 9 should do it I think. There are 2 ways of doing it as far as I can see. The diagram below shows the 2 different layouts. Which one looks best do you think?

boilerheatingrodspacing.jpg


Cheers

 
What's wrong with Copper FB? (give us a casual name)Seems an awful waste of PB. Green, saving the planet an all that cr4p like Gordon keeps telling us. IMHO 2 for burner heat circulation.
Regards Ian.

PS. Despite using the frame reduction box at the top of the screen, yer photies are big over here an all :big: :big:
 
FB,

As requested, here are the shots of my brazing hearth.

I actually got the firebricks from a friend, and cut the side pieces to fit the full sized ones on the bottom and back.

Then a bit of angle iron was welded up to make a frame for them to sit in, with risers on the bottom to keep the heat away from my bench, in fact they don't even get warm, and side carrying handles for moving it about.

hearth1.jpg


hearth2.jpg


hearth3.jpg


hearth4.jpg


The last shot shows it filled with broken firebricks. These are used to reduce the internal size of the hearth and for blocking up the parts. It saves a lot on gas by getting the area reduced, you are reducing the amount of heat lost to air.
This one has been in continual use for the last 15 years.
It is based around a commercial one I saw in a magazine, and this one cost nothing compared to the exhorbitant price they wanted for the advertised one.
There is a resident spider that lives in the left hand riser, and he moves out when I start to do a bit of work, but he is always there next time I come to use it again. His little webs about the place keep the flies out of my coffee.


John

BTW, as Ian says, you would get better heat transfer by using copper for your spikes.
 
:) ;) ;D

Hi Guy's,

FB,

As John and Ian have correctly stated, copper studs will have a slightly better heat transfer rate, but there really is not much difference with such small components.

Also, since you have already got PB for the stays, it saves having to buy another material just for the studs.

The main reason I suggested PB is that it will stand up better to direct (not in contact with water) heat from the burner...copper will tend to burn away more readily...but there is not much in it.

As for layout...YES I would go with version 2..... better heat transfer pattern...also better from a shell stress point of view.

The old BBQ should make quit a good hearth, but don't make it to much higher.... you will often need to get over the top of things when soldering....such as a larger boiler standing on it's end..... it is better to not have to over reach in this sort of case, or worse still having to stand on a box to get a better view. ;) ;) ;)

John,

Very nice small hearth.... even better that it is portable....not sure the spider would agree though.....ENFORCED holidays etc. ;D ;D ;D....Dodgy landlord and all that.

Keep happy.

SandyC ;D ;D ;D
 
Sorry John & Sandy, my comment re Copper was purely from the frugality point of view, but yes more efficient for heat transfer. Due to the relatively low pressure that THIS boiler will be subject to (Given the history of the shell material) wouldn't a heat source capable of burning the pins be a little over enthusiastic? I've a feeling that this one is only a practise session for FB.

Given the fact you've got a bent wing John, are you making SWMBO cart the hearth about for you?? :big:

On the frugality stakes, on the turbine build You mentioned the possibility of trying Titanium for the rotor John? Now you've got some SERIOUS Friends if that came as a gift. Having said that, my SWMBO has Titanium locking knobs on her cross stitch frame. ::) :D

Regards Ian.
 
Sandy,
As you most probably know, my shop is getting a full refurb. Spideys' house is in fact in a new location since I took the pics this morning. So he is officially evicted. But he is quite within his rights, with my blessing, to take up any new non mobile residence in my workshop. I'm not a bad landlord really. Cheap rates and easy to get on with.

Ian,

Yes, I do have an associate who gets me bar end lumps of titanium, and when I was in the aircraft business, I had a lot to do with it when fitting fire integrity systems around engines, but haven't had a lot of machining experience with it, just cutting, drilling and rivetting. So one thing I must try out sometime in the future.

BTW, the bent wing is just a slightly curved one now.

So enough of that, don't want to hijack this great post.

John
 
Hi,

Ian, my name is Rich, I'll sign off with that from now on. I thought it was normal to use nick names so just carried on that way. I'm using PB for the studs cos in my ignorance I thought all boiler fittings had to be. I'll know better next time. (reminder to self, ask more questions)

Can't understand why the photos look big on your screen? They fit fine on my Pc. Is anyone else having trouble viewing photos?

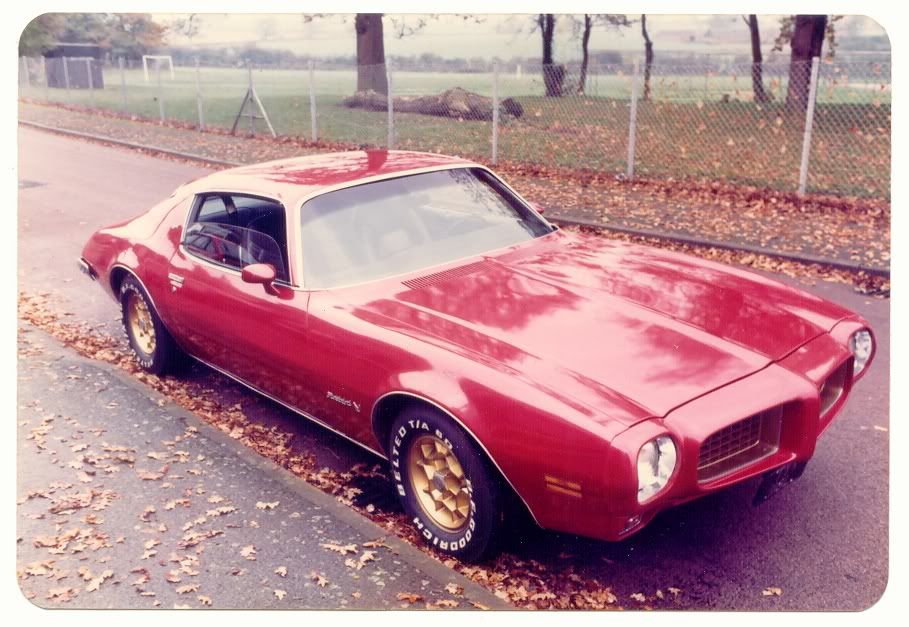
This is why I chose the name Firebird. In the good old days before wife, children, mortgage (not necessarily in that order) this was my pride and joy.

firebird.jpg


Anyway, back to reality and on with job in hand.

John, Nice hearth. I think my old barbie will do me nicely for now, the sides fold down and the back slides out so will make storage a lot easier. Just got to get some bricks.

Sandy, thanks again for the info.

Today I turned a bush for the safety valve. Drilled and tapped 5/16" x 32. In your plans Sandy you specify 5/16" x 26? I assume 5/16" x 32 is OK?

DSC06922.jpg


Started to turn the dome. On Sandy's plans it gives 7/8" as the dia.The bit of PB I have is just over 1" so I have left it at 1" for now, seems a shame to turn off all that lovely PB and it will give a little extra depth for the tapped holes. Centre drill to start then increase drill size up to 1/2" to about 7/8" depth then used a 1/2" end mill to flatten the bottom of the hole to a depth of 1". Transferred the chuck to the rotary table now set up in the horizontal position to drill the holes for the steam outlets. I haven't turned the 3/4" boss on the bottom of the dome yet. I haven't figured out yet the best way to make the 3/4" hole in the top of the boiler barrel where the dome will fit. (Hint Hint, any ideas). I'll turn the boss to suit the size of the hole.

DSC06923.jpg


DSC06925.jpg


cheers Rich
 
:) ;D ;D

Hi all,

FB (RICH),

Nice car.....but a family is much better....would be nice to afford both though.

On second thoughts...with the price of fuel now...I think the wife and kids is cheaper to run.....JUST. ;D ;D ;D :-\

Boiler...

The 5/16" x 32 thread will be Ok, it will just limit your selection of available safety valves.
Not many are made with this thread...most of the ones most suitable for this size boiler ar 5/16" x 26, however, A. J. Reeves (Reeves 2000) do one for 2 1/2" Gauge loco...part number 40/303 which should be suitable.

Blackgates Engineering also do one for the 'Tich' loco which is also suitable.

Failing that, you will have to make your own.


Dome and large hole.....no problem making the dome a bit larger in dia, other than you will have a bigger overhang at the barrel interface. (due to curvature)
If you also make the stub bigger in dia, then you may need to increase the length of it a little to ensure it goes far enough down to close off the sides of the hole in the barrel.

As for drilling the hole..... several options: -

1, best option...drill out as large as you can and then use a boring head (if you have one) on the mill.

2, you could use a hole saw (metal cutting) and clean up with a file.

3, Chain drill and file. (very slow and tedious)

4, use a step drill (available from screwfix) great tool.... does 4 - 22mm in 2mm steps.

or a combination of the above.

I use a combination of 1 and 2 for most of my large holes. (hole saw followed by boring head)

Whichever you choose...remember to clamp the barrel down to the work table.

Just a few ideas.

Keep happy.

Best Regards

SandyC  ;) :) ;D
 
Nice to meet you Rich ........... nice motor too .... 8)

My nickname is "vehicle" related too, but best to save that for another thread. Anyway, again .... many thanks to all for this most informative thread, ..... and .... Circlip, 8) ta for the silver soldering tip too.

Cheers

Dave
 
Hi

Wife and kids cheaper to run? Hmmmmmm. Must look into that one.

I had thought of making the safety myself myself. Perhaps we can go into more detail on that later on. I have a set of step drills, 4mm-32mm that I bought from our local Aldi store for £10.00. What is grocer doing selling engineering tools? I don't know.

DSC06927.jpg


DSC06928.jpg


I haven't used this type of drill before so I think some practice on a bit of scrap before I attack the boiler barrel will be in order. Any tips on their use would be appreciated

I'm heading into a period of inactivity in the shop so there will be few if any posts after this one for a while. At work saturday morning but Saturday afternoon we are going to the Melton Mowbray and district model engineering society annual show at Whissendine,should be good. Sunday we are going to Alvaston castle in Derbyshire. Its billed as the amateur radio society annual show but there is a lot more. Computers, hardware, software, electrical components, car boot etc etc. Its a good day out. We have been going, Julian and I, for a good number of years now and usually come home with loads of 'very useful stuff'. Next week I'm on a course. As soon as I get back in the shop I'll get posting again.

Rich
 
Rich,

I use exactly the same set, they are great, and indispensible at times.

The major tip when using, mark inside the flute of the size you want to drill with marker pen, and drill very carefully until that bit is in the hole, you can very easily go too far, they are that efficient.

I have used them for short range reamers rather than boring, mine cut perfectly on size.

John
 
Hi

We went to Whissendine on saturday after noon and had a great time. Good bunch of blokes. Ok so far. Sunday we travelled to Derbyshire to Alvaston castle only to find the event had been cancelled. Massive disappointment. Monday and Tuesday had to travel back and forth to a course I had to attend. Got home Tuesday night, the wifes bumped her car. Went into my shop to seek some comfort and chill out a bit. Carried on with the steam dome and promptly drilled and tapped 3 holes in the wrong place. They are not centred. You can see when I milled a recess that its out. What a silly fellow I said. Never mind. Well something along those lines.

DSC06943.jpg


It won't affect the function of the dome and as this is my first boiler I may use it to save on valuable materials. I don't know though, it doesn't look right. I'll leave it at the back of the bench for a while.

I bought some thermalite blocks and made a brazing hearth out of the old bar-b-q. Its quite surprising how easy it is to cut them with a rip saw.

DSC06951.jpg


DSC06952.jpg


DSC06953.jpg


DSC06954.jpg


Thats all the progress I've made this week. I've got to strip the bathroom this weekend ready for the builders to move in Monday so I doubt I'll get much futher for a while. SWMBO has to be kept sweet!

Cheers

Rich
 
How on Earth did you cut that so straight with a hand saw??

No matter how much care I take to mark out my cuts and line up the saw, I always end up going off mark.
 
Rich, Those holes are supposed to be of center ,right? ;) ;)
You definately redeamed yourself with the hand saw.

Tim
 

Latest posts

Back
Top