5C Collet Chuck from LMS

Home Model Engine Machinist Forum

Help Support Home Model Engine Machinist Forum:

This site may earn a commission from merchant affiliate links, including eBay, Amazon, and others.

vascon2196

Well-Known Member
Joined
Oct 2, 2009
Messages
1,026
Reaction score
312
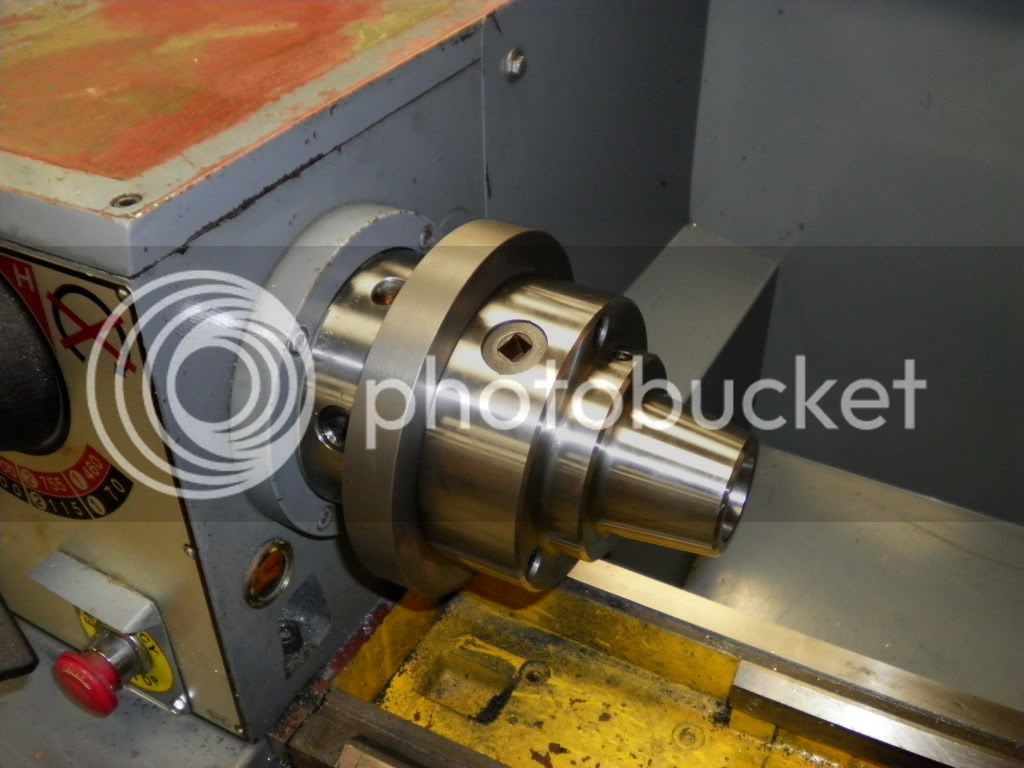
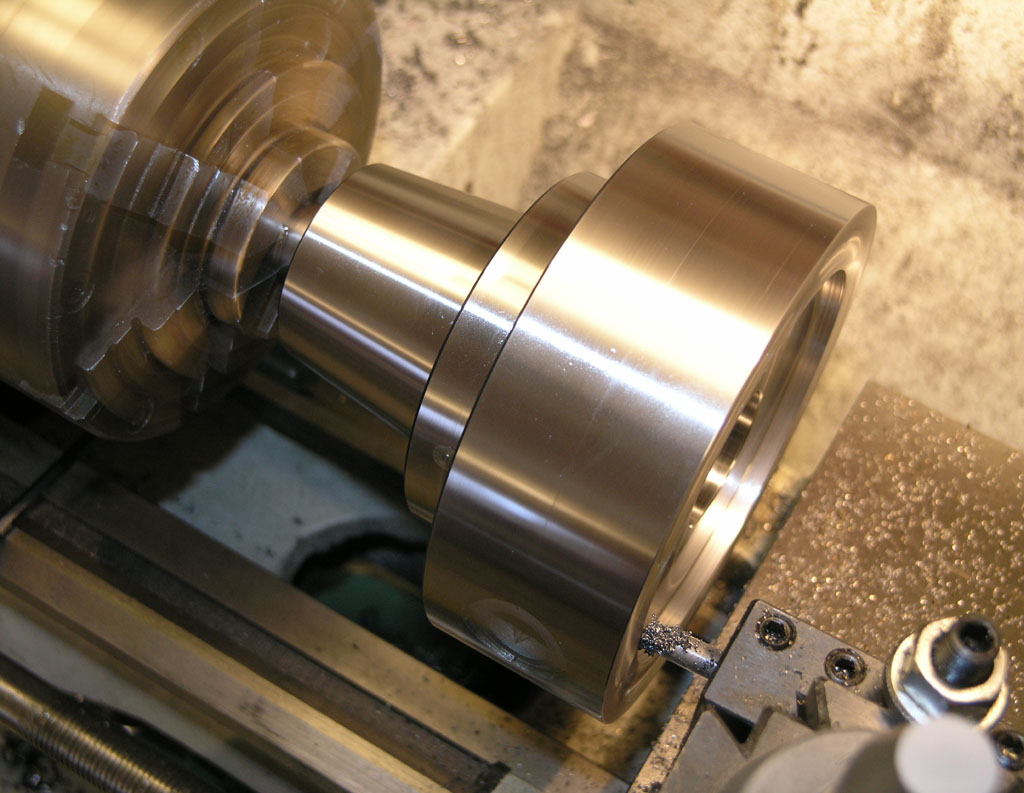
I purchased the 5C collet chuck from Little Machine Shop along with a D4 adapter flange. I mounted the adapter flange onto my lathe and machinined the male pilot for the collet chuck. I know it was a nice fit because I had to tap the chuck on with a ball peen hammer all around until it sat flush. I then transferred the mounting holes from there.

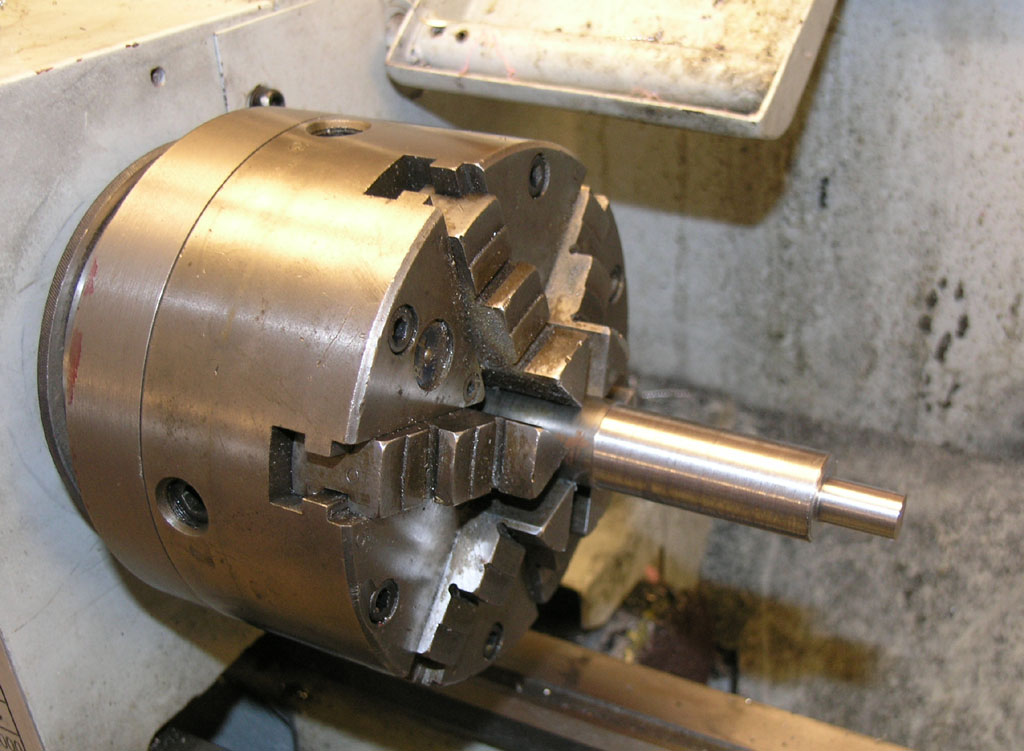
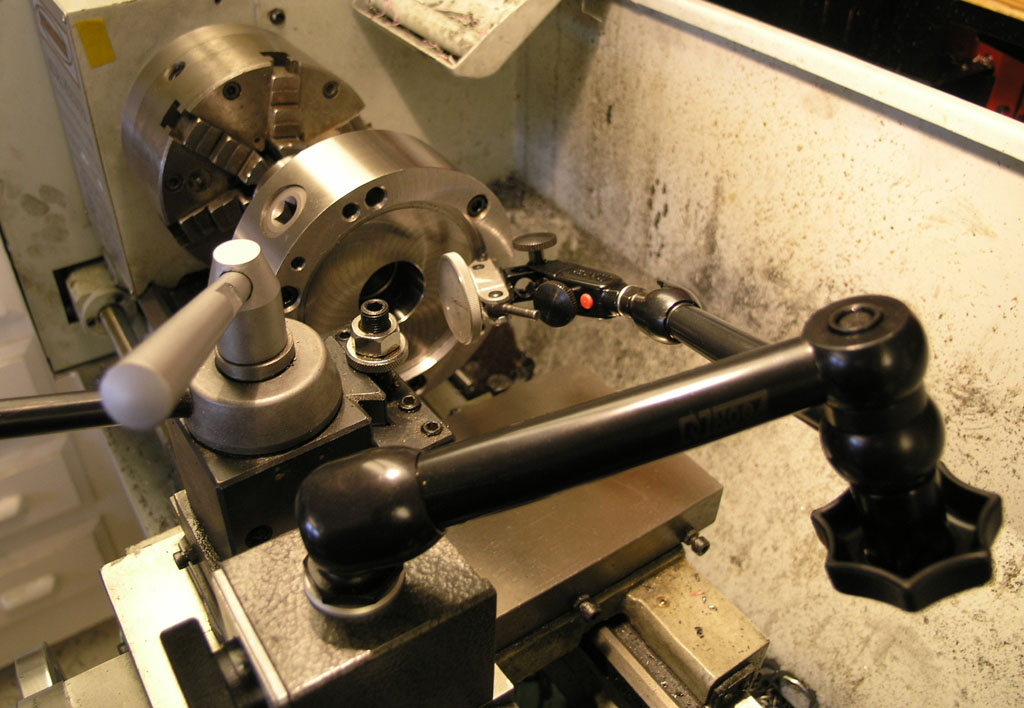
I installed a 5C collet into the chuck and tightened. The part is running out like crazy! What did I do wrong? I went as far as taking the chuck off and machined the adapter flange again and the same thing happens.

The lathe is used by first years engineering students and it has been beat up a bit but you should see the runout.

Has anypne experienced this problem with the LMS 5C collet chuck? Any suggestions?

Thank you,

Chris
 
Chuck up a stem of the stiffest piece of tool steel you have a collet for, and chuck the 5c chuck/stem into a 3 jaw so you can measure the runout on the back of the 5c mounting face.
 
This is standard fair on these cheapo 5c collet chucks. I have now fitted four of them to various lathes.

There is no use checking your lathe as the machined backplate has already taken the discrepancies out of that.

I have tried every which way to get these chucks correct, and the only method I now use is to regrind the collet nose taper with a toolpost grinder.


Bogs
 
Hi Chris,
I do indeed have some (frustrating) experience with that piece of "precision" engineering.
It may wobble like mad, but all is not lost if you are prepared to fettle it. Are you sitting comfortably this might take a while?

The first thing to do is check your back plate is sitting true. Put a DTI on the face, and then tighten the cam locks again, whilst tapping the face with a rubber hammer. Then check run out, even my genuine old but unused Colchester back plate needed this treatment, before cutting the register. If your back plate does not have a line scribed for correct alignment do this before proceeding any further, no point getting the rest right only to fine the back plate is on the wrong studs.

The second thing to do is NOT rely on the register, machine it undersize so you can tap the chuck true. This seems a common problem (the register not being central) with chucks, both cheap and medium quality, but the ability to tap the chuck true has been a standard fix (as recommended by the likes of Commander Barker and George Thomas) for more than half a century.

The next bit is the interesting bit. One of the big problems with this collet chuck is its length, the further away from the back plate the more errors will show themselves. I shall try to explain, there are two chances for errors one is radial ,effectively the up and down runout. The other can best be described as the swash plate effect. To check which problem(s) you have, put a stout ground bar in a collet with about five inches protruding and measure runout at the collet and then at the end of the bar. It must be remembered that the end of the bar is actually ten inches from the backplate, so at the collet you are measuring runout in the middle of the bar! This means that you can have zero runout at the collet but a large one at the end, likewise at the backplate. Or you can have zero runout at the end but a large one at the collet!

You might think it a hopeless situation but don't give up yet. I eventually got might to be less than half a thou at collet and at the end of an 8 inch bar. I achieved this by painstakingly fitting the collet chuck, checking and correcting runout at the collet then checking at the end and fitting foil shims to correct the swash plate effect. Then doing the whole thing again till I got it right, I did say it is frustrating didn't I? Check again after finally tightening the bolts, as uneven tightening can upset your hard work. Don't worry that the chuck will move without a tight register, the friction between backplate and chuck is great enough.

I have done the same sort of fitting to an 80mm SC 4 Jaw on my Myford, with the same sort of accuracy/repeatability, takes time to get it right but it is sooo nice to use when things are just right!

Best of luck, if it takes time to get it right, just think of it as an exercise in Zen.
Who was it that said "infinite effort is rewarded infinitely"? well now is your chance to find out. I do wonder, though, if the expensive version is any better?
Ned
PS I note that grinding out the taper has been suggested, this action does have its merits but I think it should reserved for the last resort. Get the rest right first, grinding the chuck will only correct the collet at one end, but remember that the collet locates deep down inside as well!
 
That's awful. I thought I was lucky when I mounted my Sjogren 5C chuck on my backplate and got .0002" runout. I was going to buy a cheapy collet chuck for another project, but I may avoid it now.

Is it possible the fit was too tight and you didn't get the chuck all the way down onto the backplate?

Greg
 
Thank you everyone...on Monday I am going to check the runout as it stands. I will check the fit, the camlock pins, and every other possible issue you have mentioned.

Thanks again.

Chris
 
Interesting thing about a camlock spindle.

It is an interferance fit....or at least it's supposed to be.

The back plate locates on the taper of the spindle "JUST" before the plate comes up against the back flange ( about .002" before IIRC). If made correctly, they will both be in contact with each other at the same time. The pins only pull the plate on and bed it home.

This makes for a VERY rigid spindle mount. But the tolerances are tight here.

The specification is such that you do NOT need to remachine anything if it is made correctly. It should go right on.


Dave
 
Here is a picture just in case there is a question as to what it looks like.

EZENGINEMFGPROCESS006.jpg
 
As I said in my first post. Because you have already machined the backplate to be a nice fit to the chuck, any runout should be in the chuck itself, not in your lathe nose or mounting.

Unless you are going to be making an adjustable backplate, what you have already done, as long as the chuck is a squeaky clean wringing fit on the spigot you have turned, it will be perfectly good enough to start to true it up.

On these cheaper chucks, you will most probably find that the draw nut is not rigidly fixed, but floating slightly. That means that it is the nose taper and locating pin that brings everything into line when it is tightened up. If that nose taper is not perfectly true, that is where the runout occurs, I don't think there is much you can do if the pin is at fault in any way.

The taper can usually be seen to be ground out of true if the chuck is rotate under power at a fairly low speed. Or just clock up the inside of the nose to show if it runs out or not.

On three of the four that I did, around 0.005" was detected, on one (which had a built in D1-4 mount) it was closer to 0.015". All four ran, and still do as far as I know, perfectly true now they have had the noses reground.


Bogs
 
As Bog has stated...if the back plate fits correctly, the only alternative is to regrind the collet mounting surfaces.

Dave
 
This is how I ground up my last chuck, you could use a dremel fitted to your toolpost if you keep the cuts very fine, and make sure you dress the mounted point to true it up before use.

One thing that MUST be done is mark your lathe nose fitting and the chuck backplate before carrying out any remedial work, so that the chuck always goes back in the same position.
You should do that with all self centring chucks mounted to this type of backplate holding system.
Mount the chuck, and put a fairly large accurate bar in the chuck. Turn the chuck and clock for runout, then remove the chuck and remount it in the next register position, check the runout again. Find the one position that has the least runout and mount the chuck and mark it up in line with the mark on your nose fitting. Always refit the chuck in the same position.

Bogs

grindcolletchuck.jpg
 
If the 5C taper is decent, it's a shame to have to go back and rework with the toolpost grinder.

There is another possibility, which is that the recess on the back of the chuck is not concentric or that the flat back is not truly perpendicular to the 5C's axis. While they have a nice ground finish outside, the outside contours of mine were not even close to being true.

I have one of these cheap chucks and fixed those problems in another way:

A scrap for an arbor:

P1010405.JPG


Runout check (mine was out 0.002"):

P1010394.JPG


Note, check both the inside recess and the back edge for trueness while you're set up with your indicator. My back edge was fine.

Truing the silly thing:

P1010392.JPG


Take it easy, you don't want to deflect the chuck or you've wasted your time. Take very very light cuts.

When done with all that, I then turned the spigot on the backplate, and I put them together via shrink fit. Heated the chuck to 200F in wifey's oven, and froze the backplate. These two are not coming apart easily any time soon and they are very definitely aligned to one another!

Lastly, another thing I did as part of this effort was to mark each possible orientation on the chuck spindle with a punch point (one pip, two pips, three pips, more!). I then took all of my chucks and tried them in all the positions. The position that I measured the least runout got matching pips on all the holes so it is easy to line the chucks up with the spindle.

After all that good fun, I can get the 5C collet chuck down to a repeatable 2 or 3 tenths. Full details and more pix on my site here:

http://www.cnccookbook.com/CCColletChuck.htm

Cheers,

BW
 
Wow....you guys are great. I have a lot of thinking to do...I am not a machinist by trade so fixes like these take me a little while. The important thing is I understand what needs to happen now (at least I think so).

You know, they didn't mention all of this on the website!

Well, it's good practice right!

Thanks again to everyone. I'm going to give it hell.

Chris
 
Nice set up Bob! That got to the heart of the matter!

;D

Dave
 
Bob,

Just getting away from the main issue slightly here.

Can you explain why the US chaps seem to have a fetish for setting up loads of stresses in the finished assembly and going to undue unnecessary work by using the practice of heat shrinking chucks onto backplates.

For what seems like forever now, the golden rule has been to machine to a nice wringing fit of backplate to chuck, then bolt the two together. That seems to have been satisfactory for millions of engineers around the world, then all of a sudden, this 'interference fit' method has popped up from somewhere.

Is it a figment of someone's imagination that they would achieve better results by doing it, and so has been passed along as being a 'logical step forwards', or is this a recognised and duly seconded form of fitment in the engineering community at large?


Baffled John
 
Hey Bob,


So your chuck didn't have a back plate. and you mounted yours on a back plate that had you spindle nose ...correct?

That is how I did mine, albiet without a shrink fit, and it ran fine on my 10" Atlas. Mine is a Bison 5C.

I then mounted it on my Logan, with a new back plate, though I made this back plate "adjust true" , as I find inexpensive collets run out quite a bit.

Lyndex collets here seem to perform VERY well.....worth the extra money as I can leave my chuck alone between set ups.

Now as far as fit is concerned, getting a "wringing" fit isn't as hard as one would imagine. It takes some planning and some technique...but its not that hard..just tedious.

Dave
 
John,

I think an slight interferance fit isn't bad in this application. I know there are those here who would prefer to float the chuck on the back plate, and dial out the run-out there. On a small lathe that is fine and has worked very well for many engineers for many years. Can't argue with success.

I tend towards locating to a singular "wringing" fit if possible. It works well, and is very repeatable. Can't argue with success.

There are several thousand ways to skin "la chat noir". If it works for you .......

Can't argue with success.

Dave

PS Have a Happy 4th!
 
Dave,

Sorry, my words might have come over a little argumentative, but it wasn't supposed to be.

I had noticed over the last few years that 'sweating' a chuck on had become almost a 'norm' for US model engineers, and never having come across it before, I was wondering where the idea came from, and the reasoning behind it, as it sort of goes against established processes which had stood in good stead not only in model engineering, but in commercial circles as well, since time began.

My main concern is that with this heating/cooling method, the figures to obtain a good sweated fit can very easily be overdone, especially by someone who is not too experienced, and compensated for by cooling and heating just a little more than should be, and when the two parts are eventually brought together, very high internal stresses could be set up at the joint, which should never happen with a finely turned to fit backplate spigot. In fact, turning the parts to get the CORRECT sweated fit would be more difficult to do than turning a good fitting spigot.

I am querying it on mainly a safety issue.

Cast iron, which most backplates and chucks are made of, doesn't really like to be under large continual internal stresses, which could easily happen by doing it this way, and could in fact crack and maybe shatter at some point in the future, if not straight away as the two parts are brought together.

Not a very pleasant thought if the chuck was at any sort of speed when the highly stressed parts decided to 'let go'.

BTW, we don't celebrate July 4th.


John
 
I don't know where the idea for sweating on a chuck comes from either, John. I don't think it's "the
norm" here. It surly wasn't in job shops where I've worked, and I've done a few chuck mounting jobs.
We cut the back plate so it would barely go into the chuck recess, but you could still get the chuck off
of it when you took out the mounting screws. That's how the old heads taught me.

BTW, we don't celebrate July 4th.

I'll bet not! ;)

Dean
 
All,

Sweating them on is a new one on me too....wringing fit.....0002" interferance is about right. I still want to take it off someday!

At 200 F , delta L = L0 x Alpha x delta T

If Alpha = 6/1000000 in/in/F

L0 = 6"

delta T = 140

6 x 6/1000000 x 140 = .005" is a lot of shrink fit!

And your also right. Cast iron doesn't like being stretched beyound its tensile limit, as it has no ductility...it just breaks, but I don't think the chuck body is cast, I think it's semi-steel or steel......which is good as steel has some ductility....

But...in any case.....There it is, in all its glory.


Dave
 

Latest posts

Back
Top