Yes, now I AM in for it... It looks nice but,...
Ok. So, I can't leave well enough alone. I had to tinker with this first engine before
moving on to other projects. Running well on 6 psi was not good enough, it seems.
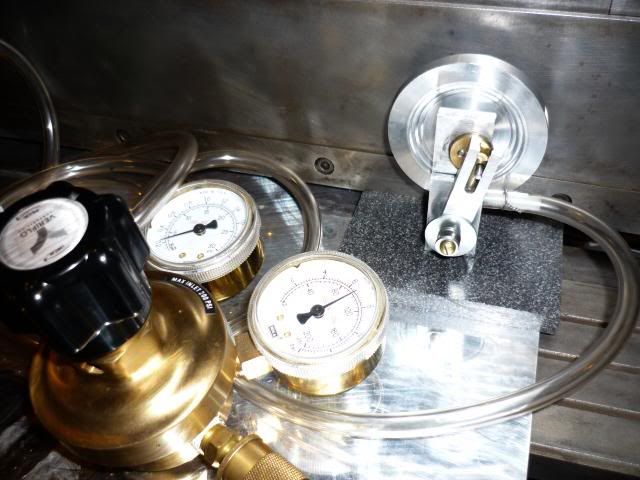
I got a set of accurate pressure gauges with a cool regulator free (from the "Craig's List" in the US) because it only could take 200 psi input and only would give 15 psi on the output, but with really good gauging. They guy that was giving it away had picked it up hoping to use it on welding tanks. His loss my gain! Now, I really know the pressure that the engine is running on.
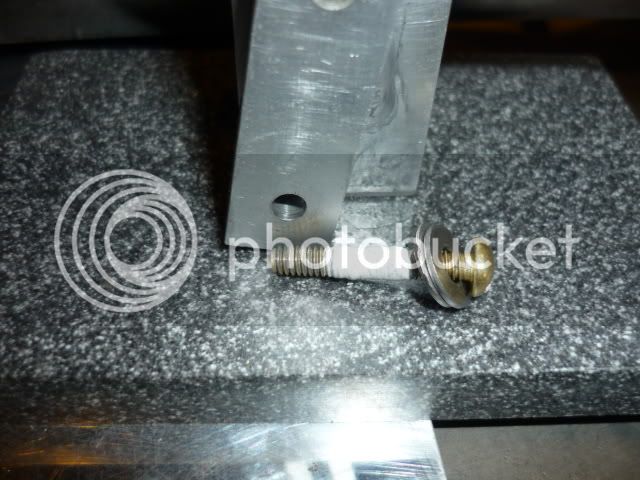
I lubed the running parts with a drop of air tool oil and added Teflon tape to the pivot screw to reduce friction. I also played around with different washers to put varying amounts of pressure on the cylinder frame face by compressing the spring. By using a larger washer right on the frame, the speed went up at any pressure setting of the regulator. It was giving a better seal to the air input on the cylinder.
Progress. It would now run down to 4 psi all day long.
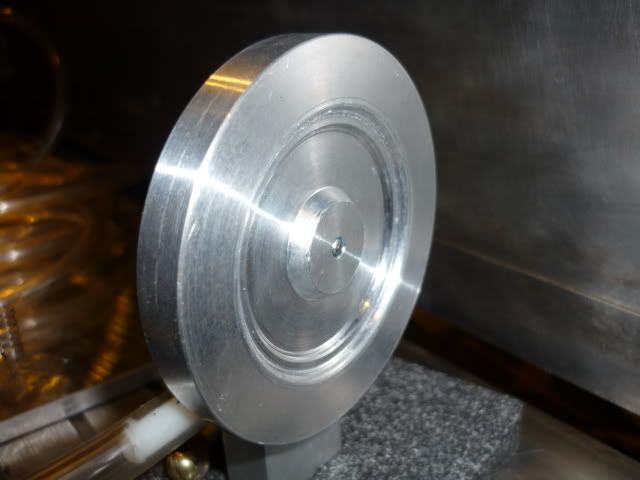
By watching the movement when the lowest pressure would stall the engine, I determined that the flywheel (which probably should have been larger like the plans) probably would be better off with some of the material taken off the middle part to put the heavy part out on the rim where it belongs. Pop the flywheel off and turn 2/3 of the middle of the flywheel into shavings.
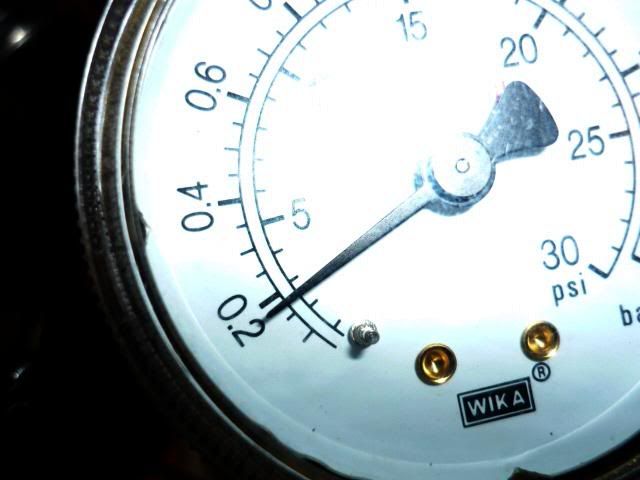
With the flywheel back on the engine, I was able to get it to run quite well at 2.5 psi indicated on the gauge. It ticks over nicely and I let it run for nearly an hour this way before taking the video (below).
<hr>
Running on 2.5 psi!

<hr>
Teflon tape on the threads of the pivot bolt.
<hr>
turned flywheel.
<hr>
2.5 psi indicated!
<hr>
New Gauges and engine running.
<hr>
Now, maybe I can keep myself from turning a full size (according to the original plan)
flywheel and move on to another project...