You are using an out of date browser. It may not display this or other websites correctly.
You should upgrade or use an alternative browser.
You should upgrade or use an alternative browser.
Whittle Aero V8 WIP
- Thread starter cobra428
- Start date


Help Support Home Model Engine Machinist Forum:
This site may earn a commission from merchant affiliate
links, including eBay, Amazon, and others.
Too true Bob, they ran up the Merlin at the Aircraft Museum down at the Port a few weeks ago. I was standing less than 20 feet from the open exhaust ports - ears rang for hours afterwards but it was worth it........Rgds - Gavin
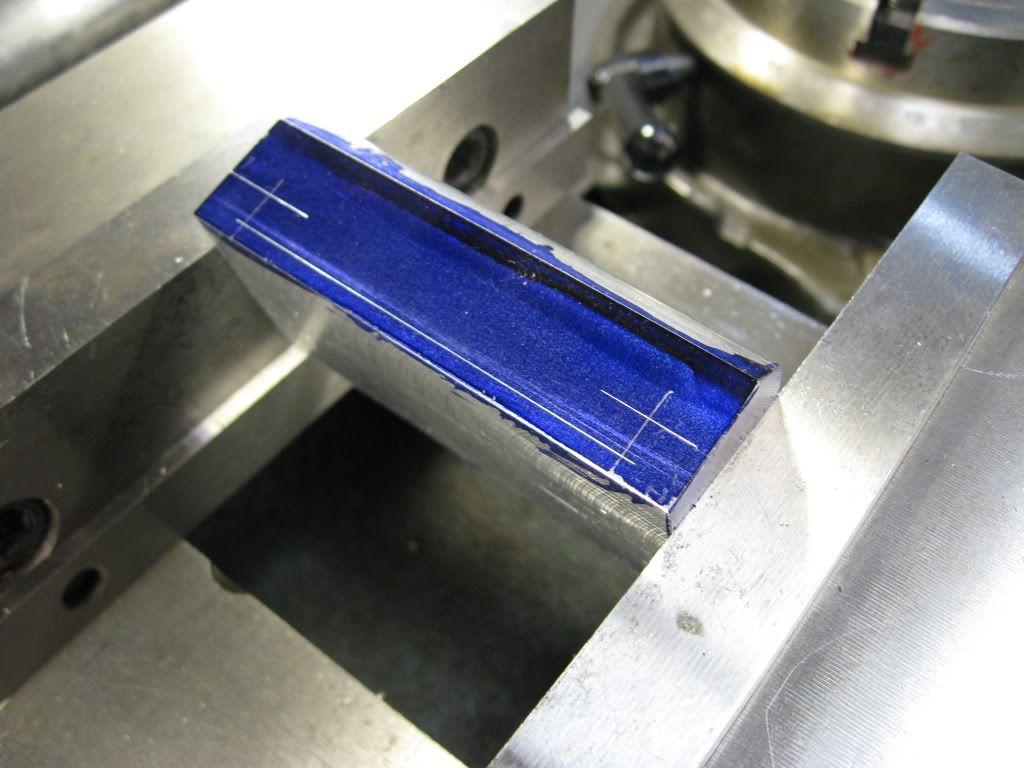
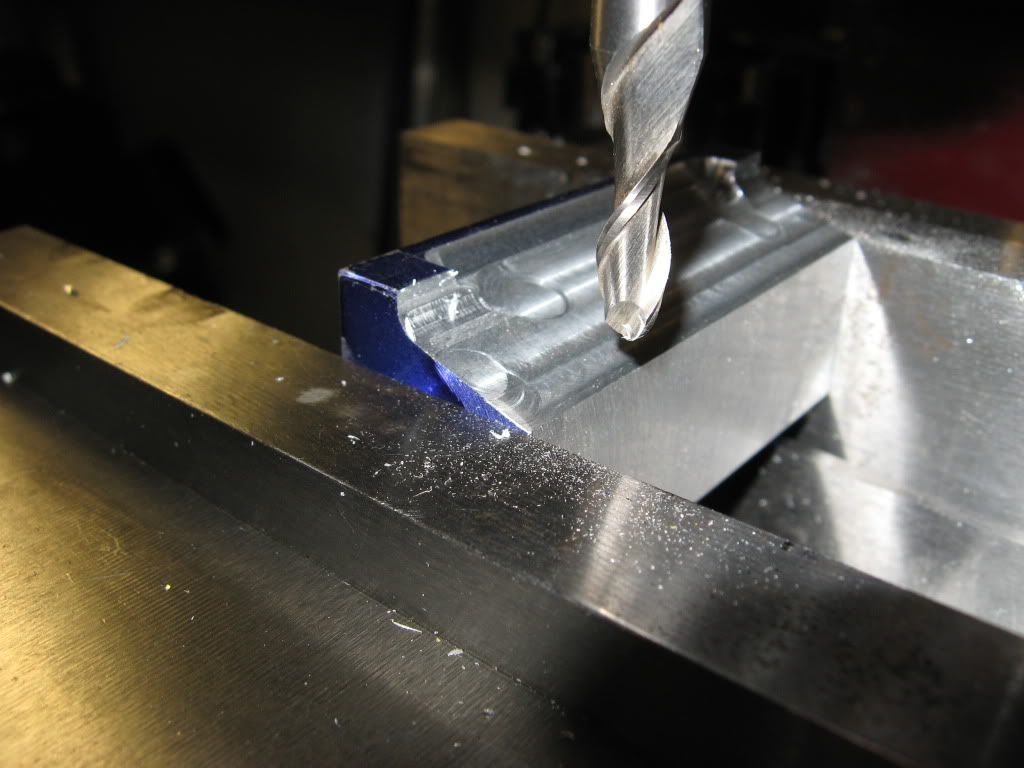
Well, got a little more done. Lower crankcase ruffed out. I wanted to drill and tap the joining of the upper and lower next. This way if I break a tap (1-72) I wouldn't have so much time into the part to remake it. It seems that EW (Eric Whittle) left out some info on the plans and in the Mag article. He thinned out the cases that to me seems like there is no "meat" to tap into. I did a fast look at the crank size and the interior of the case and there is gobs of room. He only has 6 screws holding the bottom to the top? Most engines of that era had a bolt just about every inch (silicon had not been invented yet). I searched the web for the Airdisco engine and the Air Disposal Co (whats up with that name? don't belong in aviation) But no hit on a pic or info. So if any of you surfers can help me...well appreciated :bow:.
Gail in NM you got any notes on this one?
Well anyway some pic's of Tonight's work
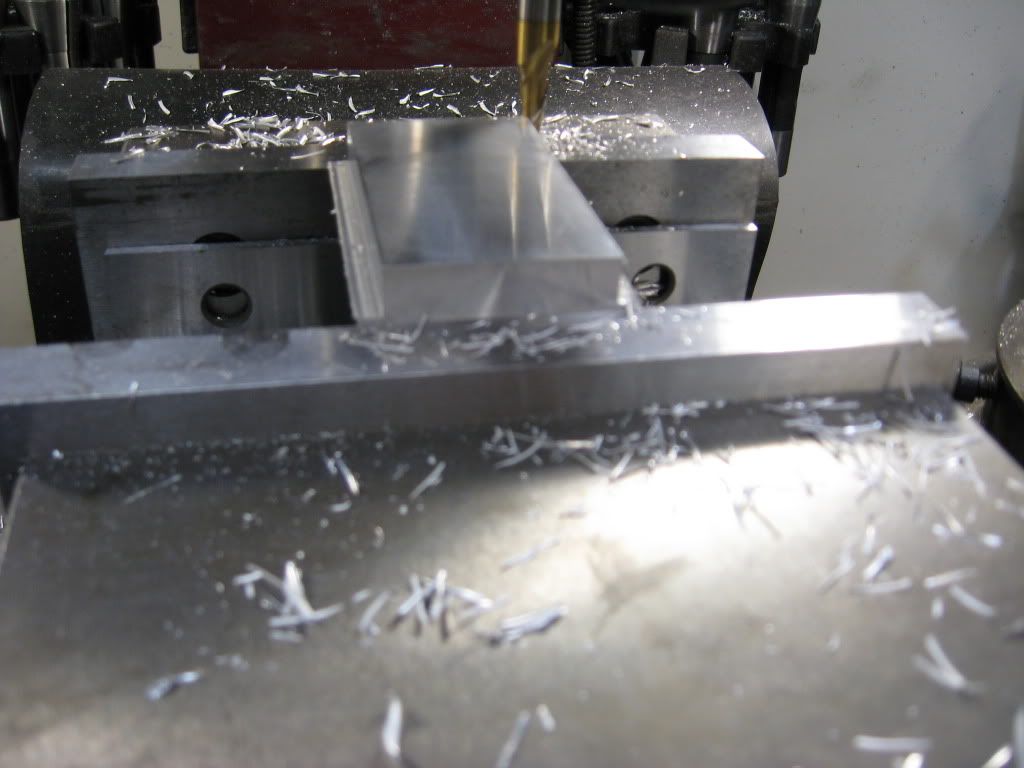
Mating surface with the upper
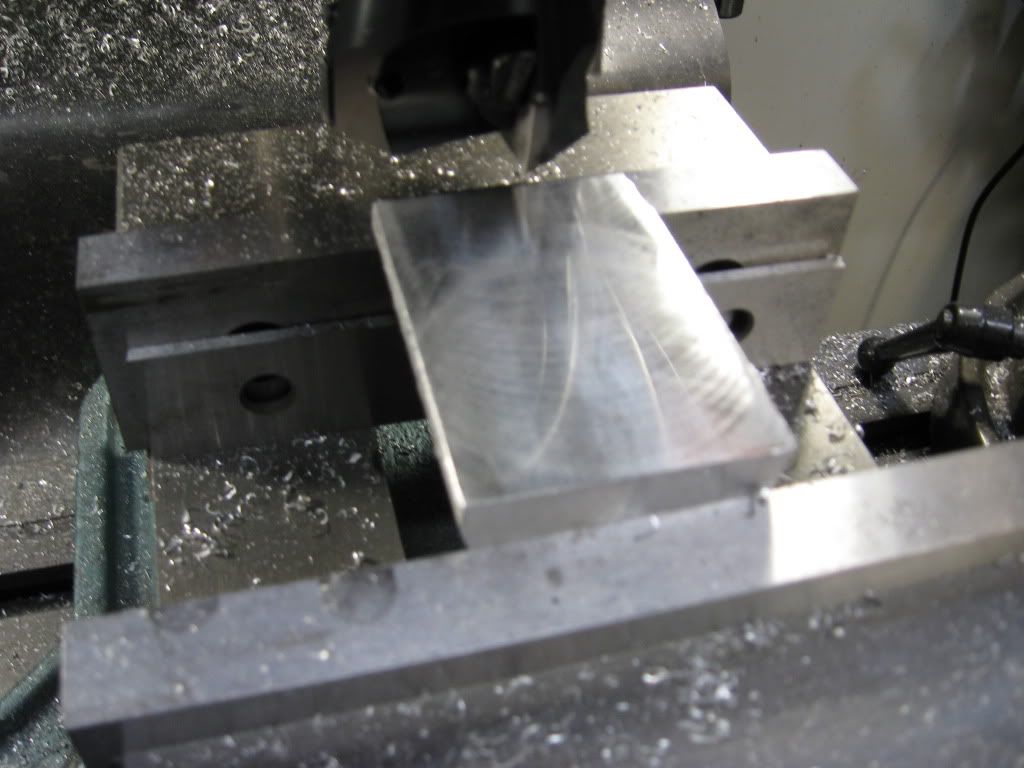
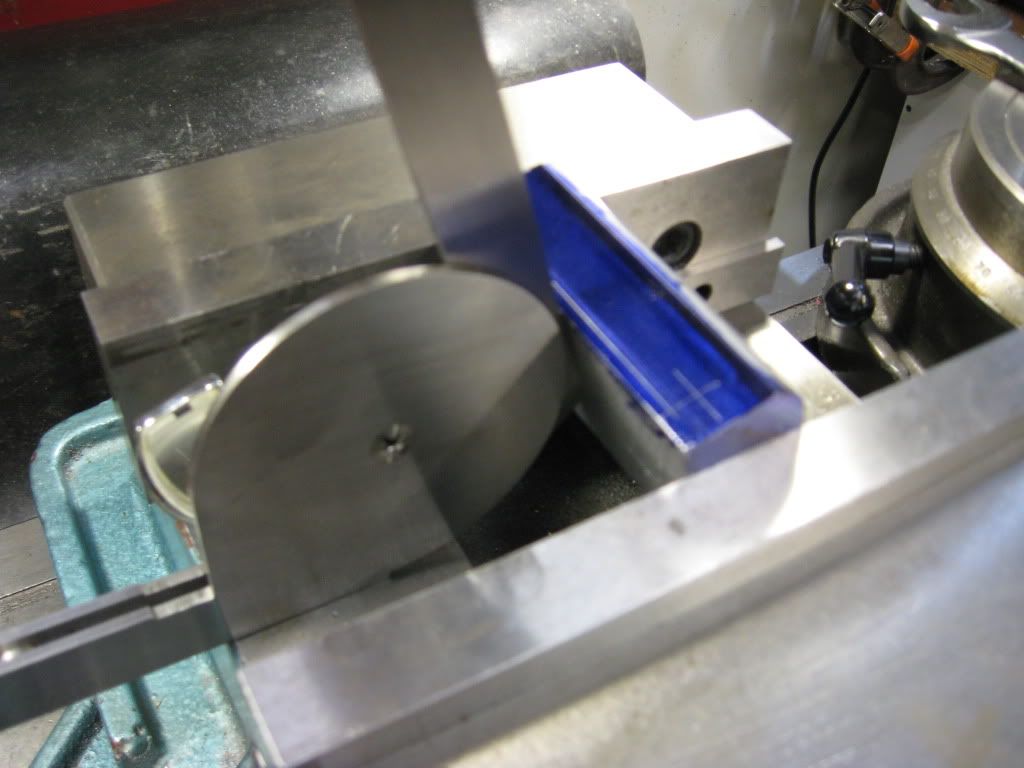
Ruffing the sides
Cutting bottom to size
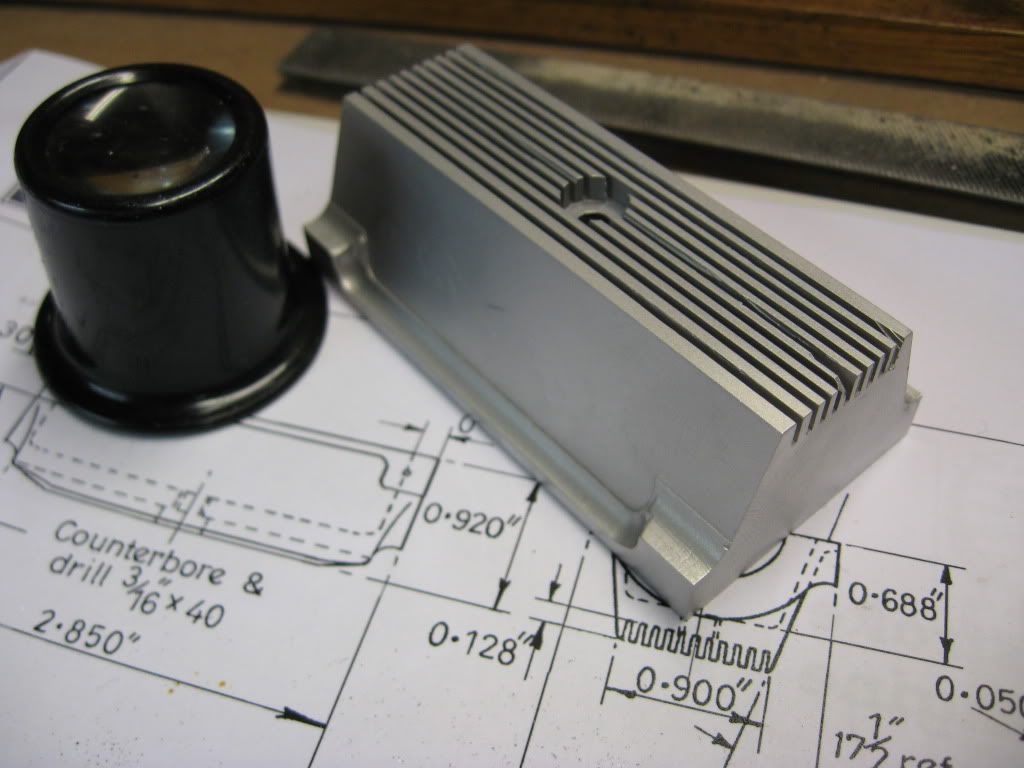
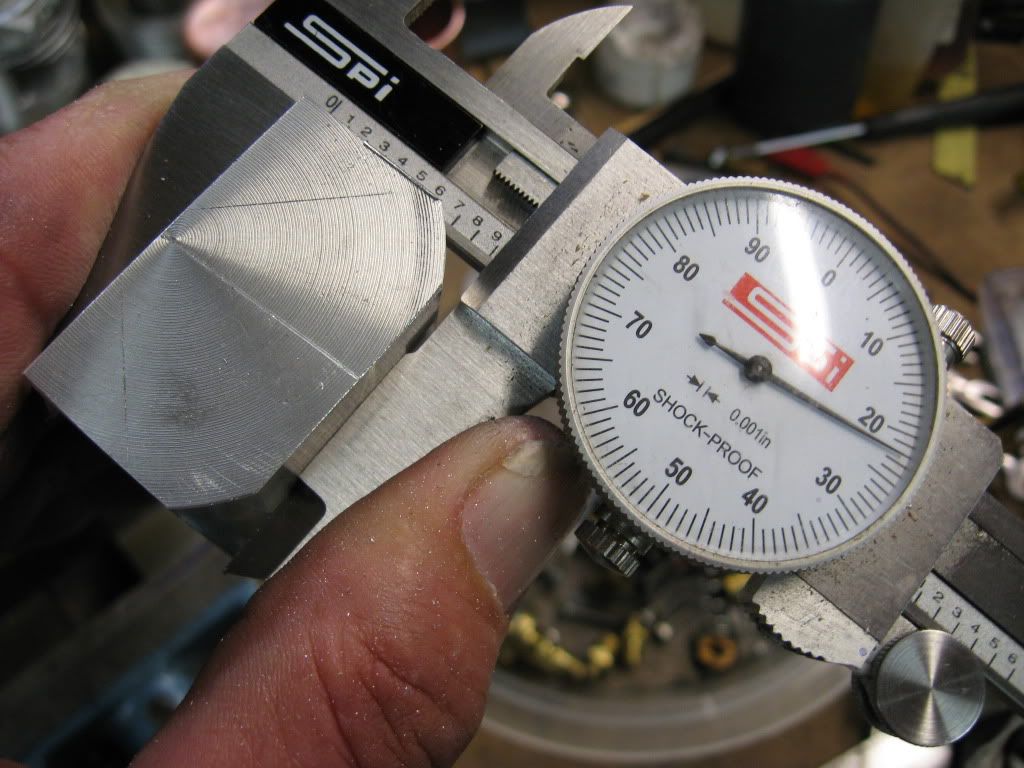
.920 on the plans .922 on the dial
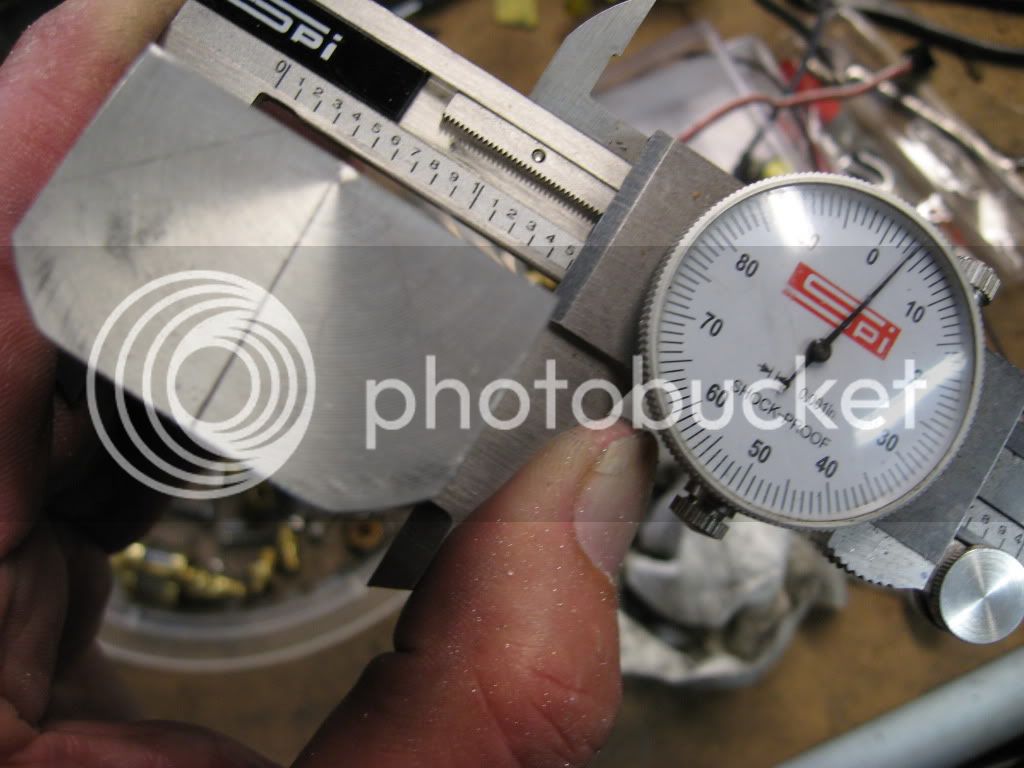
1.500 on the plans 1.504 on the dial
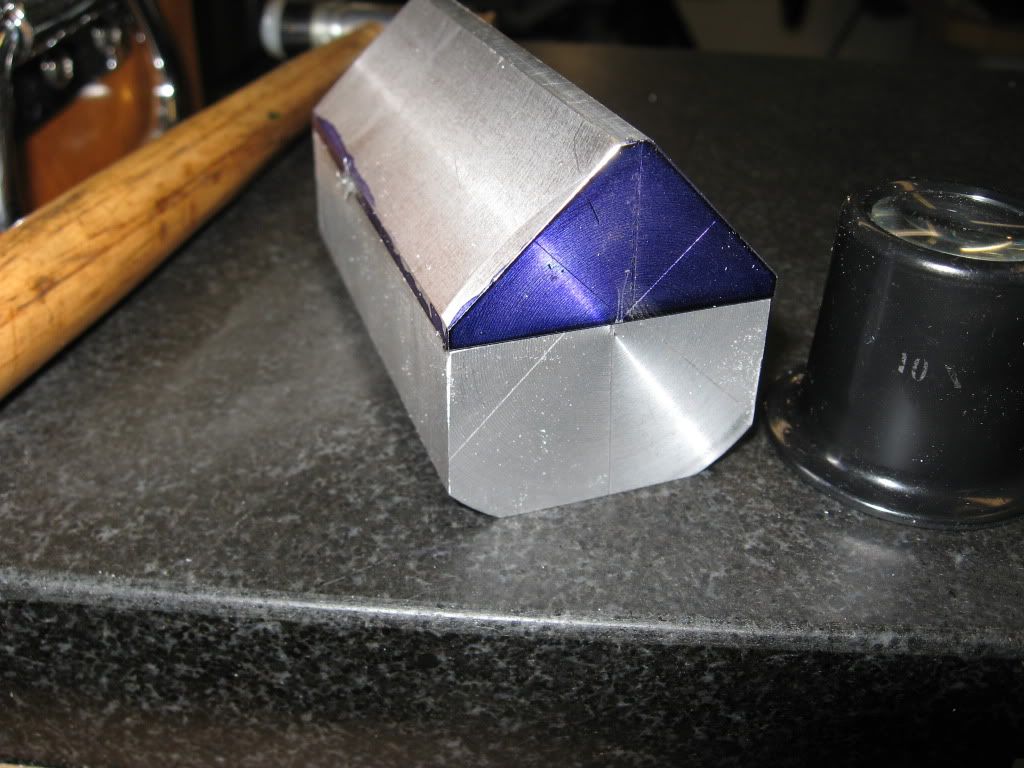
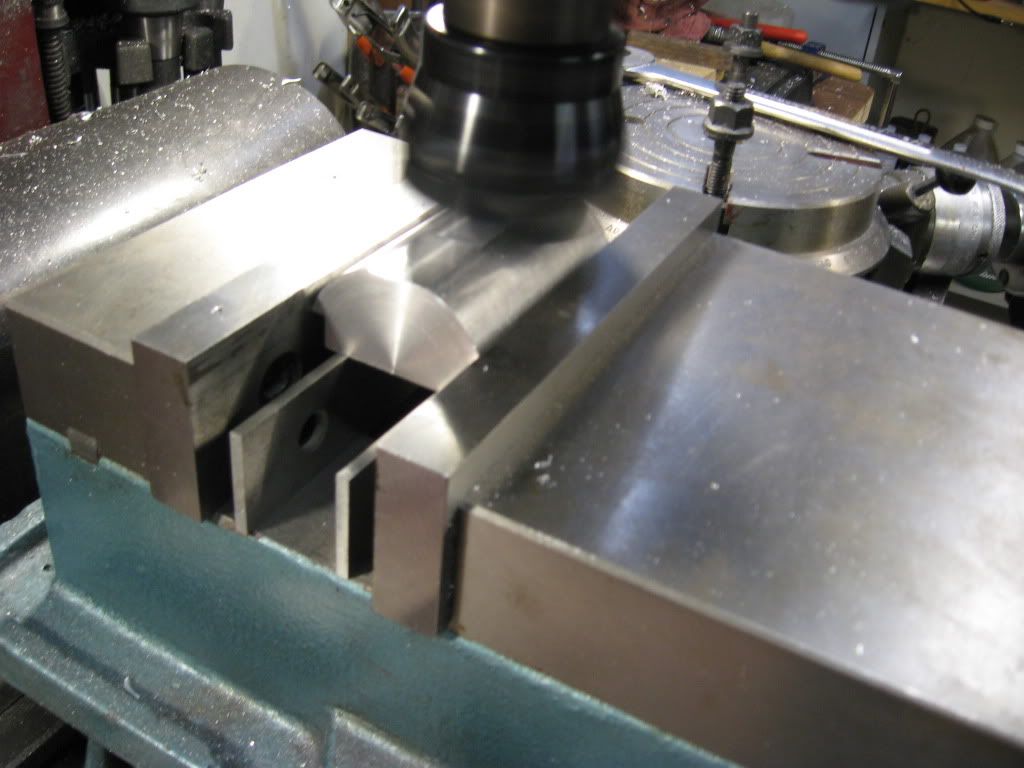
Fly cutter got a work out tonight
Dam! Have I been lucky so far.......no... no... I meant to say dam I'm good Rof}
Tony
Gail in NM you got any notes on this one?
Well anyway some pic's of Tonight's work
Mating surface with the upper
Ruffing the sides
Cutting bottom to size
.920 on the plans .922 on the dial
1.500 on the plans 1.504 on the dial
Fly cutter got a work out tonight
Dam! Have I been lucky so far.......no... no... I meant to say dam I'm good Rof}
Tony

- Joined
- Feb 17, 2008
- Messages
- 2,326
- Reaction score
- 440
Very good start Tony. Thm:
I have been following you thread since you started it, but I had an out of town model engineer guest here for a week and had not had time to respond.
Regards the screws holding the top and bottom of the crankcase together I used six 0-80 screws. I don't have any information on what the full scale would have had. I think that they are quite adequate as mostly they will be keeping a seal between the top and bottom sections. Most of the stress between the top and bottom sections will be taken by the bearing mount and the gearbox and they have lots of screws. Even then that will be mostly just to keep things a little stiffer as the crankshaft loads will all be to the top section through the gearbox, bearing mount, and center bearing.
Maybe I will get back on mine in a little while. Besides the crankcase, gearbox and front bearing mount, I only have about another 30 or so small parts made. Since our initial contact, I did get the steel for the crankshaft and have most of the other materials on hand. About a month ago I did make up the turning fixtures for the crankshaft as I plan to do it a bit differently than EW did to suit my machinery a little bit better.
Even if I started back on it now,which is not going to happen, I would wager that you will be finished first. I am only a little bit ahead of you and that won't last.
Gail in NM,USA
Thanks Gail,
I'm still working on my hit and miss (paint and bling) and my head hasn't got the 0-80 screw size fully set in. I ordered cap screws 0-80, 1-72 and 2-56's from Micro Fastener the other day. Maybe, when I have them sitting in front of me I'll have a better mental pic
Tony
I'm still working on my hit and miss (paint and bling) and my head hasn't got the 0-80 screw size fully set in. I ordered cap screws 0-80, 1-72 and 2-56's from Micro Fastener the other day. Maybe, when I have them sitting in front of me I'll have a better mental pic
Tony
Well, it's been 2 months since I played with this baby. Blinging the H/M took longer than I thought. That last 5% takes 90% of the time.
Anyway had to start to make this thread respectable again. (it was almost on page 5). Time to float it back to the top.
So here's some pics of side one of the lower crankcase (oil pan) being carved out.
17-1/2 deg. or 72-1/2 (Luv that protractor)
Did most of the "hogging" with a 3/8 end mill first (forgot to take pic)
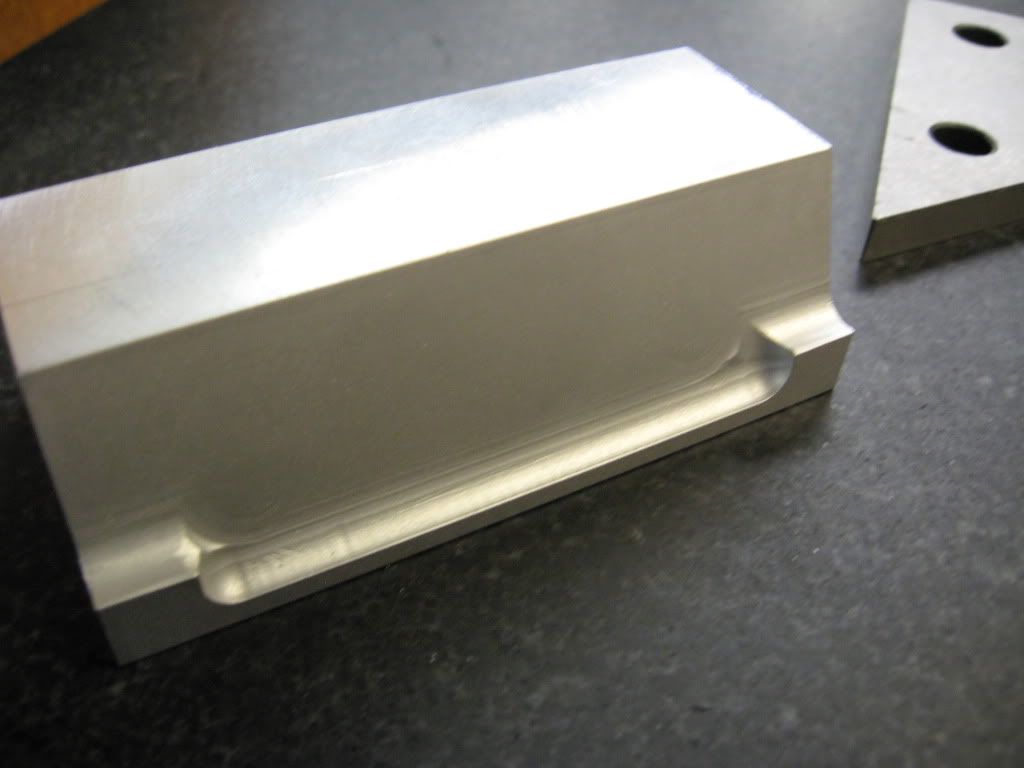
Back to the shop for the other side
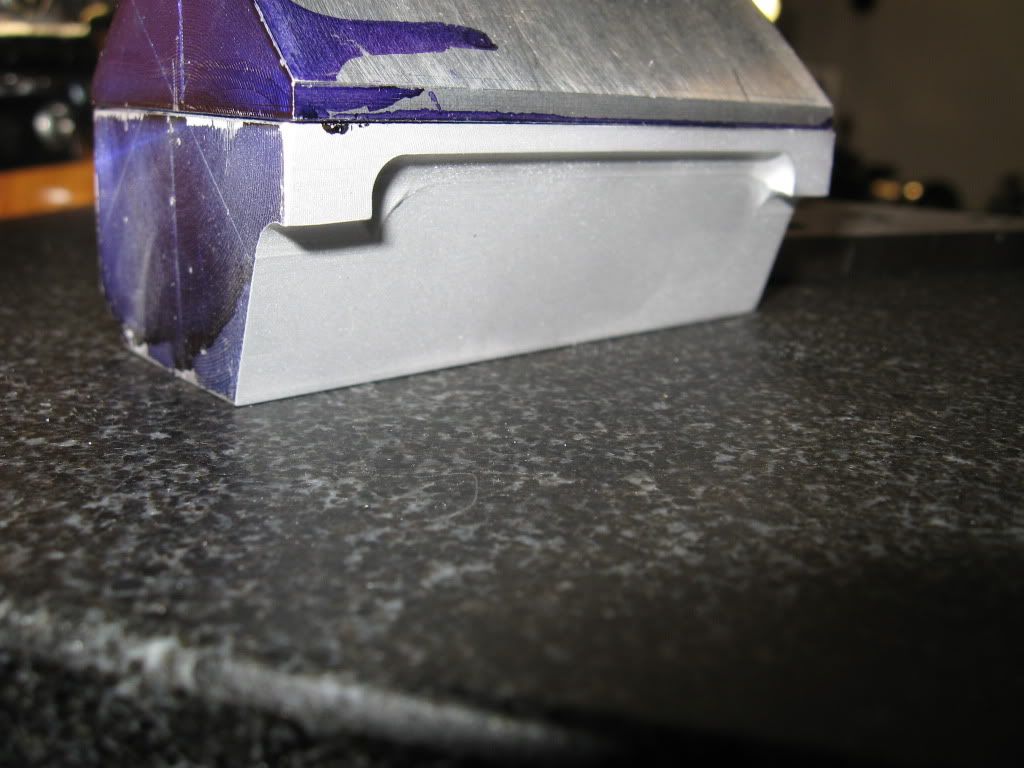
Gave it a bead blast, I couldn't tell what it looked like with all the glare
How do I clean up those "ridges" at the radii transition sandpaper? 220 320 400
Tony
Anyway had to start to make this thread respectable again. (it was almost on page 5). Time to float it back to the top.
So here's some pics of side one of the lower crankcase (oil pan) being carved out.
17-1/2 deg. or 72-1/2 (Luv that protractor)
Did most of the "hogging" with a 3/8 end mill first (forgot to take pic)
Back to the shop for the other side
Gave it a bead blast, I couldn't tell what it looked like with all the glare
How do I clean up those "ridges" at the radii transition sandpaper? 220 320 400
Tony
NOI53Y,
Take it easy on me baby :big:
I'm going the fastest I can. She's a beauty, I don't want to mess her up stickpoke
I'm working on the other side as we speak, did the set up and a few cuts
Glad you are enjoying it, because I am too, can't wait to hear the purr.
Just curious NOI53Y (November Zero one fifer tree Yankee) looks like an aircraft # Got Plane?
Tony
vlmarshall
Well-Known Member
- Joined
- Dec 28, 2008
- Messages
- 1,138
- Reaction score
- 1
That's no tail number, he's just "Noisey". ;D
Build's looking good!
Build's looking good!
Vernon.
Thanks for the complement and the info.
I live on Long Island NY I see more "Vanity Plates" on cars that make no sense while stuck in traffic. Should have known NOISEY Rof} Rof} Rof}. Being an ex pilot what the heck else would I think
Tony
Thanks for the complement and the info.
I live on Long Island NY I see more "Vanity Plates" on cars that make no sense while stuck in traffic. Should have known NOISEY Rof} Rof} Rof}. Being an ex pilot what the heck else would I think
Tony
Rof} Rof} Rof}
Yeah it's stands for noisey like Vernon said. Back when I was a little younger I was big into car audio and they were my number plates. Well they still are. Lots of people know me as noisey but my real name is Glenn ;D
Yeah it's stands for noisey like Vernon said. Back when I was a little younger I was big into car audio and they were my number plates. Well they still are. Lots of people know me as noisey but my real name is Glenn ;D