Tool Post Grinder

Home Model Engine Machinist Forum

Help Support Home Model Engine Machinist Forum:

This site may earn a commission from merchant affiliate links, including eBay, Amazon, and others.

SBWHART

Project of the Month Winner!!!
Project of the Month Winner
Joined
Jan 17, 2009
Messages
887
Reaction score
81
Hi Chaps

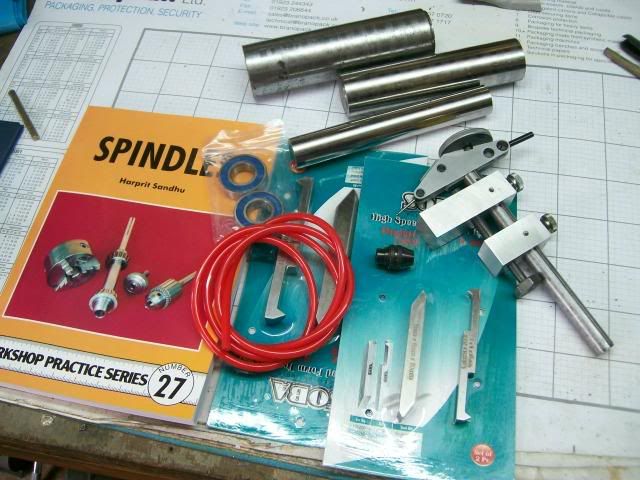
I've just finished building a tool post grinder, in the UK they are scarce as rocking horse s***, I've been on the look out for one for ages in the end I decided to make my own.

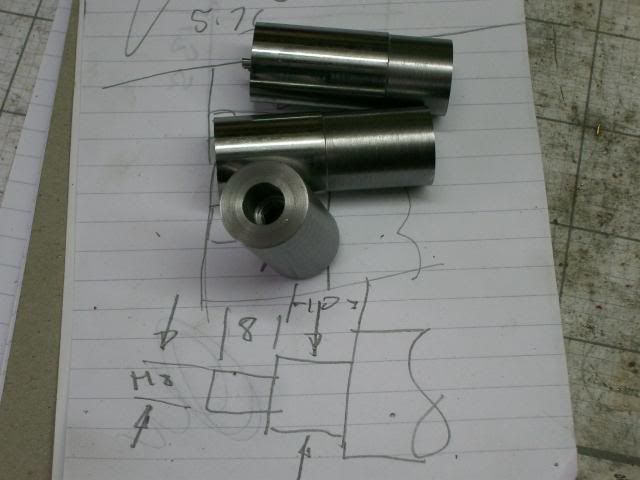
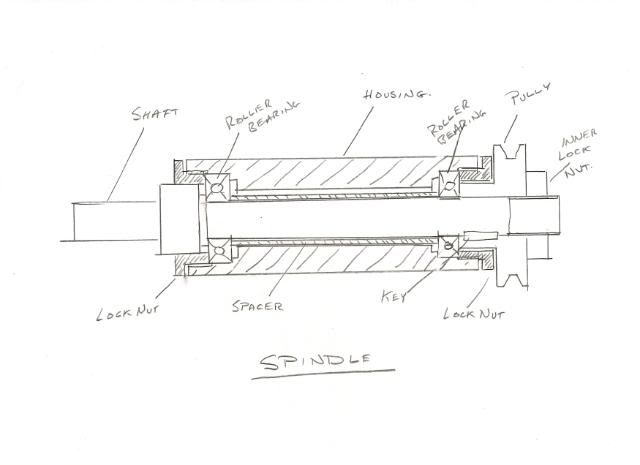
This is a sketch of the spindle

scan0001.jpg


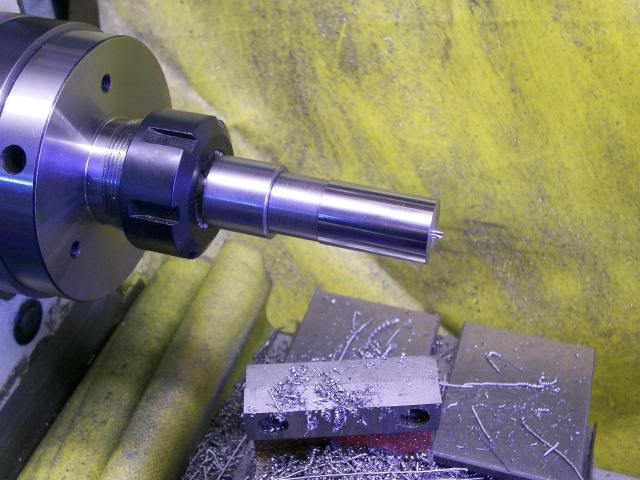
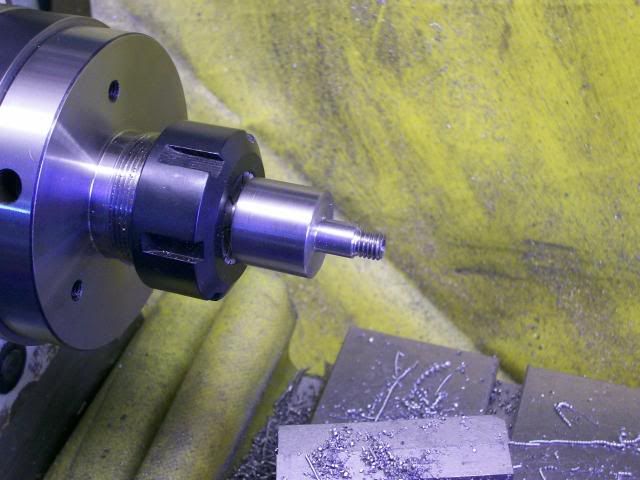
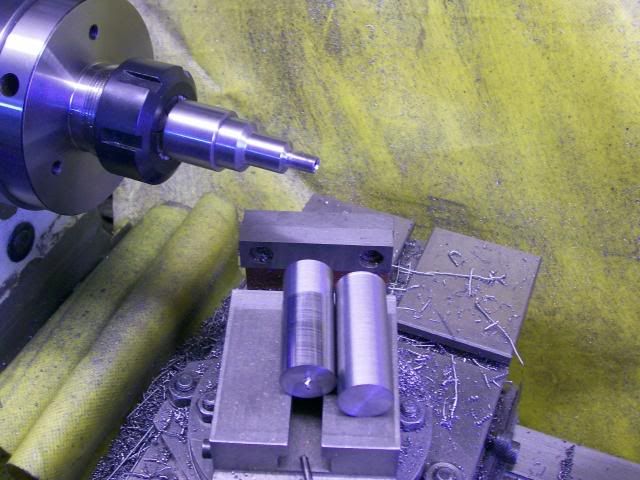
Turning the centre shaft betwen centres

100_2397-1.jpg


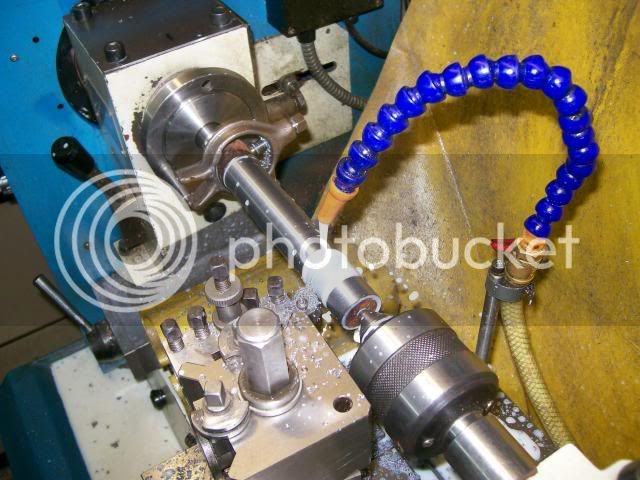
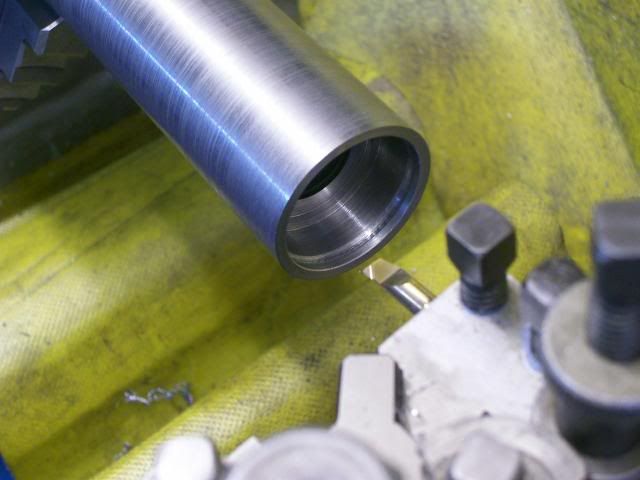
Screw cutting the housing for the end caps
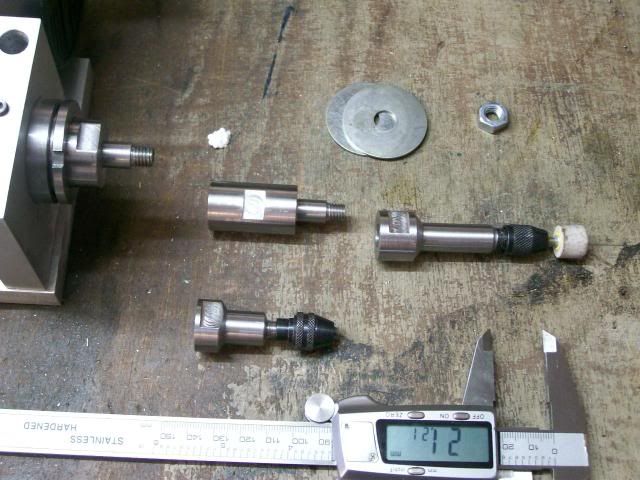
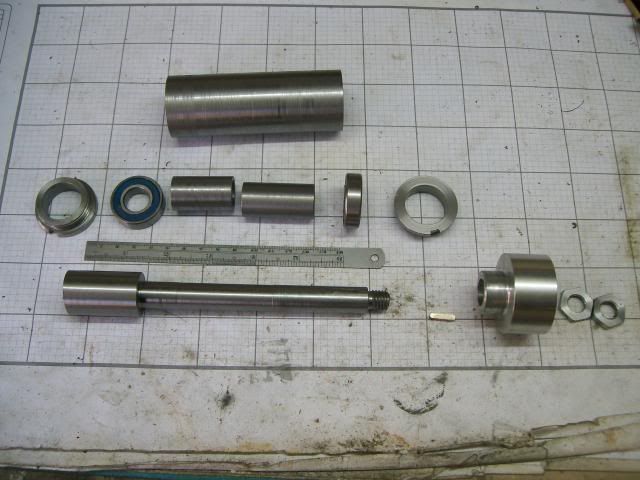
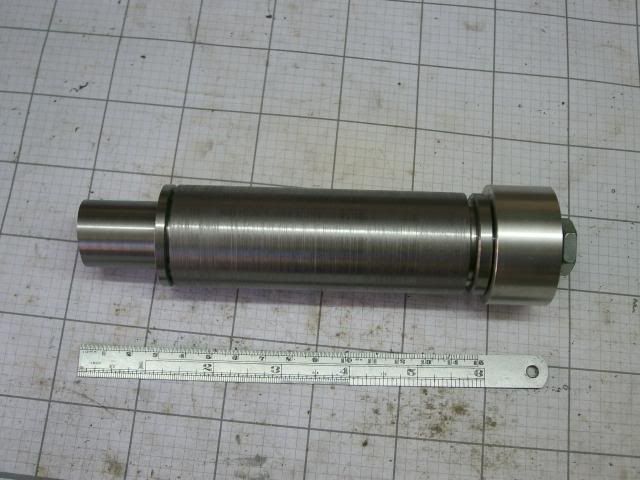
100_2383.jpg


Completed spindle

100_2442.jpg


100_2443.jpg


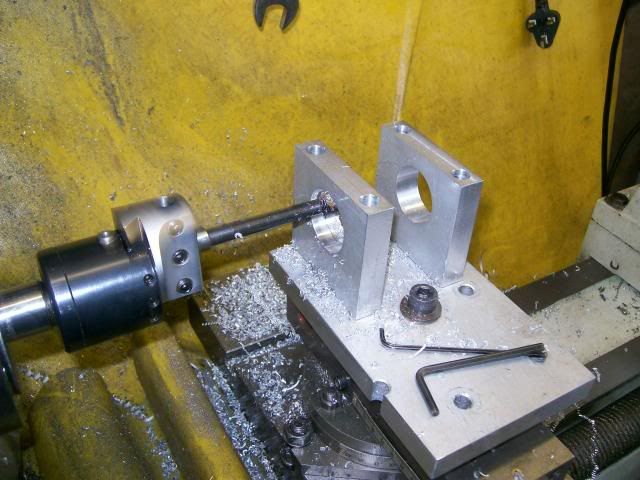
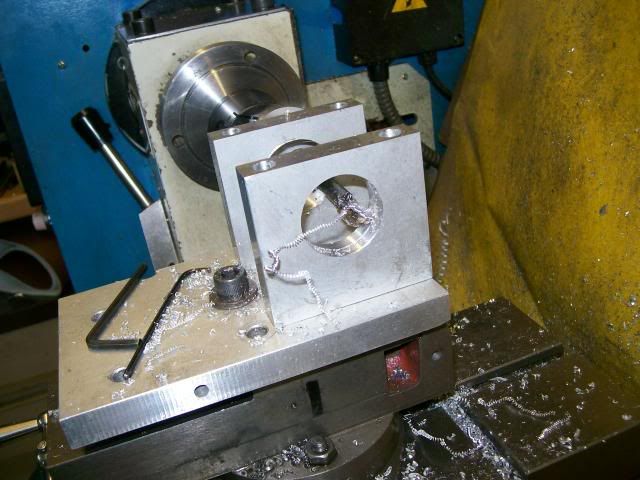
Boring out the mounting brackets

100_2563.jpg


100_2568.jpg


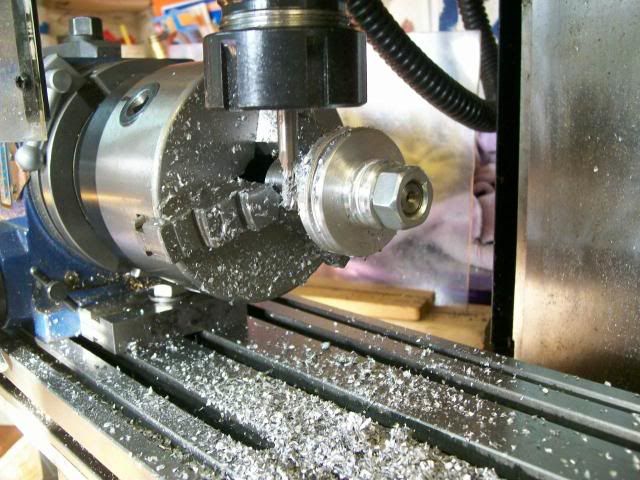
Milling the 3/16 dia groove for the belting in the pulley

100_2546.jpg


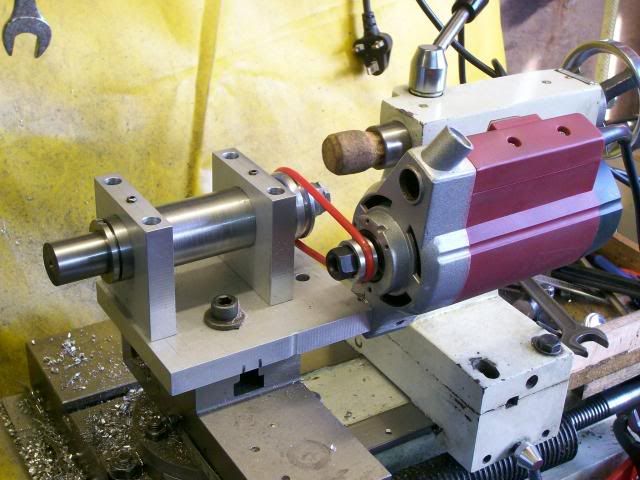
My first idea was to use a sewing machine motor to drive it but it just didn't have enough humph.

100_2572.jpg


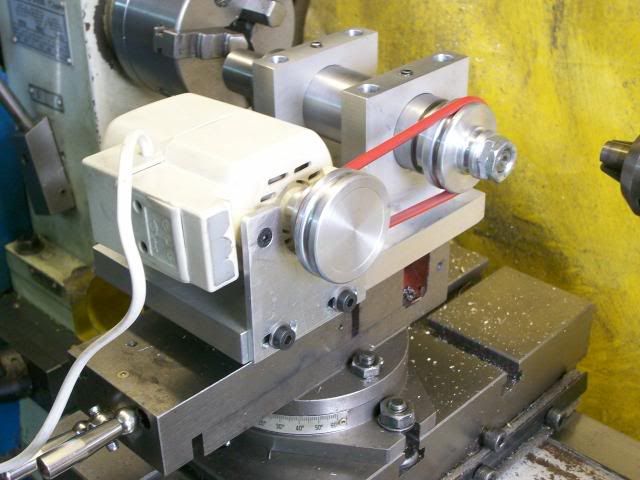
Then a friend gave me an unwanted router with a 850w variable speed motor 12000 rpm to 26000rpm.

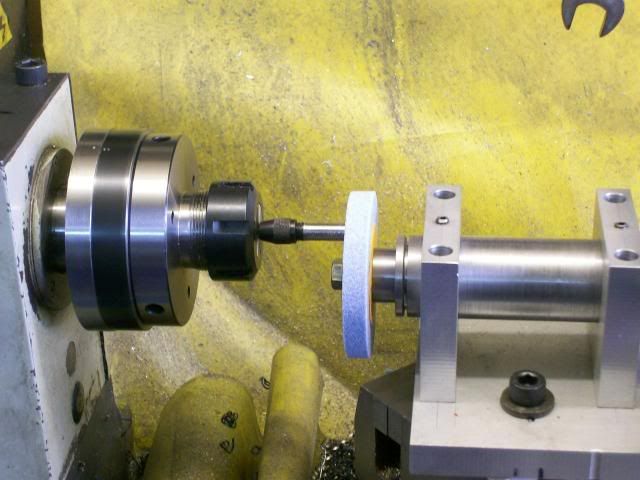
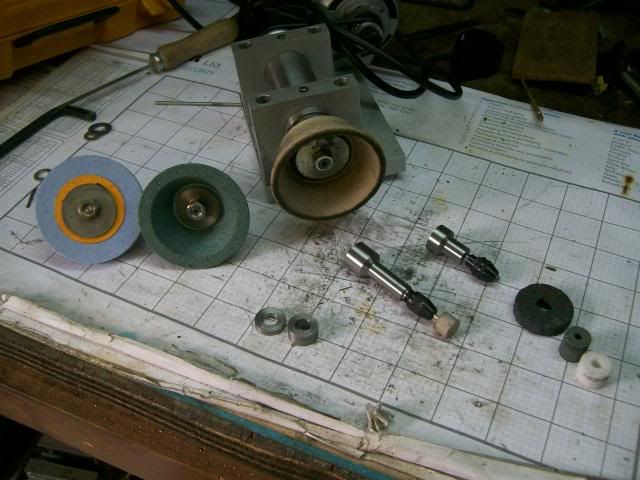
This is it mounted for use

100_2596.jpg


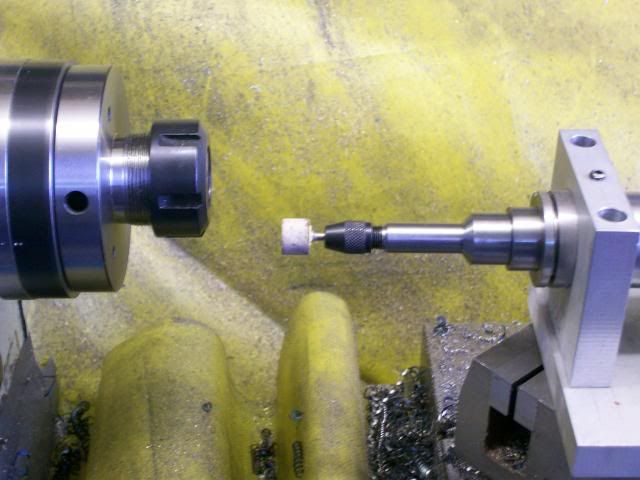
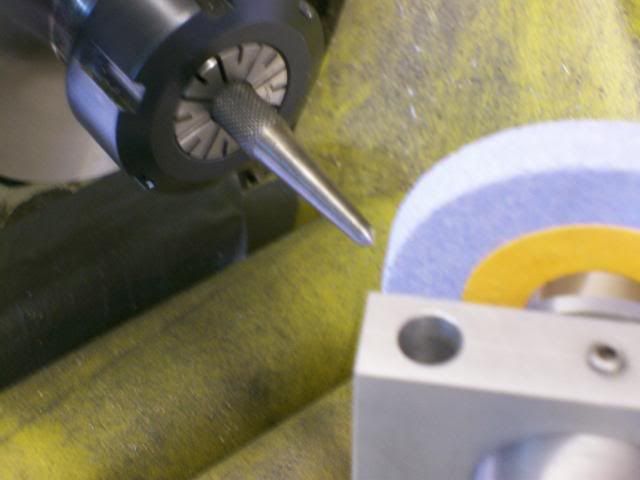
Grinding up some centre punches

100_2617.jpg


100_2618.jpg


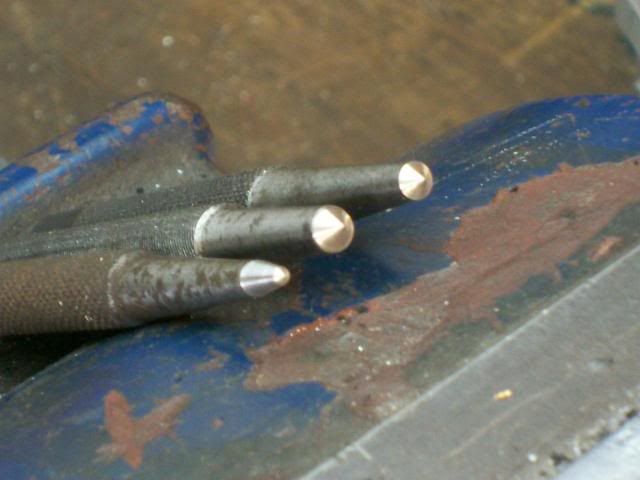
And the result, nice and sharp with a cracking finish, this will be a real handy bit of kit.

100_2627.jpg


Cheers

Stew

 
Sweet!, You are reading my mind. I've been searching for tool post grinders here, and did not find much yet.

I have been gathering parts and ideas for a few weeks now, and ideas for a lot longer.

I think I am headed more in the direction of attaching it to the dovetail tool holder. Possibly making a boring bar holder into a grinder itself. Or, attaching it directly to the dovetail. I am hoping to make one which I don't have to remove the tool post, but rather use it.

Very nice, thanks for posting this up!
 
Nice, Stew. For others who are considering such a build, imported routers are available on eBay really cheap. I bought a year ago, and even though I haven't used it yet, it's standing by for when I need it!

Chuck
 
Hi Tin

Those are the sort I was after, but no one sells them in the UK, you get the od one on sale on ebay made by Boxford but they go for silly money £150 + ish, so I was left with the only option of making my own, which I quite enjoyed doing

They are a real handy bit of kit and add an extra diminsion to your work

Thanks for your interest and comments

Stew
 
In the US the industry standard is the
Dumore
They start at $1300 for the basic models the good ones ar over $3000 so I know what you mean by crazy money.
Tin
 
Good going Stew :bow:
One of these is one of my own future projects. Do you mind if I "borrow" your plans ;)

Regards, Arnold
 
arnoldb said:
Good going Stew :bow:
One of these is one of my own future projects. Do you mind if I "borrow" your plans ;)

Regards, Arnold

Not at all Arnold I got the plans from Workshop Practice Series No 27 Ther's a pic her I did the sketch from the book and left out sizes as I was worried about copy right.

100_2353.jpg


I've a more detailed build log over on Madmodder, I've made mine a bit on the big side, as I've got ideas to use it for other things than tool post grinding I'm thinking I could use it for a surface grinder/cutter grinder but we'll have to see how that goes.

The book has plans for milling and drilling sub spindles for use with your lathe or anything else for that mater.

Have fun

Stew
 
Made a grinding quill to hold points my first attempt using a dremel chuck was a bit of a disaster it just didn't hold the points concentric and didn't wasn't consistant and just to rubbery.

For my second attempt I used a pin chuck as advised by a friend

100_2668.jpg


First job turn up another quill this time I put a 9mm drill down the end.

100_2604.jpg


Then got rid of the parts of the pin chuck not wanted.

100_2671.jpg


Then grip a bit of 1/8" silver steel good and tight with the pin chuck, then gripping the silver steel with an ER collet gently turn the end down to 9mm + 0.20mm, then gently flash down to size with the tool post grinder so that it fits nicely in the quill.

100_2672.jpg


Then supper glue the pin holder in the quill and that's it job done, the points run dead true. :thumbup:

100_2676.jpg


Well pleased with the result 1000 times better than dremil chuck.

Cheers

Stew


Once again - good going Stew :bow: - and thanks for the info!

Kind regards, Arnold
 
Ok I'm going to get on my high horse:- (high horse smilley)

When at the midlands show the other week I was on the look out for a green cupped wheel, but I was a bit p****d off that none of the suppliers seemed to sell them with the paper discs, these disc are relay important for two reasons it should tell you the type of wheel grit size bond hardness etc and the maximum safe speed of the wheel, and its important for safety reasons and the security of the wheel that are between the wheel and the clamp washers.

Her's a pic of the green wheel I bought and the card washers I've made for it along side a UK manufactured white wheel correctly supplied with washer with all the correct info on.

100_2677.jpg


So the massage is USE PAPER WASHERS TO MOUNT GRINDING WHEELS

I'm off my horse now

Some of the wheels I want to use have a bore larger than my spindle, so I made some bushes for them along with some clamp washers:- its good practice to use washers that are the same diameter so you get even clamping on the wheel

Her's a pic of all the kit to fix a wheel, Spindle I made an extension to the spindle with a male and female mouting so that mount a wheel further out) Washer, Paper washer, Wheel with bush, Paper washer, Washer, Nut.

100_2679.jpg


And this is my collection of wheels and quills.

100_2683.jpg


Cheers

Stew

 
Some really cool stuff here.

But, I'm still not picking up how your are arboring all this stuff up. The last pic, for example, you have wheels, and cups, and the pin vices, and the wheels are on individual arbors, but I'm not seeing any tapers, or draw bars, or collets to suck them in, nor can I see the back sides of the arbors themselves...

Would you be so kind to explain what's going on on that end of the shaft for me? I can only think there must be a draw bar through the shaft, but, if there is, what is centering the wheels, etc...? I'm looking for things like a taper on a mono set arbor, but on the pin vices there are none... confused.

I'm missing something here..
 
Hi

I turned a male fitting on the end of the spindle that consists of a plain register diameter and a thread. I can use this in two ways to directly mount a wheel like this

100_2672.jpg


Or with mating female fitting like these

100_2598.jpg


Mount collet chucks etc to take points.

100_2676.jpg


Or using a female fitting ------ male fitting to extend the spindle out to
and mount other wheels.

The part on the left of this pic is female/male fitting

100_2679.jpg


There is no draw bar, grinding is unlike milling or drilling where you have high cutting loads, with grinding you only take light cuts on hardened parts to bring them to size and to achieve a good finish. You need to keep thing concentric thats why you use of the register diameter, to make the quills I first turned male fitting then screwed the female fitting to it and turned the male fitting or to the required size for the collets/chuck this way all was concentric

Like this

100_2602.jpg


100_2604.jpg


100_2607.jpg


I hope this helps

Stew
 
Excellent! Thanks!

The gears are turning. My current project really needs a tool post grinder. Fortunately, it's not a one lane road on this build, with lots of side streets to keep busy on, but eventually I need to go there.

I don't see any flats for removal tools. Not needed?

And lastly, are you spinning with the lathe rotation, or counter to it? Which brings to mind, left hand threads. You got any on there? ( I believe a mono-set has lefties in the arbors, not that it has any bearing on your build, but it does tell some things, when comparing a setup like this to a standard tool grinding machine.)

You stated 12,000-26,000 RPM's on the router motor, and I was browsing some wheels at an old mono-set (next to the new CNC tool grinder, which is a very cool machine BTW), and the wheels were all between 8,000 and 12,000 max. ...Assuming 2/1 pulleys?? .... Adding or subtracting to the lathe RPM's, ...never exceeding wheel speed... etc, etc... Would you lay down some figures for us, that you have, no doubt, already scribbled out on your napkins during your build. Target speeds, ratios, counter rotating, lefties, righties, etc...

Ideas are like stepping stones, you can change directions, make bigger or smaller steps, or go up, or down, from there, but it all starts with the sharing of ideas. Thanks for that!

Spitballing is fun, but, when it comes down to actual building, I think some things need to be a little more than spitballed on an item like this. If a guy doesn't pay attention to a couple of these kinds of important, yet often overlooked, things that I'm asking here, pieces of wheel could wind up embeded in an upstairs bedroom ceiling before a guy realized what happened.... ;) Not to mention, that it's bad enough the dog has to pick through swarf in the dish to eat, but rupturing your dog's spleen with cup wheel bits would surely lose some admiration points too.. :big:.
 
Hi

I did put flats on for nipping up the quils and wheels but this was done right at the end of the build and none of the pics show them, but they are only there as a belt a braises, I used it without them and all was fine.

Just taken a pic of flats

100_2735.jpg


I used a 2 - 1 ratio that gave me in the order of 6,000 and 13,000 rpm

I try to grind with the rotation of the lathe, but you can get away with going against the rotation.

All threads are right hand because you're only putting small cutting loads, and if you tighten everything up, there's not a lot of risk of things coming undone.

There's a more detailed build log her http://madmodder.net/index.php?topic=1903.0 there's another guy on this forum who's build a tool post grinder.

Your quite right about the danger of a wheel bursting, I've added a guard to my lathe to work behind, I served my apprenticeship as a tool maker, mainly tool and gauge grinding, and I've had wheels break on me:- its a trowser browning experience.

I'm hoping to go on and use this bit of kit along with a small table and a lathe vertical slide as cutter grinder, but my real long term objective is to try and use it to grind some gear cutters for clock making but thats in the future and all very experimental.

Thanks for the interest

Stew


Great project -- thank you for the details, diagrams, and pictures.

Minor question: is there a typo in the sentence "I try to grind with the rotation of the lathe, but you can get away with going with the rotation"?

Uh, I guess if you can get away with it either way then it doesn't matter. Just wondered if one of the "with"s should be "against" . . .

Again, very nice work.

hmember
 
Hi

Yes got it wrong I've amended it to:----

I try to grind with the rotation of the lathe, but you can get away with going against the rotation.

Stew
 
Back
Top