Rattler

Home Model Engine Machinist Forum

Help Support Home Model Engine Machinist Forum:

This site may earn a commission from merchant affiliate links, including eBay, Amazon, and others.
Hi Brock
Thanks for the vote of Confidence Mate :)
I sure hope your right :big:
As far as itsy bitsy bolts go. I have poor eyes and Arthritis in my hands, so even if I could see em, I could not pick em up.
Not my idea of having a good time at all ???
Pete
 
Hay Dano
The "unsub" is holed up in Bathurst, with a shotgun, a Molasses Pie, and a Steam engine, approach with caution :big:
Did a few little things today like, lap the valves and add a grub screw to the flywheel.
I sat it on the base I made for the "Sow" to see what it looks like.
They only need a box if your going to have a coil for each engine, so maybe I will go back to having one coil bolted on the bench.
Only problem with that is, I can only run one engine at a time ::)


SANY1802 by metalmad2011, on Flickr
 
Thm:

Now there's your next project! - cut a gear train to sync all your engines to run off one spark ???

Bez
 
That's a fake fingerprint I put on for photographic purposes! Rof}
 
That explanes it mate
I just thought u had gotten your hands, too close to your Blast furnice :big:
Not a bad idea Bez
As well as saving money by having one coil. They would use less fuel too, with em hooked up together like that.
less noisy too lol
 
got a chance to drill and ream the con rod today.
after getting the bearings right, I had to go back and finish the block :big:
the 1/4-32 hole at 50 degrees is to oil the con rod and the 10-32 hole at the sump is the only way u are ever going to install the rod ( I know cos i tried lol)

SANY1803 by metalmad2011, on Flickr


SANY1804 by [url
SANY1808 by metalmad2011, on Flickr=http://www.flickr.com/people/61672544@N06/]metalmad2011[/url], on Flickr
 
Hi Pete, looks like it won't be long now. I have enjoyed your build a great deal and I can't wait for it to run. When I built mine I went through the same thing, trying to get to the rod bolts and tighten them was a chore so I thought what the heck, just drill a hole for the wrench and be done with it. I left the hole open when running and the excess oil will blow out this hole making a mess of the base. An easy wipe up and all is well.
My Rattler has been together for 3 yrs now and after taking it apart to check for wear I found none. Everything looked fine so oiling the rod bearing this way seems to work fine. I oil the rod bearing and the shuttle pins and the crossover cam before I start it everytime. At shows, I will shut the engine off every half hour or so and relube. The one thing I found when apart was that the main bearings looked a little dry. These were made from oillite bronze and I figured they wouldn't need lubed but I may have been wrong. This was after many hours of running over a couple of years and they weren't wore at all but just looked dry. Maybe we should pull the sideplates off the crank every now and then and relube these bearings. I thought about drilling small holes for the pin oiler in the sideplates but there isn't much room to do this so I will just pull the sideplates off and oil them occasionally. I hope you have found this engine easy to assemble as it takes me about a half an hour to reassemble mine.
Keep up the good work and once you're finished I will need to find something else to occupy my time. I normally check your progress when I get up in the morning and I will miss this. I have 2 of my car projects finished now and soon I will be able to get started on another engine project of my own. Dave
 
Hi Dave
Thanks Mate :)
Looking forward to seeing your new build,
Multi or single? It will be great to look over your shoulder for a while :bow:
Today I had a play with the spark plug.
I decided to go long shank and so started again, but when threading the insulator, I broke the first one.
The last few pics show a bit of thread in the end, but I cut it too short and its only a couple of threads in just for the pics :big: :big:
If I get a chance i'll install the electrode and thread tomorrow.

SANY1813 by metalmad2011, on Flickr

SANY1815 by metalmad2011, on Flickr

SANY1816 by metalmad2011, on Flickr

SANY1817 by metalmad2011, on Flickr

SANY1818 by metalmad2011, on Flickr
 
Hi Pete, your sparkplug looks great. I haven't tried to build one myself yet as I bought a few years ago and haven't used them up yet.
My next engine will be a twin cylinder four stroke. It will have 2 overhung cranks attached to a 2:1 bevel gearset and the flywheel will rotate at half the speed of the cranks. There will be 1 exhaust cam to operate both cylinders and the intake valves will be atmospheric. This engine will be thottled governed and will operate at a low speed. I have been drawing some of the early details to check to make sure it will run, My first chore will be to make the gear case and all the bearing housings. It will be alot like a Ford 9" differential in construction. All the bearings will either be taper roller or ball with the rod bearings being needle rollers. I've been wanting to build an engine with low friction bearings sometime now and I think this will be it. I've accumulated all the bearings and gears and am sizing everything up now. I am going to use my sideshaft engine dimensions as I have already figured out the clearances for this and will not have to duplicate the engineering. 1.25" bore x 2" stroke. I found an old driveshaft counterweight I can use for the flywheel. It's probably going to be hopper cooled with each cylinder having it's own hopper. I think I have everything just about figured out now and am looking forward to getting started. This will be one of those projects that will probably be hard to follow at first. Once I get along aways it will start to look like an engine.
I have been trying to get all the loose ends of the Rattler plans done so when you are finished with your build the plans will be ready for sale. I still need to draw an assembly dwg and then I will be done. It doesn't look like I have much time left as you are about finished with yours. I figured I would e-mail the plan files to purchasers but I'm not sure how to conduct the money transfers as I have no Paypal account. Any suggestions would be appreciated. I don't want to release them until your engine is running.
Well anyways, your rattler looks great and I can't wait for the video, Dave
 
Hi Dave
your engine sounds wonderfully unique as I would expect from you :bow:
It looks like we both will be building twins next, which is scary, cos first multy for me.
After finishing the "Rat" I hope to build the Wallaby and then the Mastiff, before I attempt a V8 ;D
The last pic is the current state of play with the "Rat" but I'm hoping to try to start her by the weekend, depending on work etc etc.
PS The brass name plate on the barrel will say "RATTLER" with maybe a "002" underneath
Hope that's OK Dave?
It probably will be held on by 4, 2-56 bolts with the same spacing as the combustion chamber bolts

SANY1819 by metalmad2011, on Flickr

SANY1820 by metalmad2011, on Flickr

SANY1821 by metalmad2011, on Flickr
 
Hi Pete, Your nameplate idea is fine. I guess I should make one for my Rattler 001. I think I will start the serial numbers for the plans at 100 so I can reserve the lower numbers for my own builds. I'd like to build a few as gifts for family.
So glad to hear you are almost finished. Your flywheel is lighter than mine that I made from barstock so it may not coast between hits as much as mine but it still should run fine. I have also completed the assembly dwg which should help in the building process. I have enjoyed your build a great deal and can't wait for that rattle, Dave
 
Did a few more of the little things needed before attempting to start her.
I bought some .54 piano wire and finished off the plug, locktighted in the cyl studs and bolted up the name plate.
The plans call for rings but I dont have a heat source to aneal rings as yet, if she will not run ok without em, I will buy a gas torch and remake the piston with rings.
Rings are a mandatory next step up for me anyway !! :)


SANY1828 by metalmad2011, on Flickr
 
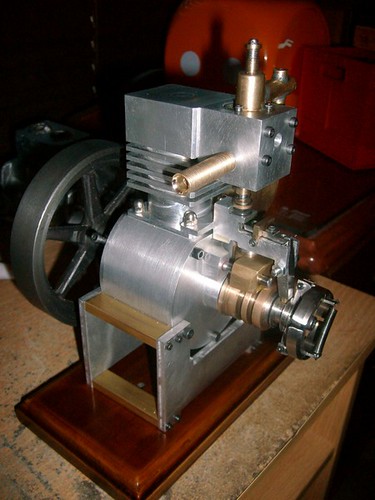
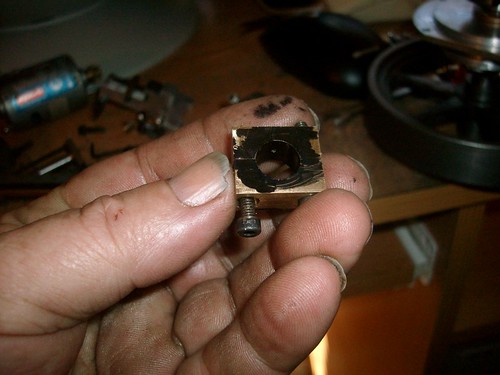
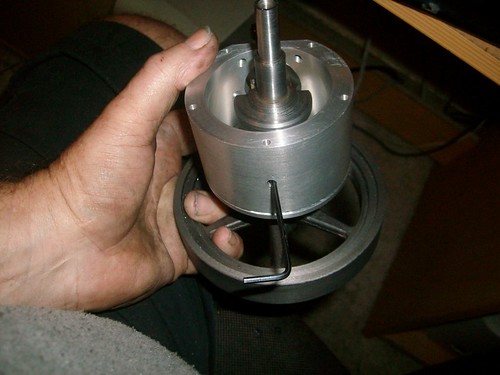
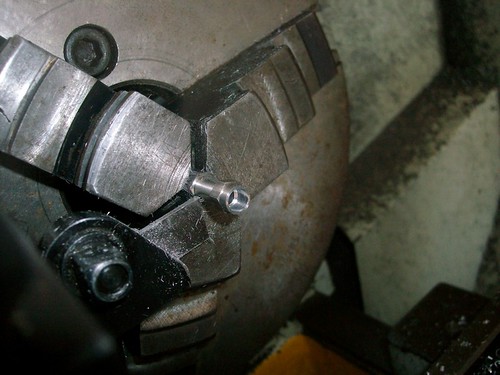
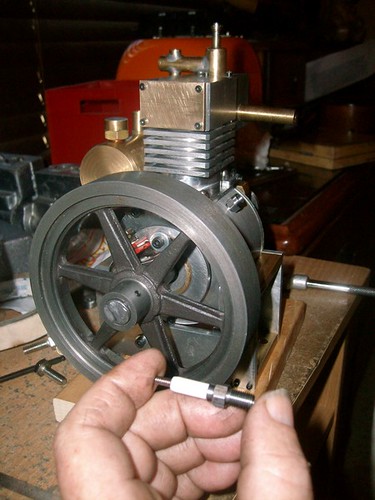
Hi Pete, I really like the spoked flywheel look. When I anneal my rings I use an oxy- acetaline torch and heat the ring and the fixture that spreads the gap to a dull red and hold it there for about five minutes. I let it cool slowly and normally the rings will fall off the fixture once cooled. Not too scientific but it works for me. I lightly sand the surfaces of the ring with 600 grit to clean them up after HT and install them on the piston and insert into the bore. After moving the piston up and down in the bore a few times I remove the piston from the bore and check the OD of the ring to make sure it has full contact. You can also install the ring without the piston in the bore then put it up to the light to check for light around the OD. I'm curious to see how well it will run without a ring, It may not need one, mine only has one ring. The engine should bounce back from the compression when lightly rotated against the compression stroke. That how I normally tell if the engine will run or not. With a ring on the piston the compression will get better as it wears in. It will need some bounce to it to get it run initially. If theres no bounce, it has a leak somewhere, valves, gaskets, or blowby the piston.
Having a little oil in the fuel may help with compression also. I've got a feeling that you will be fine just as you are. Good luck with the startup and I'm ready to celebrate. Dave
 
if you smear them with soft soap the will not blacken and clean up easier

I get them up to a good carrot and hold them there for 15 mins cover with dry sharp sand and leave alone till next day , another way to achieve the end result


BTW mine are used in 5 inch G locos so a different use for the same thing , I do not slit mine just tap them down a taper until they break , then finally fit them to the bore with a 10 thou gap


Stuart
 
Hi guys
I sure hope so Bez, Want to come over and hold the camera ? worst case happens, I make a fool of myself, but that has happened before :big:
I kinda like it too Dave, but I may put a pully on it yet :)
I have a few bits I want to remake later anyway, but I really only need to grind the fuel needle and finish off the tank, before I can try to start her.
I have read about that soap trick before Stuart with heat treating, Do u just use a squishy bar of soap or maybe a hand Soap?
I will try it out when I have heat :)
I wonder if a small map torch would work?
PS that boiler looks fantastic :bow:

SANY1830 by metalmad2011, on Flickr
 
Well we have first pop
I started the rattler up a few times today, but at the moment its not running for long
as it has had no tuning at all and is just using some old chainsaw fuel I had in the shed.
I recon, its a good bet she will run better on fresh fuel.
It does seem to be Hit and missing, but I'm not happy with the length of the lockout pin, I think I made it too short and potentially it could cause a problem when missing.
What is worrying me is, as I have it now, when the lockout lever engages, the pin is held high and does not push the lifter clear of the pin holder and that is scary :big:
I need to think about this a bit.
I think I will make a new pin or something before starting it again.

http://www.flickr.com/photos/61672544@N06/5986677539/
 

Latest posts

Back
Top