I haven't made an engine in a few years, although I've built quite a few in the past. I get a little side tracked building shop tools, and have spent a lot of time on a clock (about a year now, on and off), not to mention jobs that people give me money for doing.
There are so many great builds on this forum, and picking out something new for a project has me thinking about a hundred builds at once, so I thought I'd do up one of these little rockers for a bit of (almost) instant gratification.
I know there have been a lot of posts about these, so I'll make the pics small and limit the narrative.
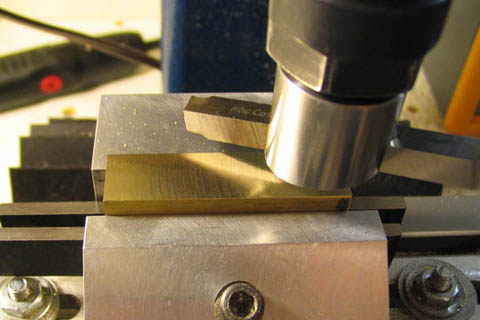
First, just a quick fly cut over the 1/2" square stock.
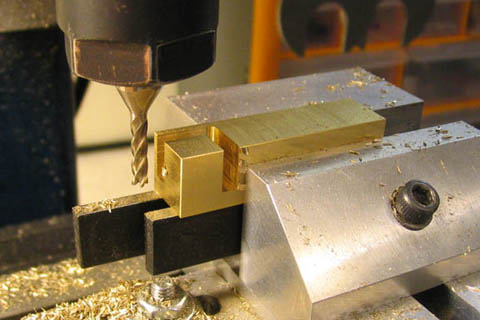
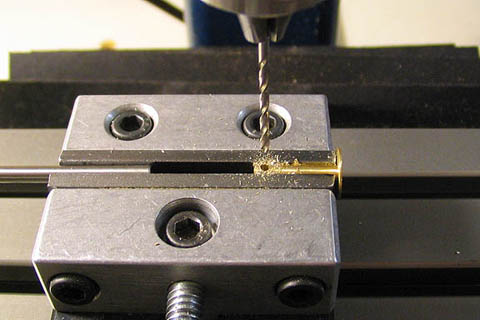
Then mill out all the stuff that's not supposed to be there
and drill the two holes.
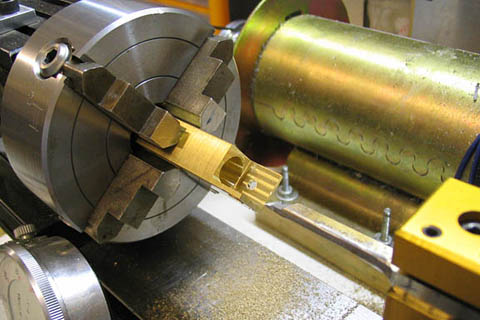
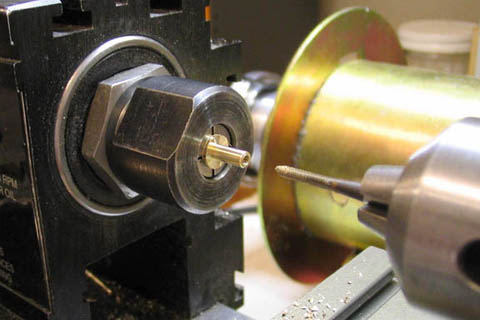
Dial in on the four jaw and drill a pilot hole, then bore the
cylinder to the proper dimension. Could be done just as well
with a reamer, I suppose.
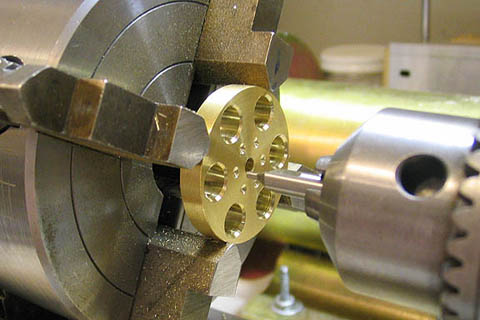
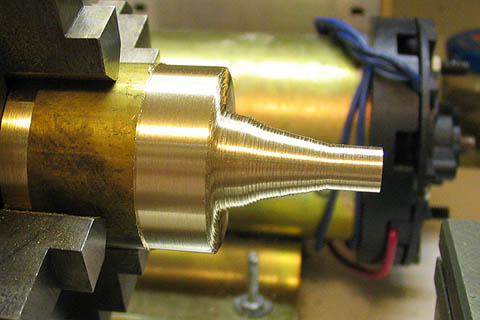
I left the cylinder long so I could dress it up. Used a parting
tool to make increasingly deeper cuts for fins, making the bottom
of the fins resemble a taper.
Then set the compound to approximate the pseudo taper and
cut the fins down a bit. I was going for something like a stinger.
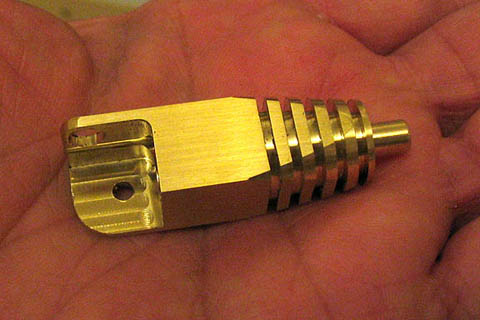
And I kind of got what I wanted. A Bee's Butt, so to speak.
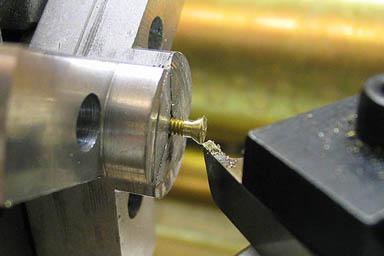
I didn't have a 2-56 flat head screw, but have a bunch of 2-56 cap
screws I made a while back, so I just taper cut the back side of
a cap screw.
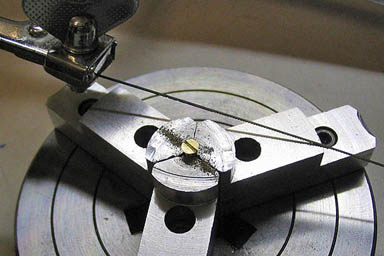
Then cut the slot with a jewelers saw.
Making the piston. Part it off, flip it in the chuck, and face
it to the proper thickness. Bevel with sand-paper-on-a-stick.
Like a hot dog on a stick.. but not.
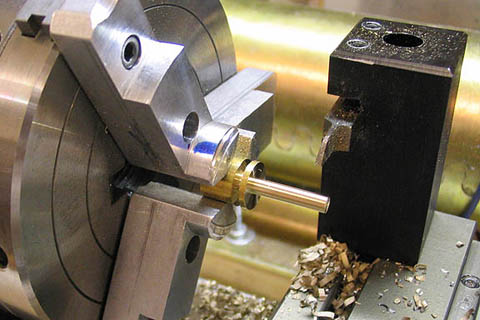
Drilling the piston "rod".

Drilling the off set crank pin hole. The wax (on head stock) is to
lube the bit. I got hold of some 3/8" brass rod that was not
the leaded type that I usually buy. Very gummy and unpleasant
to machine. Paraffin wax is a pretty good cutting lube for some
things, and doesn't make a mess.
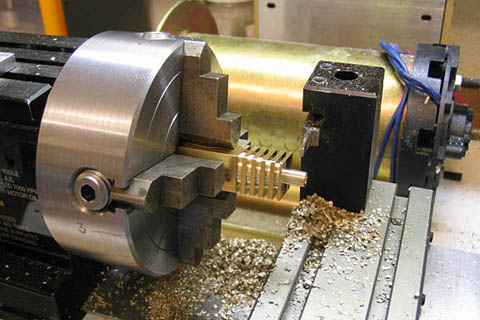
Tapping the crankshaft.
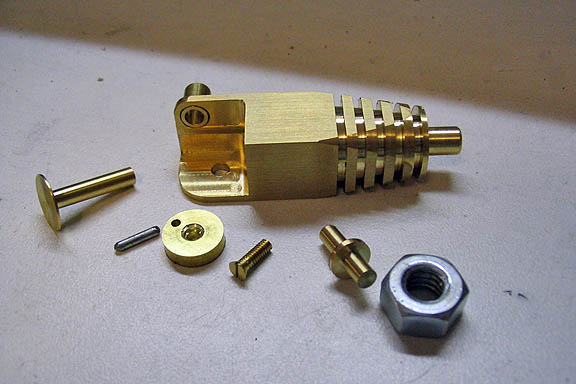
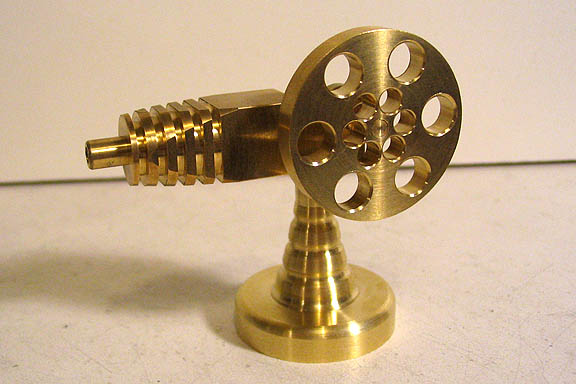
And all the engine parts but the flywheel and stand. Should get to
them by Monday. I worked on this stuff Thursday morning and Friday evening.
That is a 1/4" nut for scale.
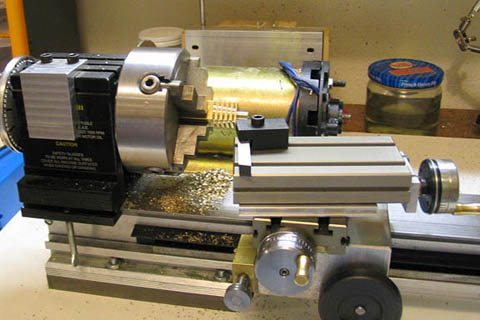
I put this together to check for rough spots or any binds and everything
fit pretty well. I have a couple of small aquarium pumps for running my
small steam and air engines, and thought, since I had them sitting there
on the bench I'd hook them up just for the heck of it. So far so good...
(Sorry for the radio in the background noise.)
[ame]http://www.youtube.com/watch?v=on7XoKp9Wug[/ame]
Dean
There are so many great builds on this forum, and picking out something new for a project has me thinking about a hundred builds at once, so I thought I'd do up one of these little rockers for a bit of (almost) instant gratification.
I know there have been a lot of posts about these, so I'll make the pics small and limit the narrative.
First, just a quick fly cut over the 1/2" square stock.
Then mill out all the stuff that's not supposed to be there
and drill the two holes.
Dial in on the four jaw and drill a pilot hole, then bore the
cylinder to the proper dimension. Could be done just as well
with a reamer, I suppose.
I left the cylinder long so I could dress it up. Used a parting
tool to make increasingly deeper cuts for fins, making the bottom
of the fins resemble a taper.
Then set the compound to approximate the pseudo taper and
cut the fins down a bit. I was going for something like a stinger.
And I kind of got what I wanted. A Bee's Butt, so to speak.
I didn't have a 2-56 flat head screw, but have a bunch of 2-56 cap
screws I made a while back, so I just taper cut the back side of
a cap screw.
Then cut the slot with a jewelers saw.
Making the piston. Part it off, flip it in the chuck, and face
it to the proper thickness. Bevel with sand-paper-on-a-stick.
Like a hot dog on a stick.. but not.
Drilling the piston "rod".
Drilling the off set crank pin hole. The wax (on head stock) is to
lube the bit. I got hold of some 3/8" brass rod that was not
the leaded type that I usually buy. Very gummy and unpleasant
to machine. Paraffin wax is a pretty good cutting lube for some
things, and doesn't make a mess.
Tapping the crankshaft.
And all the engine parts but the flywheel and stand. Should get to
them by Monday. I worked on this stuff Thursday morning and Friday evening.
That is a 1/4" nut for scale.
I put this together to check for rough spots or any binds and everything
fit pretty well. I have a couple of small aquarium pumps for running my
small steam and air engines, and thought, since I had them sitting there
on the bench I'd hook them up just for the heck of it. So far so good...
(Sorry for the radio in the background noise.)
[ame]http://www.youtube.com/watch?v=on7XoKp9Wug[/ame]
Dean