My First Stirling Engine

Home Model Engine Machinist Forum

Help Support Home Model Engine Machinist Forum:

This site may earn a commission from merchant affiliate links, including eBay, Amazon, and others.

dnp101677

Well-Known Member
Joined
Jul 23, 2009
Messages
75
Reaction score
4
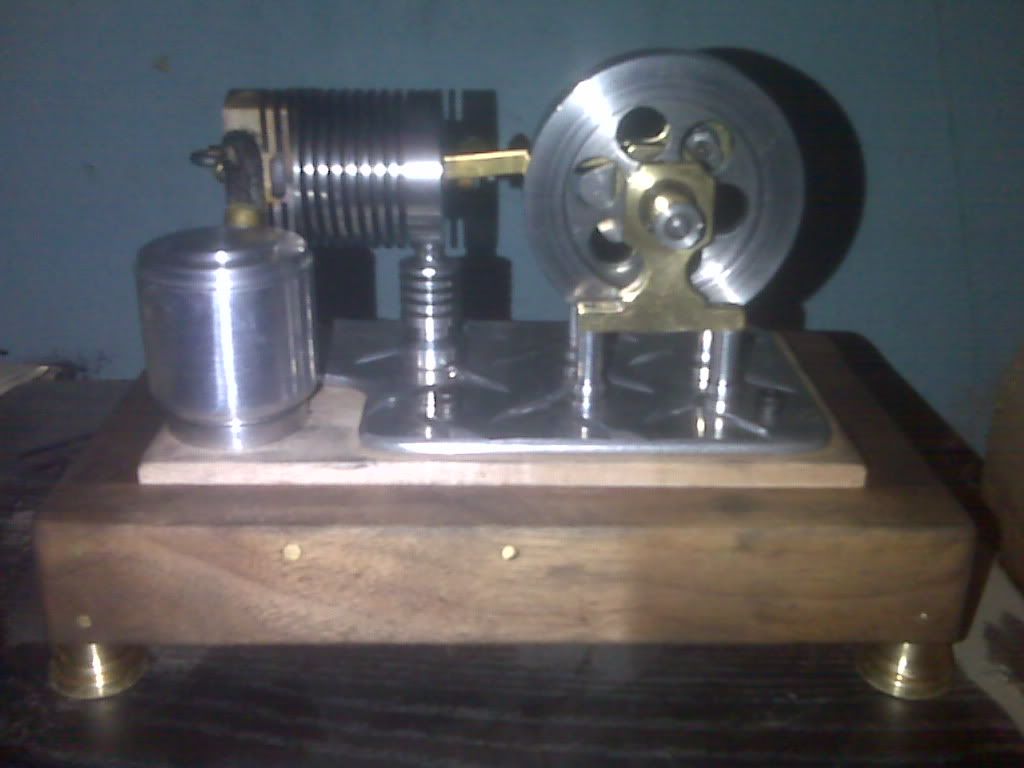
I figured I would post the finished engine since I asked many of you questions along the way and you were so helpful! This is my first stirling engine, but only the second I have ever made. My first was Elmer's Tiny (which is under repair at the present time).

Anyway, hope you all like it. It sure took me long enough to complete!

[ame]http://www.youtube.com/watch?v=NIN6wVRl3Mc[/ame]

IMG_3715.JPG


IMG_3714.JPG


IMG_3733.JPG


IMG_3730.JPG
 
You did a really nice job on it, eh, what ever your name is!
Sure runs nice.
Who did the drawings for this one? It looks familiar.

Again, very nice. Great runner. Thanks for the video!


Dean
 
Beautiful runner! Thm:

Who designed that engine?

RIck
 
What a beauty. Nice lines and I like the chimney for the heat source. It really finishes off the overall engine without the distraction of an open flame dancing around. Not to mention the discoloration on the heat cylinder. Nicely done and finished. What's next? ;D


BC1
Jim
 
Very nicely done dnp. Thanks for sharing the final results and video.

Bill
 
Great Looking Runner! Very interesting design. Did you design it yourself?

Kel
 
Very very Nice. :bow:

Runs real smooth. Thanks for sharing..

Jeff
 
Sorry Dean, my name is Dan. A few of you asked who designed it and I can't really answer that because I have no clue. There is someone on this forum (the guy with the Albert Einstein profile picture I believe) who has made this engine too. He might know who designed it. I actually have two sets of plans for this one. One set is older and the other set is a re-design produced by the college I attended - Catonsville Community in Baltimore Co. I used a little from both sets of plans. I'd gladly share if it doesn’t break any forum rules.

I am 90% sure that I will attempt the Miser by Jerry Howell for my next project.
 
I built that engine very early in my career as a model engineer - back in the 80s probably. IIRC, the original plans were in "Projects in Metal", the forerunner of "Machinist's Workshop".

At the time, I didn't have the materials to build it full size so I rescaled my version to fit what I had. It was my first experience in rescaling and was something of a trial.

STIRLING.jpg
 
Dan, I really like the size of that puppy. Very nice job on the fit and finish. It'll look nice up there on your shelf.

The engine is so nice in fact :bow: might I suggest a base that shows it off in a better light? My eye kept going to that knot hole in the side of the walnut(?) base. :hDe: Perhaps some putty in the knot hole followed with a higher gloss finish on the wood? Tung oil maybe.

-Trout
 
Dan,

Congratulations on a fine engine. :bow:

Best Regards
Bob
 
Thanks for the info, Dan. ; )
(It's nice to be able to address a person by their name.)


Also, thanks Marv. I probably have plans for it and didn't realize. Have a bunch of old PiM.

Dean
 
Thanks for all the positive words of encouragement. Funny you should mention the imperfection in the wood - it bugs the heck out of me too. In fact, that was my next improvement to work on. I thought I could live with it being my first stirling and all, but no way! It takes away from the rest of it - like you said. I think that piece of wood was the center of the tree or branch because it runs all the through the board. At least that is what a friend of mine told me. I'm not much of a wood worker myself.

Per his recommendations...I was going to patch it with some walnut wood putty and then use a coat of poly urethane. What do you guys think? Maybe I should just start over with the base. Just like Marv, I was using what I had.

By the way Marv, I really like the way yours turned out. The scaling looks great! I like how you've evenly dispersed the brass - gives it a nice overall look. Looks like you even made the nuts for the displacer screws. Very nice. Thanks for your help along the way too!
 
Dan,
Thanks for the wonderful video. I have a soft spot for Stirlings though I've never completed one myself. Well, I did complete a tin can engine about 20 years ago but never got it running beyond 2 or 3 revolutions.

That's a very smooth running engine and quite the looker, too.
 
You might be able to salvage that peice of wood. Cut it into smaller Strips and You can make a "picture frame" of sorts and place the aluminum base inside it.

Here is a pic of how I make my bases.

There are "Rails" and "stiles" made of Walnut and a peice of maple in the middle. The entire thing is held together with Brass pins pressed into undersized holes. There is no Glue at all.

flammen18.jpg


Kel
 
Dan,

I like the imperfections in wood, it's more natural. It would be a shame to not see the beautiful wood grain that piece has. A little filler and a satin finish would be great.

Your engine is a fine piece of craftsmanship. :bow:

SAM
 
That's very nice Dan, was it easy to get it running or did it take a bit of tweaking here and there?

I,ve got a log burner stove in the lounge with a flat top. I have dreams of making some sterlings to go on top of it. The top plate gets very hot so I reckon something should be possible.

Nick
 
Lovely work, dnp. Very nice runner.

Chuck
 
Nice Engine - :bow:

Best Regards
Bob
 

Latest posts

Back
Top