BobWarfield
Well-Known Member
- Joined
- Dec 27, 2007
- Messages
- 1,151
- Reaction score
- 1
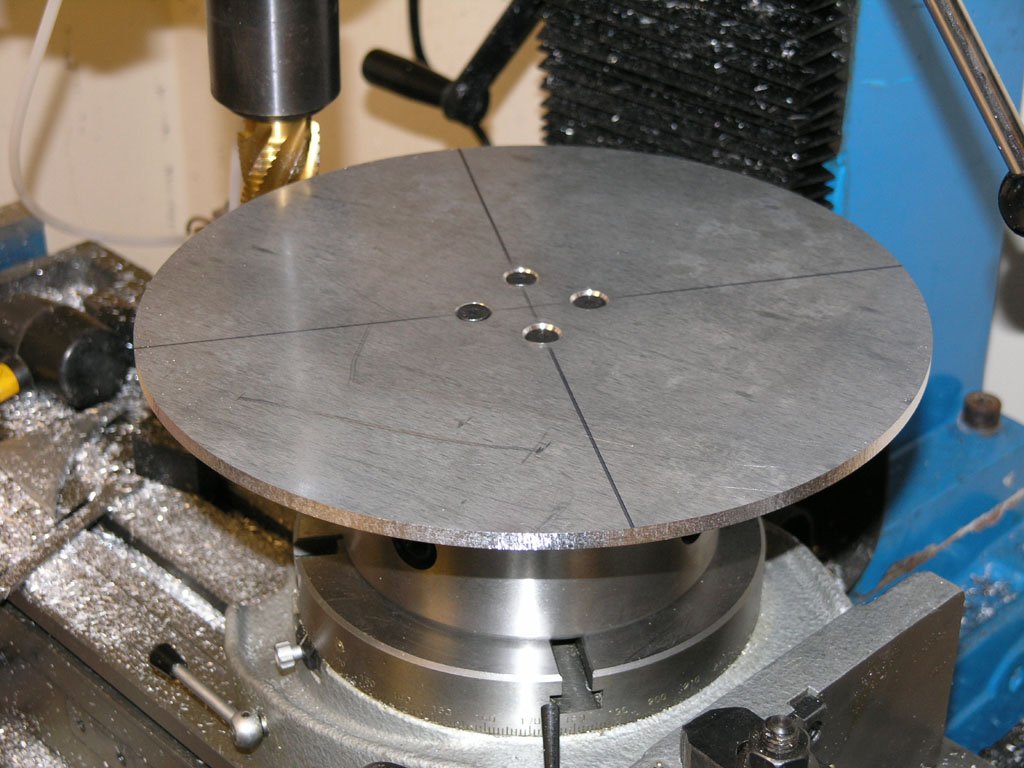
Today I spent about 3 hours in the shop making a square plate round with my rotary table. The most important discovery I made is that this is nature's way of telling me I need to buy a bigger lathe!
I wanted to pass along some more minor lessons. First, getting your part on the rotary table and concentric with its rotation. I used a technique I learned for dialing in a 4-jaw chuck:
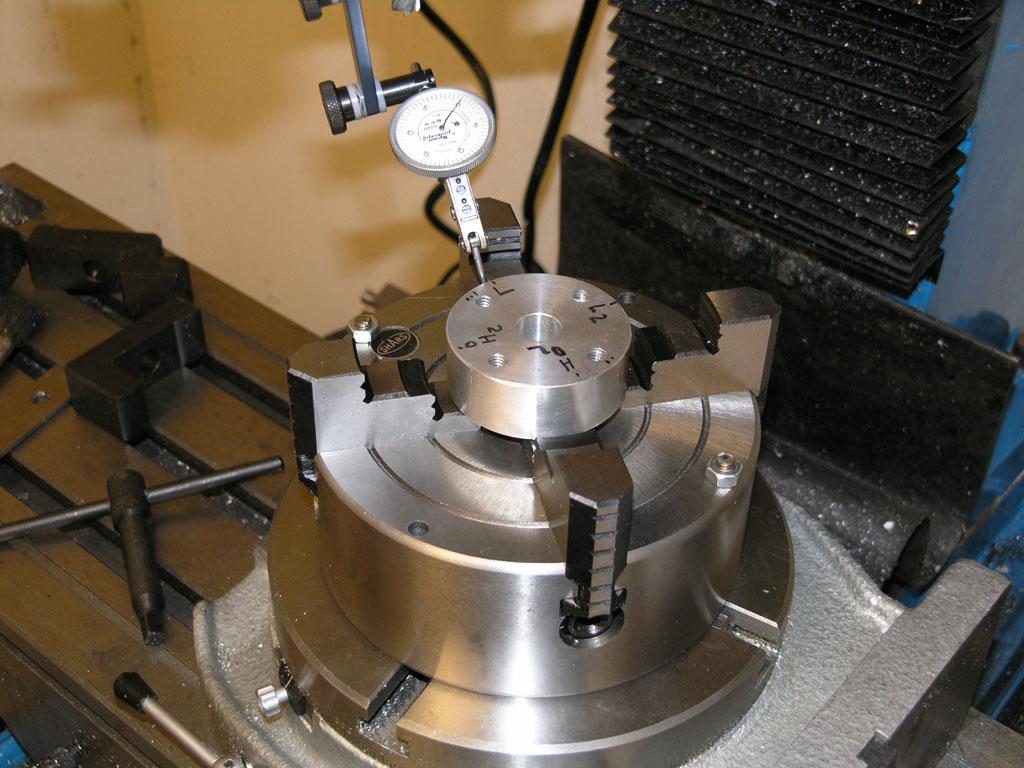
1) Put an indicator on your part and spin the part 1 revolution. While spinning, note the high point and the low point. You can see these marked "H" and "L" on my hub:
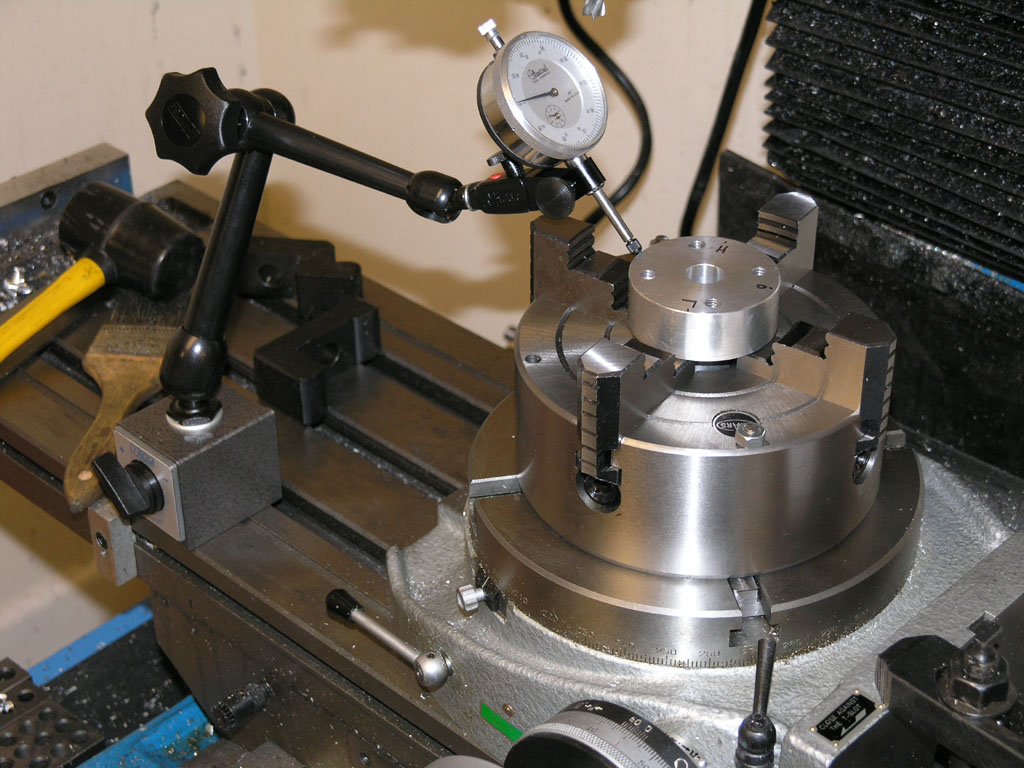
I used my plunger-type indicator to be sure I had plenty of range of motion.
2) Mark the point midway between "H" and "L" and rotate the indicator bezel to zero at that point. You can see the point marked "0" in the photo above.
3) Now line up each pair of jaws (Not the individual jaws, so we're doing 2 not 4 operations here) with the indicator and move the opposing jaws until the indicator reads 0.
You're now lined up!
I did this a second time with my more sensitive Interapid DTI and Indicol just to be sure I was dead on:
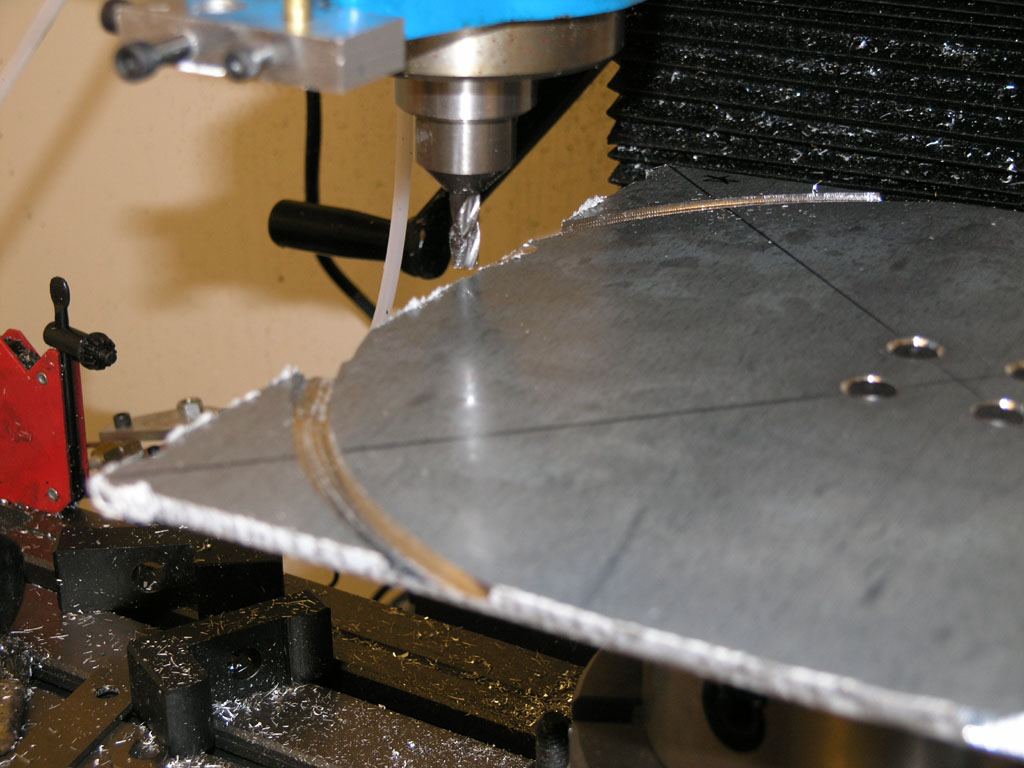
Note the second set of markings. Now I had the hub lined up, so I mounted the square plate to the hub:

And a big ugly plate it was too...
I wanted to pass along some more minor lessons. First, getting your part on the rotary table and concentric with its rotation. I used a technique I learned for dialing in a 4-jaw chuck:
1) Put an indicator on your part and spin the part 1 revolution. While spinning, note the high point and the low point. You can see these marked "H" and "L" on my hub:
I used my plunger-type indicator to be sure I had plenty of range of motion.
2) Mark the point midway between "H" and "L" and rotate the indicator bezel to zero at that point. You can see the point marked "0" in the photo above.
3) Now line up each pair of jaws (Not the individual jaws, so we're doing 2 not 4 operations here) with the indicator and move the opposing jaws until the indicator reads 0.
You're now lined up!
I did this a second time with my more sensitive Interapid DTI and Indicol just to be sure I was dead on:
Note the second set of markings. Now I had the hub lined up, so I mounted the square plate to the hub:
And a big ugly plate it was too...